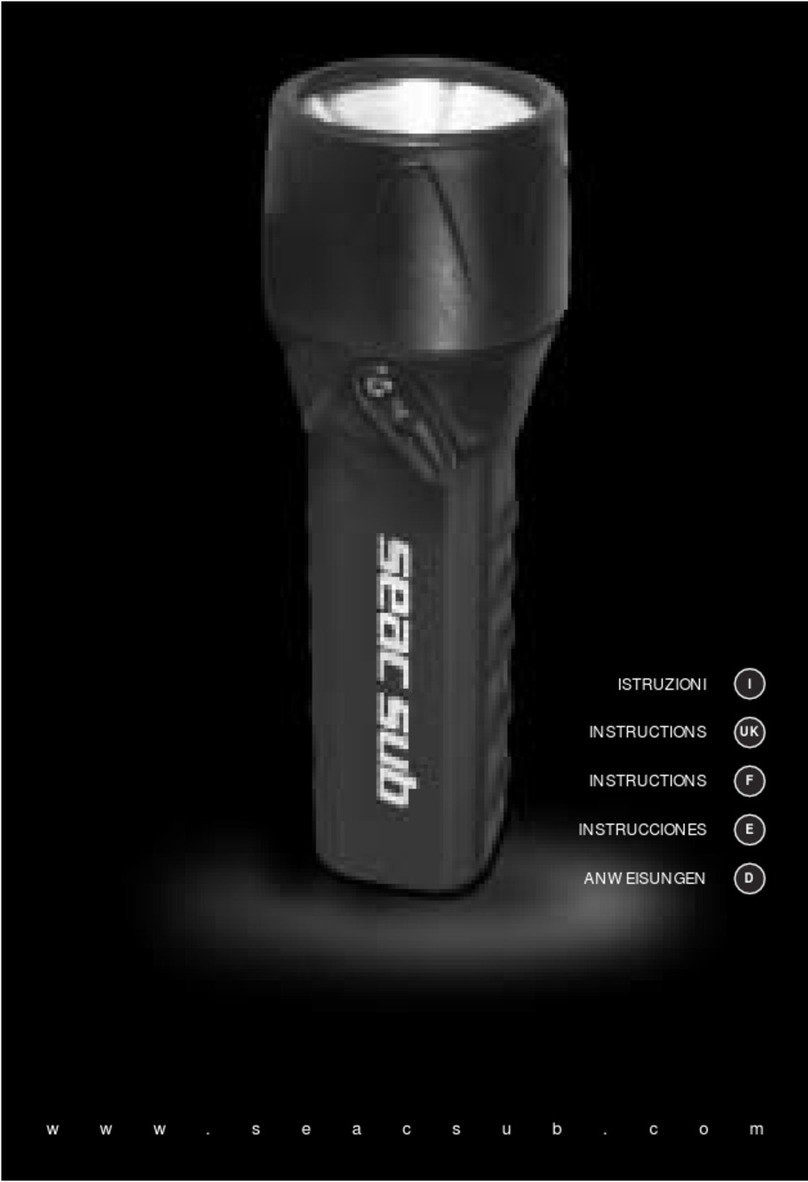
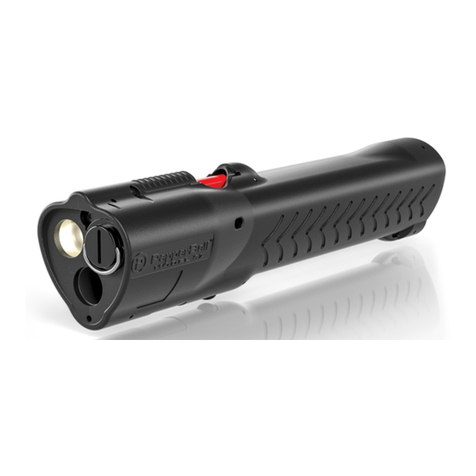
Seac Sub SHOT User manual


IITTAALLIIAANNOO
3
CCoonnggrraattuullaazziioonnii
Grazie per aver scelto un prodotto tecnologicamente avanzato della SEAC
SUB.
I processi di lavorazione, le materie prime utilizzate e la cura dei particolari
rendono tutti i nostri prodotti affidabili sia dal punto di vista della qualità che
di durata nel tempo. La continua crescita tecnologica della SEAC SUB offre
costantemente garanzia di continua innovazione.
Buon divertimento con i prodotti SEAC SUB……..
IInnttrroodduuzziioonnee
SHOT è frutto di una ricerca avanzata in collaborazione con esperti del
settore.
Le caratteristiche di semplicità, affidabilità e qualità della luce collocano la
SHOT tra le torce tascabili o di “back up” più potenti sul mercato.
La scelta di una lampadina ad alta potenza luminosa, la semplicità
dell’alloggiamento del vano batterie, la nuova parabola liscia elaborata con
geometrie computerizzate uniscono caratteristiche tecnico pratiche utili al
subacqueo sportivo-professionale.
La semplicità della forma permette il trasporto e l’utilizzo della SHOT in
qualsiasi condizioni e necessità d’immersione
Commercializzata in diversi colori, la Shot sarà vostra compagna d’avventure
e utile mezzo d’illuminazione.

4
• Non tenere accesa la torcia fuori dall’acqua.
• Non puntare la luce negli occhi sia in ambiente subacqueo che in ambiente
esterno.
• Non svitare la ghiera oblò della torcia in immersione o se bagnata.
• Non tenere la torcia vicino a fonti di calore estreme.
• Utilizzare sempre ricambi originali per eventuali operazioni di ordinaria e
straordinaria manutenzione compreso la sostituzione della lampadina.
• Le batterie non sono fornite assieme alla torcia ma devono essere
acquistate separatamente.
• Non utilizzate batterie con differente stato di carica.
AAVVVVEERRTTEENNZZEEGGEENNEERRAALLII
Prima di utilizzare la torcia Shot siate sicuri di aver letto completamente questo
manuale.
AATTTTEENNZZIIOONNEE!!Non puntare la torcia verso i propri occhi o verso gli occhi di altre
persone, sia questo in ambiente aereo che durante l’utilizzo in immersione.
AATTTTEENNZZIIOONNEE!!Accettarsi di posizionare l’interruttore nella posizione di blocco
durante tutte le fasi di trasporto in modo da impedire accensioni involontarie.
AATTTTEENNZZIIOONNEE!!Assicurarsi di togliere le batterie durante il trasporto in aereo della
torcia (SOLO VERSIONE SHOT).
AATTTTEENNZZIIOONNEE!!Durante la fase della sostituzione delle batterie, ricordarsi di
rispettare la polarità delle stesse.
AATTTTEENNZZIIOONNEE!!Utilizzare batterie di ottima qualità del tipo Alcalino Manganese.
AATTTTEENNZZIIOONNEE!!Non lasciare mai la torcia inutilizzata chiusa per un lungo periodo
con le batterie inserite.
AATTTTEENNZZIIOONNEE!!Nei periodi di non utilizzo della torcia, tenere leggermente svitata
la ghiera oblò onde evitare il bloccaggio della ghiera stessa.
AATTTTEENNZZIIOONNEE!!
AVVERTENZE GENERALI
IITTAALLIIAANNOO

5
IITTAALLIIAANNOO
CCAARRAATTTTEERRIISSTTIICCHHEETTEECCNNIICCHHEE
CCAARRAATTTTEERRIISSTTIICCHHEESSHHOOTT
PPootteennzzaa
VVoolltt
TTiippooddiibbaatttteerriiee
AAmmppéérree
AAllllooggggiiaammeennttoo
BBaatttteerriiee
LLaammppaaddiinnaaiinnddoottaazziioonnee
MMaatteerriiaalleeccoorrppoo
MMaatteerriiaalleeppaarraabboollaa
OObbllòò
OO--RRiinngg
PPeessooiinnaarriiaa
6 W
5,0 V
Richiesto uso di batterie alcaline formato A-A
(R6) 1,5 V
In alternativa
batterie ricaricabili stesso formato da 1,2 V
1,2 amps
Cestello appositamente configurato per
utilizzo in parallelo di 4 o 8 batterie
6 W Xenon
ABS ad alta resistenza agli urti
Resina PBT termo resistente
Policarbonato
NBR
310 gr. con 8 batterie inserite
PPeessooiinnaaccqquuaa180 gr. con 8 batterie inserite
LLuunngghheezzzzaa150 mm
DDiiaammeettrroo55 mm
IInntteerrrruuttttoorreeMeccanico - Microswitch
SSiiccuurraassuuiinntteerrrruuttttoorreeMeccanica
TTeemmppeerraattuurraaccoolloorree3100°K
FFaasscciioolluummiinnoossooConcentrato
AAuuttoonnoommiiaaiinnmmiinnuuttii
fino a 250 min.in funzione delle batterie usate
PPrrooffoonnddiittààmmaassssiimmaa100 m
• Corpo realizzato in ABS ad alta resistenza.
• Gruppo ottico a fascio concentrato.
• Parabola Liscia.
• Vetro oblò in policarbonato.
• Corpo ghiera in termo gomma antisdrucciolo.
• Interruttore meccanico microswitch.
• Lampada alogena allo Xenon 5 Volts, 1,2 amps, 6 watts.
• Doppio o-ring di tenuta alloggiato su tenuta oblò.
• Cestello porta-batterie configurato per l’uso in parallelo di 4 o 8 batterie.

IITTAALLIIAANNOO
6
CCAARRAATTTTEERRIISSTTIICCHHEETTEECCNNIICCHHEE
CCAARRAATTTTEERRIISSTTIICCHHEESSHHOOTTLLEEDD
PPootteennzzaa
VVoolltt
TTiippooddiibbaatttteerriiee
AAmmppéérree
AAllllooggggiiaammeennttoo
BBaatttteerriiee
LLaammppaaddiinnaaiinnddoottaazziioonnee
MMaatteerriiaalleeccoorrppoo
MMaatteerriiaalleeppaarraabboollaa
OObbllòò
OO--RRiinngg
PPeessooiinnaarriiaa
6 W
5,0 V
Richiesto uso di batterie alcaline formato A-A
(R6) 1,5 V
In alternativa
batterie ricaricabili stesso formato da 1,2 V
500 mA
Cestello appositamente configurato per
utilizzo in parallelo di 4 o 8 batterie
3x2 W power led
ABS ad alta resistenza agli urti
Resina PBT termo resistente
Policarbonato
NBR
310 gr. con 8 batterie inserite
PPeessooiinnaaccqquuaa180 gr. con 8 batterie inserite
LLuunngghheezzzzaa150 mm
DDiiaammeettrroo55 mm
IInntteerrrruuttttoorreeMeccanico - Microswitch
SSiiccuurraassuuiinntteerrrruuttttoorreeMeccanica
TTeemmppeerraattuurraaccoolloorree6200°K
FFaasscciioolluummiinnoossooConcentrato
AAuuttoonnoommiiaaiinnmmiinnuuttii
fino a 600 min.in funzione delle batterie usate
PPrrooffoonnddiittààmmaassssiimmaa100 m
• Corpo realizzato in ABS ad alta resistenza.
• Gruppo ottico a fascio concentrato.
• Vetro oblò in policarbonato.
• Corpo ghiera in termo gomma antisdrucciolo.
• Interruttore meccanico microswitch.
• N. 3 led bianchi 6200 °K power led 6 watt 500 mA.
• Doppio o-ring di tenuta alloggiato su tenuta oblò.
• Cestello porta-batterie configurato per l’uso in parallelo di 4 o 8 batterie.

IITTAALLIIAANNOO
7
•
AATTTTEENNZZIIOONNEE
!!
Rispettare tassativamente l'indicazioni delle polarità!
SSCCHHEEMMAAPPOOSSIIZZIIOONNAAMMEENNTTOOBBAATTTTEERRIIAASSUUPPOORRTTAABBAATTTTEERRIIAA
Schema con 44batterie.

Schema con 88batterie.
IITTAALLIIAANNOO
8

9
IITTAALLIIAANNOO
IINNSSEERRIIMMEENNTTOOBBAATTTTEERRIIEE::
••Se non utilizzata recentemente,verificare lo stato delle batterie della torcia
SHOT procedendo ad una verifica dell’accensione.
••Controllare la ppeerrffeettttaacchhiiuussuurraaddeellccoorrppoo.
••Appena giunti in acqua verificare che nnoonnvviissiiaapprreesseennzzaaccoonnttiinnuuaaddiibboollllee
che fuoriescono dal corpo della torcia.
MMOODDAALLIITTAA''DDIICCOONNTTRROOLLLLOOPPRRIIMMAADDEELLLL''IIMMMMEERRSSIIOONNEE::
••Svitare in senso antiorario la ghiera oblò della torcia.
••Togliere il cestello porta batterie.
••Inserire le batterie seguendo le indicazioni di polarità (+ o -) indicate sul
cestello.
••Inserire il cestello porta batterie nel corpo torcia.
••Lubrificare le o-ring di tenuta con un velo di grasso al silicone.
••Avvitare la ghiera oblò in senso orario.
••Verificare l’accensione della torcia tramite l’apposito interruttore.
AATTTTEENNZZIIOONNEE!!
In caso di errato posizionamento delle batterie (inversione di polarità) si
genera un corto circuito provocando un danno irreversibile con pericolo di
esplosione della torcia.

10
In caso di entrata d’acqua nella torcia si consiglia d’aprire la stessa, togliere le
batterie e sciacquare immediatamente le parti interne con acqua dolce,
asciugare poi con uno panno e con un phone ad aria tiepida prestando
particolare attenzione alle parti meccaniche. Asportare l'eventuale ossido
formatosi sulle parti metalliche e procedere ad una prova di funzionalità.
Se la quantità di acqua penetrata all'interno della torcia e' consistente e se vi e'
rimasta per molto tempo si consiglia di aprire la stessa e sciacquare
immediatamente le parti interne con acqua dolce, in questo caso suggeriamo
di rivolgersi immediatamente ad un centro riparazioni competente o di rivolgersi
al negozio SEAC SUB più vicino.
AALLLLAAGGAAMMEENNTTOO::
••La profondità massima operativa e' di 100 m.
••A causa delle alte temperature raggiunte dalla lampada si consiglia l’uso
della stessa ssoollooeeddeesscclluussiivvaammeenntteein ambiente subacqueo.
LLIIMMIITTIIDDIIIIMMPPIIEEGGOO::
••Svitare la ghiera oblò.
••Estrarre la lampadina da sostituire ed inserire la nuova seguendo le
indicazione delle due freccette poste sul portaparabola.
••Reinserire il tutto facendo attenzione che la lampadina combaci con il foro
della parabola.
••Avvitare la ghiera oblò procedendo preventivamente a lubrificare le parti
del filetto e le O-ring di tenuta.
SSOOSSTTIITTUUZZIIOONNEEDDEELLLLAALLAAMMPPAADDIINNAA((VVEERRSSIIOONNEESSHHOOTT))::
E' importante attenersi alle seguenti istruzioni:
••Trasportare sempre la torcia all'interno di una borsa che lo protegga da
eventuali urti.
••Evitare prolungate esposizioni ai raggi solari.
••Alla fine di ogni immersione ( Mare , Lago o Piscina ) sciacquare sempre
con acqua dolce ed asciugare.
••Verificare lo stato delle guarnizioni di tenuta ( o-rings ) ogni volta che si è
proceduto all'apertura del corpo.
••Pulire e lubrificare le parti interessate all’apertura con grasso siliconico.
••Si consiglia di far ispezionare annualmente il prodotto da un centro
autorizzato SEAC SUB.
MMAANNUUTTEENNZZIIOONNEEEETTRRAASSPPOORRTTOO::
IITTAALLIIAANNOO

11
IITTAALLIIAANNOO
La SEACSUB S.p.A. garantisce il prodotto per anni due dal momento
dell’acquisto.
Si consiglia vivamente di conservare lo scontrino fiscale comprovante la
data di acquisto.
LLaaggaarraannzziiaannoonniinncclluuddeelleennoorrmmaalliippaarrttiiddiiccoommuunneeccoonnssuummoooouussuurraa
qquuaallii::
••O-Ring, batterie, lampadine, Oblò.
LLaapprreesseenntteeggaarraannzziiaa
nnoonnccoopprreeddaannnniiddoovvuuttiiaa::
••urti meccanici.
••utilizzo in acque cariche di cloro o inquinate.
••prolungata esposizione a intense fonti di calore superiori a 70°C.
LLaaggaarraannzziiaaddeeccaaddeessee::
••l’attrezzatura è stata utilizzata in maniera impropria, eludendo l’istruzioni
per l’uso.
••il proprietario ha apportato modifiche o manomissioni e/o ha
personalmente eseguito riparazioni, o se tali interventi sono stati effettuati
da personale non autorizzato.
SSEEAACCddeecclliinnaaooggnniirreessppoonnssaabbiilliittààrreellaattiivvaaaaddaannnniiccaauussaattiiaallll''uuttiilliizzzzaattoorreeddaauunnuussoo
iimmpprroopprriiooddeelllleeaattttrreezzzzaattuurree..
AAllttrreettttaannttooddiiccaassiippeerrddaannnniiddiirreettttiiooiinnddiirreettttiiddiiqquuaallssiiaassiinnaattuurraaccaauussaattiiaappeerrssoonneeoo
ccoosseeddoovvuuttiiaaddeevveennttuuaalliippeerriiooddiiddiiiinnuuttiilliizzzzooddeellpprrooddoottttooooddaauunnuussoossccoorrrreettttooddeelllloo
sstteessssoo.
.
CCOONNDDIIZZIIOONNIIDDIIGGAARRAANNZZIIAA

12
CCoonnggrraattuullaattiioonnss!!
SEAC SUB thanks you for choosing one of our high-tech products.
Our manufacturing techniques, selection of raw materials and care for details
make all our products reliable both in terms of quality and long life. SEAC SUB
continuous technological growth is a constant guarantee of non-stop
innovation.
Enjoy your diving experience with SEAC SUB products……..
IInnttrroodduuccttiioonn
SHOT is based on the most advanced team research with a network of
experts.
Easy to use, reliable and with excellent light quality, SHOT is one of the most
powerful pocket flashlights or “back up” diving torches currently available on
the market.
The choice of a high light-output bulb, the essential battery compartment, and
the new computer-designed smooth-surface reflector combine practical
technical features useful both for the sportsman and the professional diver.
The SHOT torch essential design ensures easy handling and use and makes it
suitable for all diving conditions and requirements.
The SHOT torch comes in a wide range of colours and will be your adventure
mate as well as a handy instrument for underwater lighting.
EENNGGLLIISSHH

13
EENNGGLLIISSHH
• Never keep the torch on when out of the water.
• Do not direct the light towards the eyes both under water and out of the
water.
• Never unscrew the torch lens ring nut during a dive or if wet.
• Do not keep the torch near extreme heat sources.
• Use only original spare parts both for ordinary and extraordinary
maintenance, including bulb replacement.
• Batteries are not provided with the torch and must be purchased
separately.
• Do not use batteries with a different state of charge.
GGEENNEERRAALLWWAARRNNIINNGGSS
Before using the Shot torch make sure you have fully read this manual.
CCAAUUTTIIOONN!!Do not direct the torch towards your eyes and towards other
people’s eyes, both during a dive and out of the water.
CCAAUUTTIIOONN!!Make sure that the switch is in lock position during transport in
order to prevent accidental switching.
CCAAUUTTIIOONN!!Remove the bulb if the torch is to be transported by air (ONLY
SHOT VERSION).
CCAAUUTTIIOONN!!Observe the correct polarity when replacing batteries.
CCAAUUTTIIOONN!!Use high-quality alkaline-manganese batteries
.
CCAAUUTTIIOONN!!In case of long periods of non-use, remove the batteries before
storing the torch.
CCAAUUTTIIOONN!!During airfreight remove the batteries from the torch.
CCAAUUTTIIOONN!!During the non-use periods, keep the port light of the port light
slightly unscrewed in order to avoid the block of the port light itself.
CCAAUUTTIIOONN!!
GENERAL WARNINGS

EENNGGLLIISSHH
14
• Shock-resistant ABS body.
• Spotlight optics.
• Smooth-surface reflector.
• Polycarbonate glass lens.
• Non-slip thermorubber ring nut body.
• Mechanical microswitch.
• 5 V, 1.2 Amps, 6 W halogen Xenon bulb.
• Twin O-ring fitted on lens seal.
• Battery holder specially shaped for parallel use of 4 or 8 batteries.
TTEECCHHNNIICCAALLSSPPEECCIIFFIICCAATTIIOONNSS
SSPPEECCIIFFIICCAATTIIOONNSSSSHHOOTT
PPoowweerr
VVoollttaaggee
BBaatttteerriieess
AAmmppeerreess
BBaatttteerryy
ccoommppaarrttmmeenntt
BBuullbbssuupppplliieedd
BBooddyymmaatteerriiaall
RReefflleeccttoorrmmaatteerriiaall
LLeennss
OO--RRiinngg
WWeeiigghhttiinnaaiirr
6 W
5,0 V
Use of either A-A (R6) 1.5 V alkaline batteries
or 1.2 V rechargeable batteries, same type, is
required
1,2
Holder specially shaped for parallel use
of 4 or 8 batteries
6 W Xenon
Shock resistant ABS
Thermoresistent PBT resin
Polycarbonate
NBR
310 gr. with 8 batteries on
WWeeiigghhttuunnddeerrwwaatteerr180 gr. with 8 batteries on
LLeennggtthh150 mm
DDiiaammeetteerr55 mm
SSwwiittcchhMechanical - Microswitch
SSwwiittcchhlloocckkMechanical
CCoolloouurrtteemmppeerraattuurree3100°K
LLiigghhttbbeeaammNarrow
BBuurrnnttiimmeeiinnmmiinnuutteess6 W bulb- up to 250 min.
according to the chosen batteries
MMaaxx..ddeepptthh100 m

15
• Shock-resistant ABS body.
• Spotlight optics.
• Polycarbonate glass lens.
• Non-slip thermorubber ring nut body.
• Mechanical microswitch.
• N. 3 white leds 6200 °K power led 6 watt 500 mA.
• Twin O-ring fitted on lens seal.
• Battery holder specially shaped for parallel use of 4 or 8 batteries.
TTEECCHHNNIICCAALLSSPPEECCIIFFIICCAATTIIOONNSS
SSPPEECCIIFFIICCAATTIIOONNSSSSHHOOTTLLEEDD
PPoowweerr
VVoollttaaggee
BBaatttteerriieess
AAmmppeerreess
BBaatttteerryy
ccoommppaarrttmmeenntt
BBuullbbssuupppplliieedd
BBooddyymmaatteerriiaall
RReefflleeccttoorrmmaatteerriiaall
LLeennss
OO--RRiinngg
WWeeiigghhttiinnaaiirr
6 W
5,0 V
Use of either A-A (R6) 1.5 V alkaline batteries
or 1.2 V rechargeable batteries, same type, is
required
500 mA
Holder specially shaped for parallel use
of 4 or 8 batteries
3x2 W power led
Shock resistant ABS
Thermoresistent PBT resin
Polycarbonate
NBR
310 gr. with 8 batteries on
WWeeiigghhttuunnddeerrwwaatteerr180 gr. with 8 batteries on
LLeennggtthh150 mm
DDiiaammeetteerr55 mm
SSwwiittcchhMechanical - Microswitch
SSwwiittcchhlloocckkMechanical
CCoolloouurrtteemmppeerraattuurree6200°K
LLiigghhttbbeeaammNarrow
BBuurrnnttiimmeeiinnmmiinnuutteess6 W bulb- up to 600 min.
according to the chosen batteries
MMaaxx..ddeepptthh100 m
EENNGGLLIISSHH

•WWAARRNNIINNGG!!
Always observe the polarity indication!
BBAATTTTEERRYYPPOOSSIITTIIOONNIINNGGOONNTTHHEEBBAATTTTEERRYYHHOOLLDDEERR
Battery holder with 44batteries.
EENNGGLLIISSHH
16

17
Battery holder with 88batteries.
EENNGGLLIISSHH

18
BBAATTTTEERRYYRREEPPLLAACCEEMMEENNTT::
••
If the torch has not been recently used, check the state of the SHOT
torch batteries and switch on the torch to test.
••
Check for the ppeerrffeeccttsseeaalloofftthheebbooddyy.
••
When under water, check that there is nnooccoonnttiinnuuoouussddiisscchhaarrggeeooffaaiirr
bbuubbbblleessfrom the torch body.
CCHHEECCKKSSBBEEFFOORREEDDIIVVIINNGG::
EENNGGLLIISSHH
••
Unscrew the lens ring nut anticlockwise
.
••Remove the battery holder.
••Make sure to insert the batteries observing the correct polarity marks
(+ or -) shown on the holder.
••
Insert the battery holder into the body of the torch
.
••Lubricate the O-ring seal with a silicone grease film.
••Screw the lens ring nut clockwise.
••Switch on the torch to test.
WWAARRNNIINNGG!!
If the battery has not been installed properly (polarity inversion), a short
circuit will damage the equipment, with a serious risk of an explosion.

19
••
The maximum operating depth is 100 m.
••
Owing to the high temperatures reached by the bulb, the lamp should be
used oonnllyyunder water.
LLIIMMIITTSSOOFFUUSSEE::
••
Unscrew the lens ring nut.
••
Extract the bulb to be replaced and insert the new one as shown by the
two small arrows on the reflector holder.
••
Reinsert the whole assembly making sure that the bulb fits in the reflector
hole.
••
Lubricate threaded parts and O-rings, then screw the lens ring nut.
BBUULLBBRREEPPLLAACCEEMMEENNTT((OONNLLYYSSHHOOTTVVEERRSSIIOONN))::
Compliance with the following instructions is required:
••
Always carry the torch inside a bag protecting it from any shocks.
••
Avoid prolonged exposure to sunrays.
••
At the end of each dive (sea, lake or swimming-pool) aallwwaayyssrriinnsseeiinnffrreesshh
wwaatteerrand wipe.
••
CChheecckktthheessttaatteeooffOO--rriinnggssevery time the body is opened.
••
Clean and lubricate the parts involved in the opening process with silicone
grease.
••
It is recommended to have the product inspected every year at an
authorized SEAC SUB centre.
MMAAIINNTTEENNAANNCCEEAANNDDTTRRAANNSSPPOORRTT::
In case of water leakage into the torch, open it, remove the batteries and
rriinnsseeiimmmmeeddiiaatteellyythe internal parts iinnffrreesshhwwaatteerr, then wwiippeewith a cloth
and dry with a warm air source, paying particular care to mechanical parts.
Remove the oxide, if any, deposited on metal parts and test for correct ope-
ration.
If the quantity of water leaked into the torch is considerable and if it has
remained there for a long time, open the torch and rriinnsseeiimmmmeeddiiaatteellyythe
internal parts iinnffrreesshhwwaatteerr; in such occurrence immediately contact a sui-
table servicing centre or the nearest SEAC SUB centre.
FFLLOOOODDIINNGG::
EENNGGLLIISSHH

20
SEACSUB S.p.A. guarantees the product for a period of two years from the
date of purchase.
You are strongly advised to keep the fiscal slip supplying evidence of the
date of purchase.
TThheewwaarrrraannttyyddooeessnnoottiinncclluuddeessttaannddaarrddccoonnssuummppttiioonnoorrwweeaarrppaarrttss,,
ssuucchhaass::
••O-Rings, batteries, bulbs, glass.
TThhiisswwaarrrraannttyyddooeessn
noottccoovveerrddaammaaggeerreessuullttiinnggffrroomm::
••mechanical shocks.
••use in chlorinated or polluted water.
••prolonged exposure to strong heat sources exceeding 70°C.
TThheewwaarrrraannttyyiissccaanncceelllleeddiiff::
••the equipment has been improperly used, not following the instructions
for use.
••the owner has made modifications or tampered and/or personally carried
out repairs, or if such interventions have been carried out by unauthorized
personnel.
SSEEAACCwwiillllnnoottbbeelliiaab
blleeuunnddeerrtthhiisswwaarrrraannttyyffoorrddaammaaggeeccaauusseeddttootthhee
uusseerrtthhrroouugghhiimmpprrooppeerruusseeoofftthheeeeqquuiippmmeenntt..TThheessaammeeiissvvaalliiddffoorrddiirreecctt
oorriinnddiirreeccttddaammaaggeeooffaannyynnaattuurreeccaauusseeddttooppeerrssoonnssoorrtthhiinnggssdduueettooaannyy
ppeerriioodds
sooffnnoonn--uusseeoorrttoommiissuusseeoofftthheepprroodduucctt..
WWAARRRRAANNTTYYCCOONNDDIITTIIOONNSS::
EENNGGLLIISSHH
Other manuals for SHOT
1
This manual suits for next models
1
Table of contents
Languages:
Other Seac Sub Flashlight manuals
Popular Flashlight manuals by other brands
Hitachi
Hitachi UB 18DAL instruction manual

Strauss
Strauss LED torch FL4 Instructions and information
Bayco Products
Bayco Products NIGHTSTICK XPP-5422BA instruction manual
Hypertherm
Hypertherm Duramax Series Field Service Bulletin
Ivation
Ivation 6-in-1 Emergency Flashlight user guide
HERRMANS
HERRMANS H-BLACK MR8 Ebike user manual
