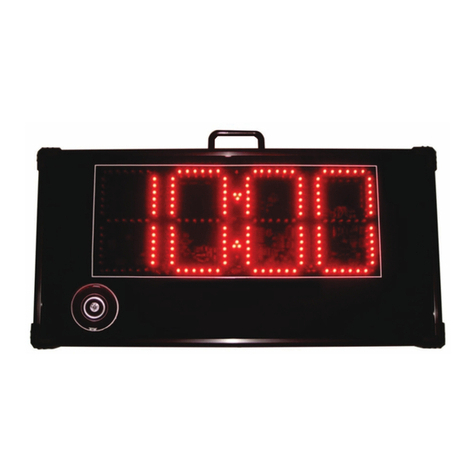
MT Logic CL-471 User manual

Model Nr. CL-471
GEBRUIKSHANDLEIDING
INSTRUCTION MANUAL
BEDIENUNGSANLEITUNG
MODE D'EMPLOI

NEDERLANDS
AANSLUITING AUDIO-IN

LICHTNETAANSLUITING
Steek de stekker van het wisselstroom netsnoer in een wisselstroom
stopcontact. Dit apparaat is uitgerust met een back-upsysteem op
batterijen en vereist 3 platte lithium batterijen van 3 volt van het type
CR2025 (niet meegeleverd). Zet de batterijen in het batterijvak en
respecteer daarbij de positieve en negatieve (+ en -) polariteiten. Tijdens
een stroomonderbreking schakelt de klokradio automatisch over naar de
batterijvoeding, zodat het horloge en de timer blijven lopen. Het systeem
schakelt opnieuw over op de netvoeding wanneer deze is hersteld.
OM TE BEGINNEN
Druk nadat het apparaat op de netvoeding is aangesloten op de
reset toets (17) op de achterzijde van het apparaat.
- Alle segmenten op de display van het apparaat gaan 2
seconden lang branden, waarna het systeem de gewone modus
binnengaat.
- De display gaat branden.
1. INSTELLEN VAN DE TIJD EN KALENDER
A. Instellen van de tijd en kalender - Houdt in de gewone modus de
insteltoets modus (1) minstens 2 secondenlang ingedrukt om de
instelmodus binnen te gaan. Druk dan op de insteltoets modus (1)
om doorheen de moduscyclus te verrollen als volgt:
LET OP controleer of de radio uitstaat, dit kunt u doen door de volume
knop omhoog te draaien. Als de radio aanstaat kunt u de tijd niet in te
stellen.


De display die de instelmodus voor de
12/24-uuraanduiding aangeeft
(24u is geselecteerd)
LET OP controleer of de radio uitstaat, dit kunt u doen door de volume knop
omhoog te draaien. Als de radio aanstaat kunt u de wekker niet in te stellen.
Als u wekker 2 niet gebruikt is het beter om deze hetzelfde in te stellen als
wekker 1, zodau u bij vergissing niet op de verkeerde tijd gewekt wordt.
De display die de instelmodus voor de
minuten aangeeft
De display die de instelmodus voor de
het uur aangeeft


2. INSTELLENVAN HET WEKGELUID EN WEKKER AAN / UIT
A. Wijzigen van het wekgeluid

3. DUURVAN DE WEKTIJD EN SLUIMERFUNCTIE
Duur van de wektijd
4. WIJZIGENVAN DE DISPLAYWEERGAVE

5. WIJZIGENVAN DE DISPLAYWEERGAVE

Selecteer de golfband MW of FM met behulp van de
De golfband MW werkt met een interne richtingantenne. Draai de
De reset-toets (17) bevindt zich op de achterzijde van het apparaat.
RESETTEN

WAARSCHUWING: Om het risico voor brand of elektrische schokken


HET KLOKRADIO EN DE PROJECTIEKLOK
MOETEN AFZONDERLIJK WORDEN INGESTELD.
OPMERKING: PROJECTEERT DE TIJD OP EEN PLAFOND OF
WAND IN EEN DUISTERE KAMER.
DE PROJECTIEAFSTAND BEDRAAGT 90 - 270 CM.

Aanwijzingen inzake de milieubescherming
Dit product mag aan het einde van zijn levensduur niet samen met het
normale huishoudelijke afval verwijderd worden, maar moet afgegeven
worden op een verzamelpunt voor de recycling van elektrische en
elektronische apparatuur. Het symbool op het product, in de
gebruiksaanwijzing of op de verpakking maakt u daarop attent.
De grondstoffen zijn volgens hun kenmerking herbruikbaar. Met het hergebruik, de
materiële verwerking of andere vormen van recycling van oude apparaten levert u een
belangrijke bijdrage tot de bescherming van ons milieu.
Gelieve bij het gemeentebestuur informatie te vragen over het bevoegde verzamelpunt.

1. MODE SET BUTTON
2. ALARM SET BUTTON
3. ALARM 1 BUZZER / RADIO SELECT BUTTON
4. ALARM 2 BUZZER / RADIO SELECT BUTTON
5. ºC / ºF BUTTON
6. INFRARED SENSOR
7. SET BUTTON
8. SET BUTTON
9. ON/OFF (ALARM OFF) BUTTON
10. SNOOZE / SLEEP BUTTON
11. LED DISPLAY
12. DIAL SCALE AND POINTER
13. AUDIO IN JACK
14. VOLUME CONTROL
15. WAVE BAND
16. TUNING CONTROL
17. RESET BUTTON
18. TEMPERATURE SENSOR (IN DOOR)
19. AC POWER CORD
20. FM ANTENNA WIRE
21. RATING LABEL
22. BATTERY COMPARTMENT
23. SPEAKER
ENGLISH

24. MINUTE BUTTON FOR PROJECTION UNIT
25. HOUR BUTTON FOR PROJECTION UNIT
26. TIME SET BUTTON FOR PROJECTION UNIT
27. FOCUS ADJUSTMENT FOR PROJECTION UNIT
28. PROJECTION ON/OFF BUTTON
29. PROJECTION UNIT
30. AUTO DIMMER SENSOR
POWER CONNECTION
Plug the AC power cord to a household outlet AC source. This unit is
equipped with a battery back up system, it requires a 3 x 3Volt CR2025
Flat Lithium battery (Not included). Insert the battery in the battery
compartment, making certain that the positive and negative (+ and -)
battery terminals are attached to the corresponding terminals on the
plate in the battery compartment. If an AC power failure occurs, the
clock automatically switches to the battery power supply, the clock and
timer memory continue running. When the AC power resumes, the clock
switches back to AC again.
GETTING STARTED
Press the reset button (17) locates on the back of unit after AC plug in.
- The unit will display full segment for 2 seconds, then it will enter the
normal mode.
- Display will lighten up.
1. TIME AND CALENDAR SETTING
A. Setting Time and Calendar – Press Mode Set button (1) in normal
mode and keep depress over 2 second to enter Time Set mode, after
enter the setting mode, press Mode Set button (1) to change the
mode cycle as follows :
CAUTION Make sure the radio isn’t activated, you can check this by turning
the volume knob to the highest position. It’s not possible to adjust the time
when the radio isactivated.
Normal gYear gMonth gDay g12/24H gRTC Hour gRTC Min g
Normal
Action (during data adjustment) :
- Press button (7) to adjust data backward
- Press button (8) to adjust data forward
- Keep depress or button for 2 second to enable auto forward

d. 12/24H Set Mode
Display Show 12/24H Set Mode
(Select 12H)
a. Year Set Mode
Initial Value : 2006
Year Range : 2000 to 2099
Display Show Year Set Mode
b. Month Set Mode
Display Show Month Set Mode
c. Day Set Mode
Remark : Weekday will recalculate when year, month or day is adjusted
Display Show Day Set Mode

Display Show Hour Set Mode
e. RTC Hour Set Mode
Display Show 12/24H Set Mode
(Select 24H)
f. RTC Min Set Mode
Display Show Min Set Mode
Remark : Second will reset for every minute adjustment
B. Setting Alarm 1 and Alarm 2 - Press Alarm set button (2) during
normal mode and keep depress over 2 second to enter alarm set
mode, after enter the setting mode, press Alarm set button (2) to
change the mode cycle as follows :
CAUTION Make sure the radio isn’t activated, you can check this by turning
the volume knob to the highest position. It’s not possible to adjust the alarm
when the radio is activated.
When you doesn’t use buzzer 2 it’s better to set this on the same time as
buzzer 1, so you won’t be awakened on the wrong time.
Normal gAL1 Hour gAL1 Min gAL1 Weekend Alarm gAL2 Hour g
AL2 Min gAL2 Weekend Alarm gNormal
Action (during data adjustment) :
- Press button (7) to adjust data backward
- Press button (8) to adjust data forward
- Keep depress or button for 2 second to enable auto forward
Table of contents
Languages: