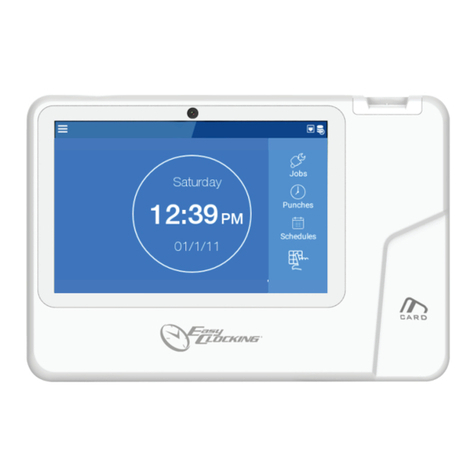
timetac Evo Smart User manual

TimeTac Time clock Evo SmartTimeTac Time clock Evo Smart
Getting started made easy! The manual for the
www.timetac.com
Information Knowledge Base
support.timetac.com
The time tracking solution
for companies.

Welcome to the
Evo Smart
clocking in
machine!

Table of contents
Introduction.......................................................................................................................4
Assembly and installation..............................................................................................6
Network settings ..............................................................................................................6
Connection to LAN/WLAN/mobile ...............................................................................8
Time clock with RFID key fob..................................................................................16
Configuration of the key fob.......................................................................................... 18
Time booking with your clocking in machine............................................................20
Delete and reconfigure a key fob..................................................................................22
Time clock with RFID key fob and fingerprint.................................................24
Configuration of the key fob.......................................................................................... 26
Adding fingerprints..........................................................................................................28
Time booking with your clocking in machine............................................................30
Delete fingerprint .............................................................................................................32
Delete and reconfigure a key fob..................................................................................34
Clock in machine settings and system BIOS ...................................................36
Network settings ..............................................................................................................38
Set backlight and volume ..............................................................................................40
Use proximity and ambient light sensors................................................................42
Troubleshooting..............................................................................................................44
Troubleshooting with system BIOS..............................................................................46

We thank you for your trust and wish you a successful start with TimeTac!
You have received your time clock for time recording. Follow these
instructions to mount and connect your device correctly.
For more comprehensive configurations on your device, you must open the sys-
tem menu BIOS, by pressing the ESC button 1and at the same time tapping
the Enter button 1below it. Before you enter the system BIOS menu, a key will
be requested.
Your personal system key is:
There are dierent clocking in machines with which you can book working hours.
You have chosen the following device variant:
Key fob (RFID)
Key fob (RFID) & fingerprint
The buttons of your device depend on the preset which have been made specifi-
cally for you. In most cases you will see the following buttons 2:Arrival, LwR
(Leaving with a reason), Departure, Break and Info. The BioKey connfiguration
button is only available if you are using a time clock with a fingerprint sensor.
The functions of the buttons will be discussed in more detail in the individual
chapters.
The time clock is configured according to your preset requirements and should
therefore be compatible with your company's internal network. For more infor-
mation about the configuration or the possibility to change it, refer to the chap-
ter Network settings (see p. 38)
Introduction
4

2
1
5

Assembly and installation
The wall bracket 1of your time clock is already mounted on the device. For the
montage use the prefabricated holes. 2Then connect the power cable 3to
the device and a power outlet. If you want to connect the device to the Internet
via LAN, you must also connect the network cable. Details can be found in the
following chapter. Then hang up the time clock and fix it at the bottom with the
supplied screw 4.
Network settings
Your internal company network requires the following settings:
• The DNS must be 8.8.8.8 in order to connect to the account.
• The following PORTs must be enabled in the network:
• 80 (HTTP)
• 443 (HTTPS)
• 8000 (Maintenance link)
• Normally, a DHCP server must be present in the network for the assignment
of the IP and the default gateway.
• To store a fixed IP address, please check p. 38.
For the default/standard settings in the BIOS, please check the
information on p. 38.
i
6

2
1
4
3
7

Connection to LAN/WLAN/mobile
Dependingontheselecteddevicemodel,youhave variousoptionsforestablishing
anetwork and Internetconnection. The standardversion ofEvoSmart is delivered
with LAN function only. If you have ordered a device with a WLAN connection or
the possibility of a mobile network connection, these options are also available.
LAN connection
Please connect the LAN cable 1on the device and plug the power cable 2into a
power connector.
Connection to a mobile network
To establish the network connection, a SIM card must be inserted into the device.
To do this, turn your device so that the back is in front of you. The narrow slot is in-
tended for your SIM card 3. Make sure you insert them with the contact surface
facing down. Then connect the time clock to a power outlet using the supplied
cable.
Aer that, you need to open the communication settings of your device. To do
this, touch the TimeTac logo for three seconds, then tap on system menu BIOS on
System settings > Communication Info > Interrupt communication > Inter-
face. Select Mobile (Whether you select the "GSM" or "GPRS" setting depends
on your mobile phone provider.). Mobile parameters > enter PIN add PIN code
of your mobile network.
You can only connect your Evo Smart to a mobile network if you
have ordered a device with this function.
i
Information about your network provider and APN data is
stored for you when you order the clocking in machine. If this data
changes, please contact our support.
i
8
13
2
9

Configuration of the WLAN
Touch/hold the ESC key, and at the same time, briefly tap the Enter key below it
to open the BIOS system menu 1and enter your key (see page 4). Tap System
settings, then Communication 2and confirm the question Interrupt commu-
nication? 3by tapping the Enter key. In this menu you can now choose various
settings. In the Interface 4change the settings from "LAN" to "WLAN". Active
mode 5must be set to "No" and HTTP mode 6must be set to "Secure". Now
follow the instructions on the next page.
You can only connect your time clock via WLAN if you have orde-
red a time clock with WLAN function.
i
10

12
3
45
6
11

Now open the menu for the WLAN Parameters 1. Tap the option Change Net-
work 2. Now existing WLAN sources 3will be displayed. Select one of them.
Once you have selected a network, an overview of this connection is displayed.
Tap on the enter password 4, to connect using the Wi-Fi network password.
Aer you have entered the password, tap Enter. Follow the steps on the following
pages.
12

1
2
34
13

A connection is now established in the overview of the relevant WLAN. Then tap
save configuration 1. To do this, select a free memory space 2. In the over-
view that appears again, the same option is no longer selectable 3, which me-
ans that the save was successful.
The advanced settings menu item 4provides you with information about the
WLAN configuration to which you are currently connected. You can also manual-
ly adjust the stored IP address here.
14

1
3
2
4
15

Time clock with RFID key fob
If you have purchased a time clock with a key fob reader, the users' time bookings
are only made with a key fob. You will see the dierent keys Arrival, LwR, Depar-
ture, Break and Info on the start display 1.
The key fob reader is located in the lower part of the device 2.
Time bookings are forwarded to our server and can then be viewed in both the
web browser and the smartphone app. Time bookings that have been made via
your time clock can be recognized by a symbol in the timestamp list in the
soware.
If your time clock is oline for a short time, e.g. due to a company internal net-
work change, the timestamps are temporarily stored on the clocking in machine.
As soon as an Internet connection is available again, this data is forwarded.
If you purchase your key fobs from TimeTac, you can always order more if nee-
ded. Just write us an email to support@timetac.com
16

2
1
2
17

Configuration of the key fob
To enable your employees to book times correctly, each user must be assigned
a key fob.
Fist scan of the key fob: select Info and then tap ESC. Now the message "Read
transponder" is displayed. Now hold the new, unused key fob in front of the rea-
der. You will now get the response "Unknown transponder 1" 1.
To assign the key fob to a user, open your TimeTac account in the web browser.
Note that only managers with full access can assign key fobs. In the le side
menu, click Settings > User settings > Terminal > Terminal transponder
mapping.
Now click update in the upper right corner 2. The scanned key fob is displayed
with a unique ID. 3By double-clicking in the user column in the line of the cor-
responding key fob ID, the drop-down menu opens 4, allowing the key fob to
be assigned to a user.
18

2
34
1
19

Time booking with your clocking in machine
Clock in
Tap on Arrival. Now put your key fob on the reader. The data is read in and the
time clock displays "Good day, [name]". Time recording has started.
Clock out
Tap on Departure. Now put your key fob on the reader. The data is read in and
the time clock displays "Goodbye, [name]". The time recording has ended.
Break
To record breaks, tap Break and hold the key fob to the reader at the clocking in
machine. To restart the working time aer the break, select Arrival and hold the
key fob to the reader as usual.
Leaving with a reason
To record other absences, tap Leave with a reason. The desired absence reason
can then be selected in a menu. Hold the key fob onto the reader. Customize
available absence reasons individually by contacting our customer support at
support@timetac.com
Information
Here, each user can see information depending on the selected TimeTac modu-
les. To do this, tap on Info and hold the key fob to the reader as usual. Now, de-
pending on which TimeTac modules you are using, your working time balance,
daily balance or remaining vacation, for example, will be displayed. In general,
you can see the task that is currently running and when it was started.
In a time clock with time control, actions (e.g. arrival, departure) are
automatically selected. Of course, another action can be selected at
any time.
i
20
Table of contents
Other timetac Time Clock manuals
Popular Time Clock manuals by other brands

Icon Time Systems
Icon Time Systems Universal Time Clock RTC-1000 2.5 Product user guide

RenewAire
RenewAire TC7D Series installation manual

Karlsson
Karlsson big flip instruction manual

WESTERSTRAND
WESTERSTRAND Lumex 5 instructions

Anviz
Anviz CX7 user guide

LA CROSSE CLOCK
LA CROSSE CLOCK Northwoods 433-3841D manual