With a little practice, the MULTIMAC can be fitted or removed from your car in one or
two minutes as shown in the photographs:
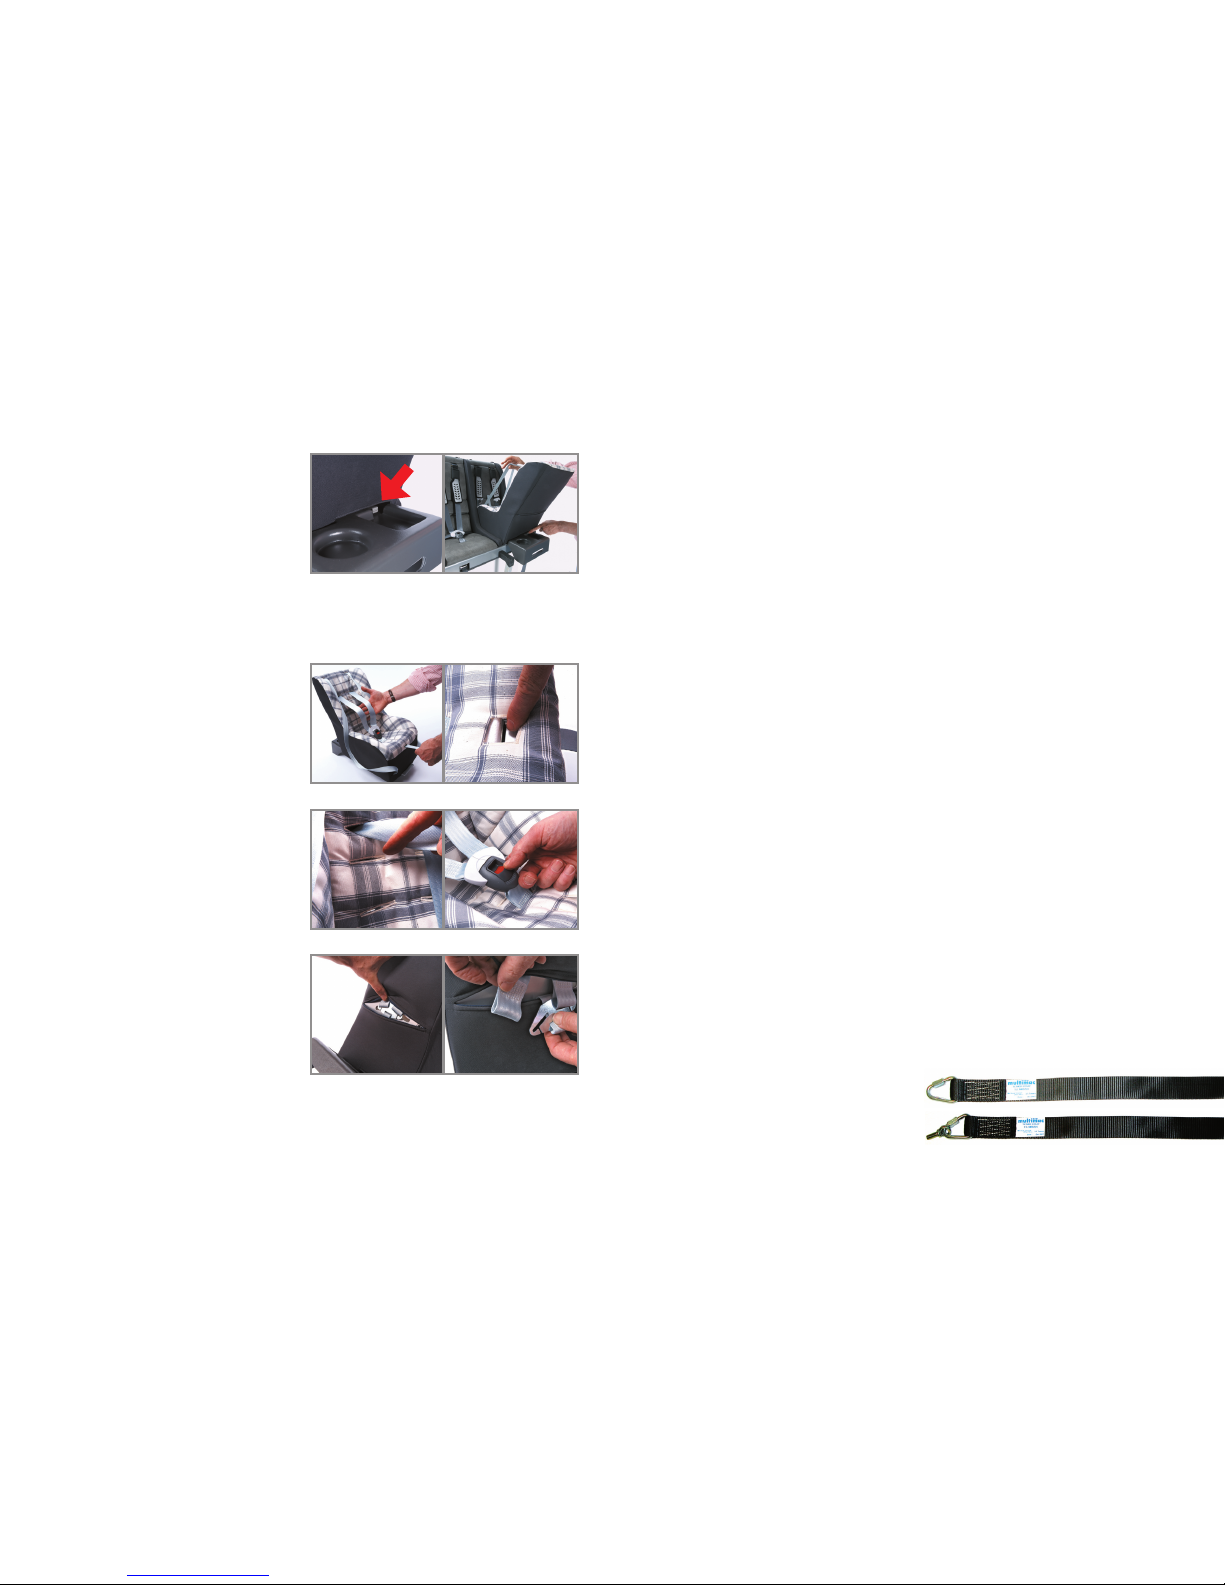
3.1 Initially, the two tether straps provided
with the MULTIMAC have to be fitted to
the bolts securing the “lap strap” of the
central rear seatbelt (Fig 3a).
Fittings will be different for each car
and you may want this work to be done
by your local garage. Full details are
shown in SECTION 5.
Once fitted, the tether straps simply lie
across the rear seat when not in use (Fig 3b). Before fitting the MULTIMAC, the
adult buckles should be tucked away
behind the seat so the MULTIMAC does
not rest on them (see section 5.1)
3.2 The cushions from the two middle
seats of the 4-seater Multimac (2 outer
on 3-seater) are removed by lifting the
front edge and threading the crotch-
strap through the aperture in the seat,
once the main buckle has been undone
(Fig 3c).
This will reveal the two “ratchet adjusters” (Fig 3d).
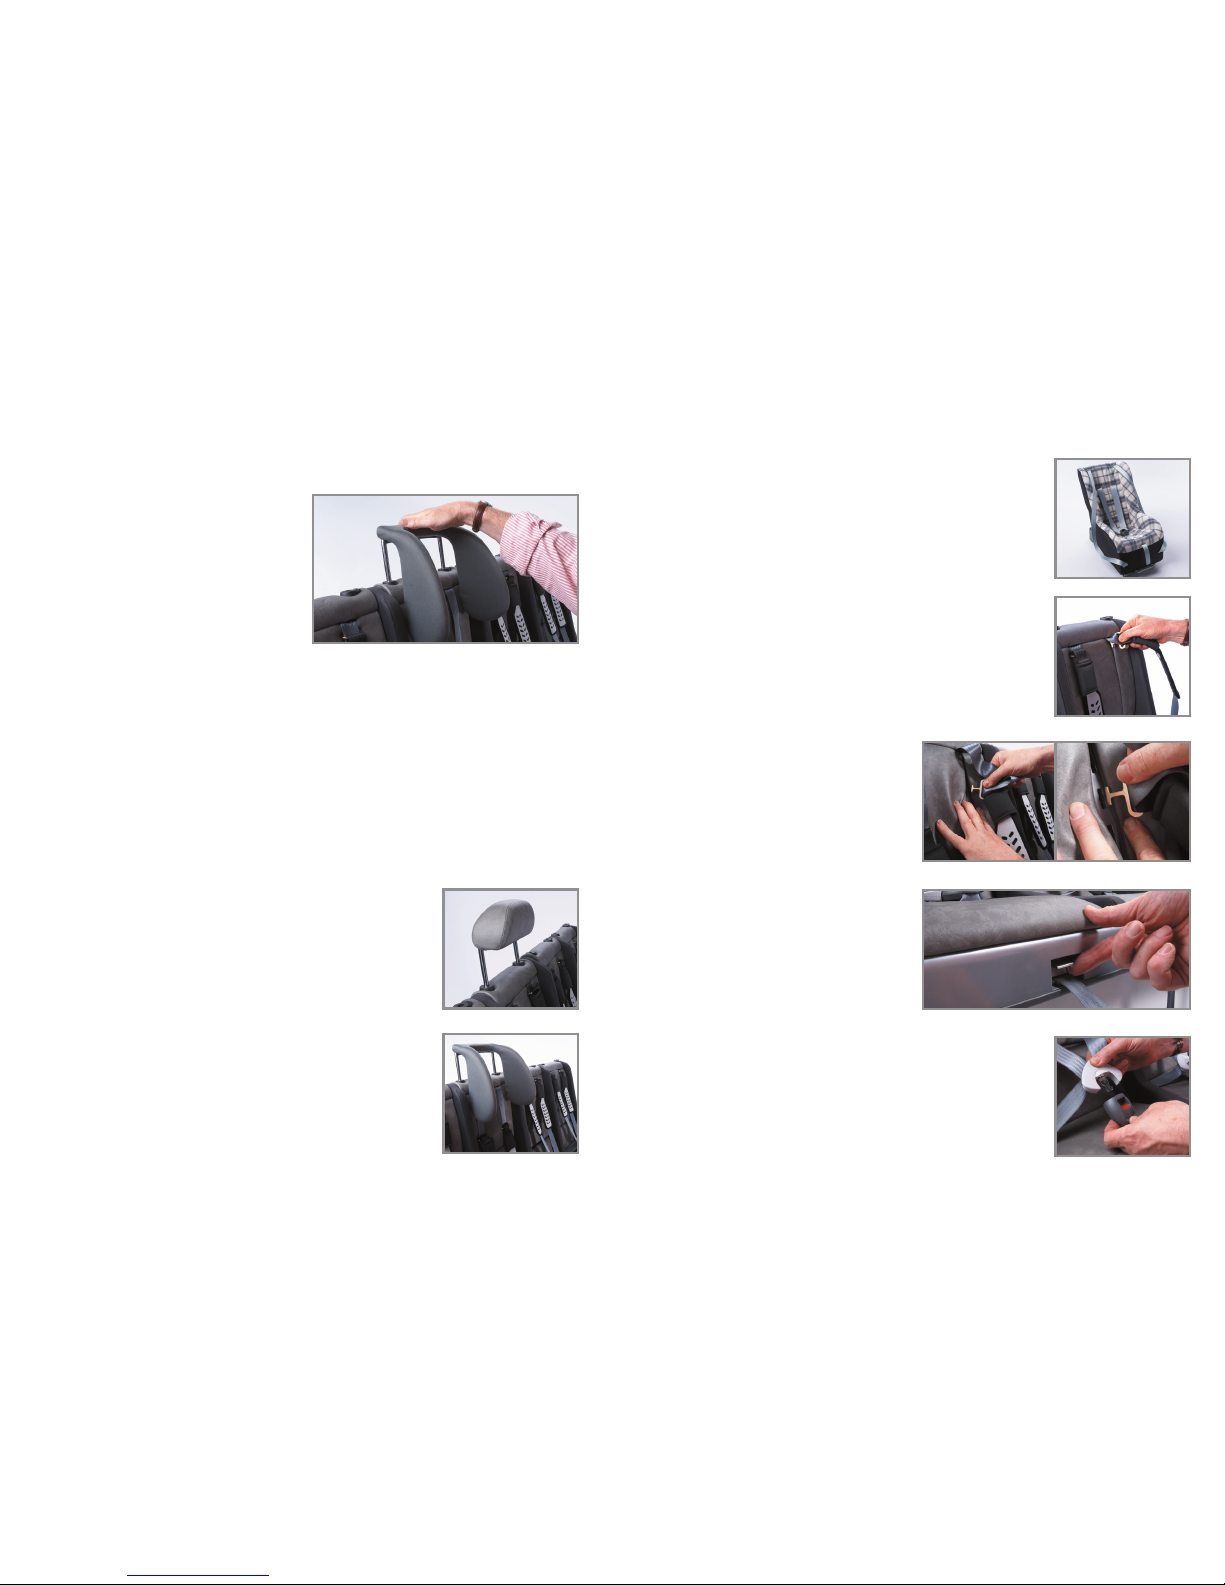
3.3 To make the MULTIMAC more easily manoeuvrable, the two
legs should be pulled out of their sockets (they are retained
by elastic cords) and rested in the cavity created by moving
the seat cushions, while the MULTIMAC is lifted into position,
resting on the back seat of the car (Fig 3e).
NOTE – Caution – The MULTIMAC is quite heavy (35kgs) and
normal care must be taken when lifting: ideally this is a 2-person job.
As an optional extra, 2 clip-in “lifting handles” are available which lock into the
outer seat positions (once the cushions are removed) using the
MINIMAC fixings (Fig 3f).
3.4 The handles of the ratchet adjusters should be released by
pulling the locking bar (Fig 3g), and then pushed right back as
far as they will go.
The tether straps should be threaded through the slots in the
rear of the Multimac and then through the slots in the spindles
of the ratchet adjusters and pulled through to remove all slack.
3. FITTING THE MULTIMAC
INTO YOUR CAR
NOTE – Ensure that the tether straps
are not twisted: the label should be on
the top.
The handle of each ratchet adjuster
should be rotated forwards (you will
have to pull the locking bar again), and
continue to be operated back and forth,
pulling the MULTIMAC towards the
back of the car seat (Fig 3h).
When it reaches the back of the car
seat, but before the tether straps
become tight (so you can still slide the
MULTIMAC laterally), check that the
MULTIMAC is positioned centrally and
that you can close both car doors.
3.5 You now re-fit the legs in their sockets
and adjust the height of the feet by
rotating the threaded rod by hand
(Fig 3j).
You only have to do this once, on the
first fitting to your car and you should
take some trouble to ensure that both
legs are adjusted equally, and that, with
the MULTIMAC in this position, the feet
just rest on the carpet.
The legs should be pushed back as far as possible, and if any
rugs or over-mats are fitted you should ensure that no hem or
ridge is preventing the rubber coated foot of the MULTIMAC from
sitting flat on the floor.
3.6 The ratchet adjusters are now fully tightened (Fig 3i): this will
pull the MULTIMAC back into the car seat and also compress
the legs.
You need not exert undue force as the ratchet adjusters have a
magnifying effect, but ensure that the MULTIMAC feels “rock-
solid” against the car seat back.
3.7 The ratchet adjuster handles are then rotated forward to their
“closed” position and the seat cushions
replaced (Fig 3k).
NOTE – There is a knack to refitting
the seat cushions:
•Holdthefrontofthecushion,and
lead the rear edge into position
first (Fig 3l).
Fig 3a Fig 3b
Fig 3c Fig 3d
Fig 3e
Fig 3h Fig 3i
Fig 3j
Fig 3l
Fig 3k
Fig 3g
Fig 3f