Murideo AVPRO-AC-FXHD-KIT User manual

Page 1of 29
Call the AVPro Team at –North America 877-886-5112 International +1-605-274-6055
Murideo
Fox & Hound Test Kit - Installer Pro Tools
AVPRO-AC-FXHD-KIT
HDMI 2.0 18 Gbps Audio/Video Generator & Analyzer
User’s Manual
Version 1.00

Page 2of 29
Call the AVPro Team at –North America 877-886-5112 International +1-605-274-6055
Important Safety Information
•Follow all instructions
•Use only a dry cloth to clean
•Use caution not to block side vents on unit
•Indoor use only: To reduce the risk of electric shock, do not use near water or expose to
rain or moisture. Keep away from excess moisture
•Do not use near heat sources such as room heaters, hot A/V equipment
•Read all warnings
•Use only accessories provided by Murideo
•Unplug the device during lightning storms or when unused for long periods of time
•Keep away from open flames
•Protect all connected cords including power cords from being pinched, compressed, and
stepped on
•Do not open the case. All servicing should be done only by qualified and approved service
personnel and will void the warranty.
•Electrical Input Rating: Power over 5V/DC 700mA. Caution: Use only the supplied AC/DC
Adapter
•Operating temperature range: e.g. 0 to 40C.
•For charging use the provided 5V/ DC 3A supply only
•To disconnect power sources, remove the AC/DC adapters from the wall outlets.

Page 3of 29
Call the AVPro Team at –North America 877-886-5112 International +1-605-274-6055
Attention –High Voltage Protection:
1. In order to protect your FOX & HOUND and complete system under test from possible
damages, please don't turn on the FOX & HOUND power switches before generator
Output is attached to tested device (repeater, video processor or display) input.
Please make sure that system under test is completely powered off before you insert or
extract HDMI cable to any of involved devices.
2. Please insert and extract HDMI cables from your FOX & HOUND gently and with high level
of care. We highly recommend you use a port-saver if you main use of the kit is testing
cables (many insertions and removal of HDMI cable).
3. Reason to be careful - during Hot-Plug between HDMI connector and receptacle (when
tested device is On) ESD discharge can occur due to the potential differences (possible
ground -loop) between powered equipments. These potential differences can be at an
extremely high level.
Our FOX & HOUND HDMI output is protected against ESD discharge up to 7KV on all active
HDMI lines, but in the case of a massive discharge this value can be exceeded and will
cause serious damage to FOX & HOUND internal circuitry and can make FOX & HOUND
HDMI output completely inoperable. We have sophisticated methods to measure directly
on the high voltage protection chips to provide evidence of such an unwanted ESD event,
but unfortunately, that will automatically void FOX & HOUND warranty. In your own
interest please pay full attention and prevent your workplace from occurrence of ESD by
trying to create Static-safe working environment.

Page 4of 29
Call the AVPro Team at –North America 877-886-5112 International +1-605-274-6055
Table of Contents
Page 5 Overview
Page 6 Key Features
Page 6 What's in the Box
Page 7-8 Functionality Diagram Generator
Page 9-10 Functionality Diagram Analyzer
Page 11-19 Basic Troubleshooting & System Testing
Page 19 Test Pattern Descriptions
Page 2-21 Specifications
Page 21 List of Supported Resolutions
Page 22 Updating Firmware
Page 23 FCC Compliance
Page 23-27 Getting Help –Warranty, Service, and Support

Page 5of 29
Call the AVPro Team at –North America 877-886-5112 International +1-605-274-6055
Overview
Fox & Hound: HDMI 2.0 Testing & Troubleshooting for A/V Integrators
Thank you for purchasing the Fox & Hound HDMI Testing Kit.
Five top reasons for owning Fox & Hound:
1. To troubleshoot HDMI distributed systems
2. To verify display and projector HDMI ports for maximum signal capability
3. To validate HDCP 2.2 compliance
4. To provide 18 GBPS and HDR source signals for video calibration
5. Peace of Mind
The Fox & Hound is the first low-cost, 2-piece, battery-operated HDMI 2.0 test kit on the market,
brought to you by Murideo, and the team that developed the Fresco advanced HDMI analyzing
tools (6A and 6G)
The Fox & Hound testing and troubleshooting kit comes with a Generator that generates test
patterns for video and audio at the HDMI 2.0x level, additionally, the kit includes an Analyzer for
analyzing the output of any source or repeater under test.
The Fox & Hound enables you to completely test from Source to Sink (and all Repeaters in
between) for failures in the HDMI ecosystem. These tests include end-to-end systems throughput
testing up to 18 Gbps (All HDMI timing and selected VESA timings). EDID tools, HDCP 2.0 tools,
Audio confidence tests, HDR verification, HDMI Cable test and more.
The Fox & Hound is battery operated, comes with a hard case for the F&H and accessories, and is
guaranteed to make your life easier when you can reduce reworks and troubleshooting and your
overall support costs go down.

Page 6of 29
Call the AVPro Team at –North America 877-886-5112 International +1-605-274-6055
Key Features:
•HDMI 2.0 Support. 600 Mcsc - 2160P @60 4:4:4 Maximum Resolution
•HDCP Pass/Fail - HDCP 2.2, 1.4 or None Indicator Light >Some of the 4K UHDs on the
market today support HDCP 2.2 - The Fox & Hound will tell you what the TV will and won’t
support.
•HDMI Cable Test –Know immediately if your HDMI cable or HDBaseT extender is defective
with complete BER testing from source to sink (results presented as Pass or Fail).
•Status Light > Instant notification if HPD and 5V is active. On the fly indicator for
troubleshooting issues especially when switching, splitting and extending HDMI.
•EDID Read and Save functionality >did you know most 4K TVs still have 2K preferred
timings? Know what your TV is telling you.
•Deep Color Testing > 48 Bit per pixel color depth > Todays TVs are still 24 bits per pixel, but
the new Blu-Ray may be 30, so lots of headroom is available.
•HDR Confidence Testing –tests for the presence of the HDR signal for both HDR-10 and
HLG > gives you the confidence that your distribution system will support High Dynamic
Range, which is becoming more common rapidly.
•Portable - Battery Operated > Rechargeable batteries included make field troubleshooting
much easier.
•Optimized Ergonomics –2.5” LCD display and simple menu system makes Fox & Hound
very user friendly.
•Includes audio confidence test tones > to make sure audio is active on the HDMI line
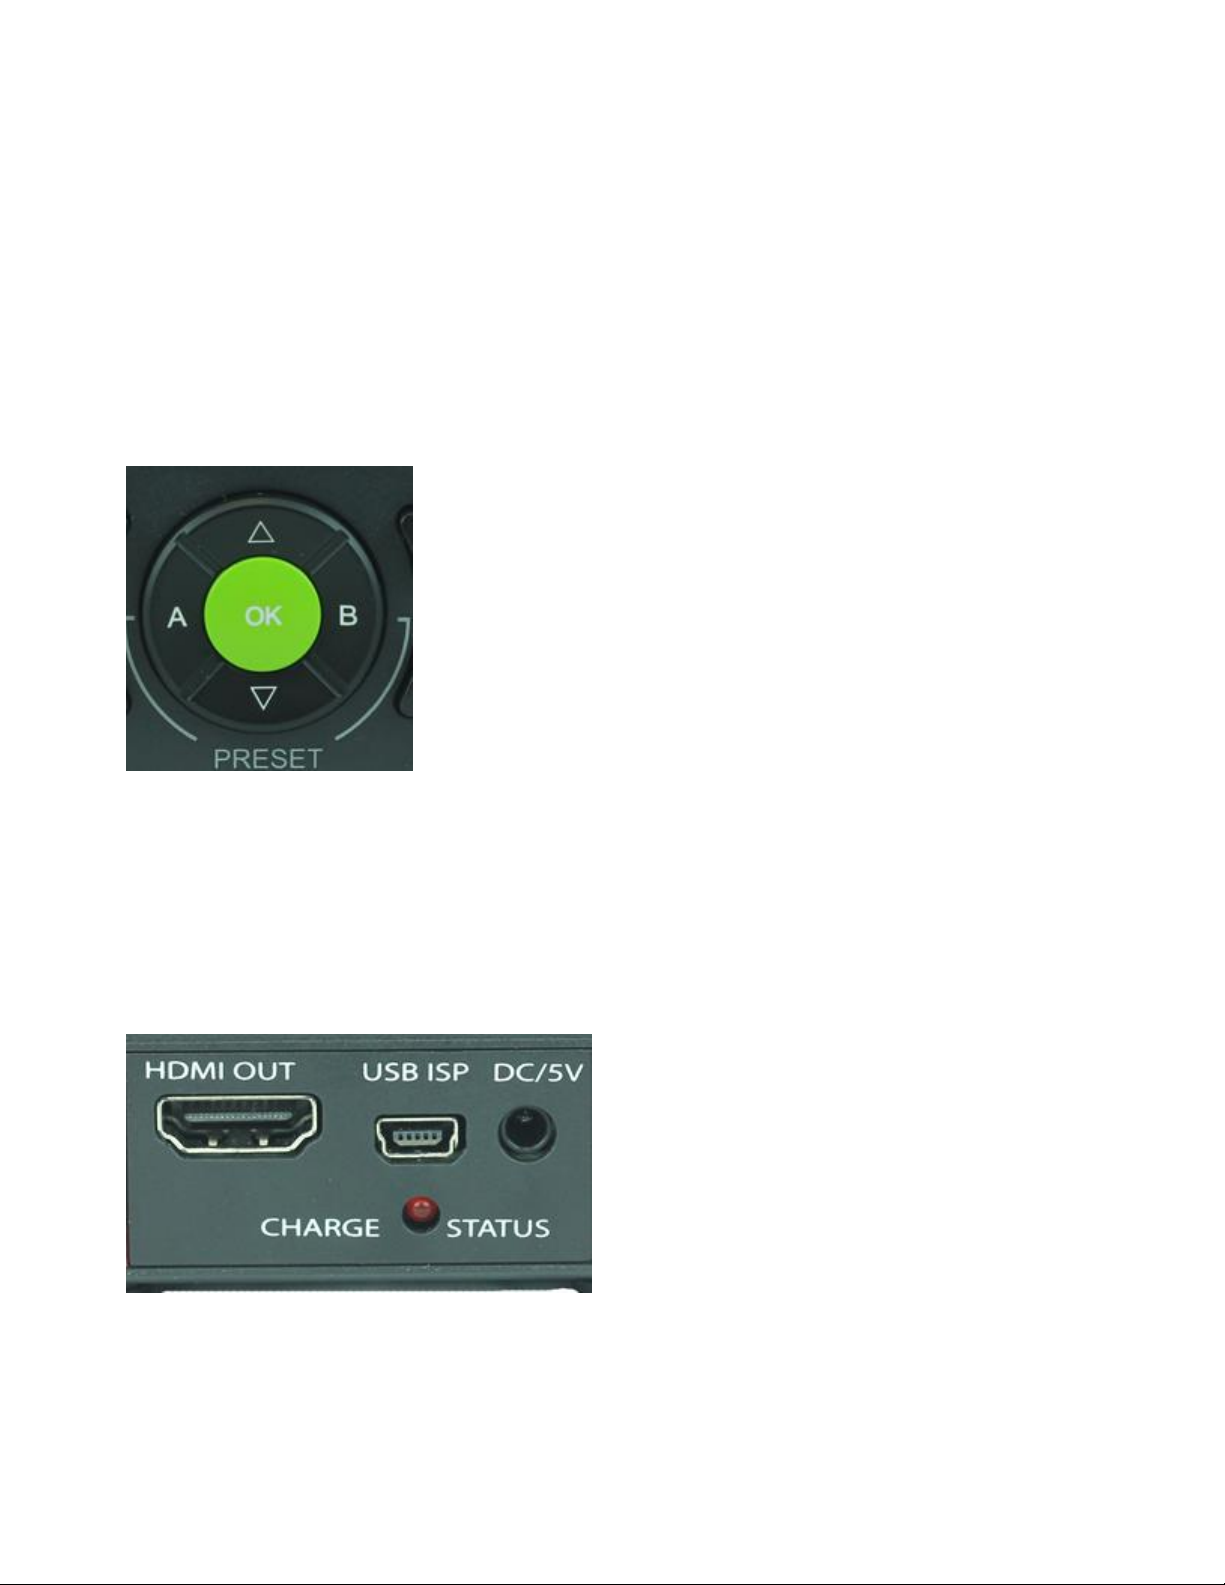
•Field upgradable via firmware.
What’s in the Box
•2.0x Generator (Source)
•2.0x Analyzer (Sink)
•2 each 5 V DC/AC Power Supply / Charger (110-240 VAC) with set of International plugs
(US, UK, AU, EU).
•Rechargeable Battery Pack (installed)
•Hard Case
•3’ Micro USB to USB cable for firmware Updates
•User Manual (recommend you download latest version from F&H Site)
Please read the entire manual before turning on your new Fox & Hound testing system for helpful
tips on charging and battery life extension.

Page 7of 29
Call the AVPro Team at –North America 877-886-5112 International +1-605-274-6055
Functionality Diagram Generator
From Top to Bottom (Left to Right)
Buttons/Indicators
a. HDCP Indicator –indicates the presence to HDCP
b. Status Indicator –indicates that Hot Plug event has occurred and there is a successful
connection between source, sink and repeaters in the system.
c. 4K Button –brings up a selection list of all 4K timings up to 18 Gbps
d. 1080 Button –brings up a selection list of all High Definition (HD) 1080 timings.
e. 720 Button - brings up a selection list of all High Definition (HD) 720 timings.
f. Power Button –use to power the unit on or off.
g. VESA Button - brings up a selection list of all VESA timings (PC).
h. Auto Button –when pressed, reads the EDID from the sink device connected to the
generator and outputs the preferred timing from the EDID. Note: Auto screen is only place
to see actual battery charge level.
i. SD Button - brings up a selection list of all Standard Definition (SD) timings.

Page 8of 29
Call the AVPro Team at –North America 877-886-5112 International +1-605-274-6055
j. HDCP Button –brings up a selection list for HDCP troubleshooting –HDCP Off, HDCP 2.2
and HDCP 1.4
k. Audio Button - brings up a selection list of audio output formats for audio confidence
testing.
l. Color Button –brings up a selection list of Color (chroma subsampling) selections. Use this
in combination with a timing button to achieve desired bandwidth for system testing.
m. HDR Button –use this to test for HDR-10 or HLG (Hybrid Log Gamma).
n. Back Button –Use this button to return to pattern selection screen.
Note: Rotary Switch in middle of buttons (reference for items o-q).
o. Up/Down Arrows –Use these to scroll through patterns or scroll through sub-menu items.
p. OK Button –Use this to select menu items –change timing, HDCP type, HDR, etc.
q. A & B Buttons –Press and hold either A or B button for 3 seconds to store the current
configuration –includes timing, color, HDCP and pattern –handy feature for A/B testing of
new and existing infrastructure.
Note: Top Panel of Generator Indicated below (reference for items r-u).
r. HDMI OUT connector –connect to any sink or repeater input via HDMI cable.
s. USB ISP –port used for installing firmware updates if required.

Page 9of 29
Call the AVPro Team at –North America 877-886-5112 International +1-605-274-6055
t. DC/5V –DC 5V power port –connect included power supply to this connector –use for
charging and can be used for operation
u. Charge Status –when lit changing is in process.
Functionality Diagram Analyzer
From Top to Bottom (left to Right):
a. VOL + Button –Use this button to increase the volume of the internal speaker when an
audio signal in being generated by the analyzer or from a source device.
b. EDID Select Button –This button allows selection of 5 default EDIDs and 2 User EDIDs.
c. Re-Sync Button –This button causes a hot-plug event when pressed –use this for
troubleshooting distributed systems. It is not necessary to plug/unplug HDMI cable when
using this button.
d. Power Button –Use this button to power the unit on and off.
e. VOL - Button –Use this button to decrease the volume of the internal speaker when an
audio signal in being generated by the analyzer or from a source device.

Page 10 of 29
Call the AVPro Team at –North America 877-886-5112 International +1-605-274-6055
f. Active EDID Button –Use this button to view the EDID being used in the system under test
now. Oftentimes this button is used in conjunction with the EDID Select Button to verify
active EDID.
g. Cable Test Button –Use this button to perform an HDMI cable test after plugging cable
under test into generator and analyzer.
h. HDCP Button –Use this button to emulate HDCP functions –Off, HDCP Auto, HDCP 2.x and
HDCP 1.x
i. Video Button –Press to see active video material –test pattern when connected to
analyzer, content when connected to a source.
j. Info Button –Press to see signal & timing information on device under test. Also see
battery charging status and firmware revision number.
Note: Refer to rotary switch below for items k, l and m:
k. Up/Down Buttons –use these buttons for scrolling through menu items under buttons
discussed above.
l. OK Button –use this to select menu items.
m. A/B Buttons –Use these by holding either for 3 seconds to capture EDID of sink device
(display). This allows you to have 2 user EDIDs available with single button press –handy for
troubleshooting EDID issues and for pre-testing distribution end points prior to display
installation.
Note: Top Panel of Analyzer reference items n-q below.
n. HDMI Input connector –connect to any source or repeater output via HDMI cable.

Page 11 of 29
Call the AVPro Team at –North America 877-886-5112 International +1-605-274-6055
o. USB ISP –port used for installing firmware updates if required.
p. DC/5V –DC 5V power port –connect included power supply to this connector –use for
charging and can be used for operation
q. Charge Status –when lit changing is in process.
Basic Troubleshooting of Audio/Video Systems
In the system diagram above it’s easy to see the basic components of a video distribution system.
Obviously, this is a very simple system diagram, use your imagination to replace all the sources,
displays, matrices, distribution amplifiers and extenders in the system [where you see the term –
DISTRIBUTION SYSTEM above] and the task of troubleshooting these systems can become
daunting at times.
Example of functioning system above:
1. Generator –generates test pattern (SMPTE Bars) at desired timing and HDCP
version.
2. Analyzer –receives, decodes and displays signal (SMPTE Bars) at desired timing and
HDCP version.
3. Indicator Lights –Status HDCP and Status lights are green –SMPTE color bars is
displayed
All AV Systems are made of basically 3 main components:

Page 12 of 29
Call the AVPro Team at –North America 877-886-5112 International +1-605-274-6055
a. Sinks –This is the display or projector –this is an HDMI Receiver device. Substitute the
analyzer for sinks during system testing –use the generator to test sinks by injecting a
specific timing characteristic expected to pass through distribution system.
b. Sources –This is any device that outputs HDMI –Set top boxes, game consoles, computers
and more. This is a HDMI Transmitter device. Substitute the generator during system
testing –use the analyzer to test the output of any source for the desired timing
characteristic.
c. Repeaters –This is a combination device that can be connected between one or several
sources and sink devices –like an AVR (audio video receiver) or matrix switch. Use both
generator and analyzer for troubleshooting the devices and for system troubleshooting.
Understanding what happens when these devices are connected in a simple or distributed system
is useful in troubleshooting an actual system.
The Fox & Hound is designed for testing HDMI distribution systems and devices in these systems.
The tests included are the result of years of testing and troubleshooting with integrators in the
field like you –but understanding the basic principles of systematic troubleshooting –from source
to display –and everything in between will improve your chances of resolving issues. The chart
below is helpful in determining “what”system components should do based on their specification
and firmware revision.
Chart above shows the 3 most common AV formats –the top two will run in almost any
distribution system. The third is new, requires double the bandwidth, and is where systems are
3 Main Formats in CE
-1080P24/30/60
-2160P24/30 4:2:0
-2160P60 4:4:4

Page 13 of 29
Call the AVPro Team at –North America 877-886-5112 International +1-605-274-6055
failing, cables are failing –or more proper –systems are not engineered correctly or some of the
components of the system are just not up to par in 2017 and uncompressed 4K.
Fox & Hound Test Scenario Examples
Pre-Installation Testing (racking):
1. Use the GENERATOR in place of your source and test for all actual resolutions, HDCP flavor
and HDR type that will be used in the system.
2. Connect the ANALYZER at the end of the distribution system (replace your TV) and use for
testing the output resolution, HDCP, HDR, etc.
3. Look for any differences; is the signal you are sending unchanged by your distribution
system? or has something been downscaled? Compressed? altered? If your bandwidth,
timing, or resolution is different from what the GENERATOR is outputting, then you know it
was changed by a product in your distribution system.
4. Is everything the same? Then you are done with the first part, if not work backwards from
the sink with your analyzer checking the signal after each product to find the where the
change originated.
Notes of pre-testing:
Why Pre-Test products?
Nothing is worse than integrating a complete system and then finding out that you are not getting
a picture or sound somewhere. Pre-Testing all your products can save you time and hassle of not
having to track down one bad piece in a project that has hundreds of connection points. Many
integrators will test each product before installation at the job site. Others will have someone test
all the products in a lab or warehouse before they get to the site. Let the Fox & Hound save you
time and money by pre-testing products.
HDCP Specific Testing when copyrighted 4K UHD material will be distributed
1. Use the GENERATOR in place of your source, choose a test pattern and the highest
resolution your distribution system can handle. Then press “HDCP” on the GENERATOR and
select 2.2.
2. Place your ANALYZER in place of your sink, press the Info Button to analyze the signal,
make sure you are getting HDCP 2.2 by pushing “HDCP” on the ANALYZER –you should see
video if HDCP setting on either 1- HDCP 2.2 + 1.X (will auto-select based on content &
HDCP path from source to sink –all compliant) or 3 - HDCP 2.2 only.

Page 14 of 29
Call the AVPro Team at –North America 877-886-5112 International +1-605-274-6055
3. If you get picture on your ANALYZER and the HDCP light is lit up your system is ready to go.
If you get no picture, or no HDCP light, work backwards from the sink with your analyzer
checking the signal after each repeater product to find the where HDCP was lost
Test a Source Device
How to Test a Source (a source is anything that creates the video signal: Blu-ray, Apple TV, Roku,
Media Player, Computer) –see example of connecting directly to a UHD player above.
1. Connect the supplied HDMI cable from the output of the Source to the ANALYZER.
2. Press the INFO or VIDEO buttons to display the video content (VIDEO) or video signal info
(INFO).
3. Make sure the signal you expected is being achieved - Is the signal 4K? Does it have the
correct color space? Is the timing correct for this source, Is HDCP present and in the proper
form?
4. If everything reads correctly, you know your source is ready. But if not you will need to get
into that sources menus and make sure that it is sending an optimized signal. If your source
isn’t optimized, there is no way for the rest of your system to distribute a truly higher
resolution if it is not coming from the source.

Page 15 of 29
Call the AVPro Team at –North America 877-886-5112 International +1-605-274-6055
Test a Display (sink) Device
How to Test a Sink (a sink is anywhere the signal ends up such as a TV, Projector, or Computer
Monitor)
1. Connect supplied HDMI cable from the output of your generator to the input of the display
you want to test.
2. Select a familiar test pattern from the GENERATOR using the up down arrows. Then choose
the resolution you want to distribute by selecting either “4K”, “1080”, “720” or “VESA”,
click “OK” when you are on the one you would like to use. For testing verifying a full 4K
system select 3840X2160 60 Hz and Color Space RGB Full Range or similar full HDMI 2.0
resolution.
3. The test pattern should appear on the display, if it does not, start decreasing your
resolution until you get a picture on screen. Once you get a picture, this would be the
maximum resolution for that display.

Page 16 of 29
Call the AVPro Team at –North America 877-886-5112 International +1-605-274-6055
Test a Repeater
How to Test a Repeater (a repeater is any HDMI device that receives an input signal and
retransmits that same signal to a downstream sink or display device; like a matrix, a switch, an AV
receiver or distribution amplifier)
1. Plug one end of the first cable into the GENERATOR, and the other into the repeaters input.
Use the other cable to connect the repeaters output to your ANALYZER.
2. With the GENERATOR, choose any test pattern, then select the highest resolution, timing
and bandwidth required to be passed through the repeater.
3. Select INFO Button on the ANALYZER to read the output signal from the repeater. It should
be the exact same signal that the GENERATOR was configured to send. If not, attempt to
use internal settings in the repeater to make adjustments to items such as scaling, format
conversion, color space, etc. to correct the issue. If you can’t optimize the repeater device
via internal adjustment or you can’t achieve the required signal timing, HDCP version, HDR,

Page 17 of 29
Call the AVPro Team at –North America 877-886-5112 International +1-605-274-6055
etc., you may need to replace the device with a compliant device or you may need to
downclock your entire system to accept this device.
Test a HDMI Extender (over Category Cable)
How to Test an Extender (also known as a balen or HDBaset Tx & Rx)
1. For this you need two trusted HDMI cables and a trusted CAT 5/6/7 cable. Plug one end of
the first cable into the GENERATOR, and the other into the Extender Transmitter’s input.
Use the other HDMI cable to connect to Extender Receiver’s output and then into your
ANALYZER. Connect the Transmitter and Receiver with the trusted CAT cable.
2. With the GENERATOR, choose any test pattern, then select the highest resolution, timing
and bandwidth you want to pass through the extender.
3. Select “OK” on the ANALYZER to read what is being output. It should be the exact same
thing that the GENERATOR was inputting. If not then your extenders are changing the
signal, and in most times with extenders if there is something wrong you will get NO
PICTURE. At this point you will need to swap products or “dumb-down” your entire system
to meet the extender set’s capabilities.

Page 18 of 29
Call the AVPro Team at –North America 877-886-5112 International +1-605-274-6055
Test an HDMI Cable (replace DISTRIBUTION SYSTEM with an HDMI cable –any HDMI cable 😊
How to Run a Cable Test:
1. To run a cable test with the Fox & Hound the first step is to connect one end of the HDMI cable
to the Generator, and the other end to the Analyzer. Double check that they are connected
properly.
2. Send any signal and make sure that you can see the video preview on the Analyzer.
3. Now Press the “Cable Test Button” on the Analyzer.
4. WAIT! Don’t press any more buttons, if you press any other buttons that will affect the Cable
test and you could get incorrect readings.

Page 19 of 29
Call the AVPro Team at –North America 877-886-5112 International +1-605-274-6055
5. As the readings go through they will show up on the analyzer automatically, you can view them
on the main screen.
6. Results are pass or fail –specifically:
•5V –OK –This indicates 5V is present
•18G –Pass / Error / No Signal –Pass = pass, Error = sees signal, but cannot pass all
data. No Signal and Error are considered defective cables.
•Same as above for all other lower resolutions
•DDC –OK The Display Data Channel, or DDC, is a collection of protocols for digital
communication between a computer display and a graphics adapter that enable the
display to communicate its supported display modes to the adapter and that enable
the computer host to adjust monitor parameters, such as brightness and contrast.
•HDP –OK - HPD (Hot Plug Detection) allows the source to detect a display plugged
in real time and indication should be OK if functioning properly.
Note: Use the cable test to verify that all cables are passing full resolution requirements for your
project. Use the chart below to help determine requirements and remember –some cables are
better than others and sometimes you may need fiber to get longer runs or extenders –but realize
the limitations of each device selected. Fox & Hound can be substituted under Murideo Six Series
column below:

Page 20 of 29
Call the AVPro Team at –North America 877-886-5112 International +1-605-274-6055
Common Symptoms you will find in a distributed Audio/Video System:
No Video?
Start at TV with generator –does TV work? Generate a test signal at the next HDMI point (for
instance the input to an extender) and every HDMI point until the signal is lost. Once the signal is
lost, use analyzer and generator combo to isolate to a cable, TX, RX or other component. Problem
could also be firmware –if in doubt call the manufacturer.
No 4K?
Individually check that each product can handle the same types of 4K; 4K 18Gpbs is drastically
different than 4K 10.2Gbps. Manage your EDID’s on each repeater and sink to make sure you have
your system optimized for the 4K signal you are trying to distribute.
Incompatible Video?
Are you getting a signal to the Sink but it’s telling you that the signal is incompatible? Test the
maximum capability of that Sink and make sure you are not feeding it something it can’t handle, if
you know if should handle the signal. Strip the EDID from the Sink to make sure the rest of your
setup is ready for that same EDID.
Discolored Video?
First check that the Sink’s settings are set up show the correct color. Remember you get a live video
preview on the ANALYZER so you can visibly see what is being outputted at each spot you test.
Normally this symptom is related to a color space mismatch –system looking for YCbCr and source
is sending RGB. Use Color Button on generator to substitute alternative color space setting to
isolate and solve problem.
Source Problems?
You can check if your source has problems by plugging in the ANALYZER directly to your source you
can find out what it is actually outputting compared to what it should be outputting. You will be
surprised that they are not always the same, and when you have a problem with your source,
nothing can be done with your distribution system to fix it.
Table of contents
Other Murideo Measuring Instrument manuals