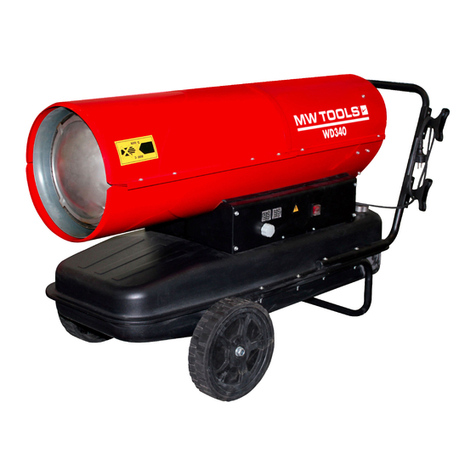
MW TOOLS WD70I User manual

M1.1.WD70I.NLFREN - 25042019
HANDLEIDING - MODE D’EMPLOI - MANUAL
WD70I (722316560)
Diesel verwarming
Chauffage diesel
Diesel heater
P.02 Gelieve te lezen en voor later gebruik bewaren
P.09 Veuillez lire et conserver pour consultation ultérieure
P.16 Please read and keep for future reference
FR
EN
NL
copyrighted document - all rights reserved by FBC

2
NL
M1.1.WD70I.NLFREN - 25042019
1 Veiligheid
AANDACHT!
Lees en begrijp alle instructies in deze handleiding voordat u de verwarming monteert, bedient
of onderhoudt. Zorg ervoor dat u de instructies en waarschuwingen die bij het apparaat
meegeleverd zijn in acht neemt. Het niet naleven van deze instructies kan leiden tot brand of een
explosie, die materiële schade en ernstige of dodelijke letsels kan veroorzaken.
GEVAAR!
• Gebruik deze verwarming nooit in een ruimte die ontvlambare dampen kunnen bevatten.
Gevaar voor explosie, brand en verbranding.
• Zorg altijd voor voldoende ventilatie tijdens het gebruik van het apparaat. Gebruik de
verwarming alleen in goed geventileerde ruimtes, de lucht moet tijdens gebruik regelmatig
ververst worden (tweemaal per uur, onvoldoende verbranding door een gebrek aan zuurstof
kan koolmonoxidevergiftiging veroorzaken).
• Stel het apparaat niet bloot aan regen of sneeuw, gebruik het nooit in vochtige plaatsen.
• Haal de stekker uit het stopcontact voordat u het apparaat onderhoudt of controleert.
• Dit apparaat mag gebruikt worden door kinderen ouder dan 8 jaar en personen met verminderde fysieke, zintuiglijke of
mentale capaciteiten of een gebrek aan ervaring en kennis als ze onder toezicht staan en geïnstrueerd zijn over het veilige
gebruik van het apparaat en de gevaren ervan begrijpen. Kinderen mogen niet met het apparaat spelen. Reiniging en
onderhoud door de gebruiker kunnen niet zonder toezicht door kinderen uitgevoerd worden.
• Bedek de verwarming niet, om oververhitting te voorkomen.
• Kinderen jonger dan 3 jaar moeten uit de buurt van het apparaat gehouden worden, tenzij onder voortdurend toezicht.
• Kinderen van 3 tot en met 8 jaar mogen het apparaat in-/uitschakelen alleen als het in zijn normale positie geplaatst of
geïnstalleerd werd en als zij onder toezicht staan en instructies hebben ontvangen over hoe zij het apparaat veilig kunnen
gebruiken en de gevaren ervan begrijpen. Kinderen tussen 3 en 8 jaar mogen het apparaat niet aansluiten, instellen,
reinigen of onderhouden.
AANDACHT!
Sommige onderdelen van dit product kunnen zeer heet worden en verbrandingen veroorzaken.
Wees vooral voorzichtig als kinderen en kwetsbare personen aanwezig zijn.
AANDACHT!
Een koolmonoxidevergiftiging kan dodelijk zijn.
De eerste symptomen van koolmonoxidevergiftiging zijn vergelijkbaar met die van inuenza met ernstige hoofdpijn
duizeligheid en/of misselijkheid. Dergelijke symptomen kunnen veroorzaakt worden door een technisch probleem.
ALS U DEZE SYMPTOMEN OPMERKT, VERLAAT DAN ONMIDDELLIJK DE KAMER, GA NAAR BUITEN en meldt de
technische dienst dat het apparaat gerepareerd moet worden.
Inhoud
1 Veiligheid..............................................................................................................................................................2
2 Technische gegevens en omschrijving........................................................................................................................3
3 Installatie...............................................................................................................................................................5
4 Brandstof...............................................................................................................................................................5
5 Werkingsprincipe...................................................................................................................................................6
6 Bediening .............................................................................................................................................................6
7 Brandstoflterreiniging ............................................................................................................................................6
8 Onderhoud ...........................................................................................................................................................7
9 Foutweergave ........................................................................................................................................................7
10 Preventief onderhoud ............................................................................................................................................8
11 Probleemidenticatie.............................................................................................................................................8
12 Onderdelen.......................................................................................................................................................23
13 EG conformiteitsverklaring ...................................................................................................................................24
copyrighted document - all rights reserved by FBC

3
NL
M1.1.WD70I.NLFREN - 25042019
Bevoorrading
• Het personeel dat belast is met de bevoorrading moet gekwaliceerd en vertrouwd zijn met de gebruiksaanwijzing en de
geldende voorschriften voor de bevoorrading van verwarmingsapparaten.
• Alleen de op de naamplaat van het apparaat aangegeven brandstoftypes mogen gebruikt worden.
• Schakel het apparaat uit en laat het afkoelen voordat u gaat tanken.
• Brandstoftanks moeten in een aparte kamer geplaatst worden.
• Brandstoftanks moeten op een veilige afstand geplaatst worden in overeenstemming van de geldende voorschriften.
• De brandstof moet opgeslagen worden in een ruimte met een geïsoleerde vloer, zodat de brandstof niet door de vloer in
de open vlam onder de vloer kan dringen en de brandstof kan verbranden.
• Brandstofopslag moet voldoen aan alle geldend voorschriften.
Veiligheidsvoorschriften
• De verwarming mag nooit gebruikt worden in een ruimte met brandstof, verfoplosmiddelen en andere brandbare roken.
• Alle plaatselijke voorschriften moeten in acht genomen worden bij het gebruik van de verwarming.
• Een verwarming die in de buurt van dekzeilen, schermen of andere soortgelijke materialen werkt, moet op een veilige
afstand geplaatst worden. Het gebruik van niet-ontvlambare dekens wordt sterk aanbevolen.
• Het apparaat mag alleen in goed geventileerde ruimtes gebruikt worden. Om een goede luchtcirculatie te garanderen,
moet u voor een voldoende opening zorgen, volgens de geldende voorschriften.
• Voor de elektrische aansluiting van het apparaat, moeten de op de naamplaat gegeven spanning en frequentie stikt in acht
genomen worden.
• Gebruik alleen geaarde drie-draads verlengsnoeren.
• Minimale veiligheidsafstand tussen het verwarmingsapparaat en brandbare materialen: voorzijde = 2,5 m; zijkanten,
boven- en onderkant = 1,5 m.
• Om het risico op brand te voorkomen, plaats de verwarming op een stabiele en horizontale ondergrond.
• Houd de dieren op een veilige afstand van de verwarming.
• Laat de stekker uit het stopcontact wanneer u het apparaat niet gebruikt.
• Met de thermostaatregeling kunt u de verwarming op elk moment inschakelen.
• De verwarming mag niet gebruikt worden in kamers die vaak bezocht worden en in slaapkamers.
• Blokkeer de luchtstroom (aan de achterzijde van het apparaat) en de luchtinlaat (aan de voorzijde) niet.
• Wanneer het apparaat aangesloten, heet of draaiend is, mag u het niet verplaatsen, hanteren, tanken en onderhouden.
• Kanaliseren de luchtstroom niet aan de inlaat of uitlaat van het apparaat.
• Houd een veilige afstand tussen de hete onderdelen van het apparaat en warmtegevoelige of brandbare materialen
(inclusief stroomkabels).
• Als de stroomkabel beschadigd is, moet deze door de fabrikant of een andere gekwaliceerde persoon vervangen worden,
om gevaren te voorkomen.
• De verwarming mag niet direct onder een stopcontact geplaatst worden.
• Gebruik de verwarming niet met een tijdschakelaar, een timer of elk ander apparaat waarmee de verwarming automatisch
ingeschakeld kan worden.
2 Technische gegevens en omschrijving
2.1 Tabel
Model WD70I
Vermogen 20 kW
Brandstofverbruik 1,9 l/h
Brandstoftype Diesel / Petroleum
Tankinhoud 10,5 liter
Stroomvoorziening 220-240 V ~ 50 Hz 110 W
Netto gewicht 18,2 kg
Sproeier 0,4 GpH 60° S Danfoss
copyrighted document - all rights reserved by FBC

4
NL
M1.1.WD70I.NLFREN - 25042019
2.2 Omschrijving
【
FIGURES
】
NO.1
B A A
B
NO.3
NO.2
C
Figuur 1
copyrighted document - all rights reserved by FBC

5
NL
M1.1.WD70I.NLFREN - 25042019
3 Installatie (zie guur 2)
1. Draai beide schroeven van de vaste ringen los.
2. Plaats het beschermpaneel op de aangegeven plaats, zodat het overeenkomt met de schroefgaten.
3. Plaats de schroeven terug met het beschermpaneel.
4. Installatie van de voorrooster.
5. Installatie van de handgreep.
6. Installatie van het onderstel.
【10.Installation】
1.Open the two screws on the fixed rings
2.Put the protection panel on the designated spot to meet the screw holes.
3.Set the screws with the protection panel
1 2 3
1. Front grill installation
2. Handle installation
3. Stand installation
【10.Installation】
1.Open the two screws on the fixed rings
2.Put the protection panel on the designated spot to meet the screw holes.
3.Set the screws with the protection panel
1 2 3
1. Front grill installation
2. Handle installation
3. Stand installation
4 Brandstof
AANDACHT!
Het apparaat werkt alleen met DIESEL of PETROLEUM.
Om elk risico op brand of explosie te voorkomen, gebruik alleen diesel of petroleum. Gebruik geen benzine, nafta, verfsolvent,
alcohol of andere brandbare vloeistoffen.
Voor gebruik bij zeer lage temperaturen, gebruik een antivriesmiddeladditief.
Figuur 2
1 2 3
456
copyrighted document - all rights reserved by FBC

6
NL
M1.1.WD70I.NLFREN - 25042019
5 Werkingsprincipe
Zie guur 1 op pagina 4.
Een luchtstroom is noodzakelijk om een goede verbranding te garanderen, en wordt door de interne branderventilator. De
lucht komt in de brandertrechter binnen en mengt zich met een hogedrukbrandstofstraal. De brandstofstroom wordt door een
elektrische pomp geleverd, die de brandstof uit de tank haalt en onder hoge druk naar de sproeier voert.
6 Bediening
AANDACHT!
Lees hoofdstuk 1: “Veiligheid” aandachtig voordat u het apparaat inschakelt.
6.1 Het apparaat inschakelen
1. Volg altijd de veiligheidsvoorschriften op.
2. Controleer dat er brandstof is in de tank.
3. Sluit de vuldop van de brandstoftank.
4. Sluit de stroomkabel aan (controleer de spanning in de technische gegevens).
5. Zet de ON/OFF schakelaar op ON (I) (guur 1, No. 2, A). Het apparaat moet na een paar seconden aanstaan. Als dit
niet het geval is, raadpleeg hoofdstuk 11: “Probleemidenticatie”.
6. Controleer de positie van de thermostaat (guur 1, No. 2, C).
OPMERKING:
Als het apparaat stopt als gevolg van brandstofuitputting, moet u het uitschakelen, bijtanken en
weer inschakelen.
6.2 Het apparaat uitschakelen
AANDACHT!
Onderbreek de stroomtoevoer niet en haal de stekker niet uit het stopcontact voordat het
apparaat volledig afgekoeld is (ongeveer 5 minuten).
1. Zet de ON/OFF (I/0) schakelaat op OFF (0). Zie guur 1, No. 2, A).
7 Brandstoflterreiniging
Afhankelijk van de brandstofkwaliteit, kan een lterreiniging noodzakelijk zijn.
1. Verwijder de vuldop van de brandstoftank (zie guur 1, No. 3).
2. Verwijder het lter uit de tank (zie guur 1, No. 3).
3. Verwijder de zuigslang (zie guur 1, No. 3).
4. Reinig de zuigslang en het lter met schone brandstof.
5. Vervang het lter door een nieuw als het beschadigd is.
!
copyrighted document - all rights reserved by FBC

7
NL
M1.1.WD70I.NLFREN - 25042019
8 Onderhoud
Om het beste onderhoud- en/of transportprocedure te garanderen, dient u de volgende procedure in
acht te nemen:
1. Leeg de brandstoftank.
2. Als er nog restanten aanwezig zijn, giet u wat schone brandstof in de tank en maakt u deze opnieuw leeg.
3. Sluit de vuldop, voer de brandstof af volgens de geldende voorschriften.
4. Om een goed onderhoud van de verwarming te garanderen, dient u deze horizontaal te houden om brandstoekken te
voorkomen, op een droge plaats te bewaren en tegen beschadiging te beschermen.
9 Foutweergave
Zie guur 1, No. 2, B
Foutcode Mogelijke oorzaak Oplossing
F0 Verrichtingsprobleem
De ON/OFF schakelaar stond op ON bij het
aansluiten van het apparaat Na het uitschakelen van het apparaat, zorg ervoor
dat u de schakelaar op OFF zet, sluit het apparaat
aan en zet vervolgens de schakelaar op ON
F1 Fotocelprobleem
Geen brandstof Zet de schakelaar op OFF en tank bij
De brandstof is vervuild Zet de schakelaar op OFF, leeg de brandstoftank
en vul deze in met schone brandstof. Reinig
het lter met schone brandstof, zonder het te
beschadigen (zie hoofdstuk 7)
De fotocel is vuil of beschadigd Neem contact op met de technische dienst
Het brandstoflter is vuil Zie hoofdstuk 7
Ontstekingsfout Neem contact op met de technische dienst
F2 Fout in de temperatuursensor
Onderbroken kabel Neem contact op met de technische dienst
Sensor beschadigd Neem contact op met de technische dienst
F3 Thermostaatfout
Interne oververhitting van het apparaat Schakel het apparaat uit en laat het afkoelen
Anti-kantelsensor geactiveerd Plaats het apparaat op een stabiele en horizontale
ondergrond
LO Externe temperatuur lager dan -9 °C Normale toestand
CH Continue werking (55 °C) Normale toestand
copyrighted document - all rights reserved by FBC

8
NL
M1.1.WD70I.NLFREN - 25042019
10 Preventief onderhoud
AANDACHT!
Voor onderhoud of reparaties, haal de stekker uit het stopcontact en zorg ervoor dat het
apparaat volledig afgekoeld is.
Component Onderhoudsfrequentie Te verrichten werkzaamheden
Brandstoftank Reinig het om de 150-200 bedrijfsuren of
wanneer nodig Leeg en spoel de tank met schone brandstof
Sproeier Reinig of vervang deze eenmaal per seisoen of
wanneer nodig Neem contact op met de technische dienst
Fotocel Reinig deze eenmaal per seisoen of wanneer
nodig Neem contact op met de technische dienst
Brandstoflter Reinig of vervang het tweemaal per seisoen of
wanneer nodig Reinig het lter met schone brandstof
Ontstekingstoestel Reinig of vervang het om de 1000 bedrijfsuren
of wanneer nodig Neem contact op met de technische dienst
Ventilatorbladen Reinig deze wanneer nodig Neem contact op met de technische dienst
11 Probleemidenticatie
Probleem Mogelijke oorzaak Mogelijke oplossing
Het apparaat werkt niet Apparaat geblokkeerd Schakel het apparaat weer in
De schakelaar staat op OFF Zet de schakelaar op ON
Geen stroom 1. Sluit het netsnoer in een geschikt
stopcontact aan
2. Controleer het voedingsnet
Besturingskaart geblokkeerd 1. Schakel het apparaat weer in
2. Identiceer de weergegeven foutcode
3. Neem contact op met de technische dienst
Onjuiste thermostaatinstelling Stel de thermostaat in op een hogere
temperatuur dan de kamertemperatuur
Temperatuursensor niet geactiveerd 1. Wacht minsten tien minuten en probeer dan
het apparaat weer in te schakelen
2. Neem contact op met de technische dienst
Zekering beschadigd Neem contact op met de technische dienst
De motor/de pomp
werken maar de vlam
ontsteekt niet
Brandstoftekort Schakel het apparaat uit, tank bij en schakel het
apparaat weer in
Het ontstekingstoestel is vuil Neem contact op met de technische dienst
Het brandstoflet is vuil Reinig het brandstoflter met schone brandstof
Se sproeier is vuil Neem contact op met de technische dienst
De fotocel is vuil, beschadigd of niet goed
gemonteerd Neem contact op met de technische dienst
Vreemde stoffen in de brandstoftank Leeg de tank en vul deze met schone brandstof
in
De elektroden zijn versleten of op een
verkeerde afstand geplaatst Neem contact op met de technische dienst
De ventilator is
geblokkeerd of draait
langzaam
Motor beschadigd Neem contact op met de technische dienst
copyrighted document - all rights reserved by FBC

9
FR
M1.1.WD70I.NLFREN - 25042019
1 Sécurité
ATTENTION !
Lisez et comprenez toutes les instructions de ce manuel avant d’assembler, de mettre en marche
ou d’entretenir l’appareil de chauffage. Veillez à respecter les instructions et avertissements
fournis avec l’appareil. Le non-respect de ces consignes peut causer un incendie ou une explosion
pouvant provoquer des dommages matériels ainsi que des blessures graves voire mortelles.
DANGER !
• N’utilisez jamais ce chauffage dans un endroit pouvant contenir des vapeurs inammables.
Risque d’explosion, d’incendie et de brûlure.
• Prévoyez toujours une ventilation sufsante pendant l’utilisation de l’appareil. N’utilisez le
chauffage que dans des endroits bien ventilés, l’air doit être régulièrement renouvelé pendant
son utilisation (deux fois par heure, une combustion inadéquate causée par un manque
d’oxygène peut provoquer une intoxication au monoxyde de carbone).
• N’exposez pas l’appareil à la pluie ou à la neige, ne l’utilisez jamais dans un endroit humide.
• Débranchez l’appareil avant l’entretien ou l’inspection de celui-ci.
• Cet appareil peut être utilisé par les enfants à partir de 8 ans et les personnes ayant des capacités physiques, sensorielles
ou mentales réduites ou un manque d’expérience et de connaissance si elles sont supervisées et ont reçu des instructions
concernant l’utilisation de l’appareil en toute sécurité et comprennent les dangers qu’il présente. Les enfants ne peuvent
pas jouer avec l’appareil. Le nettoyage et l’entretien par l’utilisateur ne peuvent pas être effectués par des enfants sans
surveillance.
• Ne couvrez pas le chauffage, pour éviter le risque de surchauffe.
• Les enfants de moins de 3 ans doivent être tenus éloignés de l’appareil, sauf sous surveillance constante.
• Les enfants âgés de 3 ans à moins de 8 ans ne peuvent allumer/éteindre l’appareil que s’il a été placé ou installé dans sa
position normale et s’ils sont supervisés et ont reçu des instructions concernant l’utilisation de l’appareil en toute sécurité et
comprennent les dangers qu’il présente. Les enfants âgés de 3 ans à moins de 8 ans ne peuvent pas brancher, régler ni
nettoyer l’appareil ni effectuer l’entretien.
ATTENTION !
Certaines pièces de ce produit peuvent devenir très chaudes et provoquer des brûlures. Faites
particulièrement attention en présence d’enfants et de personnes vulnérables.
ATTENTION !
Une intoxication au monoxyde de carbone peut être fatale.
Les premiers symptômes d’une intoxication au monoxyde de carbone sont semblables à ceux de la grippe avec des
maux de tête sévères, des étourdissement et/ou des nausées. De tels symptômes peuvent être causés par un problème
technique. SI VOUS REMARQUEZ CES SYMPTÔMES, QUITTEZ IMMÉDIATEMENT LA PIÈCE ET SORTEZ, puis avertissez
le service technique que l’appareil doit être réparé.
Table des matières
1 Sécurité.................................................................................................................................................................9
2 Données techniques et description ..........................................................................................................................10
3 Installation........................................................................................................................................................... 12
4 Carburant ...........................................................................................................................................................12
5 Principe de fonctionnement.................................................................................................................................... 13
6 Utilisation............................................................................................................................................................13
7 Nettoyage du ltre à carburant ..............................................................................................................................13
8 Entretien.............................................................................................................................................................. 14
9 Afchage d’erreur ................................................................................................................................................14
10 Entretien préventif...............................................................................................................................................15
11 Identication des problèmes ................................................................................................................................15
12 Pièces détachées................................................................................................................................................ 23
13 Déclaration de conformité CE .............................................................................................................................. 24
copyrighted document - all rights reserved by FBC

10
FR
M1.1.WD70I.NLFREN - 25042019
Approvisionnement
• Le personnel en charge de l’approvisionnement doit être qualié et bien connaître le manuel d’utilisation ainsi que la
réglementation en vigueur pour l’approvisionnement d’appareils de chauffage.
• Seuls les types de carburant spéciés sur la plaque signalétique de l’appareil peuvent être utilisés.
• Avant de faire le plein de carburant, éteignez l’appareil et laissez-le refroidir.
• Les citernes de carburant doivent être placées dans un local séparé.
• Les réservoir de carburant doivent être placés à une distance sûre de l’appareil selon la réglementation en vigueur.
• Le carburant doit être stocké dans une pièce avec un plancher isolé de sorte ce que le carburant ne puisse pas pénétrer
par le plancher dans la amme nue se trouvant sous le plancher et causer la combustion du carburant.
• Le stockage de carburant doit respecter toutes les règles en vigueur.
Consignes de sécurité
• Le chauffage ne peut jamais être utilisé dans une pièce contenant du carburant, des solvants pour peintures et autres
fumées combustibles.
• Toutes les réglementations locales doivent être respectées lors de l’utilisation du chauffage.
• Un chauffage en service à proximité de bâches, d’écrans ou d’autres matériaux similaires doit être placé à une distance
sûre. L’utilisation de couvertures ininammables est fortement recommandée.
• L’appareil ne peut être utilisé que dans des locaux bien ventilés. Pour assurer une bonne circulation de l’air, prévoyez une
ouverture sufsante, selon la réglementation en vigueur.
• Pour le branchement électrique de l’appareil, respectez scrupuleusement la tension et la fréquence indiquées sur la plaque
signalétique.
• N’utilisez que des rallonge à trois ls reliées à la terre.
• Distance de sécurité minimale entre l’appareil de chauffage et les matériaux combustibles : devant = 2,5 m; sur les côtés,
au-dessus et en-dessous = 1,5 m.
• Pour éviter le risque d’incendie, placez le chauffage sur une surface stable et horizontale.
• Tenez les animaux à une distance sûre du chauffage.
• Laissez l’appareil débranchez lorsqu’il n’est pas utilisé.
• Le contrôle du thermostat permet d’allumer le chauffage à tout moment.
• Le chauffage ne peut pas être utilisé dans des pièces fréquemment visitées ni dans les chambres à coucher.
• N’entravez pas le ux d’air (à l’arrière de l’appareil) et l’entrée d’air (à l’avant).
• Lorsque l’appareil est branché, s’il est chaud ou s’il fonctionne, ne le déplacez pas, ne le manipulez pas, ne faites pas le
plein de carburant et n’effectuez aucun travail d’entretien.
• Ne canalisez pas le ux d’air à l’entrée ou à la sortie de l’appareil.
• Maintenez une distance de sécurité entre les parties chaudes de l’appareil et les matériaux thermosensibles ou
combustibles (y compris les câbles d’alimentation).
• Si le câble d’alimentation est endommagé, il doit être remplacé par le fabricant ou une autre personne qualiée pour éviter
tout danger.
• Le chauffage ne peut pas être placé directement sous une prise de courant.
• N’utilisez pas le chauffage avec un programmateur, une minuterie ou tout autre dispositif permettant d’allumer le chauffage
automatiquement.
2 Données techniques et description
2.1 Tableau
Modèle WD70I
Puissance 20 kW
Consommation de carburant 1,9 l/h
Type de carburant Diesel / Pétrole
Capacité du réservoir 10,5 litres
Alimentation électrique 220-240 V ~ 50 Hz 110 W
Poids net 18,2 kg
Type d’injecteur 0,4 GpH 60° S Danfoss
copyrighted document - all rights reserved by FBC

11
FR
M1.1.WD70I.NLFREN - 25042019
2.2 Description
【
FIGURES
】
NO.1
B A A
B
NO.3
NO.2 C
Figure 1
copyrighted document - all rights reserved by FBC

12
FR
M1.1.WD70I.NLFREN - 25042019
3 Installation (voir gure 2)
1. Desserrez les deux vis des anneaux xes.
2. Placez le panneau de protection à l’endroit indiqué pour faire correspondre les trous de vis.
3. Remettez les vis avec le panneau de protection.
4. Installation de la grille avant.
5. Installation de la poignée.
6. Installation du socle.
【10.Installation】
1.Open the two screws on the fixed rings
2.Put the protection panel on the designated spot to meet the screw holes.
3.Set the screws with the protection panel
1 2 3
1. Front grill installation
2. Handle installation
3. Stand installation
【10.Installation】
1.Open the two screws on the fixed rings
2.Put the protection panel on the designated spot to meet the screw holes.
3.Set the screws with the protection panel
1 2 3
1. Front grill installation
2. Handle installation
3. Stand installation
4 Carburant
ATTENTION !
L’appareil ne fonctionne qu’avec du DIESEL ou du PÉTROLE.
Pour éviter tout risque d’incendie ou d’explosion, n’utilisez que du diesel ou du pétrole. N’utilisez pas d’essence, de naphte, de
solvant pour peinture, d’alcool ou tout autre liquide combustible.
Pour une utilisation à des températures très basses, utilisez un additif antigel.
Figure 2
1 2 3
456
copyrighted document - all rights reserved by FBC

13
FR
M1.1.WD70I.NLFREN - 25042019
5 Principe de fonctionnement
Voir gure 1 en page 11.
Un ux d’air est nécessaire pour assurer une bonne combustion, et est fourni par le ventilateur interne du brûleur. L’air pénètre
dans l’entonnoir du brûleur et se mélange avec un jet de carburant à haute pression. Le ux de carburant est assuré par une
pompe électrique qui aspire le carburant du réservoir et l’achemine vers l’injecteur sous haute pression.
6 Utilisation
ATTENTION !
Lisez attentivement le chapitre 1 : «Sécurité» avant l’allumer l’appareil.
6.1 Allumer l’appareil
1. Respectez à tout moment toutes les consignes de sécurité.
2. Vériez s’il y a du carburant dans le réservoir.
3. Fermez le bouchon de remplissage du réservoir de carburant.
4. Branchez le câble d’alimentation (vériez la tension dans les données techniques).
5. Mettez l’interrupteur ON/OFF sur ON (I) (gure 1, No. 2, A). L’appareil doit être sous tension après quelques secondes. Si
ce n’est pas le cas, consultez le chapitre 11 : «Identication des problèmes».
6. Vériez la position du thermostat (gure 1, No. 2, C).
REMARQUE :
Si l’appareil s’arrête à cause d’une panne de carburant, éteignez-le, faites le plein et rallumez-le.
6.2 Éteindre l’appareil
ATTENTION !
Ne coupez pas l’alimentation électrique et ne débranchez pas le câble d’alimentation avant le
refroidissement complet de l’appareil (environ 5 minutes).
1. Mettez l’interrupteur ON/OFF (I/0) sur OFF (0). Voir gure 1, No. 2, A).
7 Nettoyage du ltre à carburant
Selon la qualité du carburant utilisé, un nettoyage du ltre peut être nécessaire.
1. Enlevez le bouchon du réservoir d’essence (voir gure 1, No. 3).
2. Enlevez le ltre du réservoir (voir gure 1, No. 3).
3. Retirez le tuyau d’aspiration (voir gure 1, No. 3).
4. Nettoyez le tuyau d’aspiration et le ltre avec du carburant propre.
5. Si le ltre est endommagé, remplacez-le par un nouveau.
!
copyrighted document - all rights reserved by FBC

14
FR
M1.1.WD70I.NLFREN - 25042019
8 Entretien
Pour assurer une meilleure procédure d’entretien et/ou de transport de l’appareil, respectez la
procédure suivante :
1. Videz le réservoir de carburant.
2. S’il reste des résidus, versez un peu de carburant propre et videz à nouveau le réservoir.
3. Fermez le bouchon de remplissage, éliminez le carburant selon la réglementation en vigueur.
4. Pour assurer un entretien correct de l’appareil, maintenez-le bien droit pour éviter les fuites de carburant, rangez-le dans un
endroit sec et protégez-le des dommages.
9 Afchage d’erreur
Voir gure 1, No. 2, B
Code d’erreur Cause possible Solution
F0 Problème de fonctionnement
L’interrupteur ON/OFF était sur ON lors du
branchement de l’appareil Après le débranchement de l’appareil, veillez à
mettre l’interrupteur sur OFF, branchez l’appareil et
ensuite mettez l’interrupteur sur ON
F1 Problème de photocellule
No fuel Mettez l’interrupteur sur OFF et faites le plein
Le carburant est contaminé Mettez l’interrupteur sur OFF, videz et remplissez
le réservoir avec du carburant propre. Nettoyez le
ltre avec du carburant propre, sans l’endommager
(voir chapitre 7)
La photocellule est sale ou endommagée Contactez le service technique
Le ltre à carburant est sale Voir chapitre 7
Erreur d’allumage Contactez le service technique
F2 Panne de la sonde de température
Câble interrompu Contactez le service technique
Sonde endommagée Contactez le service technique
F3 Problème de thermostat
Surchauffe interne de l’appareil Éteignez l’appareil et laissez-le refroidir
Action de la sonde anti-basculement Placez l’appareil sur une surface stable et
horizontale
LO Température externe inférieure à -9 °C État normal
CH Fonctionnement en continu (55 °C) État normal
copyrighted document - all rights reserved by FBC

15
FR
M1.1.WD70I.NLFREN - 25042019
10 Entretien préventif
ATTENTION !
Avant le début de tout travail d’entretien ou de réparation, débranchez le câble d’alimentation et
assurez-vous que le chauffage est complètement refroidi.
Composant Fréquence d’entretien Travail à effectuer
Réservoir de carburant Nettoyez-le toutes les 150-200 heures de
service ou si nécessaire Videz et rincez le réservoir avec du carburant
propre
Injecteur Nettoyez-le ou remplacez-le une fois par saison
ou si nécessaire Contactez le service technique
Photocellule Nettoyez-la une fois par saison ou si nécessaire Contactez le service technique
Filtre à carburant Nettoyez-le ou remplacez-le deux fois par
saison ou si nécessaire Nettoyez le ltre avec du carburant propre
Dispositif d’allumage Nettoyez-le ou remplacez-le toutes les 1000
heures de service ou si nécessaire Contactez le service technique
Pales du ventilateur Nettoyez-les si nécessaire Contactez le service technique
11 Identication des problèmes
Problème Cause possible Solution possible
L’appareil ne fonctionne
pas Appareil bloqué Rallumez l’appareil
L’interrupteur est sur OFF Mettez l’interrupteur sur ON
Pas de courant 1. Branchez le câble d’alimentation dans une
prise adéquate
2. Vériez le réseau d’alimentation électrique
Carte de commande bloquée 1. Rallumez l’appareil
2. Identiez le code d’erreur afché
3. Contactez le service technique
Mauvais réglage du thermostat Réglez le thermostat sur une température plus
élevée que la température ambiante
Sonde de température non activée 1. Attendez au moins dix minutes, ensuite
essayer à nouveau d’allumer l’appareil
2. Contactez le service technique
Fusible endommagé Contactez le service technique
Le moteur/la pompe
fonctionnent mais la
amme ne s’allume pas
Panne de carburant Éteignez l’appareil, faites le plein de carburant
et rallumez l’appareil
Le dispositif d’allumage est sale Contactez le service technique
Le ltre à carburant est sale Nettoyez le ltre avec du carburant propre
L’injecteur est sale Contactez le service technique
La photocellule est sale, endommagée ou
mal installée Contactez le service technique
Présence de substances étrangères dans le
réservoir Videz et remplissez le réservoir avec du
carburant propre
Les électrodes sont usées ou placées à une
mauvaise distance Contactez le service technique
Le ventilateur est bloqué
ou tourne trop lentement Moteur endommagé Contactez le service technique
copyrighted document - all rights reserved by FBC

16
EN
M1.1.WD70I.NLFREN - 25042019
1 Safety
WARNING!
Read and understand all of the instructions in this manual before assembling, starting or servicing
the heater. Be sure to comply with the instructions and warnings provided with this heater. Failure
to comply can result in re and explosion that can cause property loss, bodily injury, or loss of
life.
DANGER!
• Never use the heater where ammable vapours may be present, there is danger of explosion,
re and burning.
• Always provide adequate ventilation during the use. Only use the appliance in well ventilated
area, the air must be regular exchanged during the use (two times/one hour, inadequate
burning caused by oxygen shortage can cause carbon monoxide poisoning).
• Don’t expose the appliance to rain or snow, never use it in humidity places either.
• Pull out the plug before maintenance and examination.
• This appliance can be used by children aged from 8 years and above and persons with reduced physical, sensory or
mental capabilities or lack of experience and knowledge if they have been given supervision or instruction concerning use
of the appliance in a safe way and understand the hazards involved. Children shall not play with the appliance. Cleaning
and user maintenance shall not be made by children without supervision.
• In order to avoid overheating, do not cover the heater.
• Children of less than 3 years should be kept away unless continuously supervised.
• Children aged from 3 years and less than 8 years shall only switch on/off the appliance provided that it has been placed
or installed in its intended normal operating position and they have been given supervision or instruction concerning use of
the appliance in a safe way and understand the hazards involved. Children aged from 3 years and less than 8 years shall
not plug in, regulate and clean the appliance or perform user maintenance.
CAUTION!
Some parts of this product can become very hot and cause burns. Particular attention has to be
given where children and vulnerable people are present.
WARNING!
Carbon monoxide poisoning can prove to be fatal.
First symptoms of carbon monoxide poisoning are similar to inuenza with severe headaches, dizziness and/or nausea.
Such symptoms may be caused by generation fault. UPON NOTICING THESE SYMPTOMS, IMMEDIATELY LEAVE THE
ROOM AND GO OUTSIDE, next, notify the technical service center that the generator needs to be repaired.
Contents
1 Safety................................................................................................................................................................. 16
2 Technical data and description............................................................................................................................... 17
3 Installation (see gure 2) ....................................................................................................................................... 19
4 Fuel.................................................................................................................................................................... 19
5 Operating principle .............................................................................................................................................. 20
6 Operation ........................................................................................................................................................... 20
7 Cleaning the fuel lter........................................................................................................................................... 20
8 Maintenance ....................................................................................................................................................... 21
9 Display errors ...................................................................................................................................................... 21
10 Preventive maintenance schedule.......................................................................................................................... 22
11 Problem identication ......................................................................................................................................... 22
12 Spare parts ....................................................................................................................................................... 23
13 EC declaration of conformity................................................................................................................................ 24
copyrighted document - all rights reserved by FBC

17
EN
M1.1.WD70I.NLFREN - 25042019
Supply
• Personnel in charge of supply must be fully qualied, must be familiar with the manufacturer’s manual as well as the
effective regulations for safe supply of generators.
• Only the fuel types specically listed on the generator’s nameplate are to be used.
• Before refuelling, shut down the generator and wait for it to cool down.
• Fuel cisterns are to be located in separate facility.
• All fuel containers are to be located within safe distance from the generator, as per the applicable regulations.
• Fuel is to be stored in rooms with insulated oor, so that the fuel cannot penetrate the oor into the open ame below
causing fuel combustion.
• Fuel storage need to follow all the applicable regulations.
Safety considerations
• The generator should never be used in rooms with fuel, paint thinners and other combustible fumes.
• All applicable local rules and regulations need be observed while using the generator.
• Generators in operation near tarpaulin, screens or other similar materials need to be located a safe distance away. The use
of inammable covers is highly encouraged.
• The device is to be used in well ventilated interiors only. To ensure proper air circulation, a proper opening is required, as
per the applicable regulations.
• For generator power feed observe closely the voltage and frequency values given in the nameplate.
• Only use grounded, three-core extension cords.
• Minimal safety distance between the generator and combustible materials is: front = 2.5 m; side, up and back = 1.5 m.
• To avoid re, hot or working generator is to be placed on a stable and levelled ooring.
• Animals are to be kept at a safe distance away from the generator.
• Unplug the generator at all times during downtime.
• Thermostat control allows the generator to be turned on at any time.
• The generator must not be used in frequently visited rooms and in bedrooms.
• Do not obstruct the airow (back of the device) and air intake (front) of the generator.
• If the generator is plugged in, hot, or currently running, it must not be moved, manipulated, refuelled or attempt
maintenance work of any kind.
• Do not channel the air ow at intake or the generator output.
• Keep the safe distance between the hot parts of the generator and thermos-sensitive or combustible materials(including
feeder cable).
• If the supply cord is damaged, it must be replaced by the manufacturer,or similarly qualied persons in order to avoid a
hazard.
• Heater is not located immediately below a socket-outlet.
• Do not use the heater with a programmer, timer or any other device that switches the heater on automatically.
2 Technical data and description
2.1 Table
Model WD70I
Power 20 kW
Fuel consumption 1.9 l/h
Kind of fuel Diesel / Kerosene
Fuel tank capacity 10.5 liter
Electrical supply 220-240 V ~ 50 Hz 110 W
Net weight 18.2 kg
Nozzle type 0.4 GpH 60° S Danfoss
copyrighted document - all rights reserved by FBC

18
EN
M1.1.WD70I.NLFREN - 25042019
2.2 Description
【
FIGURES
】
NO.1
B A A
B
NO.3
NO.2
C
Figure 1
copyrighted document - all rights reserved by FBC

19
EN
M1.1.WD70I.NLFREN - 25042019
3 Installation (see gure 2)
1. Open the two screws on the xed rings.
2. Put the protection panel on the designated spot to meet the screw holes.
3. Set the screws with the protection panel.
4. Front grill installation
5. Handle installation
6. Stand installation
【10.Installation】
1.Open the two screws on the fixed rings
2.Put the protection panel on the designated spot to meet the screw holes.
3.Set the screws with the protection panel
1 2 3
1. Front grill installation
2. Handle installation
3. Stand installation
【10.Installation】
1.Open the two screws on the fixed rings
2.Put the protection panel on the designated spot to meet the screw holes.
3.Set the screws with the protection panel
1 2 3
1. Front grill installation
2. Handle installation
3. Stand installation
4 Fuel
WARNING!
The generator only runs on DIESEL or KEROSENE fuel.
To avoid re or explosion, use only diesel or kerosene fuel. Do not use gasoline, naphtha, paint thinners, alcohol or any other
combustible liquids.
For low-temperature operation, use antifreeze supplements.
Figure 2
1 2 3
456
copyrighted document - all rights reserved by FBC

20
EN
M1.1.WD70I.NLFREN - 25042019
5 Operating principle
See gure 1 on page 4
Airow is necessary to ensure proper combustion, it is supplied by the internal burner fan. The air enters the burner funnel and
gets mixed with a high-pressure fuel jet. The fuel ow is secured by an electrical pump, which sucks the fuel away from the tank
and moves it to the nozzle under high pressure.
6 Operation
WARNING!
Read the chapter 1 “Safety” carefully before turning the generator on.
6.1 Running the generator
1. Observe all safety instruction at all times.
2. Check the fuel is present in the tank.
3. Close the fuel tank ller plug.
4. Plug the feeder cable into the socket (check the voltage in technical data).
5. Turn the “ON/OFF” Switch “ON” (|) (gure 1, No. 2, A). The generator should be online in a few seconds. If it is not,
please refer to the chapter 11: “Problem identication”.
6. Check the position of the thermostat (gure 1, No. 2, C)
NOTE:
In the event of generator being turned off due to running out of fuel, turn the generator OFF,
refuel and turn it back ON.
6.2 Turning the generator off
WARNING!
Do not cut the power or disconnect the feeder cable before the generator cools down completely
(about 5 minutes).
1. Turn the “1/0 (ON/OFF)” switch to “0 (OFF). (See gure 1, No. 2, A)
7 Cleaning the fuel lter
Depending on the quality of fuel used, it may be necessary to clean the fuel lter.
1. Remove the plug on the fuel tank (see gure 1, No. 3).
2. Remove the lter from the tank (see gure 1, No. 3).
3. Take out of the oil suction pipe (see gure 1, No. 3).
4. Clean the oil suction pipe and lter with clean fuel.
5. Replace with the new lter if damaged.
!
copyrighted document - all rights reserved by FBC
This manual suits for next models
1
Table of contents
Languages:
Other MW TOOLS Heater manuals