MW TOOLS EBL900 User manual

M1.1.EBL-EL-SEL.NLFREN 06122018
HANDLEIDING - MODE D’EMPLOI - MANUAL
EBL900 (754753150) - EL1000 (754753152)
EL1400 (754753155) - EL2300 (754753156)
SEL550012 (754753160) - SEL550024 (754753162)
Elektrische lier
Treuil électrique
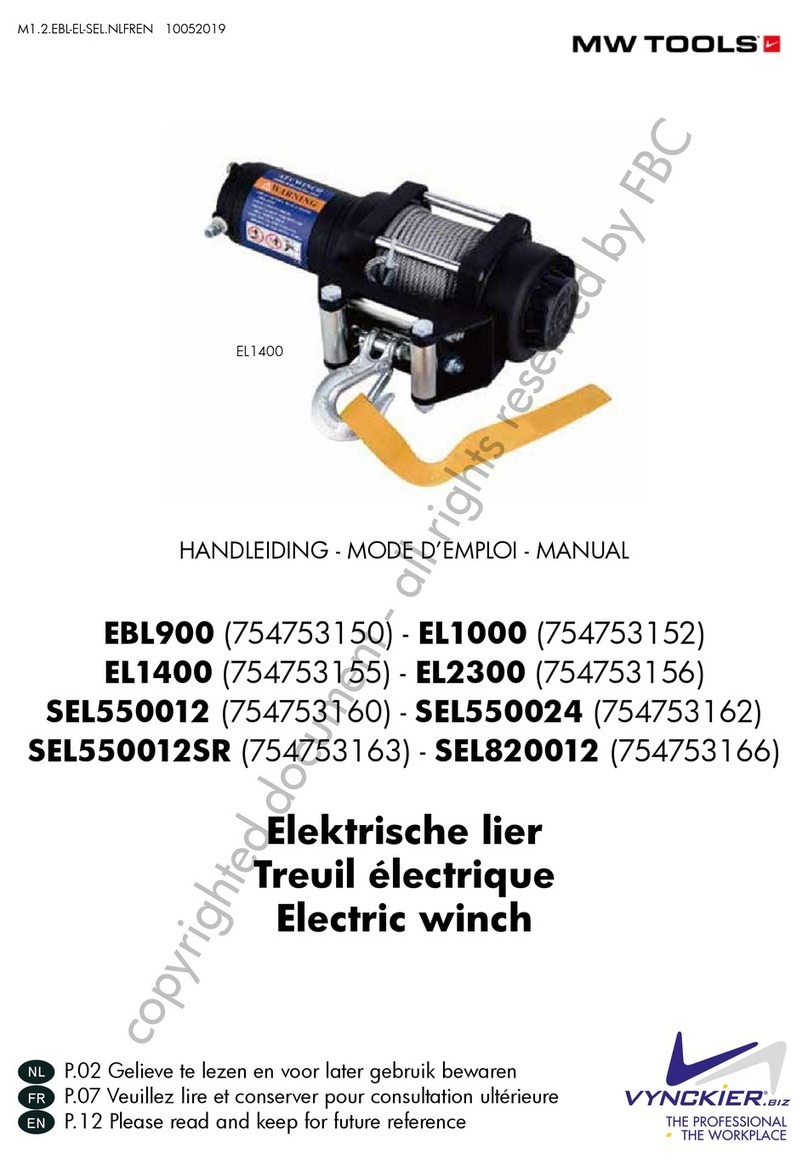
Electric winch
P.02 Gelieve te lezen en voor later gebruik bewaren
P.07 Veuillez lire et conserver pour consultation ultérieure
P.12 Please read and keep for future reference
FR
EN
NL
EL1400
copyrighted document - all rights reserved by FBC

2
NL
M1.1.EBL-EL-SEL.NLFREN 06122018
1 Technische specicaties
Model EBL900 EL1000 EL1400
Motor 12 V - 280 W 12 V - 750 W 12 V - 700 W
Capaciteit 907 kg 907 kg 1360 kg
Lengte kabel 9,2 m 15,2 m 15,2 m
Ø kabel 4,8 mm 4 mm 4,8 mm
Snelheid - 1,12 m/min 2,15 m/min
Afmetingen (l x b x h) 525 x 300 x 405 mm 285 x 100 x 106 mm 335 x 114 x 114 mm
Netto gewicht 23 kg 8 kg 12 kg
Model EL2300 SEL550012 SEL550024
Motor 12 V - 1100 W 12 V - 4950 W 24 V - 4950 W
Capaciteit 2268 kg 5443 kg 5443 kg
Lengte kabel 15,2 m 28 m 28 m
Ø kabel 6,3 mm 9,5 mm 9,5 mm
Snelheid 1,80 m/min 14,5 m/min 14,5 m/min
Afmetingen (l x b x h) 395 x 117 x 120 mm 557 x 164 x 243 mm 557 x 164 x 243 mm
Netto gewicht 15 kg 38 kg 38 kg
2 Meegeleverde accessoires
• Voedingskabel, voorzien van waterdichte stekker en stroomonderbreker.
• Afstandschakelaar met waterdichte stekker voor een veilige werking.
• Kabel met bevestigde haak.
• Montagebeugel voor trekhaak.
• Noodslinger en verstelbare koppeling.
Inhoud
1 Technische specicaties........................................................................................................................................... 2
2 Meegeleverde accessoires....................................................................................................................................... 2
3 Kenmerken van het product...................................................................................................................................... 3
4 Veiligheid.............................................................................................................................................................. 3
4.1 Algemene veiligheidsvoorschriften..................................................................................................................... 3
4.2 Speciale waarschuwingen bij het gebruik van de elektrische lier........................................................................... 4
5 Bedrading van de lier............................................................................................................................................. 4
5.1 Tijdelijke bedrading ........................................................................................................................................ 4
5.2 Permanente bedrading .................................................................................................................................... 4
6 Montage van de lier............................................................................................................................................... 5
6.1 Permanente montage.......................................................................................................................................5
6.2 Tijdelijke montage...........................................................................................................................................5
7 Gebruik van de lier ................................................................................................................................................ 6
8 Onderhoud ........................................................................................................................................................... 6
9 Onderdelen......................................................................................................................................................... 17
10 EG conformiteitsverklaring ................................................................................................................................... 19
copyrighted document - all rights reserved by FBC

3
NL
M1.1.EBL-EL-SEL.NLFREN 06122018
3 Kenmerken van het product
• Handige, draagbare krachtbron voor het trekken van boten, vastzittende voertuigen en andere zware voorwerpen.
• Krachtige trekkracht.
• 12 V of 24 Volt voeding voor handig gebruik zonder verlengsnoeren of kleine gasmotoren.
• Draagbaar, met ingebouwde draaggreep en snelmontageplaat.
AANDACHT!
De waarschuwingen, voorzorgsmaatregelen en instructies die in deze handleiding besproken
worden, kunnen niet alle mogelijke omstandigheden en situaties behandelen die zich kunnen
voordoen. De gebruiker moet begrijpen dat gezond verstand en voorzichtigheid factoren zijn
die niet in dit product ingebouwd kunnen worden, maar die door de gebruiker geleverd moeten
worden.
4 Veiligheid
AANDACHT!
Bij het gebruik van elektrische apparatuur moeten altijd de basisveiligheidsmaatregelen in acht
genomen worden om het risico van persoonlijk letsel en andere risico’s te beperken.
LEES ALLE INSTRUCTIES VOORDAT U DEZE APPARATUUR GEBRUIKT!
4.1 Algemene veiligheidsvoorschriften
• Houd het werkgebied schoon. Wanorde is een bron van ongevallen.
• Houd rekening met de omstandigheden op het werkgebied. Gebruik geen gereedschap op vochtige, natte of slecht
verlichte plaatsen. Gebruik geen elektrisch aangedreven apparatuur in de aanwezigheid van brandbare gassen of
vloeistoffen.
• Houd kinderen uit de buurt en laat ze niet met de machines, gereedschappen of apparatuur omgaan.
• Bewaar stationair werkende apparatuur. Wanneer het apparaat niet gebruikt wordt, moet het op een droge plaats
opgeslagen worden, om roestvorming te voorkomen. Berg gereedschappen altijd op, en houd deze buiten bereik van
kinderen.
• Forceer het gereedschap niet. Het zal beter en veiliger werken als binnen zijn capaciteiten gebruikt wordt.
• Gebruik het juiste gereedschap voor elk werk. Gebruik geen gereedschap voor een doel waarvoor het niet bedoeld is.
• Kleed je goed aan. Draag geen losse kleding of sieraden, omdat deze in bewegende delen gevangen kunnen worden.
Draag antislip schoenen. Bind lang haar samen of draag een haarnetje. Draag altijd geschikte werkkleding.
• Bescherm het netsnoer tegen schade door stoten, trekken of bijtende stoffen. Trek niet aan het netsnoer van de machine om
deze van het stopcontact los te koppelen.
• Onderhoud het gereedschap met zorg. Volg de instructies voor het smeren en vervangen van accessoires. Controleer het
netsnoer regelmatig en laat het indien beschadigd door een bevoegde elektricien repareren. Controleer alle bewegende
delen en bevestigingsbouten voor gebruik.
• Vermijd onbedoeld opstarten. Zorg ervoor, dat u klaar bent om met het werk te beginnen voordat u de startschakelaar
bedient.
• Blijf alert. Let op wat u aan het doen bent. Gebruik de machine niet als u moe bent.
• Gebruik de machine niet onder invloed van alcohol, drugs of medicijnen, die uw concentratievermogen kunnen
beïnvloeden.
• Controleer de machine op defecte onderdelen. Voordat u de machine gebruikt, moet elk onderdeel dat beschadigd lijkt,
zorgvuldig gecontroleerd worden om vast te stellen of het goed zal werken en de beoogde functie zal uitvoeren. Controleer
de bewegende delen op correcte uitlijning en bevestiging. Controleer dat de bewegende delen goed uitgelijnd zijn en niet
vastzitten. Controleer op gebroken onderdelen of bevestigingen, en alle andere omstandigheden die de goede werking
van de machine kunnen beïnvloeden. Beschadigde onderdelen moeten door een gekwaliceerde technicus gerepareerd of
vervangen worden. Gebruik de apparatuur niet als een schakelaar niet goed in- en uitgeschakeld wordt.
• Onderdelen en accessoires. Gebruik bij het onderhoud alleen identieke vervangingsonderdelen. Het gebruik van andere
onderdelen annuleert de garantie. Gebruik alleen onderdelen en accessoires die bestemd zijn voor gebruik met dit
gereedschap en die verkrijgbaar zijn bij de fabrikant.
copyrighted document - all rights reserved by FBC

4
NL
M1.1.EBL-EL-SEL.NLFREN 06122018
4.2 Speciale waarschuwingen bij het gebruik van de elektrische lier
• Kabel
Maak zeker dat de kabel in goede staat is en goed bevestigd.
Gebruik de lier niet als de kabel rafelig is.
Vervang de kabel niet door een kabel van mindere sterkte.
• Batterij
Maak zeker dat de batterij in goede staat is. Vermijd contact met batterijzuur of andere verontreinigingen.
Draag altijd ANSI goedgekeurde oogbescherming wanneer u rond de batterij werkt.
Laat de motor draaien wanneer u de lier gebruikt, om de voorkomen dat de batterij leegloopt.
• Afstand nemen
Blijf uit de directe lijn van de trekkabel. In geval van uitglijden of breken zal de kabel langs deze lijn “zwepen”.
Houd handen, kleding, haar en sieraden uit de buurt van de lier tijdens het gebruik.
Gebruik een toeschouwer om u te helpen verzekeren dat het veilig is om de lier te bedienen. Zorg ervoor dat deze persoon
uit de weg van het voertuig en de kabel is voordat u de lier activeert.
• Vermogenslimieten
Probeer niet om de treklimieten van deze lier te overschrijden.
Gebruik nooit de handslinger om de lier te ondersteunen. Dit zal de lier beschadigen en kan persoonlijk letsel veroorzaken.
5 Bedrading van de lier
Uw lier kan gebruikt worden met tijdelijke of permanente bedrading.
5.1 Tijdelijke bedrading
1. Til de rubberen afdichting op en steek de voedingskabel in de stekker aan de rechterkant van het lierlichaam. Deze stekker
is voorzien van het opschrift “Power”. Leid het elektrische snoer van de lier naar uw batterij en zorg ervoor dat het niet
verstrikt raakt in bewegende apparatuur of een struikelgevaar veroorzaakt.
2. Sluit de zwarte klem van de stroomkabel aan op het chassis van uw voertuig en maak zo een massaverbinding.
Sluit de rode klem aan op de positieve (+/rode) pool van uw batterij.
Opmerking: Maak zeker dat u een 12V (24V) autobatterij of gelijkwaardige batterij gebruikt, die in goede staat is.
3. Til de rubberen afdichting aan de linkerkant van het lierlichaam op. Neem de afstandsbediening en steek de stekker aan
het uiteinde van het snoer in de stekker aan de linkerkant van het lierlichaam met het opschrift “Remote control”
(= “Afstandsbediening”).
4. Zet de afstandsbediening op een veilige plaats opzij totdat deze klaar is voor gebruik.
5.2 Permanente bedrading
1. Bevestig de overstroombeveiliging aan de positieve (+/rode) pool van uw batterij met behulp van de klembout.
2. Plan een route voor de bedrading vanaf het punt van het voertuig waar de lier gemonteerd of gebruikt wordt tot de
batterij. Deze route moet veilig zijn, uit de weg van bewegende delen, vuil, of elke mogelijkheid van beschadiging door
gebruik of onderhoud van het voertuig. Zo kunt u bijvoorbeeld de draden onder het voertuig doorvoeren en met geschikte
bevestigingsmiddelen aan het chassis bevestigen. Bevestig de draden niet aan het uitlaatsysteem, de aandrijfas, de
handremkabel, de brandstoeiding of andere onderdelen die de bedrading kunnen beschadigen door hitte of beweging,
of brandgevaar kunnen veroorzaken.
3. Als u door de bumper of een deel van het chassis boort om de draden te leiden, moet u een rubberen pakkingring in het
gat aanbrengen om te voorkomen dat de draden op dat punt uitrafelen.
4. Leid de stroomkabel van het punt waar de lier wordt gebruikt naar de batterij, volgens de hierboven beschreven
voorzorgsmaatregelen.
5. Verwijder de rode klem en bevestig de rode draad aan de overstroombeveiliging die op de positieve (+/rode) pool van uw
batterij gemonteerd is.
6. Verwijder de zwarte klem en bevestig de zwarte draad aan het chassis van uw voertuig, waardoor een veilige elektrische
massa ontstaat.
copyrighted document - all rights reserved by FBC

5
NL
M1.1.EBL-EL-SEL.NLFREN 06122018
AANDACHT!
• Sluit altijd rood op rood (positief op positief) en zwart op het chassis aan en maak een
massaverbinding wanneer u de batterij van uw voertuig gebruikt.
• Gebruik uw lier of andere accessoires nooit meer totdat de batterij volledig leeg is.
• Het is mogelijk dat u uw motor draaiend wilt houden terwijl u deze lier gebruikt, om de motor
continu op te laden. Wees echter uiterst voorzichtig bij het werken rond een rijdend voertuig.
• Gebruik geen vuile, gecorrodeerde of lekkende batterij. U kunt verwondingen oplopen door
zuurverbranding.
• Draag altijd een ANSI-goedgekeurde veiligheidsbril wanneer u rond of met een batterij werkt.
6 Montage van de lier
Uw lier is ontworpen om tijdelijk gemonteerd te worden met behulp van de montagebeugel van de
trekhaak. U kunt uw lier echter ook permanent monteren.
6.1 Permanente montage
1. Kies een montagezijde op de bumper van uw voertuig, vrachtwagenbedding, boottrailer of andere geschikte locatie.
Opmerking: Deze lier genereert een hoge trekkracht. Zorg ervoor dat de locatie die u kiest deze kracht kan weerstaan.
Afhankelijk van de gewenste montageplaats kan het nodig zijn om stalen verstevigingsplaten te gebruiken of extra
verstevigingen aan te lassen.
2. Lijn de lier uit met de gewenste locatie en markeer voor het boren van de 4 gaten op de basis van de lier.
3. Boor deze plaatsen op uw voertuig.
4. Installeer uw lier met behulp van geharde stalen bouten met een diameter van minstens 3/8’’’ op de locatie.
6.2 Tijdelijke montage
1. Bevestig de plaatbouten aan de adapterplaat met behulp van de meegeleverde moeren. Draai de bouten stevig vast.
2. Steek de koppen van de plaatbouten in de sleutelgaten aan de achterkant van de lier.
3. Bevestig de lier/adapterplaat aan uw trekhaak door de kogel van de trekhaak door het gat in de adapterplaat te steken.
copyrighted document - all rights reserved by FBC

6
NL
M1.1.EBL-EL-SEL.NLFREN 06122018
7 Gebruik van de lier
1. Zet uw voertuig in neutraalstand. Lier nooit met uw voertuig in de versnelling of in de parkeerstand, omdat dit de
transmissie van uw voertuig kan beschadigen. Zet uw handrem aan. Blokkeer de wielen met behulp van geschikte blokken.
2. Om de kabel eruit te trekken, draait u de koppelingsknop tegen de wijzers van de klok in om deze los te maken en trekt
u vervolgens de kabel die u nodig hebt eruit. Laat altijd minstens drie omwentelingen kabel op de spoel zitten om te
voorkomen dat de kabel uit de lier getrokken wordt.
3. Haak de kabel aan het voorwerp vast met behulp van een trekpunt, sleepband of ketting. Wikkel de kabel nooit om het
voorwerp heen en haak de kabel zelf vast aan de kabel. Dit kan leiden tot schade aan het voorwerp dat wordt getrokken
en tot knikken of rafelen van de kabel.
4. Draai de koppelingsknop weer vast.
5. Blijf op afstand, en als het veilig is om dit te doen, gebruik dan de stroomschakelaar in de afstandsbediening om de kabel
in te trekken, en lier het voorwerp naar wens.
AANDACHT!
• Houd handen, kleding, haar en sieraden uit de buurt van het trommelgebied en de kabel
tijdens het lieren.
• Gebruik de lier nooit als de kabel rafelig, geknikt of beschadigd is.
• Laat nooit iemand in de buurt van de kabel staan, of in lijn met de kabel achter de lier
terwijl deze onder spanning staat. Als de kabel zou wegglijden of breken, kan hij plotseling
terugspoelen naar de lier, wat een gevaar voor iedereen in de buurt kan opleveren. Sta altijd
goed opzij tijdens het lieren.
AANDACHT!
De trekkracht wordt verminderd naarmate de helling toeneemt. De capaciteit wordt bijvoorbeeld
verminderd van 2268 op een vlakke ondergrond tot 420 kg op een helling van 45°. Houd hier
rekening mee bij het gebruik van uw lier.
8 Onderhoud
• Smeer de kabel af en toe in met een lichte olie.
• Smeer de tandwielen om de 6 maanden. Verwijder hiervoor de koppelingsknop en scheid de linker- en rechterbehuizing.
Gebruik een watervast vet van goede kwaliteit.
copyrighted document - all rights reserved by FBC

7
FR
M1.1.EBL-EL-SEL.NLFREN 06122018
1 Spécications techniques
Modèle EBL900 EL1000 EL1400
Moteur 12 V - 280 W 12 V - 750 W 12 V - 700 W
Capacité 907 kg 907 kg 1360 kg
Longueur du câble 9,2 m 15,2 m 15,2 m
Ø du câble 4,8 mm 4 mm 4,8 mm
Vitesse - 1,12 m/min 2,15 m/min
Dimensions (L x l x h) 405 x 300 x 525 mm 285 x 100 x 106 mm 335 x 114 x 114 mm
Poids net 23 kg 8 kg 12 kg
Modèle EL2300 SEL550012 SEL550024
Moteur 12 V - 1100 W 12 V - 4950 W 24 V - 4950 W
Capacité 2268 kg 5443 kg 5443 kg
Longueur du câble 15,2 m 28 m 28 m
Ø du câble 6,3 mm 9,5 mm 9,5 mm
Vitesse 1,80 m/min 14,5 m/min 14,5 m/min
Dimensions (L x l x h) 395 x 117 x 120 mm 557 x 164 x 243 mm 557 x 164 x 243 mm
Poids net 15 kg 38 kg 38 kg
2 Accessoires inclus
• Cordon d’alimentation, équipé d’une che étanche à l’eau et d’un disjoncteur.
• Interrupteur à distance avec prise étanche à l’eau pour un fonctionnement sûr.
• Câble avec crochet attaché.
• Support de montage pour crochet de remorque.
• Manivelle de secours et couplage réglable.
Table des matières
1 Spécications techniques.........................................................................................................................................7
2 Accessoires inclus................................................................................................................................................... 7
3 Caractéristiques du produit...................................................................................................................................... 8
4 Consignes de sécurité.............................................................................................................................................8
4.1 Consignes de sécurité générales.......................................................................................................................8
4.2 Avertissements spéciques pour l’utilisation du treuil électrique..............................................................................9
5 Câblage du treuil ...................................................................................................................................................9
5.1 Câblage temporaire........................................................................................................................................9
5.2 Câblage permanent........................................................................................................................................9
6 Montage du treuil.................................................................................................................................................10
6.1 Montage permanent......................................................................................................................................10
6.2 Montage temporaire .....................................................................................................................................10
7 Utilisation du treuil................................................................................................................................................11
8 Entretien..............................................................................................................................................................11
9 Pièces détachées..................................................................................................................................................17
10 Déclaration de conformité CE ..............................................................................................................................19
copyrighted document - all rights reserved by FBC

8
FR
M1.1.EBL-EL-SEL.NLFREN 06122018
3 Caractéristiques du produit
• Source d’énergie pratique et portable pour tirer des bateaux, des véhicules bloqués et d’autres objets lourds.
• Grande puissance de traction.
• Alimenté en 12 V ou 24 V pour une utilisation pratique sans rallonges ou petits moteurs à gaz.
• Portable, avec poignée de transport intégrée et plaque de montage rapide
ATTENTION !
Les avertissements, mises en garde et instructions gurant dans ce mode d’emploi ne peuvent pas
couvrir toutes les conditions et situations qui peuvent survenir. L’utilisateur doit comprendre que
le bon sens et la prudence sont des facteurs qui ne peuvent être intégrés à ce produit, mais qui
doivent être fournis par l’utilisateur.
4 Consignes de sécurité
ATTENTION !
Lors de l’utilisation d’un appareil électrique, des précautions de base doivent toujours être prises
pour réduire les risques de blessures et les dangers.
LISEZ TOUTES LES INSTRUCTIONS AVANT D’UTILISER CET OUTIL !
4.1 Consignes de sécurité générales
• Garder la zone de travail propre. Les endroits encombrés peuvent causer des blessures.
• Observer les conditions de l’espace de travail. N’utiliser pas les outils dans des endroits humides, mouillés ou mal éclairés.
N’utiliser pas d’appareils électriques en présence de gaz ou de liquides inammables.
• Gardez les enfants à l’écart et ne les laissez pas manipuler les machines, les outils ou l’équipement.
• Entreposez l’équipement inutilisé. Lorsqu’ils ne sont pas utilisés, les outils doivent être enfermés dans un endroit sec pour
empêcher la rouille. Enfermez toujours les outils et gardez-les hors de portée des enfants.
• Ne forcez pas l’outil. Il fera le travail mieux et de façon plus sûre dans les limites de ses capacités.
• Utilisez l’outil adapté pour chaque travail. N’utilisez pas un outil dans un but autre que celui pour lequel il a été conçu.
• Habillez-vous correctement. Ne portez pas de vêtements amples ou de bijoux, car ils peuvent se prendre dans les pièces
en mouvement. Des chaussures antidérapantes sont recommandées. Attachez les cheveux longs ou portez un let pour les
contenir. Portez toujours des vêtements de travail appropriés.
• Protégez le cordon d’alimentation des dommages causés par les chocs, la traction ou les substances corrosives. Ne tirez
pas sur le câble électrique pour débrancher de la che.
• Ne vous penchez pas trop. Gardez toujours une bonne assise et un bon équilibre.
• Entreteniez les outils avec soin. Suivez les instructions pour lubrier et changer les accessoires. Inspectez périodiquement
le cordon d’alimentation et, s’il est endommagé, faites-le réparer par un électricien qualié. Inspectez toutes les pièces
mobiles et les boulons de xation avant d’utiliser l’appareil.
• Évitez tout démarrage involontaire. Assurez-vous d’être prêt à commencer le travail avant d’actionner l’interrupteur de
démarrage.
• Restez attentif. Faites attention à ce que vous faites. N’utilisez pas cette machine lorsque vous êtes fatigué.
• N’utilisez pas cette machine sous l’inuence de l’alcool, de drogues ou de médicaments pouvant altérer votre capacité de
concentration.
• Vériez que les pièces ne sont pas endommagées. Avant d’utiliser un outil, toute pièce qui semble endommagée doit être
soigneusement vériée pour s’assurer qu’elle fonctionne correctement et qu’elle remplira sa fonction correctement. Vériez
l’alignement des pièces mobiles, contrôlez s’il y a des pièces ou accessoires de montage cassés, ainsi que toute autre
condition qui pourrait affecter le bon fonctionnement. Toute pièce endommagée doit être réparée ou remplacée par un
technicien qualié. N’utilisez pas l’outil si un interrupteur ne s’allume pas ou ne s’éteint pas correctement.
• Pièces de rechange et accessoires. N’utilisez que des pièces de rechange identiques lors de l’entretien. L’utilisation de toute
autre pièce annulera la garantie. N’utilisez que des pièces et accessoires destinés à cet outil, disponibles chez le fabricant.
copyrighted document - all rights reserved by FBC

9
FR
M1.1.EBL-EL-SEL.NLFREN 06122018
4.2 Avertissements spéciques pour l’utilisation du treuil électrique
• Câble
Assurez-vous que le câble est en bon état et xé correctement.
N’utilisez pas le treuil si le câble est efloché.
Ne remplacez pas le câble par un câble moins résistant.
• Batterie
Assurez-vous que la batterie est en bon état. Évitez tout contact avec l’acide de la batterie ou d’autres contaminants.
Portez toujours des lunettes de protection homologuées ANSI lorsque vous travaillez autour de la batterie.
Faire tourner le moteur lors de l’utilisation du treuil, pour éviter d’épuiser la batterie.
• Gardez vos distance
Restez en dehors de la ligne directe du câble de traction. S’il glisse ou se casse, il «fouettera» le long de cette ligne.
Gardez les mains, les vêtements, les cheveux et les bijoux à l’écart du treuil pendant l’utilisation.
Utilisez un observateur pour vous aider à vous assurer que le treuil peut être utilisé en toute sécurité. Assurez-vous que cette
personne se trouve à l’écart du véhicule et du câble avant d’actionner le treuil.
• Limites de puissance
N’essayez pas de dépasser les limites de traction de ce treuil.
N’utilisez jamais la manivelle pour aider le treuil. Cela endommagerait le treuil et pourrait causer des blessures.
5 Câblage du treuil
Votre treuil peut être utilisé avec un câblage temporaire ou permanent.
5.1 Câblage temporaire
1. Soulevez le joint en caoutchouc et branchez le câble d’alimentation dans la prise située sur le côté droit du corps du treuil.
Cette che porte la mention «Power». Acheminez le cordon électrique du treuil à votre batterie, en prenant soin de ne pas
l’emmêler dans l’équipement en mouvement ou de ne pas provoquer un risque de trébuchement.
2. Connectez la pince noire du câble d’alimentation au châssis de votre véhicule en établissant une connexion à la terre.
Connectez la pince rouge à la borne positive (+/rouge) de votre batterie.
Remarque : Assurez-vous d’utiliser une batterie automobile de 12 V (24 V) ou l’équivalent, en bon état.
3. Soulevez le joint en caoutchouc sur le côté gauche du corps du treuil. En prenant la télécommande, insérez la che à
l’extrémité du cordon dans la prise située sur le côté gauche du corps du treuil et portant l’inscription «Remote control»
(= «Télécommande»).
4. Mettez la télécommande de côté dans un endroit sûr jusqu’à ce qu’elle soit prête à l’emploi.
5.2 Câblage permanent
1. Fixez le protecteur de surintensité à la borne positive (+/rouge) de votre batterie à l’aide du boulon de serrage de la borne
de batterie.
2. Prévoyez un parcours pour le câblage à partir du point du véhicule où le treuil sera monté ou utilisé jusqu’à la batterie.
Cet itinéraire doit être sécurisé, à l’écart des pièces en mouvement, des débris de la route, ou de toute possibilité d’être
endommagé par l’utilisation ou l’entretien du véhicule. Par exemple, vous pouvez faire passer les câbles sous le véhicule
en les attachant au châssis à l’aide d’attaches appropriées. Ne xez pas les ls au système d’échappement, à l’arbre
d’entraînement, au câble du frein à main, à la conduite de carburant ou à tout autre composant qui pourrait endommager
le câblage par la chaleur ou le mouvement, ou créer un risque d’incendie.
3. Si vous percez le pare-chocs ou toute autre partie du châssis pour acheminer les ls, assurez-vous d’installer un œillet en
caoutchouc dans le trou pour éviter que les ls ne s’eflochent à cet endroit.
4. Acheminez le câble d’alimentation du point où le treuil sera utilisé jusqu’à la batterie, en suivant les précautions décrites
ci-dessus.
5. Retirez la pince rouge et attachez le l rouge au protecteur de surintensité qui est monté sur la borne positive (+/rouge) de
votre batterie.
6. Retirez la pince noire et attachez le l noir au châssis de votre véhicule, créant ainsi une mise à la terre électrique sûre.
copyrighted document - all rights reserved by FBC

10
FR
M1.1.EBL-EL-SEL.NLFREN 06122018
ATTENTION !
• Connectez toujours le rouge au rouge (positif au positif) et le noir au châssis, pour faire une
mise à la terre, lorsque vous utilisez la batterie de votre véhicule.
• N’utilisez jamais votre treuil ou tout autre accessoire jusqu’à ce que la batterie soit
complètement déchargée.
• Vous voudrez peut-être laisser tourner votre moteur pendant que vous utilisez ce treuil, an
de recharger continuellement le moteur. Toutefois, soyez extrêmement prudent lorsque vous
travaillez autour d’un véhicule en marche.
• N’utilisez pas une batterie sale, corrodée ou qui fuit. Vous courrez un risque de brûlures
causées par l’acide.
• Portez toujours des lunettes de sécurité homologuées ANSI lorsque vous travaillez autour ou
avec une batterie.
6 Montage du treuil
Votre treuil est conçu pour être monté temporairement au moyen du support de montage de l’attache-
remorque. Toutefois, vous pouvez également installer votre treuil de façon permanente.
6.1 Montage permanent
1. Choisissez un côté de montage sur le pare-chocs de votre véhicule, la plate-forme de votre camion, la remorque de votre
bateau ou tout autre endroit approprié.
Remarque : Ce treuil génère une force de traction élevée. Assurez-vous que l’emplacement que vous choisissez peut résister
à cette force. Selon l’emplacement de montage souhaité, il peut être nécessaire d’utiliser des plaques de renfort en acier ou
de souder des renforts supplémentaires.
2. Alignez le treuil avec l’emplacement désiré et marquez l’emplacement des 4 trous sur la base du treuil.
3. Percez ces emplacements sur votre véhicule.
4. À l’aide de boulons en acier trempé d’au moins 3/8’’ de diamètre, installez votre treuil à cet endroit.
6.2 Montage temporaire
1. Fixez les goujons plats sur la plaque d’adaptation à l’aide des écrous fournis. Serrez fermement.
2. Insérez les têtes des goujons de la plaque dans les fentes des trous de serrure à l’arrière du treuil.
3. Fixez l’ensemble treuil/plaque d’adaptation à votre crochet de remorque en insérant la boule d’attelage de remorque dans
le trou formé dans la plaque d’adaptation.
copyrighted document - all rights reserved by FBC

11
FR
M1.1.EBL-EL-SEL.NLFREN 06122018
7 Utilisation du treuil
1. Mettez votre véhicule au point mort. Ne treuillez jamais avec votre véhicule en vitesse ou en position de stationnement, car
cela pourrait endommager la boîte de vitesse de votre véhicule. Serrez votre frein à main. Bloquez les roues avec des cales
appropriées.
2. Pour retirer le câble, tourner le bouton d’embrayage dans le sens inverse des aiguilles d’une montre pour le desserrer, puis
retirez le câble dont vous avez besoin. Laissez toujours au moins trois tours de câble sur la bobine pour éviter de tirer le
câble hors du treuil.
3. Accrochez l’objet à l’aide d’un point de traction, d’une sangle de remorquage ou d’une chaîne. N’enroulez jamais le
câble autour de l’objet et ne l’accrocher au câble lui-même. Cela pourrait endommager l’objet à tirer et faire plier ou
eflocher le câble.
4. Resserrez le bouton d’embrayage.
5. Tenez-vous à l’écart et, lorsque vous pouvez le faire en toute sécurité, utilisez l’interrupteur d’alimentation de la
télécommande pour rembobiner le câble et treuiller l’objet comme vous le souhaitez.
ATTENTION !
• Gardez les mains, les vêtement, les cheveux et les bijoux loin de la zone du tambour et du
câble pendant le treuillage.
• N’utilisez jamais le treuil si le câble est efloché, plié ou endommagé.
• Ne laissez jamais personne rester près du câble ou sur sa trajectoire derrière le treuil pendant
qu’il est sous tension. Si le câble venait à glisser ou se casser, il peut soudainement se rabattre
vers le treuil, ce qui présente un danger pour toutes les personnes se trouvant dans la zone.
Restez toujours sur le côté pendant le treuillage.
ATTENTION !
La capacité de traction diminue à mesure que l’inclinaison augmente. Par exemple, la capacité est
réduite de 2268 kg sur un terrain plat à 420 kg sur une pente de 45°. Tenez compte de ce facteur
lors de l’utilisation de votre treuil.
8 Entretien
• Lubriez de temps en temps le câble avec une huile légère.
• Graissez les engrenage tous les 6 mois. Pour ce faire, enlevez le bouton d’embrayage et séparez le boîtier gauche et le
boîtier droit. Utilisez une graisse résistante à l’eau et de bonne qualité.
copyrighted document - all rights reserved by FBC

12
EN
M1.1.EBL-EL-SEL.NLFREN 06122018
1 Technical specications
Model EBL900 EL1000 EL1400
Motor 12 V - 280 W 12 V - 750 W 12 V - 700 W
Capacity 907 kg 907 kg 1360 kg
Cable length 9.2 m 15.2 m 15.2 m
Cable Ø 4.8 mm 4 mm 4.8 mm
Speed - 1.12 m/min 2.15 m/min
Dimensions (l x w x h) 405 x 300 x 525 mm 285 x 100 x 106 mm 335 x 114 x 114 mm
Net weight 23 kg 8 kg 12 kg
Model EL2300 SEL550012 SEL550024
Motor 12 V - 1100 W 12 V - 4950 W 24 V - 4950 W
Capacity 2268 kg 5443 kg 5443 kg
Cable length 15.2 m 28 m 28 m
Cable Ø 6.3 mm 9.5 mm 9.5 mm
Speed 1.80 m/min 14.5 m/min 14.5 m/min
Dimensions (l x w x h) 395 x 117 x 120 mm 557 x 164 x 243 mm 557 x 164 x 243 mm
Net weight 15 kg 38 kg 38 kg
2 Included accessories
• Power lead, tted with water sealed plug and circuit breaker.
• Remote switch with water sealed plug for safe operation.
• Cable with attached hook.
• Mounting bracket for trailer hitch.
• Emergency crank handle and adjustable clutch.
Contents
1 Technical specications.........................................................................................................................................12
2 Included accessories.............................................................................................................................................12
3 Product feature.....................................................................................................................................................13
4 Safety.................................................................................................................................................................13
4.1 General safety instructions .............................................................................................................................13
4.2 Special warnings when using the electric winch................................................................................................14
5 Wiring your winch................................................................................................................................................14
5.1 Temporary wiring..........................................................................................................................................14
5.2 Permanent wiring..........................................................................................................................................14
6 Mounting your winch............................................................................................................................................15
6.1 Permanent mounting......................................................................................................................................15
6.2 Temporary mounting .....................................................................................................................................15
7 Using your winch .................................................................................................................................................16
8 Maintenance .......................................................................................................................................................16
9 Spare parts .........................................................................................................................................................17
10 EC declaration of conformity................................................................................................................................19
copyrighted document - all rights reserved by FBC

13
EN
M1.1.EBL-EL-SEL.NLFREN 06122018
3 Product feature
• Convenient, portable power for pulling boats, stuck vehicles and other heavy items.
• Powerful pulling power.
• 12 V or 24 Volt powered for convenient use without extension cords or small gas engines.
• Portable, with built-in carrying handle and quick-attach mounting plate.
WARNING !
The warnings, cautions and instructions discussed in this instruction manual cannot cover all
possible conditions and situations that may occur. It must be understood by the operator that
common sense and caution are factors which cannot be built into this product, but must be
supplied by the operator.
4 Safety
WARNING!
When using powered equipment, basic safety precautions should always be followed to reduce
the risk of personal injury and hazards.
READ ALL INSTRUCTIONS BEFORE USING THIS TOOL!
4.1 General safety instructions
• Keep work area clean. Cluttered areas invite injuries.
• Observe work area conditions. Do not use tools in damp, wet or poorly lit locations. Do not use electrically powered
equipment in the presence of ammable gases or liquids.
• Keep children away, and don not let them handle the machines, tools or equipment.
• Store idle equipment. When not in use, tools must be locked up in a dry location to inhibit rust. Always lock up tools and
keep out of reach of children.
• Do not force the tool. It will do the job better and more safely at the rate for which it was intended.
• Use the right tool for the job. Do not use a tool for a purpose for which it was not intended.
• Dress properly. Do not wear loose clothing or jewellery, as they can be caught in moving parts. Non-skid footwear is
recommended. Wear restrictive hair covering to contain long hair. Always wear appropriate work clothing.
• Protect the power cord from damage, either from impacts, pulling or corrosive materials. Do not yank machine’s cord to
disconnect it from the receptacle.
• Do not overreach. Keep proper footing and balance at all times.
• Maintain tools with care. Follow the instructions for lubricating and changing accessories. Inspect power cord periodically
and, if damaged, have it repaired by an authorized technician. Inspect all moving parts and mounting bolts prior to use.
• Avoid unintentional starting. Be sure that you are ready to begin work before turning the start switch on.
• Stay alert. Watch what you are doing. Do not operate this machine when you are tired.
• Do not operate this machine while under the inuence of alcohol, drugs or prescription medicines.
• Check for damage parts. Before using any tool, any part that appears damaged should be carefully checked to determine
that it will operate properly and perform its intended function. Check for alignment and binding of moving parts, any
broken parts or mounting xtures, and any other condition that may affect proper operation. Any part that is damaged
should be properly repaired or replaced by a qualied technician. Do not use the tool if any switch does not turn on and
off properly.
• Replacement parts and accessories. When servicing, use only identical replacement parts. Use of any other parts will void
the warranty. Only use parts and accessories intended for use with this tool, which are available from seller.
copyrighted document - all rights reserved by FBC
14
EN
M1.1.EBL-EL-SEL.NLFREN 06122018
4.2 Special warnings when using the electric winch
• Cable
Be sure the cable is in good condition and attached properly.
Do not use the winch if the cable is frayed.
Do not replace the cable with a cable of lesser strength.
• Battery
Be sure the battery is in good condition. Avoid contact with battery acid or other contaminants.
Always wear ANSI approved eye protection when working around the battery.
Have the engine running when using the winch, to avoid running the battery down.
• Stand back
Stay out of the direct line that the cable is pulling. In case it slips or breaks, it will “whiplash” along this line.
Keep hands, clothing, hair and jewellery clear of the winch while in use.
Use a spotter to assist you in assuring that it is safe to operate the winch. Make sure this person is out of the way of the
vehicle and the cable before activating the winch.
• Power limits
Do not attempt to exceed the pulling limits of this winch.
Never use the hand crank to assist the winch. This will damage the winch and may cause personal injury.
5 Wiring your winch
Your winch may be used with temporary wiring or permanent wiring.
5.1 Temporary wiring
1. Lift the rubber seal and plug the power cable into the plug on the right side of the winch body. This plug is labelled
“Power”. Route the electric cord from the winch to your battery, being careful to avoid tangling it in moving equipment or
causing a tripping hazard.
2. Connect the black clamp handle of the power cable to the frame of your vehicle, establishing a ground connection.
Connect the red clamp handle to the positive (+/red) terminal of your battery.
Note: Be sure you are using a 12V (24V) automotive battery or equivalent, in good condition.
3. Lift the rubber seal on the left side of the winch body. Taking the remote control unit, insert the socket at the end of the cord
into the plug on the left side of the winch body labelled “Remote control”.
4. Set the remote control aside in a safe place until ready for use.
5.2 Permanent wiring
1. Attach the over-current protector to the positive (+/red) terminal of your battery, using the battery terminal clamp bolt.
2. Plan a route for the wiring from the point of the vehicle where the winch will be mounted or used to the battery. This
route must be secure, out of the way of moving parts, road debris, or any possibility of being damaged by operation or
maintenance of the vehicle. For example, you may wish to route the wires under the vehicle, attaching it to the frame using
suitable fasteners. Do not attach the wires to the exhaust system, drive shaft, emergency brake cable, fuel line, or any other
components which may create damage the wiring through heat or motion, or create a re hazard.
3. If you drill through the bumper or any part of the body to route the wires, be sure to install a rubber grommet in the hole to
prevent fraying of the wires at that point.
4. Route the power cable from the point the winch will be used to the battery, following the precautions discussed above.
5. Remove the red clamp handle, and attach the red wire to the over-current protector which is mounted onto the positive (+/
red) terminal of your battery.
6. Remove the black clamp handle, and attach the black wire to the frame of your vehicle, creating a secure electrical ground.
copyrighted document - all rights reserved by FBC
15
EN
M1.1.EBL-EL-SEL.NLFREN 06122018
WARNING!
• Always connect red to red (positive to positive) and black to the frame, making a ground
connection, when using battery power from your vehicle.
• Never continue use of you winch or other accessory until the battery is completely run down.
• You may wish to keep your engine running while using this winch, to continually recharge the
engine. However, exercise extreme caution when working around a running vehicle.
• Do not use a dirty, corroded or leaking battery. You may suffer injury from acid burns.
• Always wear ANSI approved safety glasses when working around or with a battery.
6 Mounting your winch
Your winch is designed to be mounted temporarily, using the trailer hitch mounting bracket. However,
you may also mount your winch permanently.
6.1 Permanent mounting
1. Select a mounting side on the bumper of your vehicle, truck bed, boat trailer or other suitable location.
Note: This winch generates a high pulling force. Be sure the location you select can withstand this force. You may need to
use steel reinforcement plates, or weld on additional bracing, depending on the desired mounting location.
2. Align the winch with the desired location, and mark for drilling the locations of the 4 holes on the base of the winch.
3. Drill these locations on your vehicle.
4. Using hardened steel bolts at least 3/8’’ in diameter, install your winch to the location.
6.2 Temporary mounting
1. Attach the plat stud bolts to the adapter plate, using the supplied nuts. Tighten securely.
2. Insert the heads of the plate studs into the keyhole slots on the back of the winch.
3. Attach the winch/adapter plate assembly to your trailer hitch, by inserting the trailer hitch ball through the shaped hole in
the adapter plate.
copyrighted document - all rights reserved by FBC

16
EN
M1.1.EBL-EL-SEL.NLFREN 06122018
7 Using your winch
1. Put your vehicle in neutral. Never winch with your vehicle in gear or in park, since this could damage your vehicle’s
transmission. Put your emergency brake on. Block the wheels from rolling, using suitable chocks.
2. To pull out the cable, turn the clutch knob counterclockwise to loosen it, then pull out the cable you need. Always leave at
least three turns of cable on the spool to prevent pulling the cable out of the winch.
3. Hook onto the object using a pulling point, tow strap or chain. Never wrap the cable around the object and hook onto the
cable itself. This can cause damage to the object being pulled, and kink or fray the cable.
4. Re-tighten the clutch knob.
5. Stand clear, and when it is safe to do so, use the power switch in the remote control to retract the cable, and winch the item
as desired.
WARNING!
• Keep hands, clothing, hair and jewellery clear of the drum area and cable when winching.
• Never use the winch if the cable is frayed, kinked or damaged.
• Never allow anyone to stand near the cable, or in line with the cable behind the winch while
it is under power. If the cable should slip of break, it can suddenly whip back towards the
winch, causing a hazard for anyone in the area. Always stand well to the side while winching.
WARNING!
Pulling capacity is reduced as incline increases. For example, rolling capacity is reduced from 2268
on at ground to 420 kg on a 45° incline. Please take this into consideration when using your
winch.
8 Maintenance
• Lubricate the cable occasionally with a light oil.
• Grease the gears every 6 months. To do this, remove the clutch knob and separate the left and right housing. Use any good
quality waterproof grease.
copyrighted document - all rights reserved by FBC

17
M1.1.EBL-EL-SEL.NLFREN 06122018
NL
FR
EN
9 Onderdelen
9 Pièces détachées
9 Spare parts
copyrighted document - all rights reserved by FBC

18
M1.1.EBL-EL-SEL.NLFREN 06122018
SAFETYOPERATIONMAINTENANCE SETUP
Assembly Diagram
copyrighted document - all rights reserved by FBC

19
M1.1.EBL-EL-SEL.NLFREN 06122018
Fabrikant/Invoerder
Fabricant/Importateur
Manufacturer/Retailer
Verklaart hierbij dat het volgende product :
Déclare par la présente que le produit suivant :
Hereby declares that the following product :
Product
Produit
Product
Hydropneumatische kriks
Crics hydropneumatiques
Hydro-pneumatic jacks
Order nr. :
Geldende EG-richtlijnen
Normes CE en vigueur
Relevant EU directives
2014/30/EU
EN 61000-6-4:2007+A1:2011
EN 61000-6-2:2005
Overeenstemt met de bestemming van de bovengenoemde richtlijnen - met inbegrip van deze betreffende het
tijdstip van de verklaring der geldende veranderingen.
Correspond aux directives citées ci-dessus, y compris aux modications en vigueur au moment de cette
déclaration.
Meets the provisions of the aforementioned directive, including, any amendments valid at the time of this
statement.
Bart Vynckier, Director
Vynckier Tools sa
Vynckier Tools sa
Avenue Patrick Wagnon, 7
ZAEM de Haureu
B-7700 Mouscron
10 EG conformiteitsverklaring
10 Déclaration de conformité CE
10 EC declaration of conformity
EBL900 (754753150) - EL1000 (754753152)
EL1400 (754753155) - EL2300 (754753156)
SEL550012(754753160) - SEL550024(754753162)
FR
EN
NL
Mouscron, 06/12/2018
copyrighted document - all rights reserved by FBC
This manual suits for next models
11
Table of contents
Languages:
Other MW TOOLS Winch manuals
Popular Winch manuals by other brands

Champion Power Equipment
Champion Power Equipment T-P2500 Assembly & operating instructions

Runva
Runva 10DB Assembly & operating instructions

Ramsey Winch
Ramsey Winch RPH 133,4 Operating, Service and Maintenance Manual

Comeup
Comeup WT-180 instruction manual

therM
therM TA150KGMR1 owner's manual

Rugged Ridge
Rugged Ridge Extreme Heavy Duty 2.0 owner's manual