FCC: DCH-S161
IC:DCH-S161A1
Wi-Fi Water Sensor
Quick Start Guide
Version 1.00 (US)_70x110
August 22, 2018
Copyright ©2018 All rights reserved. D-Link and the D-Link logo are registered
trademarks of D-Link Corporation or its subsidiaries. Product specifications, size and
shape are subject to change without notice, and actual product appearance may
differ from that depicted on the packaging. Visit dlink.com for more details.
Canada Statement
This device complies with Industry Canada’s licence-exempt RSSs. Operation is
subject to the following two conditions:
(1) This device may not cause interference; and
(2) This device must accept any interference, including interference that may cause
undesired operation of the device.
Le présent appareil est conforme aux CNR d’Industrie Canada applicables aux
appareils radio exempts de licence. L’exploitation est autorisée aux deux conditions
suivantes :
(1) l’appareil ne doit pas produire de brouillage;
(2) l’utilisateur de l’appareil doit accepter tout brouillage radioélectrique subi, même
si le brouillage est susceptible d’en compromettre le fonctionnement.
The device meets the exemption from the routine evaluation limits in section 2.5
of RSS 102 and compliance with RSS-102 RF exposure, users can obtain Canadian
information on RF exposure and compliance.
Le dispositif rencontre l'exemption des limites courantes d'évaluation dans la
section 2.5 de RSS 102 et la conformité à l'exposition de RSS-102 rf, utilisateurs peut
obtenir l'information canadienne sur l'exposition et la conformité de rf.
This transmitter must not be co-located or operating in conjunction with any other
antenna or transmitter. This equipment should be installed and operated with a
minimum distance of 20 centimeters between the radiator and your body.
Cet émetteur ne doit pas être Co-placé ou ne fonctionnant en même temps
qu'aucune autre antenne ou émetteur. Cet équipement devrait être installé et
actionné avec une distance minimum de 20 centimètres entre le radiateur et votre
corps.
Battery replacement warning
Risk of explosion if the battery is replaced by an incorrect type.
This product contain build in battery that need to be removed by a specialist before
the product disposal mandatory
Keep the battery away from excessive heat and direct sunlight. Do not place it on
heating device such as microwave Owen stoves or radiators
Battery may explode if overheated. Recommended if possible
(1)Risk of explosion if battery is replaced by an incorrect type.
(2)Dispose of used batteries according to the instructions.
Support
For troubleshooting tips and more information, visit:
support.dlink.com
For technical support, call:
1-877-453-5465 (USA) 1-800-361-5265 (CAN)
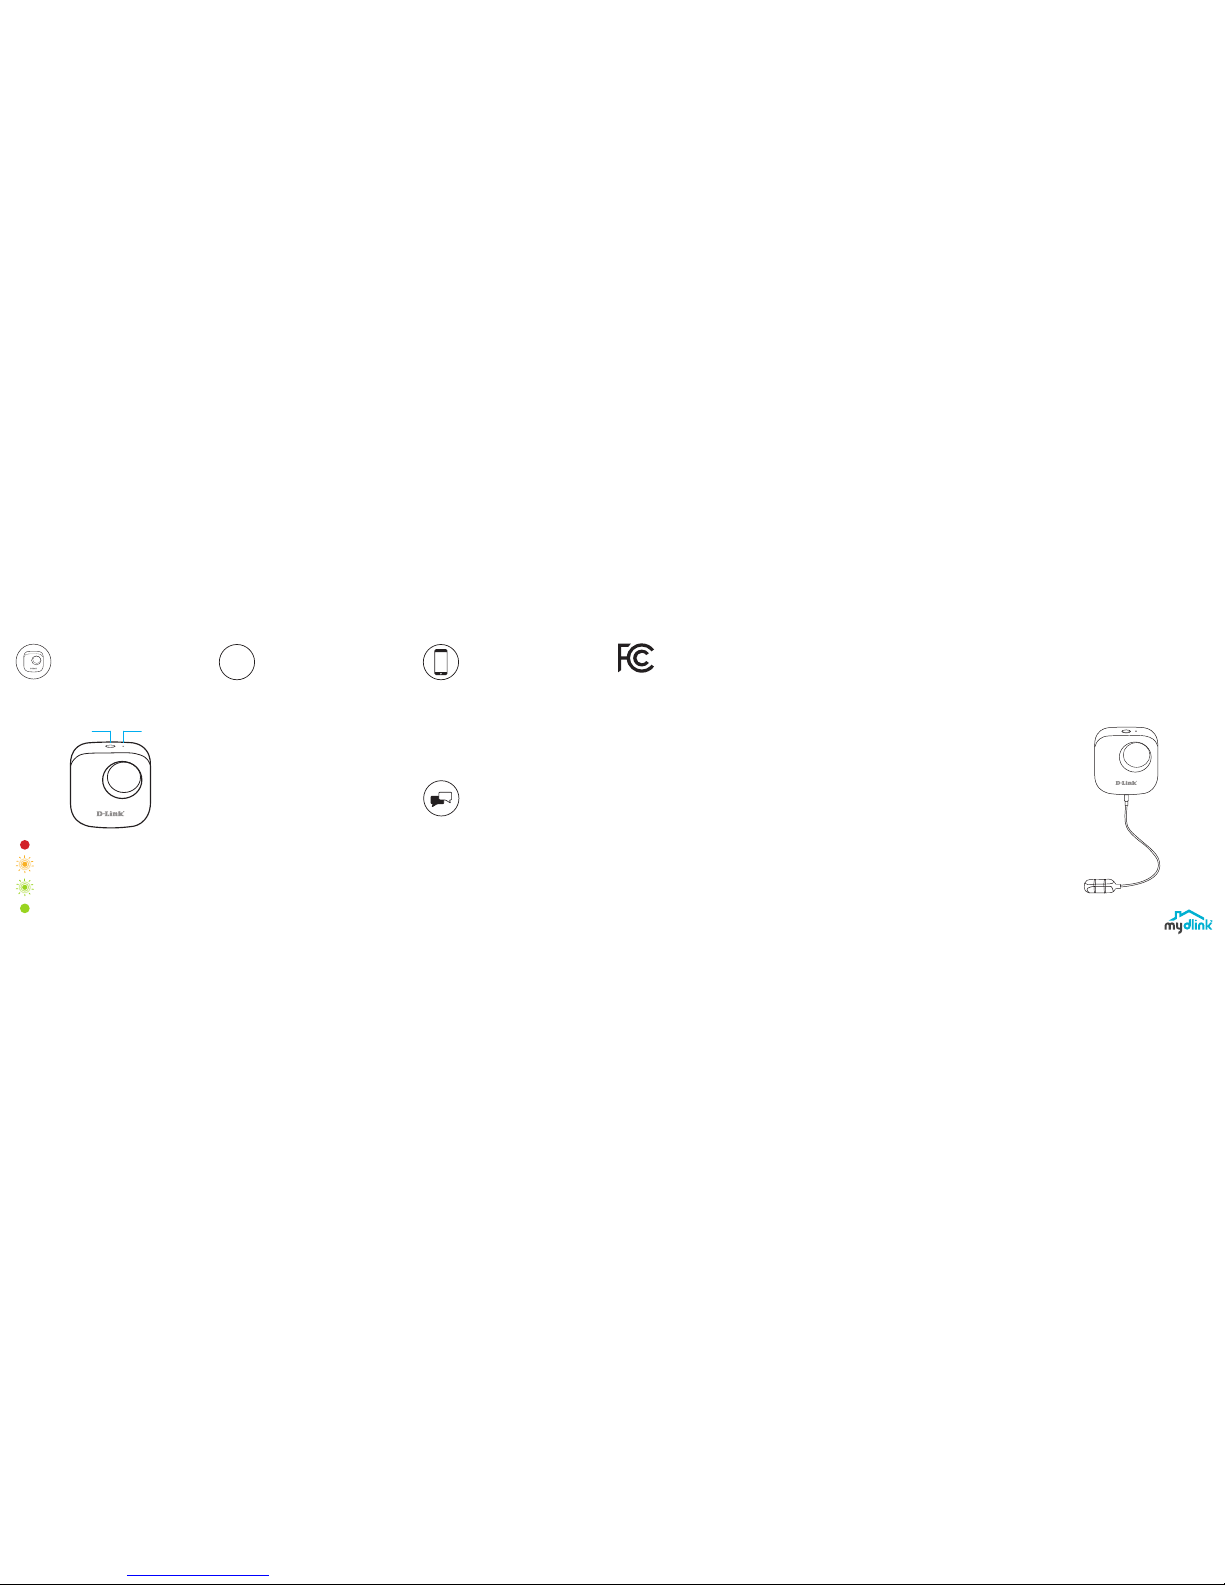
Device Information
DCH-S161
Action Button / LED Reset Button
The device is booting up or has been reset successfully.
Ready for setup or the device lost its Wi-Fi connection.
The device is connecting to a Wi-Fi network.
The device successfully connected to a Wi-Fi network.
The LED will turn off shortly after.
?
Frequently Asked Questions
1) What can I do if my water sensor is not working properly
or I’m having problems setting it up?
Reset the water sensor by pressing the Reset button using a
paperclip and try setting the water sensor up again.
In addition, please verify that:
• your Internet connection is working.
• your router’s wireless is turned on.
• the AA batteries are inserted correctly and have power.
• your water sensor is on the same network as your mobile
device (for initial setup).
2) How do I turn o the siren?
Press the Action Button once to turn off the siren.When next
time the water sensor detects flooding, the siren will sound
again.
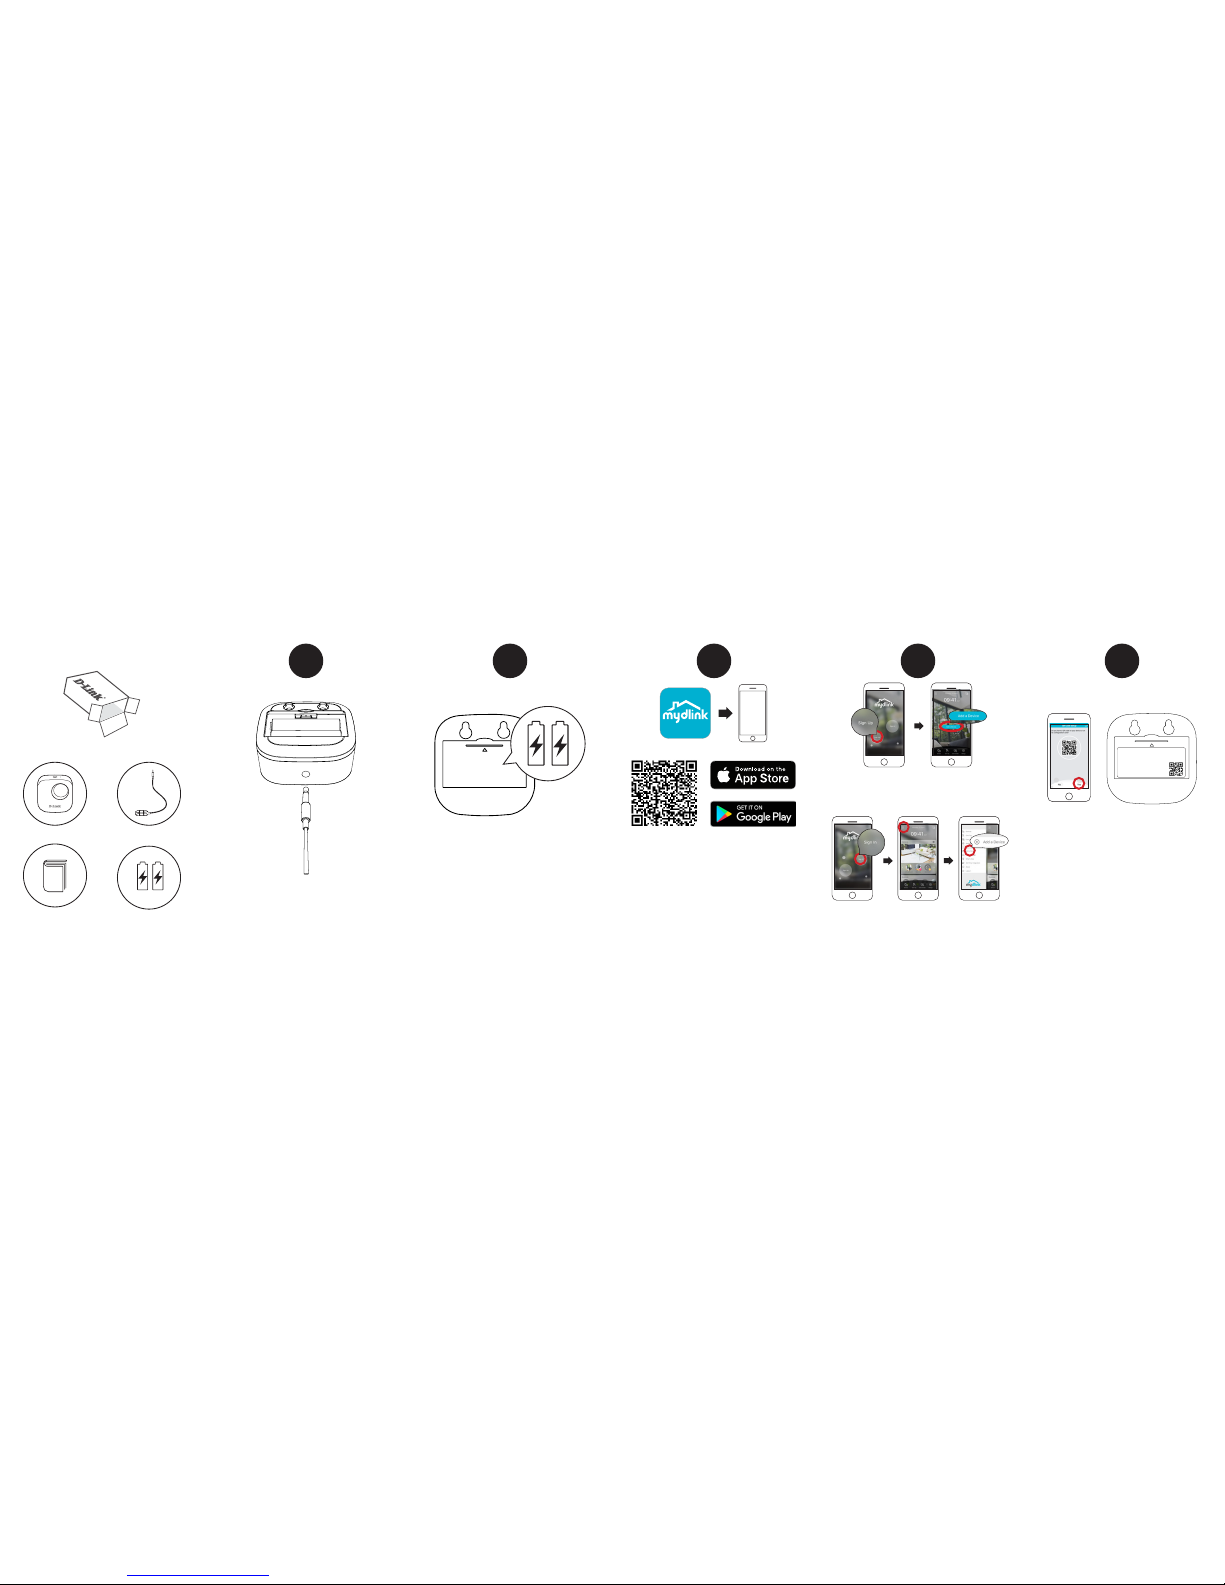
Minimum Requirements
To install this product, you will need:
• A 802.11n/g router (a router with a WPS button is
recommended)
• An Internet connection
• An e-mail account (required to register for mydlink service)
• The mydlink™ app is available for iPhone®, iPad® and
Android™ devices. Please refer to the mobile app's store page
to check whether your device is compatible.
FCC Statement
This equipment has been tested and found to comply with the limits for a Class
B digital device, pursuant to part 15 of the FCC Rules. These limits are designed
to provide reasonable protection against harmful interference in a residential
installation. This equipment generates, uses and can radiate radio frequency energy
and, if not installed and used in accordance with the instructions, may cause
harmful interference to radio communications. However, there is no guarantee that
interference will not occur in a particular installation. If this equipment does cause
harmful interference to radio or television reception, which can be determined
by turning the equipment off and on, the user is encouraged to try to correct the
interference by one or more of the following measures:
—Reorient or relocate the receiving antenna.
—Increase the separation between the equipment and receiver.
—Connect the equipment into an outlet on a circuit different from that to which
the receiver is connected.
—Consult the dealer or an experienced radio/TV technician for help.
FCC Radiation Exposure Statement
This device complies with FCC radiation exposure limits set forth for an uncontrolled
environment and it also complies with Part 15 of the FCC RF Rules. This equipment
must be installed and operated in accordance with provided instructions and
the antenna(s) used for this transmitter must be installed to provide a separation
distance of at least 20 cm from all persons and must not be co-located or operating
in conjunction with any other antenna or transmitter. End-users and installers must
be provided with antenna installation instructions and consider removing the no-
collocation statement.
This device complies with Part 15 of the FCC Rules. Operation is subject to the
following two conditions:
(1) this device may not cause harmful interference, and
(2) this device must accept any interference received, including interference that
may cause undesired operation.
Caution!
Any changes or modifications not expressly approved by the party responsible for
compliance could void the user's authority to operate the equipment.