MYE M15TV-NAQ2 User manual

Mar24,2009(Version4) www.myeclubtv.com Page1/24
MYE Entertainment
MYE PERSONAL DIGITAL TV SYSTEM
M15TV-NAQ2
Owners Manual

Mar24,2009(Version4) www.myeclubtv.com Page2/24
CONTENTS
page(s)
page
GENERAL SAFETY and CARE 3 - 4
In the Box…………………………………….. 5
Mounting the Screen………………………... 5
MENU: SETUP and OPERATION 6
Main MENU – Access 6
1 CHANNEL MENU 6 - 9
1 - 1 Tuning Band…………………... 6 1 - 2 Cable Mode……………. 7
1 - 3 DTV Signal…………………….. 7 1 - 4 Auto CH Search………. 8
1 - 5 Manual CH…………………….. 8 1 - 6 Channel Label Options.. 9
1 - 7 Menu Language………………. 9
2 Video Menu 10 - 12
2 - 1 Contrast……………………….. 10 2 - 2 Brightness…………….. 10
2 - 3 Sharpness…………………….. 11 2 - 4 Color…………………… 11
2 - 5 Tint…………………………….. 11 2 - 7 Aspect Ratio………….. 12
2 - 8 Settings………………………… 12
3 Audio Menu 13 - 15
3 - 1 Audio Language……………… 13 3 - 2 Base…………………… 14
3 - 3 Treble …………………………. 14 3 - 4 Balance……………….. 14
3 - 5 Digital Audio Output………….. 15 3 - 6 Setting…………………. 15
4 Setting Menu 16 - 18
4 - 1 Set Time……………………….. 16 4 - 2 Sleep Mode Timer……. 16
4 - 3 Advanced Video Mode………. 17 4 - 4 Set Password………… 17
4 - 5 Parental Control ……………... 17 4 - 6 Close Caption Options.. 18
4 - 7 Closed Caption…………….…. 18
5 Custom Features 19 - 21
5 - 1 Auto OFF / Vibration Detect ... 19 5 - 2 Channel Default Time…. 20
5 - 3 Channel Default………………. 20 5 - 4 Auto Default……………. 21
5 - 5 Auto Power ON………………. 21
6 IR Remote Control………... 22
7 Warranty…………………….. 23 - 24

Mar24,2009(Version4) www.myeclubtv.com Page3/24
GENERAL SAFETY and CARE
Thank you for your purchase of the MYE Entertainment MYE PERSONAL DIGITAL TV SYSTEM.
This product has been designed specifically for use in the health & fitness industry, ensuring maximum
performance and longevity in the harsh fitness club environment. Properly cared for, this product will
provide years of high-quality entertainment.
Prepare an area in which to place the product components as they
are removed from the box prior to installation. The surface of the
work area should be clean so as not to damage the screen and
associated components.
WARNING!
Do not open monitor enclosure. There are no user-serviceable parts inside.
Any changes or modifications made to this product that are not approved by
MYE Entertainment will void the user’s warranty and authorization to operate
the equipment.
Do not open package using sharp instruments or tool.
7/16” wrench #2 Phillips NO POWER TOOLS!
Required
Tools
Inspect all shipping carton for signs of damage and to ensure that the
contents of the carton have not broken loose during shipping.

Mar24,2009(Version4) www.myeclubtv.com Page4/24
Keep away from liquid or areas of high humidity
Do not use bent or damaged power cords.
Discontinue use and contact
y
our technician.
Never touch power cords with wet hands.
GENERAL SAFETY and CARE
Radio Frequency Interference (RFI) Federal Communications Commission, Part 15
This device complies with Part 15 of the FCC Rules (47CFR15). Operation is subject to the following two conditions:
1. This device may not cause harmful interference, and
2. This device must accept any interference received, including interference that may cause undesired operation.
This product generates and utilizes radio frequency energy. If not installed and maintained in accordance with the installation &
maintenance procedures as prescribed by MYE Entertainment, there is a possibility of causing interference with other services.
In order to determine whether or not this product is generating harmful interference, try performing the following steps:
•Try turning off the product by unplugging it from the AC power receptacle.
•Try powering the product from another AC power receptacle.
•Relocate or turn the antenna of the receiving device.
•Increase the distance between this product and the receiving device.
If these steps do not resolve the interference, please contact your local installing company or MYE Entertainment at 1-661-964-0217.
Unattended monitor should be unplugged during
lighting or electrical storms.
Unplug by the power cord if there are uncharacteristic
sounds or if smoke occurs.
Do not spray cleaner directly on monitor. This can cause electrical
shock or damage to the enclosure. Use a mild solution
on a soft cloth to wipe the surface of the monitor.

Mar24,2009(Version4) www.myeclubtv.com Page5/24
Screen Power adapter & AC power
cord Combined coaxial/power cable
MYE Entertainment
MYE PERSONAL DIGITAL TV SYSTEM
M15TV-NAQ2
Owners Manual
IR remote control Screen controller coiled cord
with 8-pin modular plugs Owners Manual
In The Box…
The shipping carton for the screen should contain the following components:
IMPORTANT! REPORT ALL DAMAGES AND SHORTAGES IMMEDIATELY!
Mounting the Screen
Once the mount has been assembled and the cabling routed through the equipment or universal stand, the
screen must be attached to the mounting plate.
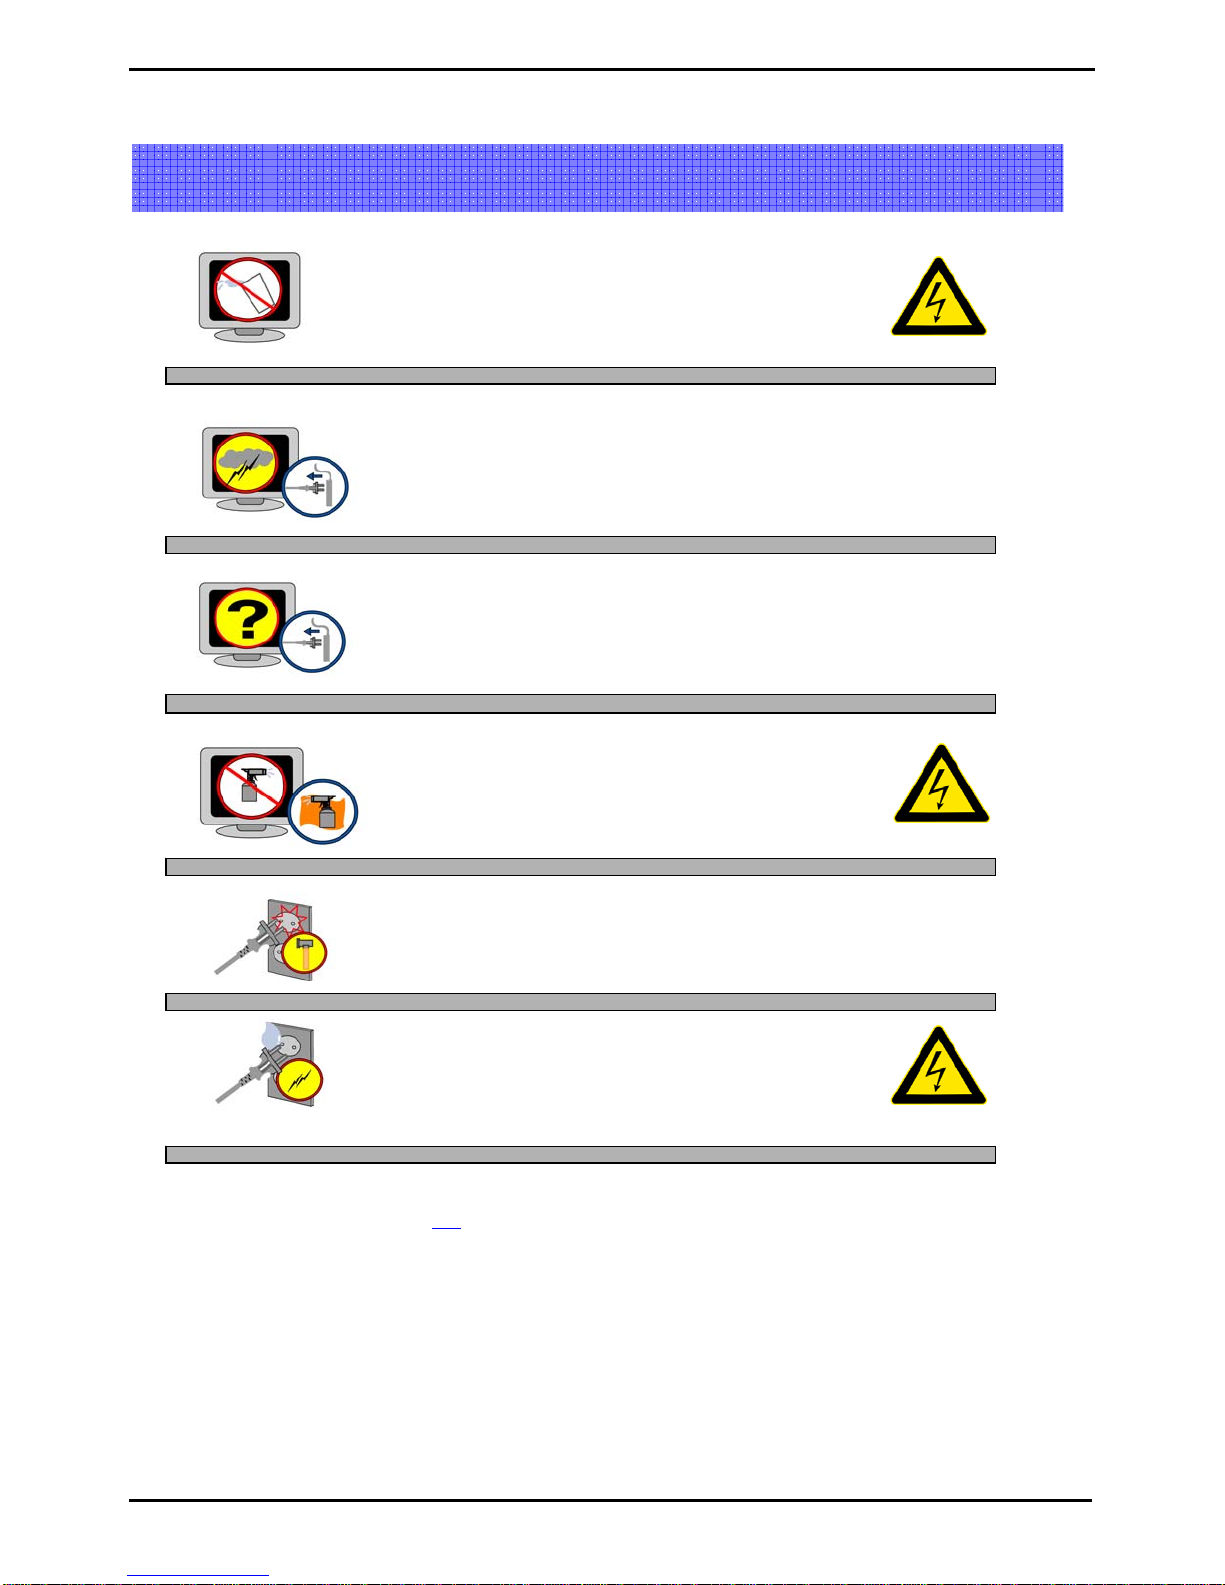
Unplug the power adapter from the power source.
Use the four screws (included) to fasten the screen
to the mount. Using screws other than those
supplied, may result in damage to the screen. It is
highly recommended not to use a power tool when
tightening these screws, as this may result in
damage to the screen! Use a #2 Phillips
screwdriver, taking care not to over-tighten!
Screen mounting Screws
Fasten the F-connector of the coaxial cable on to
the fitting on the rear of the screen. It is important
that care be taken with this connector, as
over-tightening will result in serious damage to
the screen. This connector should be started using
only fingers and then tightened to 20 inch-pounds of
torque, slightly more than finger-tight.
Push the 12-volt connector on to 12-volt jack on the
rear of the screen. Tighten the locking collar only
finger tight in order to prevent the connector from
vibrating loose during normal use.

Mar24,2009(Version4) www.myeclubtv.com Page6/24
MENU: SETUP and OPERATION
Once the unit has been connected, a setup procedure is required for optimal operation.
1-CHANNEL MENU
1-1 Tuning Band
To ENTER MENU
1) Push “MENU” on the IR remote.
2) Use ST keys on remote to select Sub-Menu.
Sub-menu pages are:
Channel
Video
Audio
Setup
3) Push the Xkey to enter a Sub-Menu.
Tuning Band
Cable Mode
DTV Signal
Auto CH Search
Manual CH Setting
Channel Label Options
Menu Language
Menu Language
1) Use ST keys on remote to select Tuning Band.
2) Push “OK” key to enter / change setting.
3) (AIR – CABLE – HRC – IRC – AUTO CABLE)
MAIN MENU – ACCESS To access all MENU functions you MUST enter MENU mode.
Enter MENU and Sub-menu page…
Sub-menu page “Channel”
To EXIT MENU
1
)
Push EXIT to set /exit MENU

Mar24,2009(Version4) www.myeclubtv.com Page7/24
1-2 Cable Mode
1-3 DTV Signal
Digital cable is supported depending on transmission system. When QAM is set, 64/256 QAM is automatically detected and
set. This works only when Tuning Band is set to cable. Please check with your cable provider whether the transmission
system is 8VSB, 64QAM or 256QAM. Encrypted signals from paid channels cannot be converted into video/audio. When
transmission is 8VSB, set cable mode at VSB. When transmission is 64/256 QAM, set cable mode at QAM.
1) Use ST keys on remote to select DTV Signal.
2) Push “OK” key to enter.
Signal Window meter will show signal strength.
(weak/normal/strong)
1) Use ST keys on remote to select Cable Mode.
2) Push “OK” key to enter / change setting.
(VSB – QAM – NONE)
Cable Mode set to NONE will scan analog channels only.
Input Signal Level Requirements
Common sources of television signal are cable, satellite or over-the-air antenna systems. Many of these choices will
provide signal in analog, digital or both even both formats. In order to provide high-quality images, the signal level supplied
to each screen should be in the range of +5dBmV to +15 dBmV when read on analog channels. A signal level outside of
this range will provide less than optimum results. In order to ensure the highest degree of satisfaction, MYE Entertainment
recommends using a MYE Entertainment Certified Installer for installation & ongoing maintenance.
Enter MENU and Sub-menu page…

Mar24,2009(Version4) www.myeclubtv.com Page8/24
1-4 Auto CH Search
1-5 Manual CH Setting
1) Use ST keys on remote to select Auto CH Search.
2) Push “OK” key to enter.
Broadcasting frequency is automatically searched and
saved. The search starts from analog TV (NTSC) to
digital TV (VSB/QAM), and it takes 2~4 min.
Channel numbers are allocated for weak signals from
analog broadcasting. IN DTV, weak signals or signals
without broadcasting data are ignored.
Number of channels found.
Autoprogram status.
1) Use ST keys on remote to select Manual CH.
2) Push “OK” to move to channel list.
3) Use ST keys on remote to select channel
4) Push “OK” to enter / set options:
Channel Default - Auto Default
Channel Def. & Auto Def.
Viewable – Not Viewable – Favorite
(See Section 5 for definitions and use.)
Depending on the content provided by the cable or satellite
company, there may be some content received that is
inappropriate for your intended viewing audience. Once
channel scanning is complete, these channels can be deleted
as necessary by using the IR remote control.
If the content provider does not provide an encoded rating for
the content (Eg: MA14), inappropriate content will not be
blocked by the parental control setting of the screen.
Enter MENU and Sub-menu page…

Mar24,2009(Version4) www.myeclubtv.com Page9/24
1-6 Channel Label Options
1-7 Menu Language
1) Use ST keys on remote to select Channel Label.
2) Push “OK” key enter.
3) Use ST keys on remote to select channel.
4) Use Volume +/- to move to first character entry.
5) Use Channel +/-to select character.
6) Use Volume +/- to move to next character entry
Analog channels are shown as “------“ because there is
no channel info in analog.
1) Use ST keys on remote to select Menu Language.
2) Push “OK” key to enter / change setting.
(English – Spanish – French)
Enter MENU and Sub-menu page…

Mar24,2009(Version4) www.myeclubtv.com Page10/24
2-Video Menu - USER
2-1 Contrast
2-2 Brightness
Contrast
Brightness
Sharpness
Color
Tint
Color Temperature
Aspect Ratio
Settin
g
s
1) Use ST keys on remote to select Contrast.
2) Push “OK” key to enter / change setting.
3) Use the WX keys to adjust level.
Video Menu contains 3 video presets (Soft – Standard – Vivid) and 1 user adjustable option (User).
1) Use ST keys on remote to select Video Menu.
2) Push Xkey to enter Video Mode.
3) Push “OK” key to change setting. (Soft – Standard – Vivid – User)
1) Use ST keys on remote to select Brightness.
2) Push “OK” key to enter / change setting.
3) Use the WX keys to adjust level.
2-VIDEO MENU
Enter MENU and Sub-menu page…

Mar24,2009(Version4) www.myeclubtv.com Page11/24
2-3 Sharpness
2-4 Color
2-5 Tint
1) Use ST keys on remote to select Tint.
2) Push “OK” key to enter / change setting.
3) Use the WX keys to adjust level.
1) Use ST keys on remote to select Color.
2) Push “OK” key to enter / change setting.
3) Use the WX keys to adjust level.
1) Use ST keys on remote to select Sharpness.
2) Push “OK” key to enter / change setting.
3) Use the WX keys to adjust level.
Enter MENU and Sub-menu page…

Mar24,2009(Version4) www.myeclubtv.com Page12/24
2-7 Aspect Ratio
2-8 Settings
When you exit the menu, all video-related values which
were previously set will reset to factory default.
1) Use ST keys on remote to select Aspect Ratio.
2) Push “OK” key to enter / change setting.
(16:9 – 4:3)
1) Use ST keys on remote to select Settings.
2) Push “OK” key to enter / change setting.
3
)
Push EXIT to set /exit MENU
Enter MENU and Sub-menu page…

Mar24,2009(Version4) www.myeclubtv.com Page13/24
3 Audio Menu - User
3-1 Audio Language
Audio Language
Bass
Treble
Balance
Digital Audio Output
Settings
Audio Language supports digital broadcasting audio as digital broadcasting include several kinds of
audio. Audio Language is set to Default. In some digital channels, audio language is not English
although English is set as audio language. It can be regarded as an error in terms of broadcasting
information, but there will be no problem in functioning.
Audio Menu contains 4 audio presets (Standard – Music – Movie -Sports) and 1 user adjustable
option (User).
1) Use ST keys on remote to select Audio Menu.
2) Push Xkey to enter Audio Mode.
3) Push “OK” key to change setting. (Standard – Music – Movie – Sports – User)
3 AUDIO MENU

Mar24,2009(Version4) www.myeclubtv.com Page14/24
3-2 Bass
3-3 Treble
3-4 Balance
1) Use ST keys on remote to select Balance.
2) Push “OK” key to enter / change setting.
3) Use the WX keys to adjust level.
1) Use ST keys on remote to select Treble.
2) Push “OK” key to enter / change setting.
3) Use the WX keys to adjust level.
1) Use ST keys on remote to select Bass.
2) Push “OK” key to enter / change setting.
3) Use the WX keys to adjust level.
Enter MENU and Sub-menu page…

Mar24,2009(Version4) www.myeclubtv.com Page15/24
3-5 Digital Audio Output
3-6 Setting
1) Use ST keys on remote to select Digital Output.
2) Push “OK” key to enter / change setting.
(AC-3 – PCM)
When you exit the menu, all audio-related values which
were previously set will be reset to the factory settings.
1) Use ST keys on remote to select Settings.
2) Push “OK” key to enter / change setting.
3
)
Push EXIT to set /exit MENU
Enter MENU and Sub-menu page…

Mar24,2009(Version4) www.myeclubtv.com Page16/24
4 SETUP MENU
1) Use ST keys on remote to select Setup Menu.
2) Push Xkey to enter.
4-1 Set Time
4-2 Sleep Mode Timer
Set Time
Sleep Mode Timer
Advanced Video Menu
Set Password
Parental Control
Closed Caption Options
Dis
p
la
y
Closed Ca
p
tion
1) Use ST keys on remote to select Set Time.
2) Push “OK” to enter Set Time.
3) Use ST keys to select setting.
Time Zone
Year
Date
Time
4) Push Xkey to adjust.
1) Use ST keys on remote to select Sleep Timer.
2) Push “OK” to enter / change setting.
(30 - 60 - 90 min.)
Enter MENU and Sub-menu page…

Mar24,2009(Version4) www.myeclubtv.com Page17/24
4-3 Advanced Video Menu
4-4 Set Password
4-5 Parental Control
1) Use ST keys on to Advanced Video Menu.
2) Push “OK” to enter Advanced Video Menu.
3) Use ST keys to select setting.
Noise Reduction
Color Temperature
3D Y/C
Adaptive Contrast
Live Scan
LCD Brightness
Setting (Reset)
4) Push “OK” to enter / change setting.
1) Use ST keys on remote to select Set Password.
2) Push “OK” to enter old password.
3) Use number keys to enter old password
(Factory Set password is 0-0-0-0.)
4) Confirm password
1) Use ST keys on remote to select Parental Control.
2) Push “OK” to enter to password window.
3) Use number keys to enter password.
4) View Parental Control settings.
MPAA
TV RATING
5) Use TSWX select rating level
6) Press “OK” to lock / unlock rating
Enter MENU and Sub-menu page…

Mar24,2009(Version4) www.myeclubtv.com Page18/24
4-6 Closed Caption Options
4-7 Display Closed Caption
1) Use ST keys on remote to Closed Caption Options.
2) Push “OK” to enter Closed Caption Options.
3) Factory setting is “Automatic”
4) Press “OK” to enter / change to “Custom”
5) Use ST keys to select Custom CC function.
Size
Text Color
Text Opacity
Background Color
Background Opacity
Edge Effect
Edge Color
6) Press “OK” to enter change selected function.
1) Use ST keys on remote to Display Closed Caption.
2) Push “OK” to enter / change setting.
(On – Off)
Enter MENU and Sub-menu page…

Mar24,2009(Version4) www.myeclubtv.com Page19/24
5- CUSTOM FEATURES – ACCESS
C ustom Features
5-1 AUTO OFF / VIBRATION DETECT
Used to set the vibration monitoring time. When no vibration is detected after the assigned monitoring time TV will:
1) Turn Off (Auto Default set to Off.)
2) Auto Default to assigned HOME channel (Auto Default set to ON).
C ustom Features
1) Press VOLTto “0.”
2) With the VOLUME level bar (OSD) still present
enter code “1-5-9-3” on the number keypad.
3) Custom Features menu (OSD) will appear.
Detect Vibration
Channel Default Time
Channel Default
Auto Default
Auto Power On
Manual Channel Setting
Set Factory Default (Reset)
1) Press CHST to select DETECT VIBRATION.
2) Press VOLSonly to select desired vibration
monitoring time in minutes: 1-8
3) Press EXIT or VOL
Tto exit / lock settings.
To access Custom Features you must enter Custom Features MENU mode.
To ENTER Custom Features MENU:
Enter Custom Features Menu…

Mar24,2009(Version4) www.myeclubtv.com Page20/24
5-2 CHANNEL DEFAULT TIME
Used to set the time period for viewing the Channel Default channel upon power “ON” but only when a channel is
assigned as the HOME auto default channel as well. During this assigned time period the user will be unable to
change the channel from the Default Channel until TV switches to the HOME auto default channel.
Custom Features
5-3 CHANNEL DEFAULT
Used to assign a channel as a Default Channel when the TV is first turned “On.”
Custom Features
1) Press CHST to CHANNEL DEFAULT TIME.
2) Press VOLSonly to enter change setting.
(Off - 10 - 20 - 30 - 40 – 50 – 60 seconds)
1) Press CHST to select CHANNEL DEFAULT.
2) Press VOLSonly to select “ON.”
3) Press CHTto select MANUAL CH SETTING.
4) Press VOLSonly to enter.
5) Manual Channel Setting menu (OSD) will appear.
6) Press CHST to select desired default channel.
7) Press VOLSto select “CHANNEL DEFAULT.”
This channel is now assigned as the default
channel when the TV is turned on.
8) Press EXIT or VOL Tto exit / lock settings.
Enter Custom Features Menu…
Table of contents
Other MYE TV Receiver manuals