Myenergi LIBBI-305Sh User manual

Revision 6.0 April 2023
UNITED KINGDOM
PM-00002
Model No.
LIBBI-305Sh, LIBBI-310Sh, LIBBI-315Sh, LIBBI-320Sh,
LIBBI-505Sh, LIBBI-510Sh, LIBBI-515Sh, LIBBI-520Sh
Installation Manual

Copyright
Copyright of these instructions remains with the
manufacturer. Text and images correspond to the technical
level at the time of going to press. We reserve the right to
make changes. The content of the operating instructions
shall not give rise to any claims on the part of the purchaser.
We are grateful for any suggestions for improvement and
notices of errors in the operating instructions.
myenergi libbi, myenergi zappi, myenergi eddi, myenergi
harvi and myenergi hub are registered trademarks of
myenergi ltd.
Liability Limitation
myenergi do not accept any direct or indirect liability for
product damage or property loss caused by the following
conditions:
•Product modified, design changed or parts replaced
without authorisation
•Changes, repair attempts and erasing of serial numbers
or seals by an unauthorised person
•System design and installation were not in compliance
with standards and regulations; failure to comply with
the local safety regulations
•Damage caused by any transportation of the products
by the installer
•Failure to follow any and/or all user manuals,
installation guides and maintenance regulations
•Improper use or misuse of the device
•Force majeure (stormy weather, lightning overvoltage,
fire etc.)
•Damage from external factors

3
Contents
1. Introduction ..........................................................4
1.1 Safety ...............................................................4
1.2 Regulatory Information....................................5
2. Product Description...............................................6
2.1 Product Introduction ............................................6
2.2 Model Options ......................................................6
2.3 Box Contents.........................................................7
3. System Topologies.................................................8
4. System Appearance...............................................9
4.1 Battery and Inverter..............................................9
4.2 Controller ............................................................10
5. Installation............................................................10
5.1 Site and Environmental Parameters ...................10
5.2 Floor Stand Support ............................................10
5.3 Battery ................................................................10
5.4 Inverter ...............................................................12
6. Electrical Connections ...........................................13
6.1 Battery and Inverter............................................13
6.2 Controller ............................................................19
6.3 Fitting the Controller Cover ................................20
7. Wiring Overview Diagram......................................21
8. Initial Configuration ..............................................22
8.1 Power Up ............................................................22
8.2 Controller Set-up.................................................22
8.3 CT Configuration .................................................22
8.4 Pairing Devices....................................................22
8.5 Device Settings....................................................23
8.6 Internet Connectivity ..........................................24
8.7 Export Limitation.................................................24
8.8 Grid Limit.............................................................25
9. Product Registration (Installer Portal) ....................25
10. Product Registration (Customer app and myaccount)
.................................................................................26
11. Commissioning ....................................................26
12. Routine Maintenance & Cleaning.........................26
12.1 Emergency Power Down Procedure.................27
12.2 Battery Reboot .................................................27
13. Warranty.............................................................27
14. Technical Support................................................27
14.1 Status, Warning and Fault Codes......................27
15. Specifications ......................................................30
Appendix A – libbi EESS Installation Schematics .........32
Appendix B – libbi N-E Bond Relay .............................33

4
1. Introduction
1.1 Safety
Read all the safety instructions. Failure to install and operate
the libbi in accordance with these instructions may cause
injury or death, damage to the unit or inefficient operation and
invalidate the manufacturer’s warranty.
The libbi utilises warning signs which contain important
information for the system to be operated safely. Ensure these
remain undamaged and clear to read. If damaged, warning
signs must be replaced immediately.
Manual Keeping
This manual contains important information about operating
the system. Before operating, please read it verycarefully. The
system should be operated in strict accordance with the
instructions in this manual. This manual should be kept for
future maintenance and reparation for the duration of the
products lifecycle.
DANGER
Danger to life due to high voltages of the PV array, battery and
electric shock. When exposed to sunlight, the PV array
generates a dangerous DC voltage which will be present in the
DC conductors and the live components of the inverter.
Touching the DC conductors or the live components can lead
to lethal electric shocks. If you disconnect the DC connectors
from the system under load, an electric arc may occur leading
to electric shock and burns. Therefore, for safety reasons,
testing must be carried out with a properly calibrated voltage
tester before an installer works on the equipment.
•The invertercan keep a life-threatening voltage even after
disconnecting it from the DC and/or AC side
•Do not touch uninsulated cable ends
•Do not touch the DC conductors
•Do not open the inverter and battery
•Do not wipe the system with a wet cloth
•Have the system installed and commissioned by qualified
personnel with the appropriate skills only
•Prior to performing any work on the inverter or the battery
pack, disconnect the inverter from all voltage sources, as
described in this document.
Emergency power down procedure can be found in this
document on page 27.
WARNING
Risk of chemical burns from electrolyte or toxic gases. During
normal operation, no electrolyte shall leak from the battery
pack and no toxic gases shall form. Despite careful
construction, if the battery pack is damaged or a fault occurs,
it is possible that electrolyte may be leaked or toxic gases
formed.
Do not install the battery and inverter in any environment of
temperature below -10°C or over 50°C or in which humidity is
over 95%
•Do not install the controller in any environment of
temperature below -10°C or over 40°C
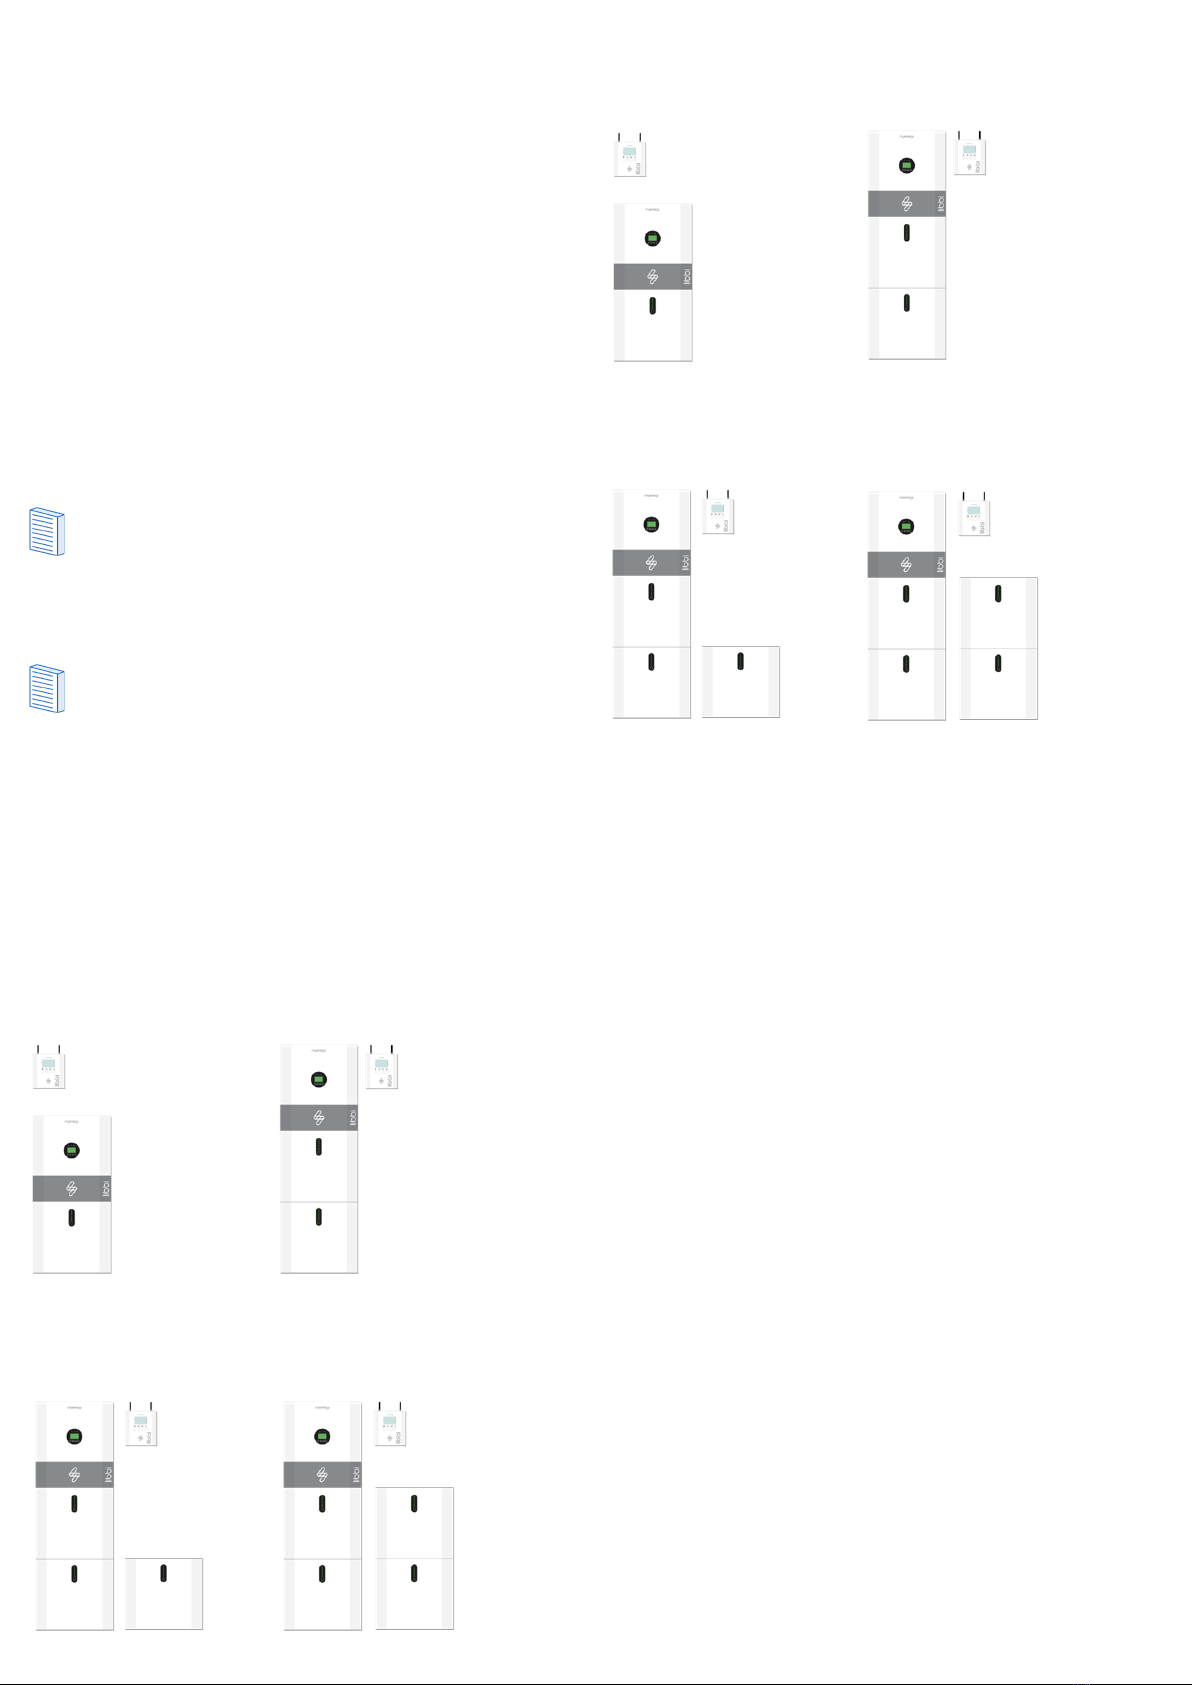
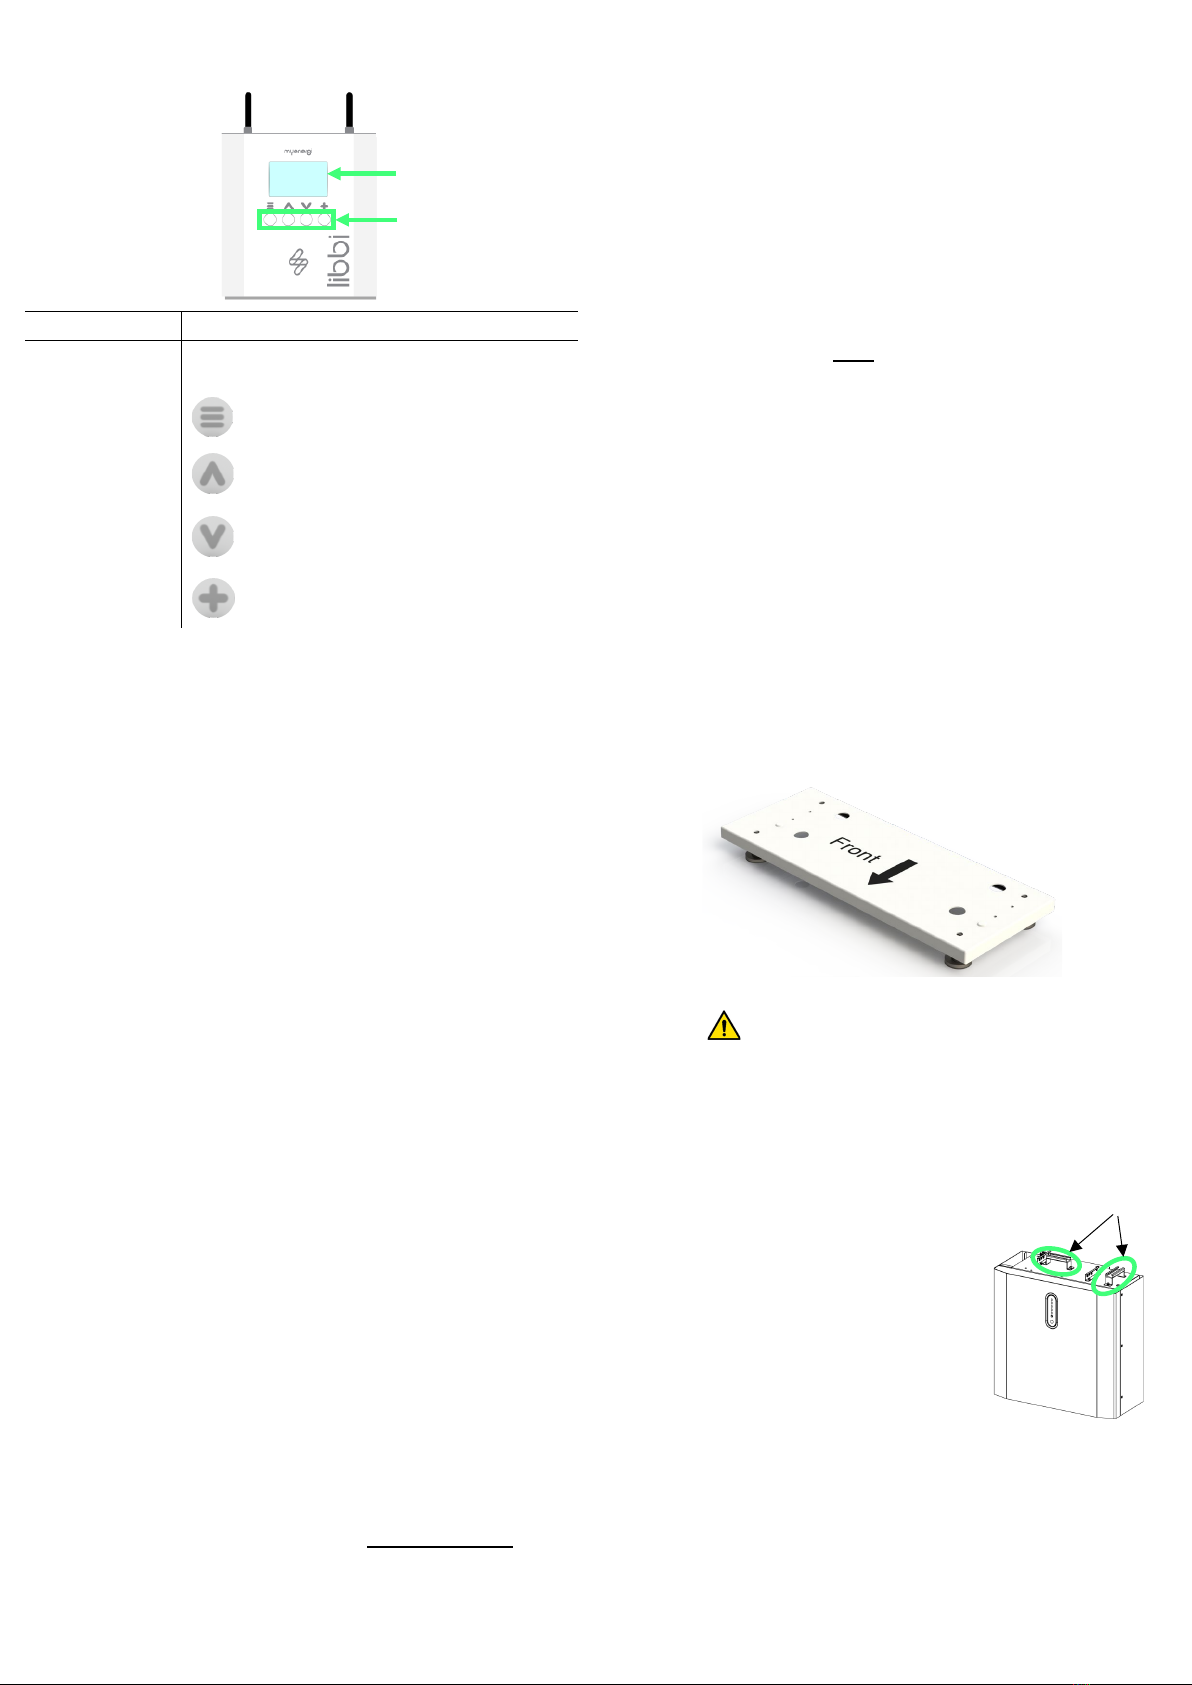
•libbi battery and inverter may be sited indoors or outdoors
and must be orientated vertically and mounted to a
suitable surface or wall
•The controller must be sited indoors and must be
orientated vertically and mounted to a suitable surface or
wall
•Do not touch the system with wet hands
•Do not put any heavy objects on top of the system
•Do not damage the system with sharp objects
•Do not install or operate the system in potentially
explosive atmospheres or areas of high humidity
•Do not mount the inverter and the battery pack in areas
containing highly flammable materials or gases
•If moisture has penetrated the system (e.g. due to a
damaged enclosure), do not install or operate the system
•When transporting, secure the system to prevent tipping
•The libbi is not to be used by persons (including children)
with reduced physical, sensory, or mental capabilities, or
lack of experience and knowledge, unless they are
supervised or have been given instruction concerning use
of the device by a person responsible for their safety
•The transportation of libbi system must be arranged by the
manufacturer or instructed personnel, including the
Installer. These instructions shall be recorded and
repeated
•A certified ABC fire extinguisher with minimum capacityof
2kg must be carried along when transporting
•It is totally prohibited to smoke in or near to the
transporting vehicle, at any time
•For the exchange of a battery module, please request for
new hazardous goods packaging if needed, pack it and let
it be picked up by myenergi or a 3rd party arranged by
myenergi
•In case of contact with electrolyte, rinse the affected areas
immediately with water and consult a doctor without delay
•Avoid any maintenance to this equipment in adverse
weather conditions, when located outdoors
CAUTION
Risk of injury through lifting or dropping the system. The
inverter and battery are heavy. There is a risk of injury if the
inverter or battery is lifted incorrectly or dropped during
transportation or when attaching to or removing from the wall.
Ensure all operations are carried out to the National Manual
Handling Guidelines and in accordance with the Manual
Handling Operations Regulations 1992.
•Lifting and transporting the inverter and battery must be
carried out by a minimum of 2 people
•The system should be operated in strict accordance with
the instructions in this manual. This manual should be kept
for future reference for any maintenance and reparation.
Indicates a hazardous situation which, if not
avoided, could result in death or serious injury.
Indicates a notice or ‘tip’ to guide you along your
install.

5
1.2 Regulatory Information
General
This product complies with the applicable CE and UKCA
marking directives / statutory instruments and harmonised
/designated standards:
•Radio Equipment (RED: Detective 2014/53/EU & SI 2017
No. 1206)
•Electromagnetic Compatibility (EMC: Directive 2014 / 30/
EU & SI 2016 No. 1091)
•Low Voltage (LVD: Directive 2014/35/EU & SI 2016 No.
1101)
A copy of the Declaration of Conformity is available in the
Download Centre on the myenergi website here;
https://www.myenergi.com/installers-centre/download-
centre/
Electromagnetic Compatibility (EMC)
This equipment has been designed and tested to fulfil
applicable standards for:
•Radio frequency emissions when installed according to the
instructions and used in its intended environment.
•Immunity to electrical and electromagnetic phenomena
when installed according to the instructions and used in its
intended environment.
This equipment generates, uses, and can radiate radio
frequency energy and, if not installed and used in accordance
with this instruction manual, may cause harmful interference
to radio communications. Modifications not expressly
approved by the manufacturer could void the user's authority
to operate the equipment under EU rules.
Electrical Safety
The libbi controller is designed for 230Vac± 10%. A suitable
capacity fuse, maximum 3A, shall be located in the supply.
Supply wiring must be 2mm min, 300V minimum rated. Wiring
shall be installed without stress and free from being scratched
by sharp objects. The unit shall be electrically grounded via the
earth point(s) provided.
The inverter input must not exceed 580Vdc. libbi is designed
to be used at less than 2000m above sea level.
Radio Equipment
This device incorporates a 868/915MHz radio and 2.4GHz
wireless transmitter, and complies with EN62311 for risks to
human exposure.
Radio operates in bands between 868–870MHz / 915–
916.3MHz – 25mW max.
WiFi operates between 2412-2484 MHz (802.11 b/g/n) -
100mW max.
Grid Compliance
When installed, libbi operates the following grid compliant
modes:
G98/G99/G100
DIN VDE 0126-1-1;
VDE-AR-N-4105;
G100 Guidance
libbi includes export limit protection that complies with G100
Version 1.
Where G100 is required as part of the installation then the
following requirements must be met:
•The Grid CT must be hardwired to eitherlibbi, zappi or eddi
(not harvi)
•Ethernet cable must be used to connect the libbi, plus any
zappis and eddis that are installed, to the customer Local
Area Network.
•CT Detect must be turned on for the Grid CT
Battery Safety Information
This product is a Lithium Iron Phosphate Battery with certified
compliance under the UN Recommendations on Transport of
Dangerous Goods, Manual of Tests and Criteria, Part III,
subsection 38.3. For battery cell, chemical materials are stored
in a hermetically sealed metal case, designed to withstand
temperatures and pressures encountered during normal use.
As a result, during normal use, there is no physical danger of
ignition or explosion and chemical danger of hazardous
materials’ leakage. However, if the product is exposed to fire,
mechanical shocks or electric stress by misuse, the gas release
vent will be opened. The battery cell case will be breached at
the extreme. Hazardous materials may be released. Moreover,
if heated strongly by the surrounding fire, acid or harmful
fumes may be emitted.
Product Information Sheet
For detailed information please refer to the Product
Information Sheet which can be found on the myenergi
website.
Disposal
In accordance with European Directive 2012/19/EU on waste
electrical and electronic equipment and its implementation in
national law, used electrical devices must be collected
separately and recycled in an environmentally responsible
manner. Ensure that you return your used device to myenergi
or obtain information regarding a local, authorised collection
and disposal system. Failure to comply with this EU Directive
may result in a negative impact on the environment.
Moisture Protection
If the internal mechanisms of the battery, inverter or controller
were exposed to moisture this would likely cause damage.
Avoid any repairs or maintenance activities outdoors in
adverse weather conditions.
Operation after power failure
The battery system is part of the energy storage system which
stores life-threatening high voltage current (even when the DC
side is turned off). Touching the battery outlets is strictly
prohibited. The inverter can keep a life-threatening voltage
even after disconnecting it from the DC and /or AC side.
Therefore, for safety reasons, it must be tested with a properly
calibrated voltage tester before an installer works on the
equipment.

6
2. Product Description
2.1 Product Introduction
Thank you for choosing libbi. These instructions will help you
to familiarise yourself with the libbi energy storage system. By
reading these instructions, you will have all the information
needed to help your customer get the maximum benefit from
their new ‘eco-smart’ device.
libbi is an energy storage system that enables surplus energy
produced by a PV array, or other renewable generation, to be
stored for a home’s future use, instead of being exported back
out to the grid. It can also be installed in homes where no
generation is installed, to maximise the benefits of off-peak
Time of Use Tariff prices.
libbi can be installed as a standalone product, but will work in
conjunction with other myenergi products: zappi, eddi, harvi,
for a super ‘eco-smart’ home.
If installing alongside existing myenergi devices,
existing devices MUST be updated to the latest
firmware before pairing libbi. It is a good idea to start
the updates on these before you begin your libbi
install.
libbi is NOT compatible with zappi V1
2.2 Model Options
libbi comes in various system sizes from 5.1kWh to 20.4kWh. It
is modular by design which means a 5.1kWh system can easily
be upgraded to up to 20.4kWh, if required.
libbi has the option of 2 inverters; a 3.68kW and a 5kW. You will
need to decide which option is most suited to the install
specific requirements.
Model No. LIBBI-305Sh Model No. LIBBI-310Sh
Inverter Size: 3.68kW Inverter Size: 3.68kW
Battery Capacity: 5kWh Battery Capacity: 10kWh
Model No. LIBBI-315Sh Model No. LIBBI-320Sh
Inverter Size: 3.68kW Inverter Size: 3.68kW
Battery Capacity: 15kWh Battery Capacity: 20kWh
Model No. LIBBI-505Sh Model No. LIBBI-510Sh
Inverter Size: 5kW Inverter Size: 5kW
Battery Capacity: 5kWh Battery Capacity: 10kWh
Model No. LIBBI-515Sh Model No. LIBBI-520Sh
Inverter Size: 5kW Inverter Size: 5kW
Battery Capacity: 15kWh Battery Capacity: 20kWh

2.3 Box Contents
Part Code
Description
LIBBI
-305Sh
LIBBI
-310Sh
LIBBI
-315Sh
LIBBI
-320Sh
LIBBI
-505Sh
LIBBI
–510Sh
LIBBI
-515Sh
LIBBI
-520Sh
LIBBI-HS3680
3.68kW Inverter
LIBBI-HS5000
5kW Inverter
LIBBI-B05h
5kWh Battery Module
x1
x2
x3
x4
x1
x2
x3
x4
LIBBI-C110W
Controller
LIBBI-EK051
Cable Pack for 5kWh System
LIBBI-EK101
Cable Pack for 10kWh System
LIBBI-EK151
Cable Pack for 15kWh System
LIBBI-EK201
Cable pack or 20kWh System
LIBBI TP1
Top Panel
N/A
N/A
Opt.1
Opt.1
N/A
N/A
Opt.1
Opt.1
LIBBI-FS01
Floor Stand Support
Opt.2
Opt.2
Opt.3
Opt.3
Opt.2
Opt.2
Opt.3
Opt.3
Breakdown of individual Part Codes below:
LIBBI-HS3680 Inverter
LIBBI-HS5000 Inverter
LIBBI-B05h Battery Module
LIBBI-C110W Controller
LIBBI-EK051 Cable Pack for 5kWh System
LIBBI-EK101 Cable Pack for 10kWh System
Description
Quantity
3.68kW Inverter
1
M5 x 12mm Bolt
4
ST6.3 x 50mm Screw
2
D10 x 50mm Wall Plug
2
Backup Connector
1
AC Connector
2
MC4 Connector (Pair)
2
Inverter Mounting Panel
1
Description
Quantity
5kW Inverter
1
M5 x 12mm Bolt
4
ST6.3 x 50mm Screw
2
D10 x 50mm Wall Plug
2
CT Connector
1
AC Connector
2
MC4 Connector
2
Inverter Mounting Panel
1
Description
Quantity
5.12kWh Battery Module
1
M5 x 12mm Bolt
2
ST6.3 x 50mm Screw
4
D10 x 50mm Wall Plug
4
M6 Washer
4
Battery Mounting Panel
1
Description
Quantity
Controller
1
RS485 Cable (5 metres)
1
CT Clamp and cable (5 metres)
1
Radio Antenna
1
WiFi Antenna
1
Description
Quantity
Communication Cable - 300mm
1
Power Cable-Negative (Black) - 250mm
1
Power Cable-Positive (Red) – 250mm
1
PE Cable – 700mm
1
Description
Quantity
Communication Cable - 300mm
1
Communication Cable - 570mm
1
Power Cable-Negative (Black) - 250mm
1
Power Cable-Negative (Black) - 485mm
1
Power Cable-Positive (Red) – 485mm
1
Power Cable-Positive (Red) – 1200mm
1
PE Cable – 520mm
1
PE Cable – 700mm
1
N/A – Not applicable.
1 – Optional top panel cover for 15 and 20kWh systems.
2 – Optional Floor Stand Support to ensure a level surface for mounting battery stack.
3 - Optional Floor Stand Support to ensure a level surface for mounting battery stack. Two required for 15 and 20 kWh Systems.

8
LIBBI-151 Cable Pack for 15kWh System
Description
Quantity
Communication Cable - 300mm
1
Communication Cable - 570mm
1
Communication Cable - 1700mm
1
Power Cable-Negative (Black) - 250mm
1
Power Cable-Negative (Black) - 485mm
1
Power Cable-Negative (Black) - 1800mm
1
Power Cable-Positive (Red) – 485mm
1
Power Cable-Positive (Red) – 1900mm
1
Power Cable-Positive (Red) – 2800mm
1
PE Cable – 520mm
1
PE Cable – 700mm
1
PE Cable – 1700mm
1
LIBBI 201 Cable Pack for 20kWh System
Description
Quantity
Communication Cable - 300mm
1
Communication Cable - 570mm
2
Communication Cable - 1700mm
1
Power Cable-Negative (Black) - 250mm
1
Power Cable-Negative (Black) - 485mm
2
Power Cable-Negative (Black) - 1800mm
1
Power Cable-Positive (Red) – 485mm
2
Power Cable-Positive (Red) – 1900mm
1
Power Cable-Positive (Red) – 3300mm
1
PE Cable – 520mm
2
PE Cable – 700mm
1
PE Cable – 1700mm
1
LIBBI-TP1 Top Panel
LIBBI-FS01 Floor Stand Support
3. System Topologies
libbi is an energy storage system that enables surplus
energy produced by PV, or other renewable generation, to
be stored for future use in the home, rather than being
distributed back out to the grid. libbi can be installed as a
standalone product or will work in conjunction with other
myenergi products; zappi, eddi, harvi, for a super‘eco-smart’
home.
libbi uses a hybrid inverter so can be used with AC Coupled
or DC Coupled battery systems. An option of 5kW or 3.68kW
inverter paired with a minimum of 1 and maximum of 4,
5.1kWh battery storage units per inverter.
3.1 Overview Diagrams
The following diagrams show the libbi working as an AC, DC
or Hybrid Coupled Battery System.
AC-Coupled Battery System
•Usually retrofit systems where existing PV is in place
with a separate inverter or;
•where there are no other forms of generation
DC-Coupled Battery System
•Ideal when a customer is looking for PV and backup
battery storage at the same time (cost saving).
Hybrid Coupled Battery System
•Retrofit system where a customer already has PV and
existing inverter and they have further PV installed
alongside libbi but keep their existing inverter for their
existing PV
Description
Quantity
Top Panel
1
Description
Quantity
Floor Stand Support
1

4. System Appearance
4.1 Battery and Inverter
Inverter On Board Display and Light Indicators
You will be controlling your system using the libbi controller
and the myenergi app so it isn’t necessary to go into the
inverter on board display menu.
However, we decribe below what you can expect tosee on your
inverter display and what those light indicators mean.
The display itself will continuously run through information
screens whilst theunit is on. The screens you can expect to see
are below.
Battery Light Indicators
1.
Hybrid Inverter LIBBI-HS3680/HS5000
2.
On Board Display
3.
Cable Box (connected to inverter)
4.
Battery Capacity Indicator
5.
5.1kWh Battery Cell (Battery 1)
Icon
LED
What does it mean?
Green A solid green light indicates libbiis on and
there is a grid connection.
Green
(Flashing)
A flashing green light indicates libbi is in
standby.
Green A solid green light indicates there is an
off-grid connection.
Red
A solid red light indicates there is a
system fault. See libbi controller display
for fault code.
1.
Capacity Indicator – Each green light represents 25%
of battery capacity. If solid green this indicates this
section is full. If flashing green this indicates thissection
is currently charging. i.e. two solid green lights with a
third flashing green light indicates 50% capacity is full
and 51-75% is currently charging.
2.
Fault Indicator – Lights up red to indicate a fault with
the system. See controller display for further
information.
Note: When switching the system on and off this light
will show as red momentarily and then turn off.
3.
Running Light – A solid green light indicates the system
is on. This will become a flashing green light when the
battery is charging and discharging.
4. Reset Button – For resetting the battery.
1
2
3
4
5
1
2
3
4

4.2 Controller
5. Installation
5.1 Site and Environmental Parameters
Battery and Inverter
This libbi battery & inverter has been engineered to IP65 and
can be installed in an outdoor location.
If installed indoors in a room, libbi must be installed in an
accessible location and remain unblocked by the structure of
the building, the furnishings and equipment of the room.
The location should be clean, dry and adequately ventilated.
The following locations are not allowed for installation:
•Habitable rooms
•Ceiling cavities or wall cavities
•On roofs that are not specifically considered suitable
•Access / exit areas or under stairs / access walkways
•Locations with humidity and condensation over 95%
•Places where salty and humid air can penetrate;
•Seismic areas - additional security measures are required
•Sites with altitude over 2000m
•Locations with direct sunlight or a large change in the
ambient temperature
•Places with flammable materials or gases or an explosive
atmosphere
The libbi battery & inverter must not be installed:
•In restricted locations as defined for panels in local
regulations
•Within 600mm of any heat source, such as hot water unit,
gas heater, air conditioning unit or any other appliance
•Within 600mm of any exit
•Within 600mm of any window or ventilation opening
•Within 600mm of side of other device
A libbi battery & inverter installed in any corridor, hallway,
lobby or the like and leading to an emergency exit shall ensure
sufficient clearance for safe egress of at least 1 metre.
Protect Against Spread the of Fire
To protect against the spread of fire in living spaces where the
libbi battery & inverter is mounted on surfaces of a wall or
structure with living spaces on the other side, the wall or
structure shall have a suitable non-combustible barrier. If the
mounting surface itself is not made of a suitable non-
combustible material, a non-combustible barrier can be placed
between the libbi and the surface of a wall or structure.
If the distance between the libbi battery & inverter and the
ceiling, or any object above the system, is less than 500mm,
the ceiling or structural surface above the system must be
made of non-combustible material within a radius of 600mm
around the system.
The libbi battery & inverter must be mounted to ensure the
highest point is not more than 2.2m above ground level.
Controller
The libbi controller must NOT be installed outdoors.
When siting the controller it will be useful to take into account
the following:
•Must be installed indoors and to local building regulations
•Distance of controller from the battery & inverter
(communication cable length will depend on this, up to a
max. of 100 metres)
•Distance between the controller and other myenergi
devices (if applicable)
5.2 Floor Stand Support
If using the libbi floor stand support, place in the location of
where you will be installing the battery and ensure it is level.
libbi must be installed on a level surface so, if you are not
utilising the libbi stand support option available, we would
suggest using shim quick align hinges, if necessary.
5.3 Battery
CAUTION
The battery must be handled by 2 persons and carried by the
lifting handles, as shown.
It is the installer’s responsibility to ensure they are applying
correct manual handling procedures throughout the install
process.
1) Remove the battery/batteries from the
packaging. Ensure all accessories are
taken from the boxes and kept to hand
for use later.
2) Attach the battery mounting panel to
the back of the battery using the two
M5 x 12mm screws, provided.
1.
Display
Graphical LCD display with LED backlight
2.
Control
Buttons
Four tactile buttons to navigate the menus
and alter settings:
Enter menu (from main screen) |
Exit current menu
Move up a menu item | Increase
value
Move down a menu item | Decrease
value
Select item | Confirm value and
move to next setting
1
2
Lifting Points

11
3) Position battery parallel to flat wall and make markings,
using a pencil or pen, on the wall where the fixings will go.
Then, undo the two M5 screws to detach the battery
mounting bracket.
4) Remove the handle on the left top side of the battery for
easier access. Keep this safe as you will replace it later.
5) In each place you have marked on the wall, use an 10mm
diameter drill, to create four holes to the depth of
approximately 70mm.
Depending on wall build up you may be required to
supply your own suitable fixings.
6) Insert the four wall plugs provided into each hole.
7) Re-attach the battery mounting panel as you did in step 2.
8) This step differs depending on install specific criteria. Read
the 3 options below carefully, before moving forward and
securing anything to the wall.
Option 1: If you are installing a 5.1kWh system (1 battery)
Take two M6 washers and two
ST6.3x50mm screws, one at a
time, place the washer against the
front of the battery mounting
bracket before inserting the
screws into the two bottom outside
holes to secure the mounting panel
to the wall, as depicted adjacent.
Option 2: If you are installing a 10.2kWh system (2 batteries)
AND this is the first of the two
Take four M6 washers and four
ST6.3x50mm screws, one at a
time, place the washer against the
front of the battery mounting
bracket before inserting the
screws into the two bottom outside
holes to secure the mounting panel
to the wall, as depicted adjacent.
Option 3: If you are installing a 10.2kWh system (2 batteries)
AND this is the second of the two
Take two M6 washers and two
ST6.3x50mm screws, one at a
time, place the washer against the
front of the battery mounting
bracket before inserting the
screws into the two bottom outside
holes to secure the mounting panel
to the wall, as depicted adjacent.
Washer should be placed on the front of the mounting
panel, as shown below.
9) For a 10.2kWh system (2 batteries), sit the second battery
on top of the first and follow steps 2-8 again.
If installing a 1 or 2 battery system, skip ahead to
section 5.4. If installing a 3 or 4 battery system or
upgrading to a 3or 4 battery system, please follow the
next steps carefully.
10) For a 15kWh system (3 battery) your third battery will
create a new stack. Follow steps 2-8 again, treating a third
battery the same as you would for the first battery of a
10kWh system.
11) For a 20kWh system (4 battery) your
fourth battery will sit on top of your new
stack. Follow steps 2-8 again treating a
fourth battery the same as you would for the
first battery of a 10kWh system.
12) Attach top cover to second battery stack, if
installing a 3 or 4 battery system.
13) Before progressing to the next section you should now
have all batteries assembled/installed. Please ensure your
install looks like one of the configurations below, depending
on system, before proceeding to the next stage.
NEVER install more than 2 batteries, vertically.
M5x12mm
screws
Four 10mm diameter, 70mm
depth holes
M6 Washer
Battery Mounting Bracket
ST6.3x50mm Screw

12
5.4 Inverter
Whether you have the 3.68kW or 5kW inverter, installation will
be the same.
1) Remove the inverter from its packaging. Ensure all
accessories are taken from the boxes and kept to hand for
later use.
2) Take the inverter mounting bracket and align the two
bottom holes with the two middle top holes of the battery
mounting panel. Ensure the inverter mounting bracket is
level with the wall, then make markings on the wall for the
two top holes.
3) Using an 10mm diameter drill, create two holes, where you
have just marked the wall, to the depth of approximately
70mm and then insert the wall plugs provided.
4) One at a time, with the four
remaining M6 washers and the four
remaining ST6.3x50mm screws,
place the M6 washer against the
front of the inverter in line with the
hole, then insert an ST6.3x50mm
screw. Continue until you have
tightened all four holes; two at the
top of the inverter bracket and the
two middle holes at the bottom
overlapping the battery mounting
bracket and the inverter mounting
bracket, As shown in the image to the right.
5) Remove the cable box cover by loosening the two
thumbscrews on either side at the back of the cover, as
shown below.
6) Hang the inverter onto the inverter mounting bracket and
adjust to align with the battery(ies).
7) Take the four M5x12mm bolts provided and insert them
through the bracketholes shown below and loosely tighten
to secure the inverter to the battery, on both the left and
the right side.
5.5 Controller
libbi controller is not suitable for installation outdoors.
Ensure the device always has adequate ventilation; do
not block the vents or obstruct airflow at the back of
the unit.
1) With the unit on its back on a flat surface, remove the front
cover by unscrewing the Torx screw (1) and lifting off, in a
tilting motion, from the bottom edge upwards.
5.1kWh System
(1 battery)
10.2kWh System
(2 batteries)
15.3kWh System
(3 batteries)
20.4kWh System
(4 batteries)
(1)
(1)

13
2) Place the back of the controller against the wall where you
will be installing the device,ensure level and then markthe
three holes (2) onto the wall, in preparation for drilling.
3) Using a drill, make three holes to the correct depth,
according to the suitable fixings, provided by you.
4) Insert three screws and tighten to secure the controller to
the wall’s surface.
6. Electrical Connections
WARNING
ELECTRIC SHOCK – An electric shock can be fatal; electrical
connection work may only be carried out by a competent
person.
6.1 Battery and Inverter
The method of anti-islanding protection is power
variation.
1) The Cable Box Cover will already have been removed
during section 5.4. Now you need to open the plastic
switch cover by undoing the two thumb screws, as shown
below.
2) Make up the "On Grid" cable and "Backup" cable if used, as
per steps (a-f):
WARNING
There are “L”, “N”, and “ ” symbols marked inside the
connector, the line wire of grid must be connected to “L”
terminal; the neutral wire of grid must be connected to “N”
terminal; the earth of grid must be connected to “ ”.
Please adhere to local wiring regulations when
selecting the type and size of cable to be used.
In order to keep within the warranty parameters of
libbi, the AC supply must be connected to the cable
box using the provided plug. The plug must not be
bypassed by wiring directly into the cable box.
If you are using the backup function, the main supply
cable into the libbi inverter should be suitably sized
to cope with the battery charging at full rate & the
full load connected to the backup circuits,
simultaneously.
a) Prepare the cable in accordance with the detail above.
If using stranded conductors, apply and crimp suitable
ferrules according to DIN 46228-4 to each of the
conductors.
b) Unscrew the plug provided. Then, thread the swivel nut
and threaded sleeve over the AC cable.
c) Insert the crimped conductors L, N and PE into the
corresponding terminals and tighten the screw with a
hex key wrench screwdriver.
d) Screw the swivel nut onto the threaded sleeve. This
seals the AC connector and provides strain relief for
the AC cable. This ensures that the swivel nut can be
screwed firmly onto the threaded sleeve.
Object
Description
Value
A
External diameter
12mm to 18mm
B
Copper conductor cross-section
4mm2 to 10mm2
C
Stripping length of the insulated
conductors
Approx. 13mm
D
Stripping length of the outer sheath of
the AC cable
Approx. 53mm
The PE conductor must be 10mm longer than the L and N conductors
(2)
(2)
(2)

14
e) Push the two plugparts together until a‘click’ is heard.
f) Lock the swivel nut in place by screwing shut. Then,
connect the AC plug into the terminal on the external
right side of the cable box. Push byhand until you hear
a ‘click’.
Backup connections
For back-up connection follow steps a) to f) again.
The backup CCT must be installed into a separate,
dedicated consumer unit.
Type A RCD must be installed on the backup supply.
The backup CCT is protected by a 32A MCB (BS EN
60898) within the inverter cable box.
A separate earthing arrangement must be installed,
when connecting the backup.
If you are using the backup function, the main supply
cable into the libbi inverter should be suitably sized
to cope with the battery charging at full rate & the
full load connected to the backup circuits,
simultaneously.
i.e. 3.68kW inverter plus 3.68kW backup circuit load
would require cable sufficient to cope with 7.36kW
total.
3) Connecting PV. If connecting PV Generation, make up the
MC4 plugs by following steps a) to e):
The supplied MC4 plugs are one time use only. Please
ensure you fully understand how to make up the plug
before beginning.
PV supply can be wired directly into the libbi inverter.
MC4 plugs are supplied with the libbi and MUST be
used for PV connections to the inverter.
When installing libbi alongside PV, you must fit
external DC isolators to the PV strings, to allow
maintenance of the inverter.
libbi has positive and negative terminations for up to
two inputs. However, PV strings are NOT required to
be split, you may utilise only one or both the
negative/positive inputs.
a) Strip the cable, ensuring crimped section of cable can
fit within respective fixing area.
b) Crimp the fixings.
c) Push fixings into their respective plug, until a “click” is
heard.
d) Screw the sleeves onto the plug, until flush.
e) Insert both the positive and negative connections into
the respective terminal on the side of the inverter.
4) Connecting the battery(ies). Take the negative (black)
and positive (red) battery power cables and connect into
the terminals on the left hand side of the inverter, as shown
below. Black to (-), Red to (+).
Follow instructions in step 5) which will guide you
through each system model.
5) Remove screws from the battery module side panels and
open. Then, follow the instructions on the next page,
depending on which size system you are installing
1.
AC External Connection (on grid)
2.
Back Up Supply Connection
3.
RS485 Controller Communication Connection (COM)
4.
PV Connections
GRID
BACKUP
1
2
3
4

15
5.1kWh (1 battery) System
a) Insert the black battery power cable (250mm) into the
negative terminal on the left side of the inverter. Then,
insert the other end into the top negative terminal on the
left side of the battery.
b) Insert the red battery power cable (250mm) into the
positive terminal on the left side of the inverter. Then,
insert the other end into the top positive terminal on the
left side of the battery.
c) Insert the grey/black communication cable (300mm) into
the terminal on the leftside of the inverter. Insert the other
end into the communication terminal on the top of the
battery.
d) Connect the PE Cable (700mm) to the earth connection of
the inverter, left side. Connect the other end to the earth
connection on the left side of the battery.
10.2kWh (2 battery) System
Cable Pack for 5.1kWh (1 Battery)
Communication
Power Cable - Negative
Power Cable – Positive (Red)
300mm
250mm
250mm
PE Cable
700mm
Communication
Cable Pack for 10.2kWh (2 Battery)
Power Cable – Negative (Black)
Power Cable - Positive (Red)
PE Cable
300mm
570mm
250mm
485mm
485mm
1200mm
700mm
520mm

16
a) Insert the black battery power cable (250mm) into the
negative terminal on the left side of the inverter. Then,
insert the other end into the top negative terminal on the
left side of the battery.
b) Insert the black battery power cable (485mm) into the
bottom negative battery terminal of your first battery.
Then, insert the other end into the top negative battery
terminal of the second battery.
c) Insert the red battery power cable (1200mm) into the
positive terminal on the left side of the inverter. Then,
insert the other end into the bottom positive terminal on
the left side of the second battery.
d) Insert the red battery power cable (485mm) into the top
positive battery terminal of the second battery. Then,
insert the other end into the bottom positive battery
terminal of the first battery.
e) Insert the grey/black communication cable (300mm) into
the terminal on the leftside of the inverter. Insert theother
end into the communication terminal on the top of the first
battery.
f) Insert the grey/black communication cable (570mm) into
the bottom COM terminal of the first battery. Then, insert
the other end into the top COM terminal of the second
battery.
g) Connect the PE Cable (700mm) to the earth connection on
the left side of inverter. Connect the other end to the earth
connection on the left side of the top battery.
h) Connect the PE cable (520mm) to the earth connection on
the left side of the first battery. Then connect the other
end to the earth connection on the left side of the second
battery.
Negative Battery Power Cable (Black), PE Cable and
Communication Cable always go sequentially from
inverter to first battery, to second battery and so on.
Positive Battery Power Cable (Red) has to have a
reverse loop, this will always go from inverter to the
last battery and work its way backwards.
15.3kWh (3 battery) System
Cable Pack for 15.3kWh (3 Battery) System
Communication Cable
300mm
570mm
1700mm

17
a) Insert the black battery power cable (250mm) into the
negative terminal on the left side of the inverter. Then,
insert the other end into the top negative terminal on the
left side of the battery.
b) Insert the black battery power cable (485mm) into the
bottom negative battery terminal of your first battery.
Then, insert the other end into the top negative battery
terminal of the second battery.
c) Insert the black battery power cable (1800mm) into the
bottom negative battery terminal of your second battery.
Then, insert the other end into the top negative battery
terminal of the third battery.
d) Insert the red battery power cable (2800mm) into the
positive terminal on the left side of the inverter. Then,
insert the other end into the top positive terminal on the
left side of the third battery.
e) Insert the red battery power cable (1900mm) into the
bottom positive batteryterminal of the third battery. Then,
insert the other end into the bottom positive battery
terminal of the second battery.
f) Insert the red battery power cable (485mm) into the top
positive battery terminal of the second battery. Then,
insert the other end into the bottom positive battery
terminal of the first battery.
g) Insert the grey/black communication cable (300mm) into
the terminal on the back, leftside of the inverter. Insert the
other end into the communication terminal on the top of
the first battery.
h) Insert the grey/black communication cable (570mm) into
the bottom COM terminal of the first battery. Then, insert
the other end into the top COM terminal of the second
battery.
i) Insert the grey/black communication cable (1700mm) into
the bottom COM terminal of the second battery. Then,
insert the other end into the bottom COM terminal of the
third battery.
j) Connect the PE Cable (700mm) to the earth connection on
the back of the inverter, left side. Connect the other end to
the earth connection on the left side of the top battery.
k) Connect the PE cable (520mm) to the earth connection on
the left side of the first battery. Then, connect the other
end to the earth connection on the left side of the second
battery.
l) Connect the PE cable (1700mm) to the earth connection
on the left side of the second battery. Then, connect the
other end to the earth connection on the left side of the
third battery.
Negative Battery Power Cable (Black), PE Cable and
Communication Cable always go sequentially from
inverter to first battery, to second battery and so on.
Positive Battery Power Cable (Red) has to have a
reverse loop, this will always go from inverter to the
last battery and work its way backwards.
20.4kWh (4 battery) System
Power Cable – Positive (Red)
485mm
1900mm
2800mm
Power Cable – Negative (Black)
250mm
485mm
1800mm
PE Cable
520mm
700mm
1700mm

18
a) Insert the black battery power cable (250mm) into the
negative terminal on the left side of the inverter. Then,
insert the other end into the top negative terminal on the
left side of the battery.
b) Insert the black battery power cable (485mm) into the
bottom negative battery terminal of the first battery. Then,
insert the other end into the top negative battery terminal
of the second battery.
c) Insert the black battery power cable (1800mm) into the
bottom negative battery terminal of the second battery.
Then, insert the other end into the top negative battery
terminal of the third battery.
d) Insert the black battery power cable (485mm) into the top
negative battery terminal of the third battery. Then, insert
the other end into the bottom negative battery terminal of
the fourth battery.
e) Insert the red battery power cable (3300mm) into the
positive terminal on the left side of the inverter. Then,
insert the other end into the top positive terminal on the
left side of the fourth battery.
f) Insert the red battery power cable (485mm) into the
bottom positive battery terminal of the fourth battery.
Then, insert the other end into the top positive battery
terminal of the third battery.
g) Insert the red battery power cable (1900mm) into the
bottom positive battery terminal of the third battery. Then,
insert the other end into the bottom positive battery
terminal of the second battery.
h) Insert the red battery power cable (485mm) into the top
positive battery terminal of the second battery. Then,
insert the other end into the bottom positive battery
terminal of the first battery.
i) Insert the grey/black communication cable (300mm) into
the terminal on the back, leftside of the inverter. Insert the
other end into the communication terminal on the top of
the first battery.
j) Insert the grey/black communication cable (570mm) into
the bottom COM terminal of the first battery. Then, insert
the other end into the top COM terminal of the second
battery.
k) Insert the grey/black communication cable (1700mm) into
the bottom COM terminal of the second battery. Then,
insert the other end into the bottom COM terminal of the
third battery.
l) Insert the grey/black communication cable (570mm) into
the top COM terminal of the third battery. Then, insert the
other end into the bottom COM terminal of the fourth
battery.
m) Connect the PE Cable (700mm) to the earth connection on
the back of the inverter, left side. Connect the other end to
the earth connection on the left side of the top battery.
n) Connect the PE cable (520mm) to the earth connection on
the left side of the first battery. Then, connect the other
end to the earth connection on the left side of the second
battery.
o) Connect the PE cable (1700mm) to the earth connection
on the left side of the second battery.
Then, connect the other end to the earth connection on the
left side of the third battery.
p) Connect the PE cable (520mm) to the earth connection on
the left side of the third battery. Then, connect the other
end to the earth connection on the left side of the fourth
battery.
Negative Battery Power Cable (Black), PE Cable and
Communication Cable always go sequentially from
inverter to first battery, to second battery and so on.
Positive Battery Power Cable (Red) has to have a
reverse loop, this will always go from inverter to the
last battery and work its way backwards.
6) Close the panels on the sides of the battery(ies) tightening
the screws to secure.
7) Insert the RS45 cable into the ‘COM’ port on the right hand
side of the inverter. You will connect the other end to the
controller in the next section
Cable Pack for 20.4kWh (4 Battery) System
Communication Cable
300mm
2x 570mm
1700mm
Power Cable (Black)
250mm
2x 485mm
1800mm
Power Cable (Red)
2x 485mm
1900mm
3300mm
PE Cable
2x 520mm
700mm
1700mm

19
6.2 Controller
WARNING
ELECTRIC SHOCK – An electric shock can be fatal; electrical
connection work may only be carried out by a competent
person.
6.2.1 Strip length
6.2.2 Supply
•Power to the controller must NOT be supplied by the
backup.
•Adhere to local wiring regulations when selecting the type
and size of cable to be used
•3 Amp fuse recommended for fused mains supply
•When making mains connections it should be ensured that
if the cable slips in such a way as to place strain on the
conductors, the protective earthing conductor will be the
last to take the strain
6.2.3 Gland Requirements
Glands are to be used as a way of anchoring the cables. The
size of cable andgland usedis the responsibility of the installer
and should be determined on an install-by-install basis
dependant upon install specifics.
6.2.4 Controller to Inverter Communication
(RS485)
The controller communication cable, provided,
must be inserted into the RS485 port of the
controller, Red to A, Black to B.
5m controller communication cable is supplied. If
extension is required, it must be done using twisted
pair cable like CAT5/6 and should NOT be extended
further than the distance of 100m.
6.2.5 Ethernet Connection
If the intention is to connect the controller to the internet via a
hardwired Ethernet connection, insert the Ethernet cable into
the RJ45 port at this point.
If you will be connecting to the internet via WiFi leave this port
empty.
If the controller detects an Ethernet connection it will
turn off WiFi and default to a hardwired connection by
default so it is important that if you intend to connect
via WiFi to leave this port free.
6.2.6 CT Sensor Installation
It is NOT currently G100 compliant to use harvi to
measure Grid CT. Grid CT must be wired direct to
libbi.
Current Transformers (CTs) are used to measure current at
various places of the installation. For example, the Grid
connection point, the solar/wind inverter or a static battery
system.
Installation of a CT to monitor the Grid connection point is
required. Other CTs are optional and can be purchased
separately. The number and location of CTs used within an
installation will vary according to devices installed and the
user requirements.
CTs can be wired to any myenergi device with CT inputs (e.g.
libbi, eddi, zappi or harvi). This enables flexible installation as
the CT can be wired to the nearest device.
The harvi device can be used for Generation CT, if it is not
practical to connect any CT to the libbi.
Grid CT
The Grid CT sensor (supplied) needs to be clipped around
either the Live or Neutral conductor of the electricity supply
meter. If using the Neutral conductor, reverse the direction of
the sensor (so the arrow is reversed).
The positioning of the Grid CT sensor is crucial, take note of
the following when deciding where best to install the sensor:
•Can be connected to any myenergi device with a CT input
e.g. the libbi, eddi or zappi (wired sensor) or harvi (wireless
sensor)
•ALL of the imported and exported power must be 'seen' by
the sensor – be sure to install it upstream of ANY junction
box or 'Henley Block' (the CT can be fitted inside the
consumer unit)
•There must be only one Grid CT per-phase for the whole
installation
•The CT should be on the Live or Neutral cable
•The arrowon the bottomof the CT sensormust be pointing
towards the consumer unit (in the direction of grid import)
if on the Live cable, or reversed if on the Neutral cable
•Ensure the CT is fully closed and clicks shut
•Be sure to wire the CT the correct way round; black [–],
red [+] otherwise import and export readings will be
swapped
Additional CTs
There is an option to add other CT sensors (available
separately) for monitoring the generation or other appliances,
such as 3rd party battery systems. Installing a CT for the
generator (PV system) will allow the main screen to show the
generated power and the total power consumption of the all
the other appliances in the property.
CTs can also be used to limit the power drawn from the supply:
•Additional CTs can be connected to any myenergi device
with a CT input that is linked to the network
•The arrow on the bottom of the sensor must be pointing in
the direction of normal power flow (e.g. away from the PV
inverter) if on the Live cable or reversed if on the Neutral
cable
•Ensure the sensor is fully closed and clicks shut
•Be sure to wire the CT the correct way round; black [–], red
[+]

20
Extending CT Sensor Cable
If there is a need to extend the CT sensor cable, a twisted-pair
cable like CAT5 or telephone cable must be used (only use one
pair).
WARNING
Do NOT use mains cable, bell wire or speaker cable. It is
important to use only twisted-pair cable to maintain signal
integrity. The cable can be extended up to 100m.
CT Wireless Sensor (Optional Accessory)
In some cases it can be difficult or impractical to install a wired
sensor. For example, it may be the case that the libbi unitneeds
to be connected to a sub-board, rather than main consumer
unit and two consumer units are in different buildings.
It is NOT currently G100 compliant to use a harvi to
measure Grid CT. The grid CT must be hardwired.
The solution is to install harvi – a clever little device that
enables myenergi products to be installed without using wired
CT sensors for measuring the generation power; instead theCT
sensor is connected to harvi.
The harvi does not need batteries or a power supply – the
energy from the sensor is harvested and used to transmit the
measurement signal to the libbi. This means batteries or
electrical wiring are eliminated!
Refer to the harvi installation guide for details on installing
and configuring harvi for your system.
CT Golden Rules – Grid CT
•Only ONE Grid CT per phase (check for only one ~ symbol
in Linked Devices Info)
•Located to ‘see’ ALL import and ALL export current (i.e.
always upstream of any junction box)
•Arrow pointing in direction of import (e.g. towards
consumer unit if on Live cable)
All other CTs
•Arrow should point towards the consumer unit
CT Can do’s
•Can be wired to ANY myenergi device in the network
•harvi can be used to make ANY CT wireless. However, t is
not currently G100 compliant to use harvi on Grid CT with
a libbi or zappi, in the UK
•Cable can be extended up to 100m (must use twisted-pair
cable e.g. one pair of CAT5)
•Cable can be shortened
•Can be clipped around two or more conductors feeding
appliances of the same type (e.g. two Live cables from two
inverters that are on the same phase)
•Can be in close proximity to other CTs.
•Wires can be swapped around in device to reverse the
direction of the readings (e.g. change import to export)
•Can be grouped with other CTs of the same type so that
the power reading is summed (e.g. east and west solar
Generation)
•Can be used on the Neutral conductor, on single phase
installs, only (direction of arrow or wires must be reversed)
•Can be set to None if you want to exclude the reading
6.3 Fitting the Controller Cover
1) Place the cover back on, ensuring to align the top edge
first.
2) Re-place and screw in the front cover Torx screw (1).
Connect Red/Black CT
wire to twisted pair
Connect up to 3 CTs per
length of twisted pair cable
Use 1 pair per CT
Twisted pair cable (e.g. CAT5) can be used
to extend the CT cable up to 100m
Connect each twisted pair to CT inputs
on the libbi controller
(1)
Other manuals for LIBBI-305Sh
1
This manual suits for next models
7
Table of contents