MyOUTDOORKITCHEN CGU301i-F2G-1 User manual

USER MANUAL AND
INSTALLATION INSTRUCTIONS
EN
OUTDOOR BARBECUE GAS/CHARCOAL GRILL
Model: CGU301i-F2G-1/SUNC-FGCG7630S/ SUNC-FGCG7929BLACK/SUNC-
FGCG7892S-GER/SUNC-FGCG7930BLACK-GER
Lindström & Sondén AB
Havsbadsvägen 1, 262 63 Ängelholm, Sweden

TABLE OF CONTENTS
1. INFORMATION REGARDING THE APPLIANCE AND GAS ..... 3
1.1 FOR GAS BARBECUE PART ............................................................................................... 3
1.2 FOR CHARCOAL BARBECUE PART................................................................................... 4
1.3 GAS CATEGORY.................................................................................................................. 5
1.4 GAS HOSE AND GAS REGULATOR ................................................................................... 5
1.5 STORAGE OF APPLIANCE.................................................................................................. 6
1.6 GAS CYLINDER.................................................................................................................... 6
1.7 CONNECTION TO THE APPLIANCE ................................................................................... 6
1.8 LIGHTING THE APPLIANCE ................................................................................................ 7
1.9 FOR MATCH-LIGHTING ....................................................................................................... 7
2. CLEAN AND MAINTENANCE.................................................... 7
2.1 CLEANING THE BURNER ASSEMBLY................................................................................ 8
3. TROUBLE SHOOTING............................................................... 9
4. TECHNICAL INFORMATION.................................................... 10
5. PART LIST ................................................................................ 10
6. ASSEMBLY INSTRUCTION ......................................................11
6.1 SIDE TABLE ASSEMBLY .....................................................................................................11
6.2 FLAME TAMER ASSEMBLY ................................................................................................11
6.3 COOKING GRID ASSEMBLY ............................................................................................. 12
6.4 WARMING RACK ASSEMBLY............................................................................................ 12
6.5 IGNITION ............................................................................................................................ 12
6.6 FOR GAS TANK.................................................................................................................. 13
6.7 FOR CHARCOAL GRILL..................................................................................................... 13

3
CAUTION
•Use outdoors only.
•Read the instructions before using the appliance.
•Warning! Accessible parts may be very hot. Keep young children away.
•This appliance must be kept away from flammable materials during use.
•Do not move the appliance during use.
•Turn off the gas supply at the gas cylinder after using.
•Do not modify the appliance.
•Do not fill the charcoal tray more than 2/3 of its max capacity.
1. INFORMATION REGARDING THE APPLIANCE AND GAS
1.1 FOR GAS BARBECUE PART
PLEASE DO:
•Use a spanner to tighten all gas fittings.
•Check all gas hoses and line connections for damage, cuts or cracks each time before using the
appliance.
•Always make a leak test with soapy water.
•Check all burners regularly for insect nets such as spiders, ants, etc. Nets needs to be fully removed.
•Have the gas cylinder filled by an authorized gas supplier.
•Always wear protective gloves when handling hot components.
•Clean and maintain the appliance after each using.
•USE grill at least 1.0 m from any wall or surface, combustible material, gasoline, flame liquids or
vapors.
•“Burning off” the barbecue after every use (for approx. 15 minutes) will keep excessive food residue to
a minimum.
•This barbecue has to be installed on a secure level base prior to use.
PLEASE DO NOT:
•Lean over the appliance when lighting.
•Store combustible material, gasoline or flammable liquids or vapors within vicinity of appliance.
•Use the appliance with any cover on.
•Use plastic or glass utensils on the appliance.
•Use the appliance in strong winds.
•Dismantle control valves.
•Test for gas leaks with a naked flame.
•Store spare gas cylinders in the cabinet.
•Lay the gas cylinder down (always keep upright).

4
•Use the appliance indoors.
•Modify the constructions of the appliance or the size of any burner, injector orifice or any other
components.
•Move the appliance during using.
•Obstruct any ventilation of the appliance.
•Allow the flexible gas supply hose or any electrical cord come in contact with any heated surface of
the appliance.
•Use charcoal or any other solid fuel in this appliance (gas barbecue).
•Disconnect any gas fittings while the appliance is in using.
•Use a rusty or dented gas cylinder with a damaged gas valve.
•Fill the gas cylinder beyond 80% cap.
1.2 FOR CHARCOAL BARBECUE PART
•Max fuel load is 2kg
•When you need to touch the hot parts during cooking (like air vent), use protective gloves to protect
yourself.
•The barbecue shall be heated up and the fuel kept red hot for at least 30 min before the cooking
starts.
5
•Do not cook before the fuel has a coating of ash.
•WARNING! This barbecue will become very hot, do not move it during operation.
•Do not use indoors!.
•WARNING! Do not use spirit or petrol for lighting or re-lighting! Use only firelighters complying to EN
1860-3!”.
•WARNING! Keep children and pets away.
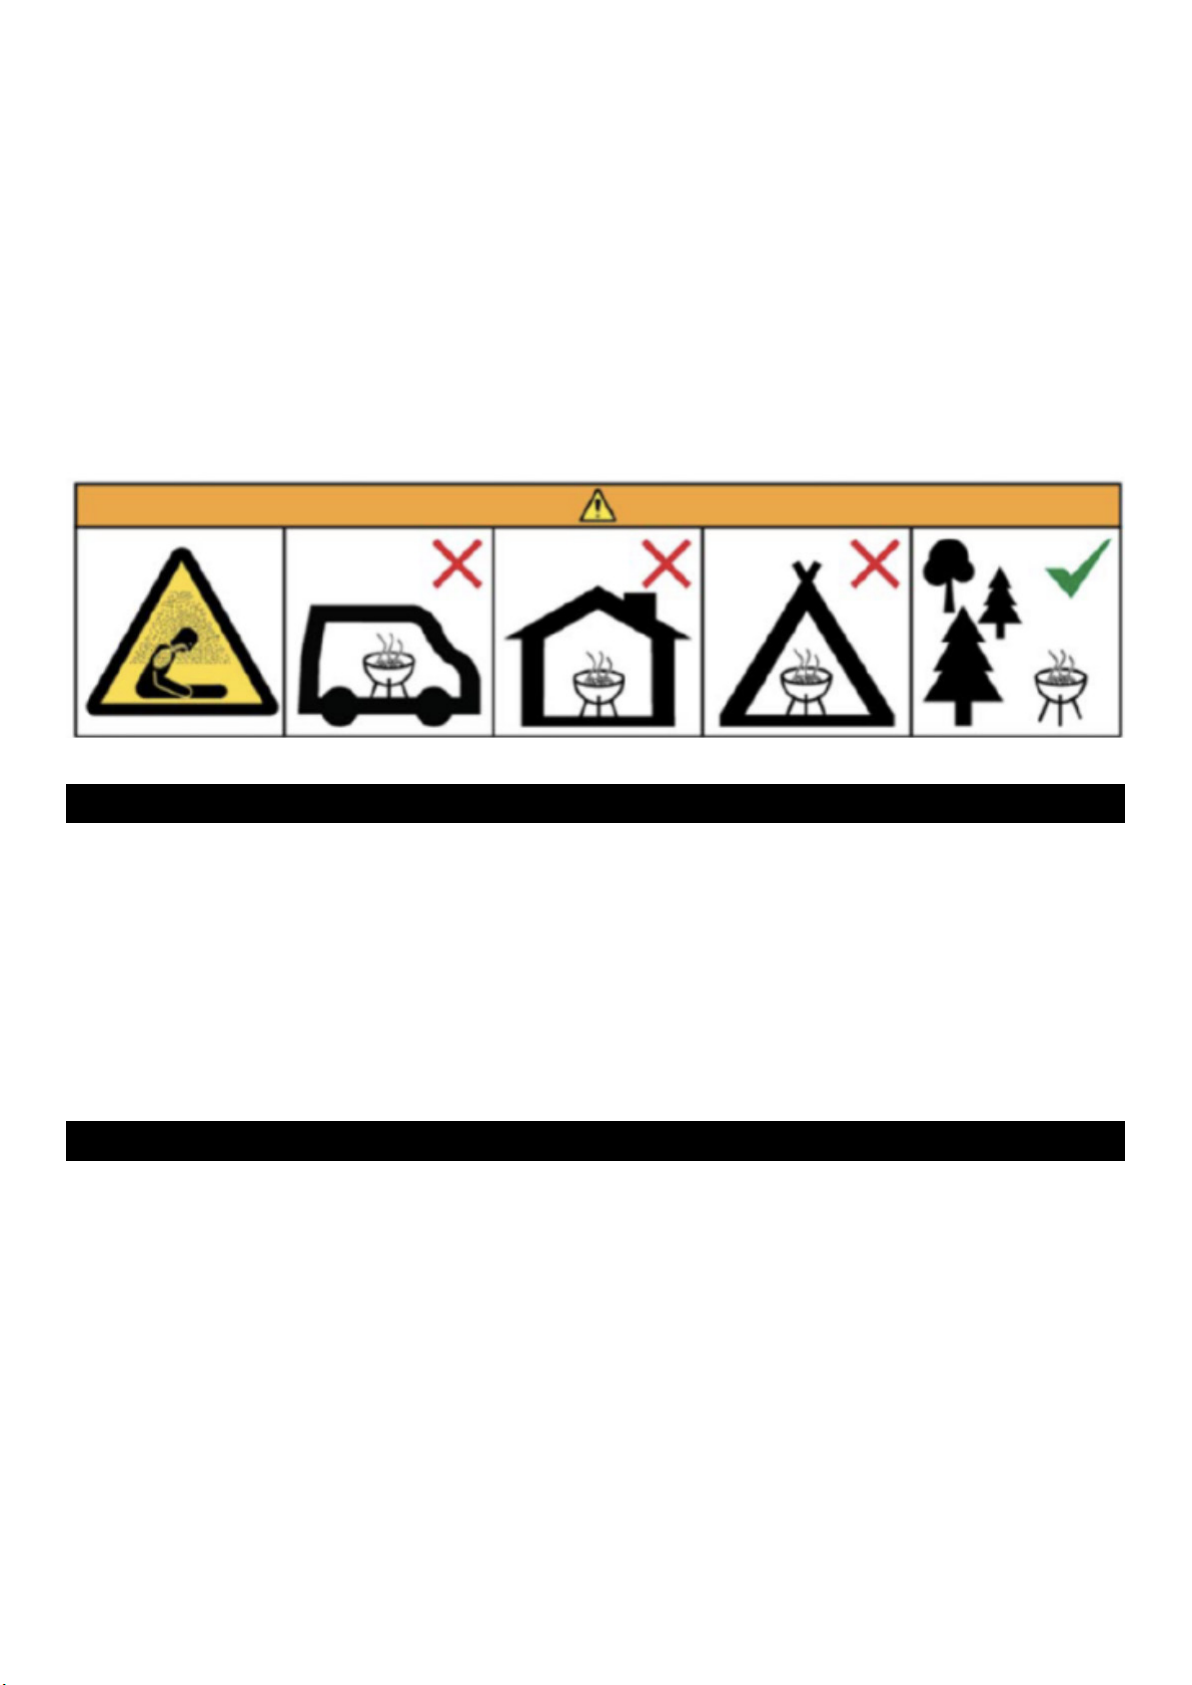
•Do not use the barbecue in a confined and/or habitable space e.g. houses, tents, caravans, motor
homes, boats. Danger of carbon monoxide poisoning fatality.
1.3 GAS CATEGORY
•This appliance is only for use with low-pressure butane, propane or their mixture gas and fitted with
the appropriate low-pressure regulator via a flexible hose. The appliance is set to operate:
» 28-30 mbar regulator with butane gas @ category I3+.
» 37mbar regulator with propane gas @ category I3+.
» 37 mbar regulator with butane, propane or their mixtures @ category I3B/P(37).
» 30 mbar or 50mbar regulator with butane, propane or their mixtures @ category I3B/P(30) or
category I3B/P(50) respectively.
1.4 GAS HOSE AND GAS REGULATOR
Use only regulator and hose approved for LP Gas at the correct pressures.
The pressure adjuster should comply with the standard EN12864 and current regulations in the country
where it is installed, which may be found at your nearest retailer of gas items. Refer to the technical date.
It is strictly prohibited to use adjustable pressure. It is recommended that the regulator is changed within
10 years of the date of manufacture or the national conditions require it.
The type of replaceable hose should meet the standard of EN1763-1-Class 3. The hose used must
conform to the relevant standard for the country of use. The length of the hose must be 0.7 meters
(minimum) and 1.5 meters (maximum). Worn or damaged hose must be replaced.

6
Ensure that the hose is not obstructed, kinked or in contact with any part of the appliance other than at
its connection. It is recommended the hose is changed within 1 year of the date of manufacture or the
national conditions required. During serving or installation, make sure that the connected flexible tube is
not subjected to twisting.
CAUTION
•The appliance is intended to be used with regulator and hose assembly.
•If they are not supplied by the manufacturer, the user must choose the authorized regulator and hose
complying with the standard and local regulations.
1.5 STORAGE OF APPLIANCE
When the appliance is not in use, storage indoors is only permitted when the cylinder is disconnected
and removed from the appliance. When the appliance is not to be used for a period of time, it should be
stored in its original packaging and stored in a dry and dust free environment.
1.6 GAS CYLINDER
•The gas cylinder should not be dropped or handled roughly! If the appliance is not in use, the
cylinder must be disconnected.
•The height of the cylinder should not be over 460mm and the diameter should not be over 310mm.
•The precaution needs to be taken when changing the gas cylinder which shall be carried out away
from any source of Ignition.
•Cylinders must be stored outdoors in an upright position and out of the reach of children.
•The cylinder must never be stored where temperatures can reach over 50°C.
•Do not store the cylinder near flames, pilot lights or other sources of ignition.
1.7 CONNECTION TO THE APPLIANCE
Before connecting, please ensure there is no debris caught in the head of the gas cylinder, regulator,
burner and burner parts.
If the hose is replaced, it must be secured to the appliance and regulator connections.
After connecting, GAS LEAKAGE CHECKING is a must. Please follow following method to check for gas
leakage:
•Ensure the control valve is “OFF”.
•Connect the cylinder to the regulator, regulator to hose and hose to the appliance, ensure the
connections are secured then turn ON the gas.
•Brush the soapy water on the hose and all joints. If bubble appears, it means there is leakage. You
have to reconnect or replace the gas leakage part or joint.
•Retest after fixing the fault. Turn OFF the gas at the cylinder after testing.

7
CAUTION
If leakage is detected and can not be fixed, do not attempt to fix the leakage, consult with your gas
dealer instead.
1.8 LIGHTING THE APPLIANCE
1. Open the lid and make sure all the knobs are on the OFF position.
2. Push down the knob and turn the knob anticlockwise to HIGH position, then keep pressing the
igniter for 2-3 seconds (a sound could be heard), thus the burner could be lit. If the burner does not
light, turn off the knob and wait for 5 minutes then repeat this process.
3. Adjust the heat by turning the knob to the High/Low position. Back burner is only set in HIGHT
position.
4. To light other burners, repeat the same process for the adjacent burner and continue in sequence
until all the burners are lit.
5. To turn the barbecue OFF, turn the cylinder valve or regulator switch to the “OFF” position and then
turn all of the control knobs on the barbecue clockwise to the “OFF” position.
1.9 FOR MATCH-LIGHTING
1. Follow above instruction step 1-3.
2. For the main burner, place the match into the match holder chain and fire the match, then put the
match into the lighting hole on the right side of the fire box; * For side burner, place the fired match
on the holes of the side burner head.
3. Push down and turn the knob anticlockwise to HIGH(+) position, then the burner could be lit. If the
burner does not light, turn off the gas tap and wait for 5 minutes then repeat this step 2-3.
The side burner is designed for pot/pan with diameter 180-260mm. Side burner lid can not be used as
worktable, do not put anything on the side burner lid while it is not working.
Before cooking for the first time, light all the main burners and keep burning for 15 minutes with the lid
closed and knob in the HIGH(+) position. This will “heat clean” the internal parts and dissipate odor from
the painted finish. The color of cooking area may get change a bit. It is normal and it is the nature of
material.
2. CLEAN AND MAINTENANCE
All cleaning and maintenance should be carried out when the appliance is cool and with the fuel supply
turned OFF at the gas cylinder after use.
•DO NOT mistake brown or black accumulation of grease and smoke for paint. Interiors of gas grills
are not painted at the factory (and should NEVER be painted). Apply a strong solution of detergent
and water or use a grill cleaner with scrub brush on insides of grill lid and bottom. Rinse and allow to
completely air dry.
8
•DO NOT apply a caustic grill / oven cleaner to painted surfaces.
•DO NOT use abrasive or flammable cleaners, as it will damage the parts of the product and may start
a fire.
Plastic parts: wash with warm soapy water and wipe dry.
Stainless steel surfaces: Stainless steel will get rust if not maintained well. To maintain your grill’s high
quality appearance, wash with mild detergent and warm soapy water and wipe dry with a soft non-
abrasive cloth after each use. Use stainless steel protection liquid like WD-40 on the surface to avoid rust.
Cooking grid: Use a mild soapy water solution. Non-abrasive scouring power can be used on stubborn
stains then rinse with water.
2.1 CLEANING THE BURNER ASSEMBLY
1. Turn gas off at control knobs and LP Tank.
2. Remove cooking grates, grease tray and grease cup.
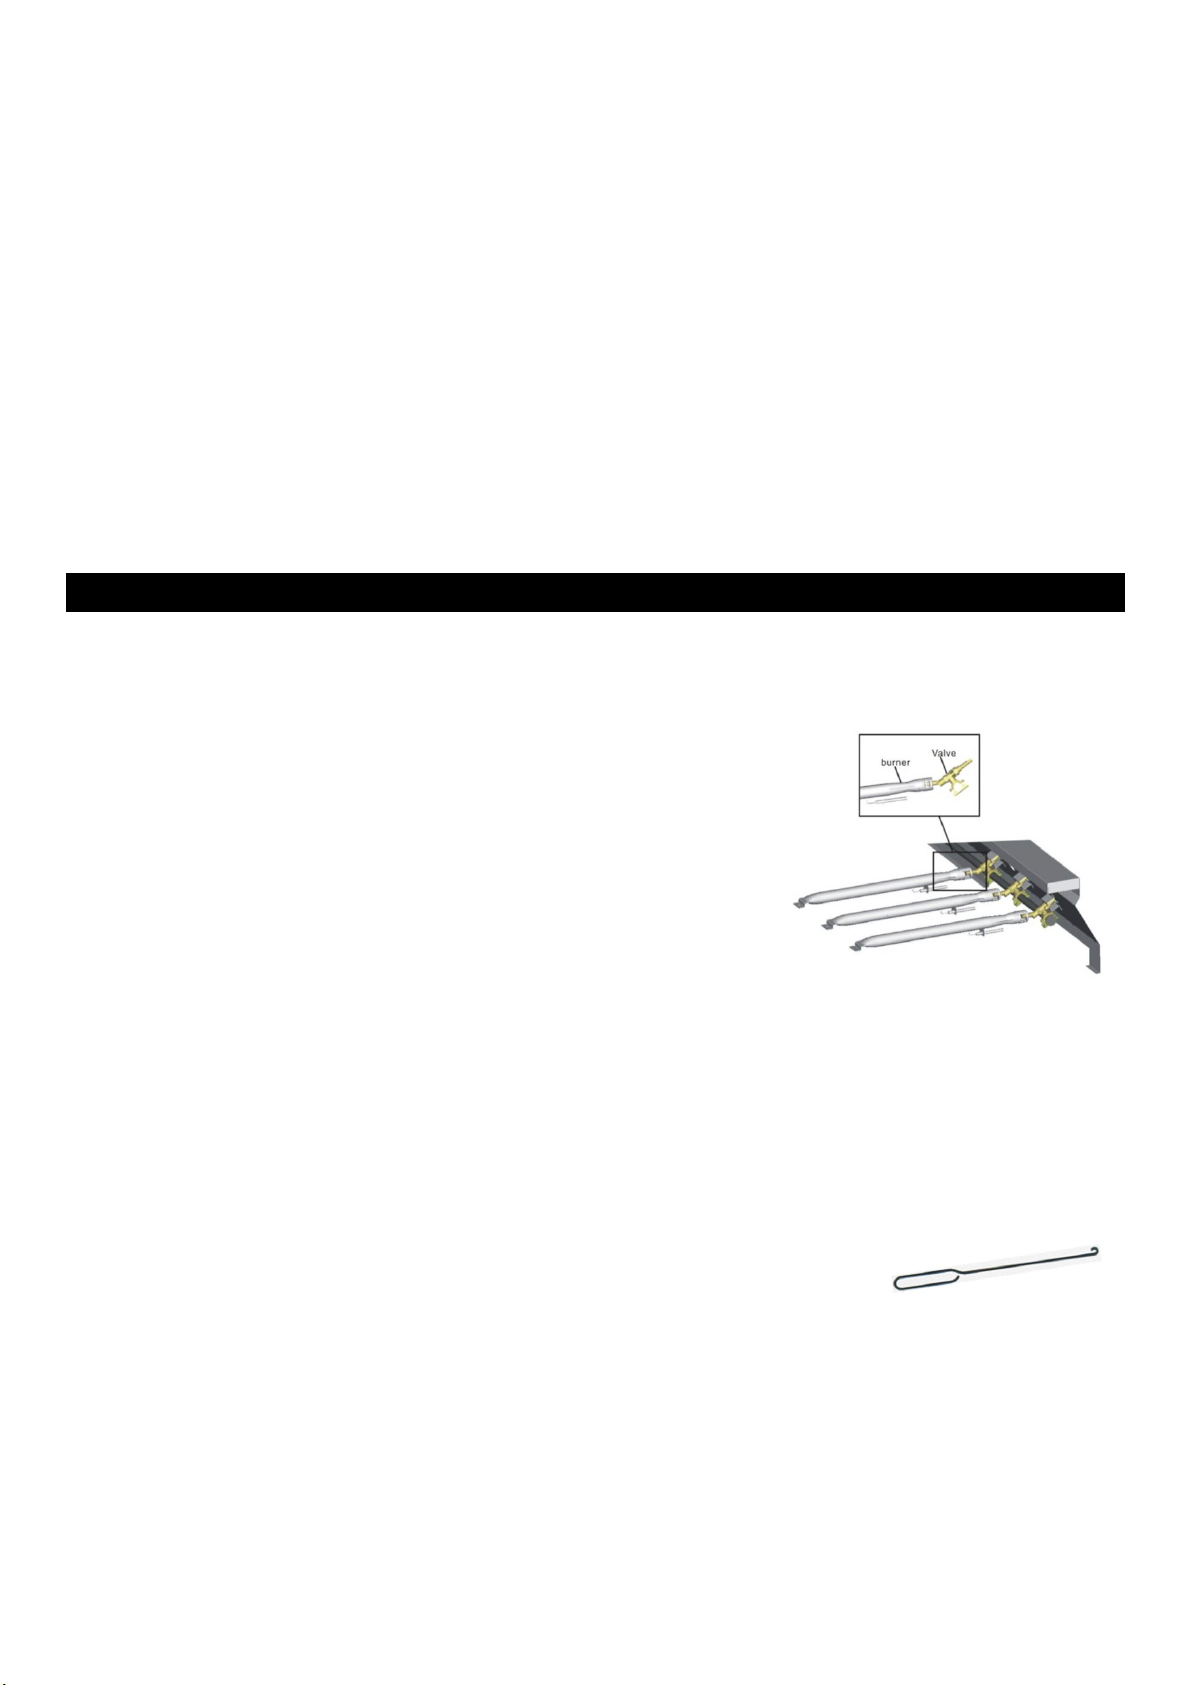
3. Remove screw at end of burner using a screwdriver.
4. Carefully lift each burner up and away from valve openings.
5. Wire brush entire outer surface of burner to remove food residue
and dirt.
6. Clean any blocked ports with a stiff wire such as an open paper clip.
7. Check burner for damage, due to normal wear and corrosion, some
holes may become enlarged. If any large cracks or holes are found
replace burner.
8. Carefully refit burners.
9. Replace screw at the end of burner.
10. Replace grease tray and cooking grates.
Inspect burner for any damage (cracks or holes). If damage is found, replace with a new burner. Reinstall
the burner, check to ensure that the Gas valve orifices are correctly positioned and secured inside the
burner inlet.
We suggest three ways to clean the burner tubes. Use the one easiest for you.
a. Bend a stiff wire (a lightweight coat hanger works well) into a small hook.
Run the hook through each burner tube and burner several times.
b. Use a narrow bottle brush with a flexible handle (DO NOT use a brass wire
brush), run the brush through each burner tube and burner several times.
c. Wear eye protection: use an air hose to force air into the burner tube and out the air ports. Check
each port to make sure air comes out each hole.
9
CAUTION
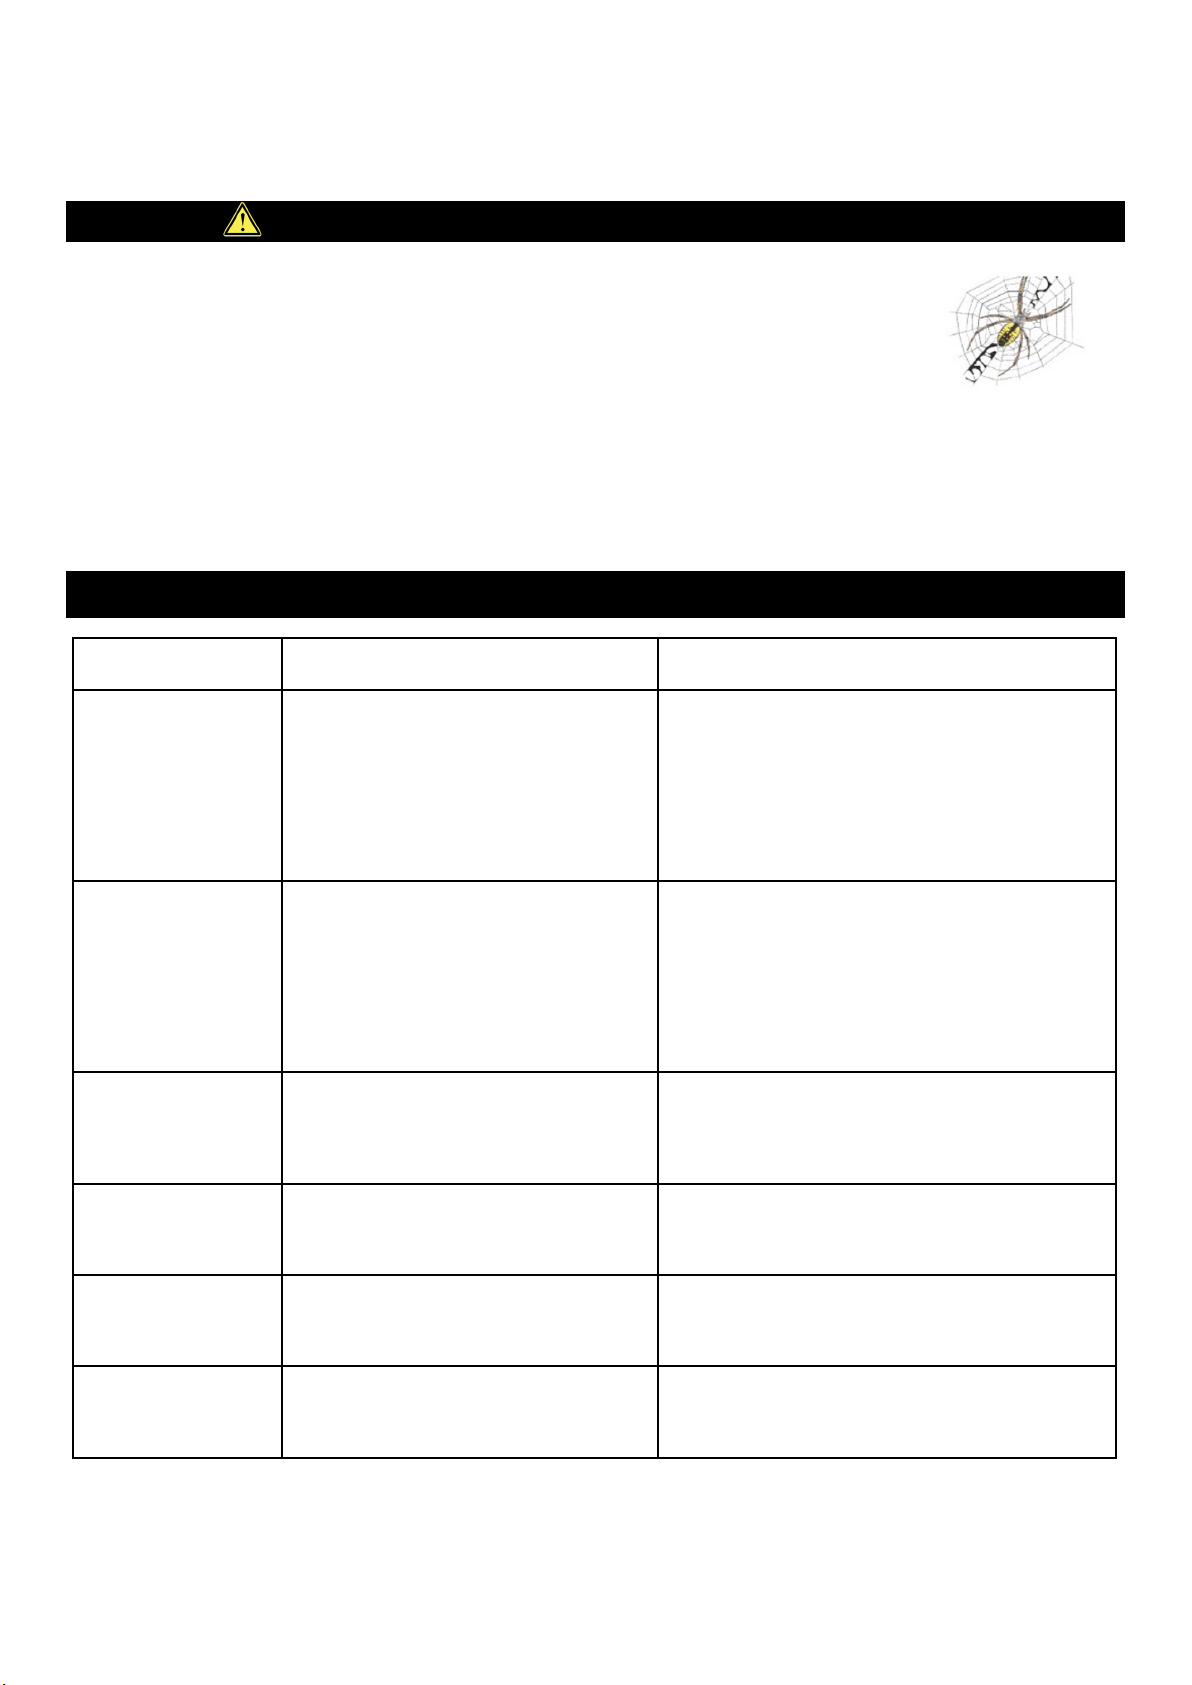
NATURAL HAZARD SPIDERS
•FACT: sometimes spiders and other insects climb into the grill tubes attached to
the burners. The spiders spin webs, build nests and lay eggs. The webs or nests can
be very small, but they are very strong and can block the flow of the gas.
•Clean burners prior to use after storing, at the beginning of the grill season or after
a period of one month unused.
•Spider guards are on the air intakes in an effort to reduce this problem, but it will not eliminate it!
An obstruction can result in a “flashback” (a fire in the burner tubes). The grill may still light, but the
obstruction does not allow full gas flow to the burners.
3. TROUBLE SHOOTING
Problem Possible Cause Prevention/Solution
Burner(s) will not
light.
•No gas flow.
•Coupling nut and regulator not
fully connected.
•Obstruction of gas flow.
•Disengagement of burner to valve.
•Is grill assembled correctly?
•Check to see if LP tank is empty.
•Turn the coupling nut about one-half to
three quarters additional turn until solid
stop. Tighten by hand only-do not use tools.
•Clear burner tube(s).
•Reengage burner and valve.
•Check steps in assembly instructions.
Sudden drop in gas
flow or low flame.
•Out of gas.
•Excess flow valve tripped.
•Check for gas in LP tank.
•Turn off knobs, wait 30 seconds and light
grill. If flames are still low, turn off knobs
and LP tank valve. Disconnect regulator.
Reconnect regulator and leak test. Turn on
LP tank valve, wait 30 seconds and then
light grill.
Flames blow out. •High or gusting winds.
•Low on LP gas.
•Excess flow valve tripped.
•Turn front of grill to face wind or increase
flame height.
•Refill LP tank.
•Refer to ”Sudden drop in gas flow” above.
Flare-up. •Grease buildup.
•Excessive fat in meat.
•Excessive cooking temperature.
•Clean grill.
•Trim fat from meat before grilling.
•Adjust (lower) temperature accordingly.
Persistent grease fire. •Grease trapped by food buildup
around burner system.
• Turn knobs to OFF. Turn gas off at LP tank.
Leave lid in position and let fire burn out.
•After grill cools, remove and clean all parts.
Flashback...
(fire in burner
tube(s)).
•Burner and/or burner tubes are
blocked.
•Turn knobs to OFF. Clean burner and/or
burner tubes.

10
4. TECHNICAL INFORMATION
Appliance Name Outdoor Use Gas Grill
Model No. CGU301i-F2G-1/SUNC-FGCG7630S/
SUNC-FGCG7929BLACK
Appliance Category I3+(28-30/37) I3B/P(30) I3B/P(50)
Type of Gas Butane Propane Butane, Propane or
their mixtures
Butane, Propane or their
mixtures
Gas Pressure 20-30mbar 37mbar 30mbar 50mbar
Heat input Main burner: 3.5kW x3
Back burner: 3.5kW x1
Main burner: 3.5kW x3
Back burner: 3.5kW x1 Main burner: 3.5kW x3
Back burner: 3.5kW x1
Total Heat Input (Qn) 14kW
(1019 g/h)
14kW
(1019 g/h)
14kW
(1019 g/h)
Main
burner Injector
0.93mm 0.93mm 0.82mm
Back burner injector 0.93mm 0.93mm 0.82mm
5. PART LIST
1. Warming rack, x2
2 & 3. Cooking grid, x4
4. Flame tamer, x3
5. Lid, x2
6. Side table, x2
7. Charcoal Basket
8. Fat tray, x2
9. Storage cabinet, x1
CGU301i-F2G-1/SUNC-FGCG7892S-
GER/SUNC-FGCG7930BLACK-GER
Electrical Supply 1.5 V Battery
This manual suits for next models
4
Table of contents
Languages:
Popular Grill manuals by other brands


Kenmore
Kenmore 415.16123800 Use and care guide

Tucker Barbecues
Tucker Barbecues GTR Series Assembly, installation and operating instructions

Monogram
Monogram ZGG540NCP1SS owner's manual

Equipex
Equipex Sodir Savoy Operation manual

Gaggenau
Gaggenau VR 414 610 use and care manual

Miele
Miele KM 408-1 operating instructions


