Myron Mixon Smokers BARQ-1700 User manual

BARQ-1700, BARQ-2400, BARQ-3600
FOR OUTDOOR USE ONLY
A MAJOR CAUSE OF FIRES IS FAILURE TO MAINTAIN REQUIRED CLEARANCES (AIR SPACES) TO
COMBUSTABLE MATERIALS. IT IS OF UTMOST IMPORTANCE THAT THIS PRODUCT BE
INSTALLED ONLY IN ACCORDANCE WITH THESE INSTRUCTIONS.
SAVE THESE INSTRUCTIONS

www.myronmixonsmokers.com | 2
IMPORTANT SAFETY INFORMATION
READ ALL INSTRUCTIONS BEFORE INSTALLING AND USING THE APPLIANCE
Please read this entire manual before installation and use of this pellet-burning appliance. Failure to follow
these instructions could result in property damage, bodily injury or even death. Contact local building or fire
officials about restrictions and installation inspection requirements in your area.
WARNINGS AND DANGERS
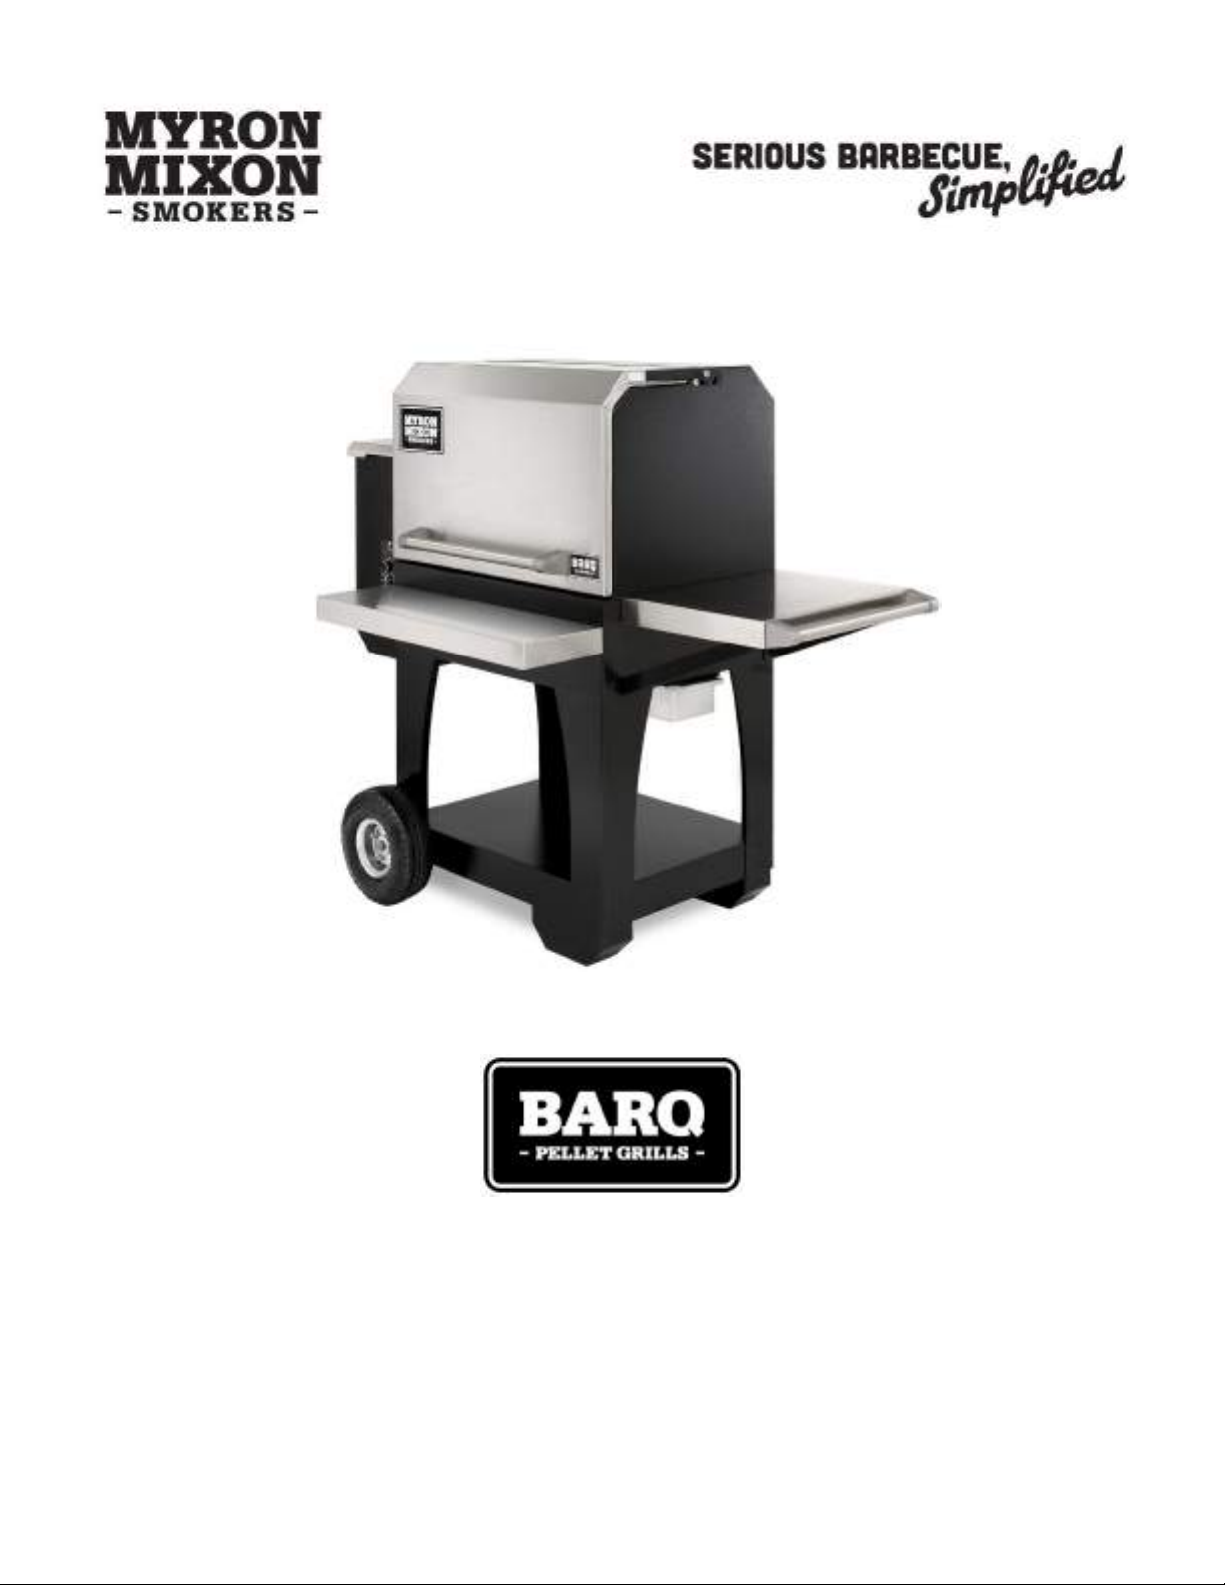
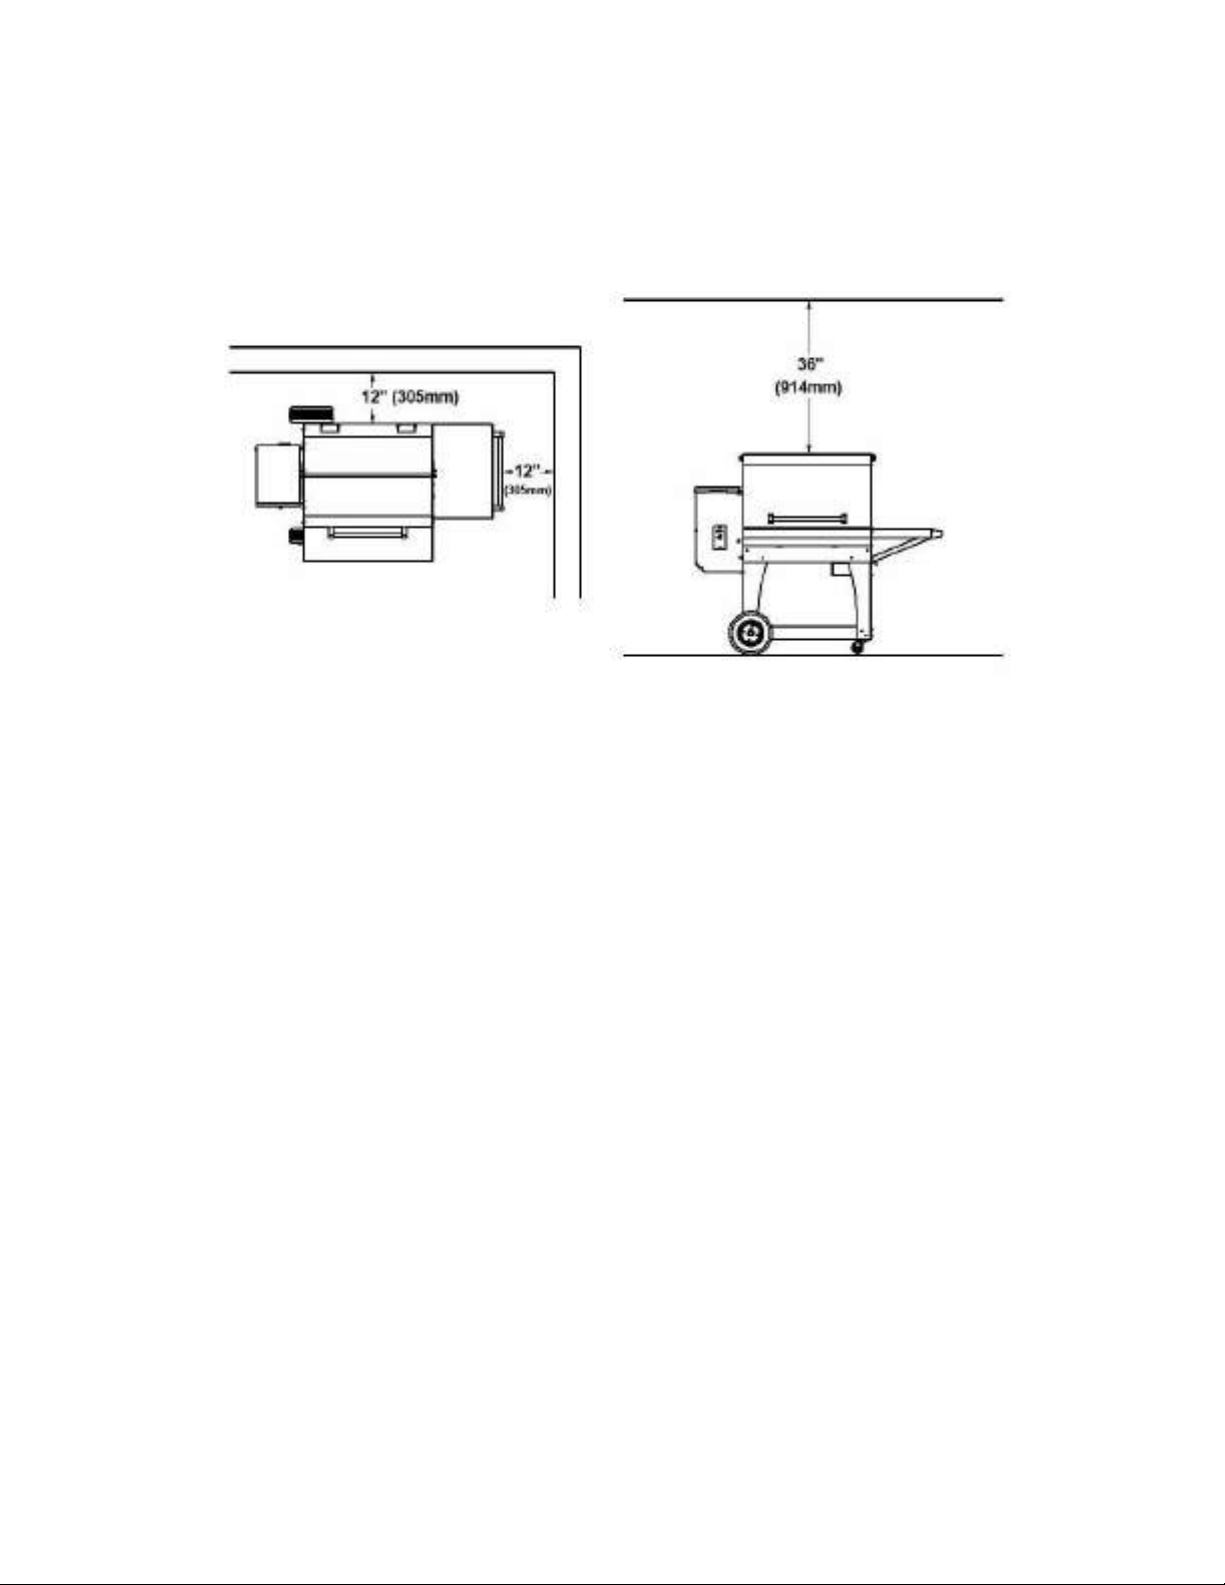
Only use your Myron Mixon Barq Pellet Grill
outdoors on a noncombustible floor, away from
combustible materials.
Never use gasoline, gasoline–type lantern fuel,
kerosene, charcoal lighter fluid, or similar liquids to
start or “freshen up” a fire in this appliance. Keep
all such liquids well away from the appliance when
in use.
Do not use accessories not specified for use with
this appliance.
Use Only High Quality Food Grade BBQ Pellets,
such as Myron Mixon BBQ Pellets, with a Mean
Heating Value ≥ 8000 Btu/lb and Ash Content ≤
2.0%. Do Not Use Pellet Fuel Labeled As Having
Additives.
Keep this grill clean. See the cleaning instructions
in this Owner’s Manual.
Always store wood pellets in a dry location away
from heat–producing appliance and other fuel
containers.
Hazardous voltage is present, which can shock,
burn, or cause death. Disconnect the power cord
before servicing the grill.
If the power cord is damaged, it must be replaced
by the manufacturer, service agent or similarly
qualified persons to avoid a hazardous condition.
Do not move or transport the grill while it is
operating or hot. Make sure the fire in the fire pot
is completely out and the grill is cool before
moving.
Parts of the grill become very hot during operation.
Keep children and pets away while in use
CARBON MONOXIDE
WARNING! Follow these guidelines to prevent this
colorless odorless gas from poisoning you, your
family or others.
Know the symptoms of carbon monoxide
poisoning: headache, dizziness, weakness, nausea,
vomiting, sleepiness, and confusion. Carbon
Monoxide reduces the blood’s ability to carry
oxygen. Low blood oxygen levels can result in loss
of consciousness and death.
See a doctor if you or others develop cold or flu-
like symptoms while cooking or in the vicinity of
this appliance. Carbon Monoxide poisoning, which
can easily be mistaken for a cold or flu, is often
detected too late.
Alcohol consumption and drug use increase the
effects of carbon monoxide poisoning.
Carbon monoxide is especially toxic to mother and
child during pregnancy, infants, the elderly,

www.myronmixonsmokers.com | 3
smokers, and people with blood or circulatory system problems, such as anemia, or heart disease.
When operating this grill, maintain a minimum distance of 12 inches (305mm) to combustibles.
If this grill is operated under overhead combustibles, a minimum distance of 36 inches (914mm) is required.
CREOSOTE –Formation and need for removal.
When wood pellets are burned slowly, they
produce tar and other organic vapors that combine
with expelled moisture to form creosote. The
creosote vapors condense in relatively cool grill
flues of a slow burning fire. As a result, creosote
residue accumulates on the flue lining. When
ignited, this creosote makes an extremely hot fire.
The grill flues should be inspected at least twice a
year to determine when grease and/or creosote
buildup has occurred. When grease or creosote
has accumulated, it should be removed to reduce
risk of fire.
DISPOSAL OF ASHES
Ashes should be placed in a metal container with a tight-fitting lid. The closed container of ashes should be
placed on a non-combustible floor or on the ground, well away from all combustible materials, pending final
disposal. When the ashes are disposed by burial in soil or otherwise locally dispersed, they should be retained
in the closed container until all cinders have thoroughly cooled.

www.myronmixonsmokers.com | 4
Table of Contents
Important Safety Information ............................................................................................................................... 2
Grill Components.................................................................................................................................................... 5
Unpacking and Assembly ....................................................................................................................................... 7
Unpacking the Grill.............................................................................................................................................. 8
Installing the Legs, Wheels and Lower Shelf ....................................................................................................... 9
Front and Side Shelf Installation ...................................................................................................................... 15
Attaching the Lid Handle ................................................................................................................................... 18
Installing the Cooking Components .................................................................................................................. 18
Grill Features ........................................................................................................................................................ 21
Specifications and Capacity ................................................................................................................................. 22
Controller Features .............................................................................................................................................. 23
Operating Instructions ......................................................................................................................................... 25
Priming the Grease Trap.................................................................................................................................... 25
Operation Standard Controller ......................................................................................................................... 25
Operation Premium Controller ......................................................................................................................... 28
Hopper Cleanout ............................................................................................................................................... 30
Cleaning, Maintenance and Best Practices ......................................................................................................... 31
Premium Controller Wi-Fi Module ...................................................................................................................... 33
Troubleshooting ................................................................................................................................................... 42
Wiring Diagram..................................................................................................................................................... 45
Warranty............................................................................................................................................................... 47
We would like to congratulate you on the purchase of your new Myron Mixon Barq Pellet Grill. With proper
operation and maintenance, your grill will provide you with delicious barbecue and years of enjoyment.
Our goal is to ensure that you are satisfied and that your “Barbecue is Simplified”
We’ll help you get started with this Owner’s Manual.

www.myronmixonsmokers.com | 5
Grill Components
BARQ-1700
Item
Description
Item
Description
1
Grill Main Body
13
Grease Pan
2
Grill Lid Handle
14
Leg #1
3
Cook Racks
15
Leg #2
4
Drip Pan
16
Leg #3
5
Flame Deflector
17
Leg #4
6
Grease Funnel
18
Bottom Shelf
7
Grease Trap
19
Axle
8
Front Shelf
20
Thick Washer
9
Grease Funnel Rail
21
10” Flat Free Tire
10
Side Shelf
22
Cotter Pin
11
Side Shelf Handle
23
Skids
12
Side Shelf Supports

www.myronmixonsmokers.com | 6
Grill Components
BARQ-2400 and BARQ-3600 (BARQ-2400 Shown)
Item
Description
Item
Description
1
Grill Main Body
13
Grease Pan
2
Grill Lid Handle
14
Leg #1
3
Cook Racks
15
Leg #2
4
Drip Pan
16
Leg #3
5
Flame Deflector
17
Leg #4
6
Grease Funnel
18
Bottom Shelf
7
Grease Trap
19
Axle
8
Front Shelf
20
Thick Washer
9
Grease Funnel Rail
21
10” Flat Free Tire
10
Side Shelf
22
Cotter Pin
11
Side Shelf Handle
23
Caster Mount
12
Side Shelf Supports
24
Locking Swivel Casters

www.myronmixonsmokers.com | 7
Unpacking and Assembly
Tools required: Pliers, 7/16” wrench, 5/32” and 3/16” hex keys.
Assistance from another person will be required for certain steps during assembly.
Hardware (included):
BARQ-1700
#
QTY
Description
Picture
1
23
1/4"-20 x 5/8” Button Head Screw
2
39
1/4"-20 Flange Nuts
3
4
3/4” Thick Washer
4
4
5/16” x 1” Shoulder Bolt
5
2
1/8” Cotter Pin
BARQ-2400 & BARQ-3600
#
QTY
Description
Picture
1
23
1/4"-20 x 5/8” Button Head Screw
2
34
1/4"-20 Flange Nuts
3
4
3/4” Thick Washer
4
4
5/16” x 1” Shoulder Bolt
5
2
1/8” Cotter Pin
6
8
5/16”-18 x 5/8” Button Head Screw

www.myronmixonsmokers.com | 8
Unpacking the Grill:
1. Position the box on a flat area where
there is plenty of space to work safely.
Ensure the box is upright.
2. Cuts the straps securing the box top to
the base.
3. Lift the top of the box off of the base.
4. Remove all the components and packing
material from around and on top of the
main body of the grill. The packing
material can be discarded. Lay out the
components in an organized manner to
aid in assembly.
5. The main body of the grill is
left in the upside down
positon on the box base to
prevent damage during
assembly.

www.myronmixonsmokers.com | 9
Installing the Legs, wheels and Lower Shelf:
6. Install Leg-3 and Leg-4 (legs
have the number cut in
them for easy identification)
to the opposite side of the
Hopper using (4) Screw #1
and (8) Flange Nut #2.
Loosely tighten hardware.
7. Attach Leg-1 and Leg-2 (legs have the number cut in them for easy identification) to hopper side of
the grill using (4) Screw #1 and (8) Flange Nut #2. Loosely tighten flange nuts. NOTE: The BARQ-1700
(2) leg mounting holes closest to the center have nuts welded in the hopper, so Screw #1 will be
installed into the weld nuts and only (6) Flange Nut #2 will be required.

www.myronmixonsmokers.com | 10
8. With the assistance of a second person, install the lower shelf. Use the axle on the Leg-1 and Leg-2
side to hold the shelf in place. The studs will help hold the shelf in place on the Leg-3 and Leg-4 side.
BARQ-1700 (If assembling a BARQ-2400 or BARQ-3600 skip to Step 11)
9. With a second person holding the axle
side of the lower shelf, install the skids on
the opposite side of the lower shelf.
10. Attach the studs using (4) Screw #1 and
(12) Flange Nut #2. Loosely tighten
hardware.
Axle
Screw #1
Flange
Nut #2
Studs
Insert Screw #1
here

www.myronmixonsmokers.com | 11
BARQ-2400 and BARQ-3600
11. With a second person holding the axle side of the lower shelf, install the caster mounting plates over
the lower shelf studs and attach with (2) Screw #1 and (4) Flange Nut #2. Loosely tighten hardware.
All Models
12. Use (6) Screw #1 and (6) Flange Nut #2 to attach Leg-1 and Leg-2 to the lower shelf on the axle side.
Loosely tighten hardware.

www.myronmixonsmokers.com | 12
13. Fully tighten all installed hardware.
BARQ-2400 and BARQ-3600 (If Assembling a BARQ-1700 Skip to Step 15)
14. Secure the swivel locking casters with (8) Screw #6. Fully tighten hardware.

www.myronmixonsmokers.com | 13
All Models
15. With the axle in place, slide two Thick Washer #3 onto the axle, one on each side.
16. Install 10” tire and wheel onto each side of the axle. The grease fitting side of the wheel hub should
be facing inward toward the grill.
17. Install Thick Washer #3 onto each side of the axle.
18. Install Cotter Pin #5 in each end of the axle and bend one tab of the cotter pin to secure.
Thick Washer #3
Thick Washer #3
Cotter Pin #5

www.myronmixonsmokers.com | 14
19. With the assistance of a second person, carefully turn the grill over to the upright position.

www.myronmixonsmokers.com | 15
Front and Side Shelf Installation:
20. Remove protective vinyl from front and side Shelf.
21. Install side shelf supports and secure with (1) Screw #1 and (1) Nut #2. Remove the screw closest to
the back of the unit that was previously installed in the leg and reinstall it with the support in place.

www.myronmixonsmokers.com | 16
22. Install the funnel rail from the inside of the smoker so the studs protrude through the right side of
the grill.
23. Install the side shelf to the outside of the smoker on the supports. Loosely secure with (3) Flange Nut
#2 on underside of shelf.
24. Attach one of the handle blocks to the side shelf. Loosely secure with (2) Screw #1 from under side
of shelf. The Barq-1700 will use the outer set of holes in the support, the Barq-2400 and Barq-3600
will use the inner set of holes. Insert the handle tube into the previously installed hand block and
install the handle block on the opposite side of the handle tube with (2) additional Screw #1.
Funnel Rail
Studs from Funnel Rail

www.myronmixonsmokers.com | 17
25. Fully tighten all shelf hardware.
26. Open the cook door. Install the front shelf onto the unit. Secure with (3) Flange Nut #2. Fully
tighten hardware.

www.myronmixonsmokers.com | 18
Attaching the Lid Handle
27. Attach one of the handle blocks to the cook door. Loosely secure with (2) Shoulder Bolt #4. Insert
the handle tube into the previously installed hand block and install the handle block on the opposite
side of the handle tube with (2) additional Shoulder Bolt #4.
Installing the Cooking Components
28. Install grease trap into square cut out at the bottom right side of the inside of the Grill.

www.myronmixonsmokers.com | 19
29. Install grease funnel into the grease
trap. The flange on the grease funnel
should rest on the hem inside the
cook chamber.
30. Install flame deflector. Rest the flame
deflector into the four notches at the
center of the cook chamber. For the
BARQ-3600, make sure the open side
of the flame deflector is facing
toward the right and the closed side
is fitted over the auger assembly.
BARQ-1700 & BARQ-2400: BARQ-3600:

www.myronmixonsmokers.com | 20
31. Install drip pan above the flame deflector. Align the
right flange pointed downward and over the grease
funnel. The tab on the left side of the cook chamber
should fit into the slot of the drip pan.
32. Slide the grease pan into place from the bottom right
side of the grill.
33. Install racks in the cook chamber.
This manual suits for next models
2
Table of contents
Other Myron Mixon Smokers Grill manuals
Popular Grill manuals by other brands

Gourmia
Gourmia GEG1800 user manual

Rowenta
Rowenta ULTRA COMPACT HEALTH GRILL CLASSIC manual

Sunday
Sunday Dragon 60 Assembly instruction

Kenyon International
Kenyon International City Grill Use & care guide - installation manual

Tramontina
Tramontina TCP 320 Safety and instruction manual

Uniflame
Uniflame CBC741W owner's manual