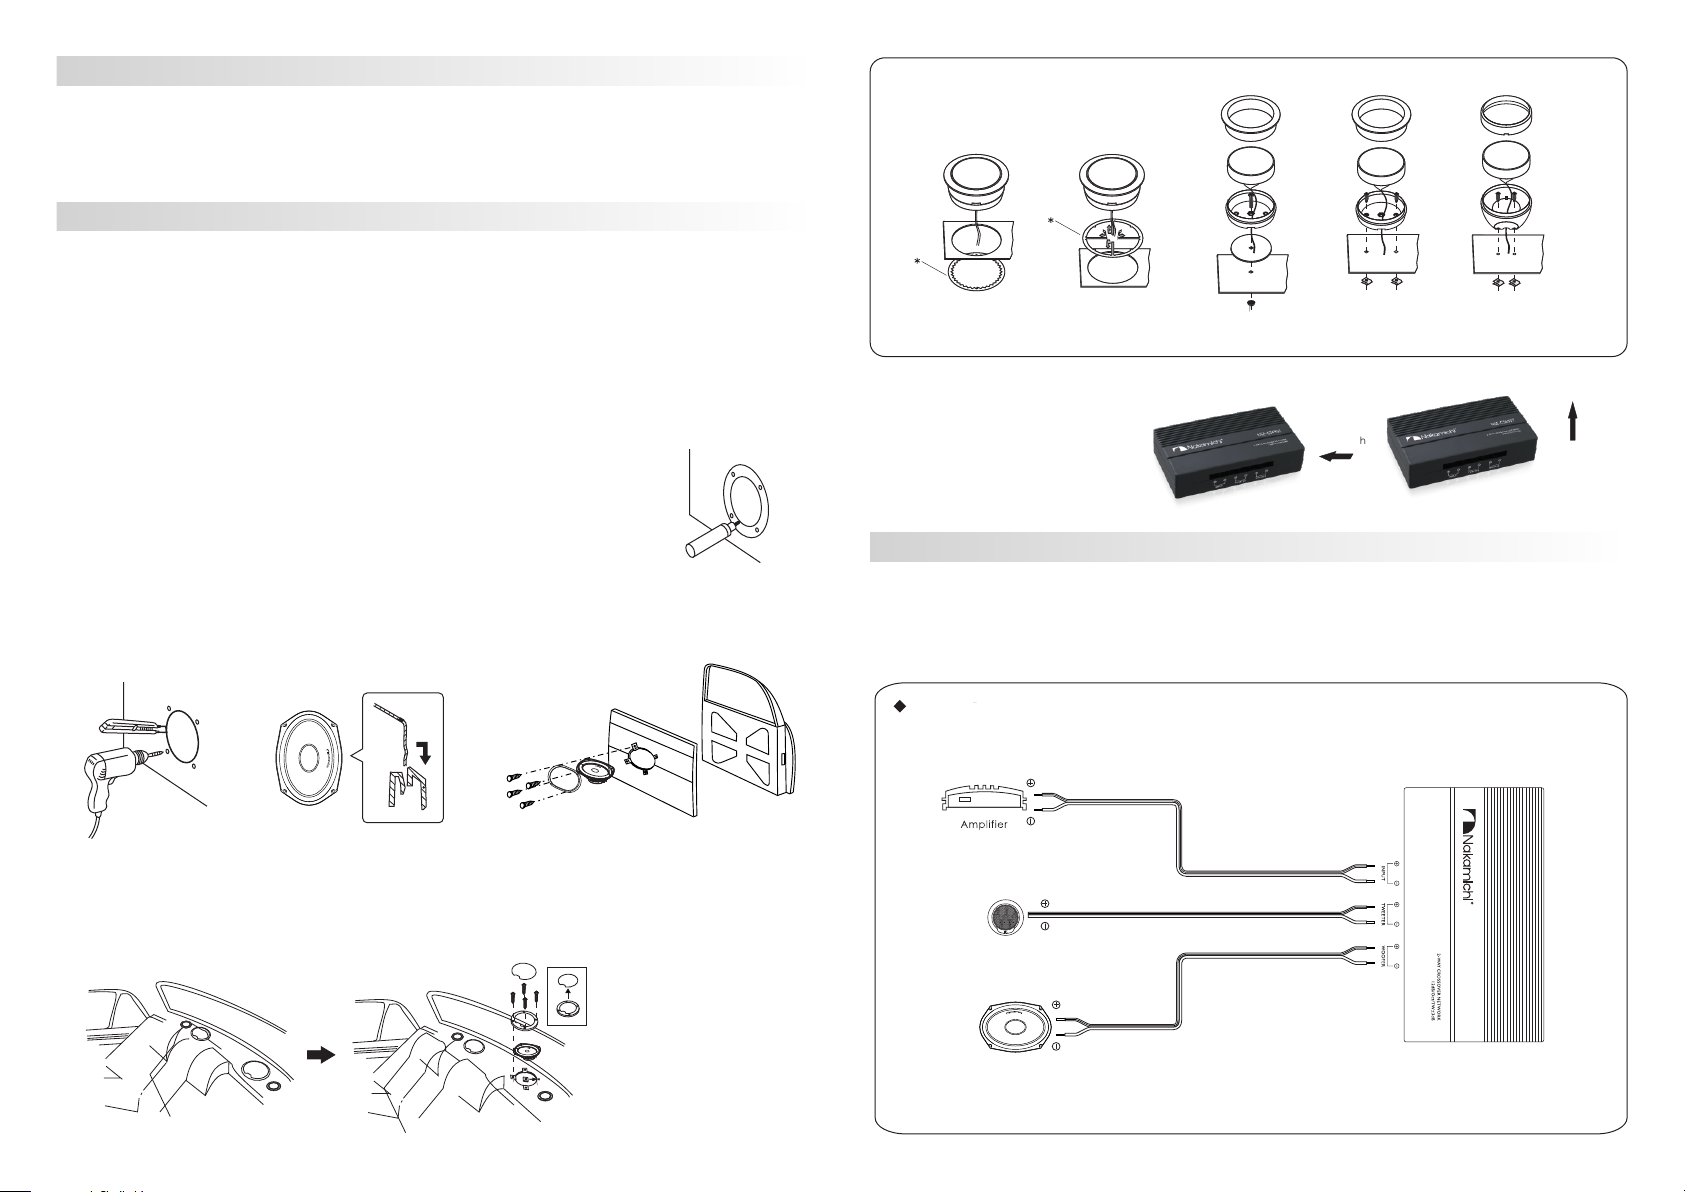
★ Consult the diagram below. Be sure to connect corresponding terminals, i.e. ''+'' to ''+'' and ''-'' to ''-''. Connection
with reversed polarity will degrade the quality of production.
★ Connect the provided speaker cord to the speaker terminal while holding the lower portion of the speaker terminal.
You can mount the woofers on the front/rear door of your car.
Option 1: Mount the woofer on door (front or rear)
1. Turn off the car ignition key.
★ If the power is on, the click noise generated by the connection may damage the speakers.
2. Cut out the mounting template from the packing box.
3. Paste the template on the location selected for mounting the speaker.
4. Mark the cut-off hole and the 4 bolt holes. (Fig.1)
5. Cut out the marked area and drill the bolt holes. (Fig.2)
6. Remove the grille net. (Fig.3)
7. Connect the woofers to the network or car audio.
(See ’How to complete the wiring.’)
8. Mount on the speaker as shown below. (Fig.4)
9. Press and insert the edges of the grille net.
★ The speaker grille can be mounted without the grille net, if you like.
Installation
Check and identify the contents of your package:
1. Installation manual(x1); 2. Speaker(x2); 3. Grille net + Frame(x2);
4. Tweeter (with wire)(x2); 5. Screw(Ø4×35mmx12 pcs); 6. Shrapnel(x12);
7. 1.5m wire(x2); 8. 2m wire(x2); 9.Angle adapter(x2) 10.Crossover (x2)
What’s in the box
You can also mount the speakers into the surface of the rear tray.
Follow the steps in section “Option 1: Mount on door” to mount the speakers into the rear tray.
Option 2: Mount the woofer on rear tray
★ Make sure that nothing obstructs around the mounting location of the door.
★ A hole for mounting may already be cut out of the inner panel of the door(front or rear). In this care, you need to
modify the board only.
★ Ensure that the speaker terminals, frame or magnet do not interfere with any inner parts, such as the window), etc.
Also ensure that the speaker grille does not touch any inner fittings, such as the window cranks, door handles, arm
rests etc.
Fig.1
Fig.2 Fig.3
Mount the Tweeter
Mount the Crossover
Option 1:
Flush mounting
(*not included)
Option 2:
Flush mounting
(*not included)
Option 3:
Surface mounting
Option 4:
Surface mounting
push
Option 5:
Angle mounting
How to complete the wiring.
Fig.4
1. Find a proper location to mount
the networks.
2. Mount the networks onto the car
with the supplied screws.
Connect the woofers and the tweeters to the 2-way crossover network first, then connect the network to
your amplifier or car audio directly.
up
NSE-CS6957
Woofer
Tweeter
NS E-CS 695 7


