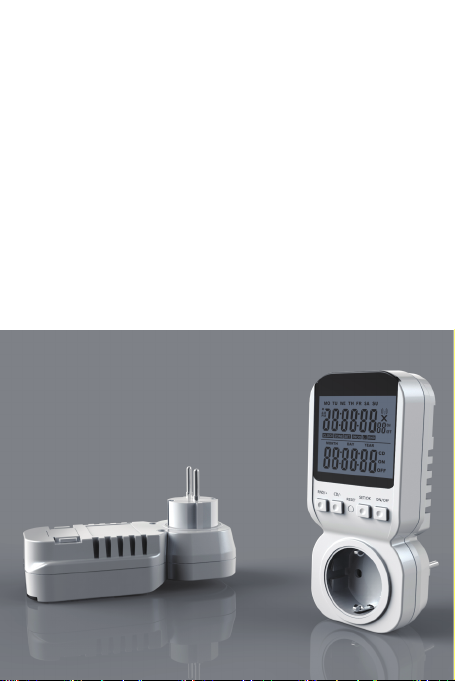
NASHONE MTS300 User manual

Digital Weekly Timer Switch
Consumer Electronics
User Manual

2
Contents
Introducon
Before first use
Safety notes
Proper use
Parts
Baeries
Set the clock and date
DST(Daylight saving me)
Program switch ON and OFF mes
Program countdown (CD)
Program random
Deacvate programs
Clearning and care
Disposal
03
03
04
06
06
08
09
10
10
11
13
15
16
17
18
19
19
MODE squence
Technical paramters
Trouble shoong

3
Introducon
Congratulaons on the purchase of your new
Mul-funcons Timer Switch with big LCD with
backlight.
The product is designed to automacally turn
a connected electrical device on or offat de-
signated mes. Lights that should turn on and
off every day at the same me can be autom-
acally controlled by the digital weekly mer.
Other devices can be acvated using the digital
weekly mer as well: for example your radio,
so that you wake up to your favorite staon or
show, or your aquarium lighng.
With twenty different switch on and off mes,
three different random modes and a countdown
mode,the digital weekly mer offers countless
other opons.
Before first use
Remove all liners and packaging materials and
check the device for damage. Clean the device as
described under Cleaning and care.
Follow all the below Safety notes while doing so.

Safety notes
Before you use your digital mer switch,
please observe the following points:
1. Read the user manual thoroughly before use.
Follow all safety instrucons to prevent injury
due to incorrect use.
2. If you give the device to a third party you must
include this user manual.
3. No liability can be accepted for possible damages
due to unintended or incorrect use.
4. This appliance is not intended for use by persons
(including children) with reduced physical, sensory
or mental capabilies, or by those with a lack of ex-
perience and knowledge, unless they have been
given supervision or instrucon concerning use of
the appliance by a person responsible for their
safety.
5. Children should be supervised to ensure that they
do not play with the appliance.
6. The device is not waterproof, do not place near
water or other liquids, or at locaons where water
or other liquids may gather. Keep a minimum dis-
tance of 5 m away from swimming pools and ponds.
7. Do not submerge the device in water.
8. Shield the device from moisture.
9. Do not expose the device to direct sunlight.
4

10. Do not use the device in the vicinity of heat-
producing devices such as ovens or stoves.
11. Do not use the device if it is damaged.
12. Never aempt to repair the device yourself.
Repairs may only be carried out by a qualified
professional.
13. Do not open the device.
14. Do not drop the device or subject it to any
mechanical load.
15. Follow all safety instrucons & instrucons of
all the devices you connect the product to.
16. For safety and licensing reasons (CE), it is not
permied to change or modify the device.
17. Never connect more than one mer device in
succession.
18. The integrated baeries may be replaced or
removed only by a professional.
This device is suitable exclusively for private
household use.
Danger of suffocaon! Keep all packaging
material away from children. Dispose of
the packaging materials in an appropriate way.
Contact your local authories about collecon
points or waste separaon.
5

Proper Use
This device is intended for the automac switching on
and off of other connected electrical devices.
This device is suitable for use with electrical devices
with a maximum power consumpon of 1800W/15A.
Parts
5
4
1
2
3
6
7
1
2
3
5
4
6
7
LCD display
RND/+ buon
CD/- buon
RESET buon
SET/OK buon
ON/OFF buon
EU plug/socket
RESET
SET/
OK
RND/
+
CD/
-
ON/
OFF
CD
OFF
ON
MONTH DAY YEAR
6

A.
B.
C.
D.
E.
F.
G.
H.
I.
J.
K.
L.
M.
N.
O.
P.
Q.
R.
A
B
C
D
F
G
I
H
L
M
N
O
P
Q
R
E
J
K
CD
OFF
ON
MONTH DAY YEAR
Weekday
RCC symbol (Oponal)
Program deacvaon
ON/OFF status
Program number
RND mode
Long Random
Symbol for Month, Day, Year
Countdown mode (CD)
ON symbol for CD
OFF symbol for CD
CD me & Month,Day, Year
PROG
SET
ZONE(me zone,oponal)
Clock symbol
AM/PM
DST symbol(Daylight Saving Time)
7

Baeries
• Only use baeries of the best quality. Low-grade
baeries could leak, causing damage to the device.
• Do not dispose of baeries with your household
waste! Please dispose of baeries in an environ-
mentally friendly way and in accordance with
current legislaon.
• Do not recharge baeries or aempt to reacvate
them in any other way, do not take baeries apart,
throw them in fire or short-circuit baeries.
• Do not use old and new baeries or baeries of
different types simultaneously.
• Before disposing of the device, remove the baeries.
Reset
Push the RESET buon (4) to simultaneously delete
all programs and sengs,back to factory default
sengs.
8

1. Set the year using the RND/+ or CD/-
2. Press SET/OK buon
3. Set the month using RND/+ or CD/-
4. Press SET/OK buon
5. Set the day using RND/+ or CD/-
6. Press SET/OK buon
7. Set the weekday using RND/+ or CD/-
8. Press SET/OK buon
9. Set the 12hr/24hr using RND/+ or CD/-
10. Press SET/OK buon
11. Set the hours using RND/+ or CD/-
12. Press SET/OK buon
13. Set the minutes using RND/+ or CD/-
14. Press SET/OK buon,back to clock seng.
For examples, we set March.2nd,2017,10:40:00AM
Set the Clock and Date
MONTH DAY YEAR
In clock mode,Push SET/OK buon for 3 seconds,
go to clock and date seng mode.
Mark:
During me seng, if no
operaon for 30 seconds
The digital weekly mer
switches automacally
back to clock mode display.
9

• While in me mode, push and hold the RND/+
and CD/- at the same me,daylight saving me
symbol (R) appears on the display (1). The me
of day is automacally set forward an hour.
• Repeat this step to reset to the normal me, the
daylight saving me symbol (R) disappears from
the display.
Push and hold the SET/OK buon (5) and push
the RND/+ buon (2) repeatedly. Push and hold to
toggle through more quickly. The sequence of
modes is shown:
Time mode: CLOCK
Switching program mode:
PROG 1 ON - PROG 1 OFF
PROG 2 ON - PROG 2 OFF and so on unl ...
PROG 20 ON - PROG 20 OFF
PROG Random: PROG 21 ON- PROG 21 OFF
Countdown mode: CD
To show the sequence of modes in reverse order,
push and hold the SET/OK buon (5) and push the
CD/- buon (3) repeatedly or push and hold to
toggle through more quickly.
DST (Daylight Saving Time)
Mode Sequence
10

Program switch ON and OFF mes
The digital weekly mer‘s 20 programmable switch-
ing programs are subdivided in:
ON: for switch-on
OFF: for switch-off programs.
1. In clock mode, push and hold the SET/OK buon
and push the RND/+ buon repeatedly.
The display shows the symbols PROG and ON as
well as the switching program number 1.
2. Push the SET/OK buon for approx. 3 seconds
unl the LCD display shows SET next to PROG
and the weekday MO blinks.
3. Set the weekday using RND/+ or CD/- , there are
following selecon, which the switching program is
acvated:
MO = Monday
TU = Tuesday
WE = Wednesday
TH = Thursday
FR = Friday
SA = Saturday
SU = Sunday
MO, TU, WE, TH, FR (Monday to Friday)
MO, TU, WE, TH, FR, SA (Monday to Saturday)
SA + SU (Saturday and Sunday)
MO, TU, WE, TH, FR, SA, SU (Monday to Saturday)
CD
OFF
ON
MONTH DAY YEAR
11

4. Push the SET/OK buon.The hour blinks.
5. Set the hour using RND/+ or CD/-.Push and hold
either buon to toggle through more quickly.
6. Push the SET/OK buon.The minute blinks.
7. Set the minute using RND/+ or CD/-. Push and hold
either buon to toggle through more quickly.
8. Push the SET/OK buon.The second blinks.
9. Set the second using RND/+ or CD/-.Push and hold
either buon to toggle through more quickly.
10. Push the SET/OK buon.
11. Switching program 1(PROG 1 ON) is set.
It will automacally back to program switch mode.
12. Push and hold the SET/OK buon and push
the RND/+ buon repeatedly. The display shows
the symbols PROG and OFF as well as the
switching program number 1.
10. Program the switch-off me by following the steps
for seng the switch-on me.
11. If required, set all 20 programs in the same way.
For examples, we set as below:
PROG 1 ON,MO-SA,14:48:35
PROG 1 OFF,MO-SA,18:22:57
12

The mer has a countdown funcon that allows a
connected electrical device to be turned on or off
automacally aer a set me has run down. The
maximum countdown me is 23 hours, 59 minutes
and 59 seconds.
1. In clock mode, push and hold the SET/OK buon
and push the CD/- buon. The display shows the
symbols CD and PROG. The me sets to 0:00:00
and the mer is in countdown mode.
2. Push the SET/OK buon for approx. 3 seconds
unl the display shows SET, CD and PROG.
In addion, ON or OFF blinks.
3. Push the RND/+ or CD/- buon to select ON/OFF:
ON: The mer turns on when the countdown starts
and turns off when the countdown runs down.
OFF: The mer turns off when the countdown starts
and turns on when the countdown runs down.
4. Push the SET/OK buon.The hour blinks.
5. Set the hour using RND/+ or CD/- . Push and hold
either buon to toggle through more quickly.
6. Push the SET/OK buon.The minute blinks.
Program countdown (CD)
13

7. Set the minute using RND/+ or CD/- . Push and hold
either buon to toggle through more quickly.
8. Push the SET/OK buon.The second blinks.
9. Set the second using RND/+ or CD/- . Push and hold
either buon to toggle through more quickly.
10.Push the SET/OK buon.
The countdown me is now programmed.
For example, we set CD me, 1h:36m:45s ON
• To start the countdown, push the CD/- buon.
• To exit the countdown, push the CD/- buon again.
The preset countdown me is displayed again.
Note:
• All other programs are deacvated during a
countdown.
• If CD blinks on the display during a countdown,
the mer is currently in another mode and
must be switched over.
• A countdown cannot be started if the weekly
mer is in random mode.
• To manually exit a countdown, push CD/- buon.
CD
ON
14

Use the random funcon to turn electrical devices
on and off at different random mes, for example
for security reasons,you are not in home in weekend,
You can use this random funcon to control your
home lighng,prevent thief to go into your house.
Program Random
You can set program me frame in PROG 21 ON/OFF
1. In clock mode,push and hold the SET/OK buon
and push the CD/- buon, to switch to program 21.
The display shows the symbols RANDOM and PROG.
There are three different randome mode:
Short random, RND symbol blinks
Long random, L-RND symbol blinks
Program random,PROG and RND symbol blinks
2. Using the same way to set program 21 ON/OFF me
frame( see Program switch ON and OFF mes)
For example, we set PROG 21 as below
PROG 21 ON,18:00:00;PROG 21 OFF,24:00:00,
SA-SU(Saturday to Sunday)
• When the random funcon is acvated, all other
preset programs are deacvated.
15

You can deacvate preset programs without
deleng the sengs.
Deacvate individual programs:
1. In clock mode, push and hold SET/OK and push
RND/+ or CD/- repeatly, switch to desired
individual program.
2. Push SET/OK and ON/OFF buon at the same me.
There will be X symbol appears on the display,
individual program is now deacvated.
3. Repeat these steps to reacvate individual program.
Deacvate all the programs:
1. In clock mode, push SET/OK and ON/OFF buon
at the same me.
2. There will be X symbol appears on the display,
all the program is now deacvated.
3. Repeat these steps to reacvate all the program.
No. Descripon Switch-on me Switch-off me
1
Short intervals within a
programable me frame
20 – 40 minutes 40 – 80 minutes
240 – 80 minutes 80 – 160 minutes
320 – 40 minutes 40 – 80 minutes
Short intervals in infinite loop
Long intervals in infinite loop
Symbol
RND
L-RND
PROG
RND
Deacvate programs
• To start Short random, push the RND/+ buon
• To start Long Random,push RND/+ buon again
• To start Program random, push the RND/+ again
• Push the RND/+ again, cancel random funcon.
16

Problem: The LCD display has frozen and the buons
don’t respond when you push them.
Soluon: Push RESET buon for 4s to reset the mer.
Problem: The mer switch’s sengs are lost when it is
not connected to the mains
Soluon: Change the baeries.
Problem: The mer switch does not perform the
programmed ON/OFF operaons
Soluon: Make sure that the programmes are not
deacvated. Acvate the programmes
Problem: The mer switch does not perform the prog-
rammed ON/OFF operaons at certain mes.
Soluon: Make sure that the random funcon is not
acvated. Make sure that no other progr-
ammes or countdown funcons are acvated
at the same me.
Troubleshoong
17

Supply voltage: 110-120V/AC, 60 Hz
Switching current: max. 15 A
Switching power: max. 1800 W
Protecon class: I
Baery type: 2pcs x LR44/AG13
Shortest switching me: 1 second
Shortest switching interval: 1 second
Switching programs: 20
Random programs: 3
CD programs: 23hr:59m:59s
Block sengs: Mo - Fr, Mo - Sa, Mo - So and Sa - So
Dimensions (W x H x D): 65 x 146 x 80 mm
Neight Weight: 180 g
Technical Paramters
-
18

Clearning and care
When cleaning, the product must be disconnected
from mains socket and electrical loads.
•
Only use dry and so cloth to clear the housing of
the power adapter.
•
Do not use abrasive or solvents.
•
General
In order to preserve, protect and improve
the quality of environment, protect human
health and ulise natural resources prudently
and raonally, the user should return unser-
viceable product to relevant facilies in acc-
ordance with statutory regulaons.
The crossed-out wheeled bin indicates the
product needs to be disposed separately
and not asmunicipal waste.
Disposal
19

20
Table of contents
Popular Switch manuals by other brands

Procentec
Procentec Profihub B2FO2+ user manual

StarTech.com
StarTech.com DS81000 Instruction guide

Broadcast Pix
Broadcast Pix Slate 3000 Series Installation planning guide

Avaya
Avaya 8000 Series Installing manual

Digitus
Digitus DN-95301 Quick installation guide

Alps Electric
Alps Electric SLLQ Series Specifications