National Geographic 80-20104 User manual

Do not mix old and new batteries.
Do not mix alkaline, standard (carbon-zinc), or rechargeable (ni-cad, ni-mh, etc.) batteries.
Non-rechargeable batteries are not to be recharged.
Please recycle batteries responsibly.
NOT INCLUDED
X2
SUN HAZARD
— Never look directly at the sun
with this device.
WARNING:
CHOKING HAZARD
— Small parts.
Not for children under 3 years.
WARNING:
FUNCTIONAL SHARP POINT
— Not for children
under 3 years.
WARNING:
The lens contains lead that may be harmful.
Wash hands after touching.
WARNING:
This product can expose you to chemicals including lead,
which is known to the State of California to cause cancer.
For more information go to www.P65Warnings.ca.gov.
WARNING:
80-20104
EN
10+
DISCOVERY SET
INSTRUCTION MANUAL
40 MM TABLE TOP TELESCOPE
& 900X MICROSCOPE

2
• SUN WARNING:
WARNING: NEVER ATTEMPT TO OBSERVE THE SUN WITH THIS DEVICE! OBSERVING THE
SUN – EVEN FOR A MOMENT – WILL CAUSE INSTANT AND IRREVERSIBLE DAMAGE TO YOUR EYE OR EVEN
BLINDNESS. EYE DAMAGE IS OFTEN PAINLESS, SO THERE IS NO WARNING TO THE OBSERVER THAT THE
DAMAGE HAS OCCURRED UNTIL IT IS TOO LATE. DO NOT POINT THE DEVICE AT OR NEAR THE SUN. DO NOT
LOOK THROUGH THE DEVICE AS IT IS MOVING. CHILDREN SHOULD ALWAYS HAVE ADULT SUPERVISION WHILE
OBSERVING.
• RESPECT PRIVACY: WHEN USING THIS DEVICE, RESPECT THE PRIVACY OF OTHER PEOPLE. FOR EXAMPLE, DO NOT
USE IT TO LOOK INTO PEOPLE’S HOMES.
• CHOKING HAZARD: CHILDREN SHOULD ONLY USE DEVICE UNDER ADULT SUPERVISION. KEEP PACKAGING
MATERIALS LIKE PLASTIC BAGS AND RUBBER BANDS OUT OF THE REACH OF CHILDREN AS THESE
MATERIALS POSE A CHOKING HAZARD.
• RISK OF BLINDNESS: NEVER USE THIS DEVICE TO LOOK DIRECTLY AT THE SUN OR IN THE DIRECT PROXIMITY OF THE
SUN. DOING SO MAY RESULT IN A PERMANENT LOSS OF VISION.
• RISK OF FIRE: DO NOT PLACE DEVICE, PARTICULARLY THE LENSES, IN DIRECT SUNLIGHT. THE CONCENTRATION OF
LIGHT RAYS COULD CAUSE A FIRE.
• DO NOT DISASSEMBLE THIS DEVICE: IN THE EVENT OF A DEFECT, PLEASE CONTACT YOUR DEALER. THE DEALER
WILL CONTACT THE CUSTOMER SERVICE DEPARTMENT AND CAN SEND THE DEVICE IN TO BE REPAIRED IF
NECESSARY.
• DO NOT SUBJECT THE DEVICE TO TEMPERATURES EXCEEDING 60 °C (140 °F).
• DISPOSAL: KEEP PACKAGING MATERIALS, LIKE PLASTIC BAGS AND RUBBER BANDS, AWAY FROM
CHILDREN AS THEY POSE A RISK OF SUFFOCATION. DISPOSE OF PACKAGING MATERIALS AS LEGALLY
REQUIRED. CONSULT THE LOCAL AUTHORITY ON THE MATTER IF NECESSARY AND RECYCLE MATERIALS
WHEN POSSIBLE.
• THE WEEE SYMBOL IF PRESENT INDICATES THAT THIS ITEM CONTAINS ELECTRICAL OR ELECTRONIC
COMPONENTS WHICH MUST BE COLLECTED AND DISPOSED OF SEPARATELY.
• NEVER DISPOSE OF ELECTRICAL OR ELECTRONIC WASTE IN GENERAL MUNICIPAL WASTE. COLLECT AND
DISPOSE OF SUCH WASTE SEPARATELY.
• MAKE USE OF THE RETURN AND COLLECTION SYSTEMS AVAILABLE TO YOU, OR YOUR LOCAL RECYCLING PROGRAM.
CONTACT YOUR LOCAL AUTHORITY OR PLACE OF PURCHASE TO FIND OUT WHAT SCHEMES ARE AVAILABLE.
• ELECTRICAL AND ELECTRONIC EQUIPMENT CONTAINS HAZARDOUS SUBSTANCES WHICH, WHEN DISPOSED OF
INCORRECTLY, MAY LEAK INTO THE GROUND. THIS CAN CONTRIBUTE TO SOIL AND WATER POLLUTION WHICH IS
HAZARDOUS TO HUMAN HEALTH, AND ENDANGER WILDLIFE.
• IT IS ESSENTIAL THAT CONSUMERS LOOK TO RE-USE OR RECYCLE ELECTRICAL OR ELECTRONIC WASTE TO AVOID IT
GOING TO LANDFILL SITES OR INCINERATION WITHOUT TREATMENT.
IMPORTANT SAFETY INSTRUCTIONS
READ AND FOLLOW THE INSTRUCTIONS BEFORE USE.
KEEP THESE INSTRUCTIONS FOR LATER USE.
Customer Service: Call 1-866-252-3811

3
1
2
3
4
5
6
6
7
7
8
Available Downloads Visit:
www.esmanuals.com
Parts Overview
1. 40 mm Objective Lens
2. Tabletop Tripod
3. Optical Tube Assembly (OTA) with Dew Shield
4. Tripod Head
5. Focus Wheel
6. Diagonal
7. Eyepieces (H6 mm and H20 mm)
8. Compass

4
How To Set Up
Note: We recommend assembling your telescope for the first time in the daylight or in a
lit room so that you can familiarize yourself with assembly steps and all components.
• Find a stable surface, like a table. Set the tripod on the table and open it until the tripod
spreaders are fully extended.
• Snap the telescope tube into the U-shaped clamp on the top of the tripod head.
• Insert the diagonal into the focuser and secure it by tightening the thumbscrews.
• Place your chosen eyepiece into the diagonal. We recommend starting with the 20 mm
because it will provide the widest field of view.
Using Your Telescope:
Now you are ready to start observing! Put the 20 mm eyepiece into the diagonal to get
the widest field of view. This wider field of view will make it easier to locate and track
objects. To move the scope up, down and side to side, grip the telescope near where the
tube meets the focuser and steadily move the tube until your target comes into view in
the eyepiece. It is important to remember that the rotation of the Earth means objects
will move out of your eyepiece fairly quickly. Once you have found and focused on your
desired target, you will have to track the object
as it journeys across the night sky. For a closer
look at an object, you can insert the 6mm
eyepiece. The magnification will increase from
20x to 67x.
Cleaning:
Your telescope is a precision optical device and keeping the optics free of dust and dirt is
crucial for optimal performance. To clean the lenses (objective and eyepiece) use only a
photo-grade soft brush or a lint-free cloth, like a microfiber cloth. Do not press down too
hard while cleaning, as this might scratch the lens. If necessary, the cleaning cloth can be
moistened with an optical glass cleaning fluid and the lens wiped clean using very little
pressure. The eyepiece is NOT waterproof so do not spray fluids directly onto the glass or
dip it in water. Never use harsh detergents! After you have finished cleaning an eyepiece,
allow it to fully dry before storing.
Make sure your telescope is always protected against dust and dirt.
After use, leave it in a warm room to dry off before storing.
Troubleshooting Guide:
Problem Solution
No picture Remove dust protection cap and sun-shield from the
objective opening.
Blurred picture Adjust focus using focus ring.
No focus possible Wait for temperature to balance out.
Bad quality Never observe through a glass surface such as a
window.
Focal Length Eyepiece Magnification
400 mm 20 mm 20x
400 mm 6 mm 67x

5
Observing Tips:
Star hopping
Star hopping is a technique used by amateur astronomers to navigate the night sky. By using easily
recognizable constellations and asterisms as a guide, an observer can locate stars and other objects.
For example, Polaris, which is commonly referred to as The North Star, can be located quickly using star
hopping. First, find the Big Dipper asterism in the Ursa Major constellation. The popular pattern is defined
by seven stars, and the two stars on the front edge of the Big Dipper’s “bowl” are Merak and Dubhe. Next,
draw an imaginary line from the bottom star (Merak) on this front edge through the top star (Dubhe)
on the front edge. Follow the line to the first bright star you see. That should be Polaris. Finally, to verify
your finding, locate the Little Dipper asterism. Polaris is the anchor star at the end of the Little Dipper’s
“handle.”
Possible Objects For Observation:
Terrestrial Objects
To view terrestrial objects, install the diagonal into the focuser, insert
the H20mm eyepiece into the diagonal and turn the focuser until
the image is clear. After mastering the H20mm eyepiece, switch to
the H12.5mm eyepiece and practice scanning and focusing. Choose
several terrestrial objects to practice focusing on — such as the
ones pictured on the right. As you are exploring, NEVER point your
telescope at or near the Sun due to serious risk of blindness.
The Moon
Diameter: 3,476 km
Distance: Approximately 384,401 km
The Moon is the Earth’s only natural satellite, and it is the second brightest
object in the sky (after the Sun). Although it is our closest neighbor, a lot
of people have never really taken a good long like at the Moon. With your
telescope, you should be able to see several interesting lunar features.
These include lunar maria, which appear as vast plains, and some of the
larger craters. The best views will be found along the terminator, which is
the edge where the visible and shadowed portions of the Moon meet.
Simulated images
The Moon
H20mm H12.5mm
H20mm H12.5mm
Terrestrial Images
BIG DIPPER
LITTLE DIPPER
POLAR STAR
CASSIOPEIA
Caph
Zeta Beta
Kochab
Pherkad
Gamma
Eta
Epsilon
Delta
Alpha
Shedar
Cih
Ksora
Segin
Alkaid
Alcor Mizar
Alioth
Megrez
Phecda
Merak
Dubhe

6
Barlow Lens
2 Lens Elements
Huygenian Eyepiece
2 Lens Elements
Light
Kellner Eyepiece
3 Lens Elements
Light
Plössl Eyepiece
4 Lens Elements
Light
Light
Eye Lens
Field Lens
Eye Lens
Field Lens
Aperture:
This figure, which is usually expressed in millimeters, is the diameter of a telescope’s light-gathering
surface (objective lens in a refractor or primary mirror in a reflector). Aperture is the key factor in
determining the brightness and sharpness of the image.
Objective Lens:
The objective lens is the main light-gathering component of a refractor telescope. It is actually composed
of several lens elements.
Diagonal:
This accessory houses a mirror that deflects the ray of light 90 degrees. With a horizontal telescope tube,
this device deflects the light upwards so that you can comfortably observe by looking downwards into
the eyepiece. The image in a standard diagonal mirror appears upright, but rotated around its vertical
axis (mirror image). To get an image without this rotation, you will need to use a special diagonal with an
erect image prism.
Eyepiece:
An eyepiece is an optical accessory comprised of several lens elements. It determines the magnification
of a particular observing setup.
Barlow Lens:
A Barlow lens effectively increases the focal length of a telescope. It is inserted between the eyepiece
and the focuser/diagonal (depending on the optical setup) and multiplies the magnification power of the
eyepiece.
For example, a 2x Barlow will double the magnification of a particular eyepiece.
Focal length (Telescope):
The focal length is the distance in millimeters between the objective lens or primary mirror and the point
at which entering light rays converge — otherwise known as the focal point. The focal lengths of the
telescope tube and the eyepiece are used to determine magnification.
Focal length (Eyepiece):
The focal length is the distance in millimeters between the center of the first lens element in an eyepiece
and the focal point. The focal lengths of the telescope tube and the eyepiece are used to determine
magnification. Short eyepiece focal lengths produce higher magnifications than long eyepiece focal
lengths.
Objective Lens
Aperture
(mm)
Eyepiece
Diagonal Focal Point
Focal Length Telescope
(mm)
Focal Length
Eyepiece
(mm)
Focuser
Telescope Terms to Know:

7
Magnification:
The magnification corresponds to the difference between observation with the naked eye and
observation through a magnifying device like a telescope. If a telescope configuration has a magnification
of 30x, then an object viewed through the telescope will appear 30 times larger than it would with the
naked eye. To calculate the magnification of your telescope setup, divide the focal length of the telescope
tube by the focal length of the eyepiece. For example, a 20mm eyepiece in a telescope with a 1000mm
focal length will result in 50x power, which will make the object appear 50 times larger. If you change the
eyepiece, the power goes up or down accordingly.
Focal ratio
The focal ratio of a telescope is determined by dividing the telescope’s focal length by its aperture
(usually expressed in millimeters). It plays a key role in determining a telescope’s field of view and
significantly impacts imaging time in astrophotography. For example, a telescope with a focal length of
1000mm and a 100mm clear aperture has a focal ratio of f/10.
Exit Pupil
The exit pupil is the diameter of the beam of light coming out of the eyepiece. To calculate exit pupil,
divide the focal length of your eyepiece by your telescope’s focal ratio. For example, if you use a 20mm
eyepiece with an f/5 telescope, the exit pupil would be 4mm.
Eye Relief
Eye relief is all about a comfortable viewing experience because it is the distance at which you need to
position your eye from the eyepiece’s outermost surface to enjoy the full field of view. This characteristic
is of special concern to observers who wear glasses to correct an astigmatism, because a long enough
eye relief is necessary to allow room
for glasses.
Exit Pupil = Eyepiece Focal Length
Telescope Focal Ratio
Eyepiece Lens
Long Eye Relief Distance
Eyepiece Lens
Short Eye Relief Distance
Eyepiece Lens
Exit Pupil (mm)
Eyepiece Lens
Long Eye Relief Distance
Eyepiece Lens
Short Eye Relief Distance
Eyepiece Lens
Exit Pupil (mm)
Eyepiece Lens
Long Eye Relief Distance
Eyepiece Lens
Short Eye Relief Distance
Eyepiece Lens
Exit Pupil (mm)
Telescope Focal Length
1000mm
Eyepiece
Focal Length
20mm
Aperture
102mm
Magnification = Telescope Focal Length
Eyepiece Focal Length
Focal Ratio = Telescope Focal Length
Telescope Aperture

8
Light
Light
Secondary Mirror
Primary Mirror
(Objective)
Focuser
Focuser
Light
Light
Objective Lens
Light
Light
Secondary Mirror
Primary Mirror (Objective)
Correcting Lens
Reflector
(Newtonian)
Refractor
Catadioptric
(Maksutov-Cassegrain/
Schmidt-Cassegrain)
Light
Light
Secondary Mirror
Primary Mirror
(Objective)
Focuser
Focuser
Light
Light
Objective Lens
Light
Light
Secondary Mirror
Primary Mirror (Objective)
Correcting Lens
Reflector
(Newtonian)
Refractor
Catadioptric
(Maksutov-Cassegrain/
Schmidt-Cassegrain)
Light
Light
Secondary Mirror
Primary Mirror
(Objective)
Focuser
Focuser
Light
Light
Objective Lens
Light
Light
Secondary Mirror
Primary Mirror (Objective)
Correcting Lens
Reflector
(Newtonian)
Refractor
Catadioptric
(Maksutov-Cassegrain/
Schmidt-Cassegrain)
Reflector
A reflector telescope uses mirrors to gather and focus light. Light enters the telescope through its open
front end and travels to the concave primary mirror at the back. From there the light is reflected back up
the tube to a flat secondary mirror, which sits at a 45° angle in relation to the eyepiece. Light bounces off
of this secondary mirror and out through the eyepiece. A reflector’s views will be upside down therefore
it should only be used for astronomical observing because “up” and “down” are irrelevant in space.
Refractor:
A refracting telescope uses a collection of lenses to gather and focus light. A refractor’s views will
be upside down if a diagonal is not in use. A standard diagonal will generate a “right side up” image,
however, it will rotate the image on the vertical axis (mirror image). To get the “right side up” image
without the rotation, you will need to use a special diagonal with an erect image prism.
Catadioptric:
A catadioptric telescope uses a combination of mirrors and lenses to gather and focus light. Popular
catadioptric designs include the Maksutov-Cassegrain and Schmidt-Cassegrain.
Types Of Telescopes:

9

10
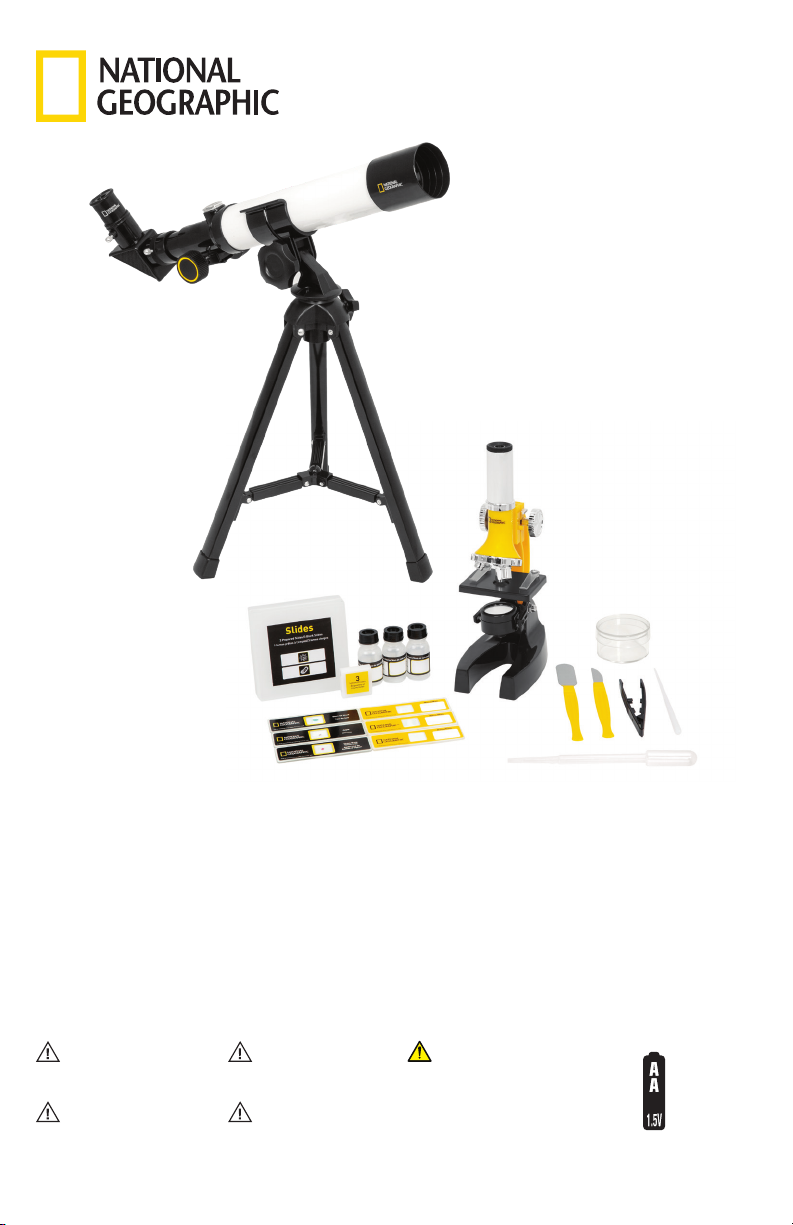
• THIS MICROSCOPE SET IS INTENDED FOR CHILDREN OLDER THAN AGE 9. CHILDREN SHOULD ONLY USE THIS DEVICE
UNDER ADULT SUPERVISION. NEVER LEAVE A CHILD UNSUPERVISED WITH THIS DEVICE. ACCESSORIES IN THE
EXPERIMENT KIT MAY HAVE SHARP EDGES AND TIPS. PLEASE STORE THE DEVICE AND ALL OF ITS ACCESSORIES AND
AIDS OUT OF THE REACH OF YOUNG CHILDREN WHEN NOT BEING USED DUE TO A RISK OF INJURY.
• CHEMICALS: ANY CHEMICALS AND LIQUIDS USED IN CONJUNCTION WITH THE DEVICE SHOULD BE KEPT OUT OF
REACH OF CHILDREN. DO NOT DRINK ANY OF THE CHEMICALS CONTAINED IN THIS SET. HANDS SHOULD BE WASHED
THOROUGHLY UNDER RUNNING WATER AFTER WORKING WITH THESE CHEMICALS. IN CASE OF ACCIDENTAL CONTACT
WITH EYES OR MOUTH, RINSE THE AFFECTED AREA WITH WATER. SEEK MEDICAL TREATMENT FOR AILMENTS ARISING
FROM CONTACT WITH THE CHEMICAL SUBSTANCE, AND TAKE THE CHEMICALS WITH YOU TO THE DOCTOR.
• CHOKING HAZARD: CHILDREN SHOULD ONLY USE DEVICE UNDER ADULT SUPERVISION. KEEP PACKAGING
MATERIALS LIKE PLASTIC BAGS AND RUBBER BANDS OUT OF THE REACH OF CHILDREN AS THESE
MATERIALS POSE A CHOKING HAZARD.
• BATTERY GUIDELINES: THIS DEVICE CONTAINS ELECTRONIC COMPONENTS THAT ARE POWERED BY BATTERIES.
BATTERIES SHOULD BE KEPT OUT OF CHILDREN’S REACH. WHEN INSERTING BATTERIES, PLEASE ENSURE THE
POLARITY IS CORRECT. INSERT THE BATTERIES ACCORDING TO THE DISPLAYED +/- INFORMATION. NEVER MIX OLD
AND NEW BATTERIES. REPLACE ALL BATTERIES AT THE SAME TIME. NEVER MIX ALKALINE, STANDARD CARBON-
ZINC AND RECHARGEABLE NICKEL-CADMIUM BATTERIES. NEVER SHORT CIRCUIT THE DEVICE OR BATTERIES OR
THROW EITHER INTO A FIRE. LEAKING OR DAMAGED BATTERIES CAN CAUSE INJURY IF THEY COME INTO CONTACT
WITH THE SKIN. IF YOU NEED TO HANDLE SUCH BATTERIES, PLEASE WEAR SUITABLE SAFETY GLOVES. REMOVE
BATTERIES FROM THE PRODUCT BEFORE EXTENDED STORAGE TO PREVENT LEAKING. DO NOT IMMERSE THE BATTERY
COMPARTMENT IN WATER. NON-RECHARGEABLE BATTERIES ARE NOT TO BE RECHARGED.
RECHARGEABLE BATTERIES ARE TO BE REMOVED FROM THE TOY BEFORE BEING CHARGED. RECHARGEABLE
BATTERIES ARE ONLY TO BE CHARGED UNDER ADULT SUPERVISION. EXHAUSTED BATTERIES ARE TO BE REMOVED
FROM TOY. THE SUPPLY TERMINALS ARE NOT TO BE SHORT-CIRCUITED. PLEASE RECYCLE BATTERIES RESPONSIBLY.
• RISK OF FIRE: DO NOT PLACE DEVICE, PARTICULARLY THE LENSES, IN DIRECT SUNLIGHT. THE CONCENTRATION OF
LIGHT RAYS COULD CAUSE A FIRE.
• DO NOT DISASSEMBLE THIS DEVICE. IN THE EVENT OF A DEFECT, PLEASE CONTACT YOUR DEALER. THE DEALER
WILL CONTACT THE CUSTOMER SERVICE DEPARTMENT AND CAN SEND THE DEVICE IN TO BE REPAIRED IF
NECESSARY.
• DO NOT SUBJECT THE DEVICE TO TEMPERATURES EXCEEDING 60 °C (140 °F).
• DISPOSAL: KEEP PACKAGING MATERIALS, LIKE PLASTIC BAGS AND RUBBER BANDS, AWAY FROM
CHILDREN AS THEY POSE A RISK OF SUFFOCATION. DISPOSE OF PACKAGING MATERIALS AS LEGALLY
REQUIRED. CONSULT THE LOCAL AUTHORITY ON THE MATTER IF NECESSARY AND RECYCLE MATERIALS
WHEN POSSIBLE.
• THE WEEE SYMBOL IF PRESENT INDICATES THAT THIS ITEM CONTAINS ELECTRICAL OR ELECTRONIC
COMPONENTS WHICH MUST BE COLLECTED AND DISPOSED OF SEPARATELY.
• NEVER DISPOSE OF ELECTRICAL OR ELECTRONIC WASTE IN GENERAL MUNICIPAL WASTE. COLLECT AND DISPOSE
OF SUCH WASTE SEPARATELY.
• MAKE USE OF THE RETURN AND COLLECTION SYSTEMS AVAILABLE TO YOU, OR YOUR LOCAL RECYCLING PROGRAM.
CONTACT YOUR LOCAL AUTHORITY OR PLACE OF PURCHASE TO FIND OUT WHAT SCHEMES ARE AVAILABLE.
• ELECTRICAL AND ELECTRONIC EQUIPMENT CONTAINS HAZARDOUS SUBSTANCE WHICH, WHEN DISPOSED OF
INCORRECTLY, MAY LEAK INTO THE GROUND. THIS CAN CONTRIBUTE TO SOIL AND WATER POLLUTION WHICH IS
HAZARDOUS TO HUMAN HEALTH, AND ENDANGER WILDLIFE.
• IT IS ESSENTIAL THAT CONSUMERS LOOK TO RE-USE OR RECYCLE ELECTRICAL OR ELECTRONIC WASTE TO AVOID IT
GOING TO LANDFILL SITES OR INCINERATION WITHOUT TREATMENT.
IMPORTANT SAFETY INSTRUCTIONS
READ AND FOLLOW THE INSTRUCTIONS BEFORE USE.
KEEP THESE INSTRUCTIONS FOR LATER USE.
Customer Service: Call 1-866-252-3811

11
1
2
3
4
5
6
7
8
9
9
10
11
12
13
Observe, Investigate, Discover!
When you want to take your investigations to the cellular level, the 900x Microscope is ready to reveal
the hidden details of the world around you. Everyday things like sand, onion skin, hair and pollen will
show their extraordinary sides when viewed at magnifications ranging from 100x to 900x. To jump start
your observations, the set comes with prepared specimens, collection tools and an experiment guide.
Parts Overview
1. 20x Eyepiece
2. Focus Knob
3. Stage
4. Stage Clips
5. Objective Turret (5x, 20x, 45x)
6. Illumination ON/OFF Switch and Mirror
7. Base and Battery Case
8. Microscope Arm
9. (3) Prepared Slides and (3) Blank Slides
with Slide Case
10. (3) Slide Covers & Labels
11. (3) Collection Vials
12. Spatula, Scalpel, Tweezers, Stirring Rod, Pipette
13. Petri Dish
Install Batteries
1. Remove button screws and cover.
2. Install batteries with the positive (+) and negative (-) in the
correct direction indicated by the battery compartment label.
3. Replace the cover and screws.
Please recycle batteries responsibly.

12
How Do I Use My Microscope
Before you use your microscope, make sure that the table, desk or surface that you place it on is stable
and is not subject to vibration. If the microscope needs to be moved, hold it by the arm and base while
carefully transferring it. Once the microscope is in a suitable location and the batteries are installed,
check the light source to make sure that it illuminates. Use a microfiber cleaning cloth to gently wipe
the lenses off. If the stage is dirty with dust or oil, carefully clean it off. Make sure that you only raise
and lower the stage using the focus adjustment knob.
How Do I Operate The Illumination?
Locate the mirror/light on the base of the microscope. Flip the mirror/light to the “on” position (with
the light facing up) and the light will illuminate. This microscope is equipped with an incandescent light
that illuminates the specimen from below.
How Do I Adjust My Microscope Correctly?
Place the microscope in a suitable location as described above, and sit in a comfortable viewing
position. Always start each observation with the lowest magnification. Adjust the distance of the
microscope stage so that the stage is in the lowest position — farthest away from the turret head. Turn
the objective turret until it clicks into place at the lowest magnification (Objective: 5x/Magnification:
100x). Note: Before you change the objective setting, always make sure the microscope stage is
farthest away from the turret by rotating the focus knob. Separating the stage and turret by rotating
the focus knob will avoid causing damage to the specimen slide or microscope. When starting an
observation, always start with the 5x objective in the rotating head.
How Do I Observe The Specimen?
Sitting in your location with adequate illumination, the following basic rules should be observed. Start
with a simple observation at the lowest magnification. Position the object or specimen in the middle of
the stage under the stage clips, center over the lower light. Focus the image by rotating the focus knob
until a clear image appears in the eyepiece.
Place the prepared slide directly under the objective on the microscope stage and secure it with the
stage clips. The prepared slide should be located directly over the lower illumination. Look through
the eyepiece and carefully turn the focus knob until the image appears clear and sharp. Now you can
select a higher magnification by rotating to the objective turret. Higher levels of magnification can be
achieved by turning the objective turret to a higher setting (400x or 900x). Following this procedure
creates a steady increase of magnification without overpowering the view of the object. The following
magnification order should be used: 100x, 400x then 900x. Each time the magnification changes (due
to the objective change), the image sharpness must be readjusted with the focus knob. When doing
this, be careful because if you move the microscope stage too quickly, the objective and the slide could
come into contact and cause damage to the slide or microscope.
For transparent objects (e.g. sea salt), light is projected by the lower light traveling from below the
stage, through the objective and eyepiece, and finally into your eye. This process of light transmission
is known as microscopy. Many micro-organisms found in water, plant components and the smallest
animal parts are transparent in nature. Opaque specimens, on the other hand, will need to be prepared
for viewing. Opaque specimens can be made transparent by a process of treatment and penetration
with the correct materials (media), or by slicing. You can read more about creating specimens in the
enclosed microscope experiments booklet.

13
Magnification Guide:
Eyepiece Objective Power
20x 5x 100x
20x 20x 400x
20x 45x 900x
Note:
The highest magnification is not
always the best for every specimen!
Troubleshooting Guide:
Problem Solution
No recognizable image Turn on light, Readjust focus,
Start with the lowest power objective (5x)
No image Center object on slide under
lowest power objective
No light Replace batteries, Check on/off position

14
History of the Microscope:
The optical microscope uses light moved through a lens or lenses to produce magnified views of the
smallest of subjects. Over the centuries, these devices have become staples in classrooms, laboratories,
jewelry stores and more.
However, like other observing aids such as the telescope, the exact origins of the optical microscope
are difficult to trace to just one inventor.
The following are some of the milestones in the development of the optical microscope:
1590s —Dutch spectacle makers create an early version of the compound microscope. Exactly which
Dutch spectacle makers should get credit for the invention is a long-standing matter of debate. The
candidates include Zacharias Janssen or Hans Lippershey, who are also linked to the invention of the
telescope.
1665 — English polymath Robert Hooke publishes Micrographia, a groundbreaking book filled with
descriptions and illustrations of observations he made with a telescope. In this publication, Hooke
coined the term “cell” when describing the microscopic structures that he had observed in a sliver of
cork.
1670s – Dutch merchant, civil servant and science enthusiast Antonie van Leeuwenhoek makes the
first observations of bacteria and protozoa using single lens microscopes that he made himself. His
microscopes reached unprecedented magnification levels up to 270x. He eventually became known as
“the father of microbiology”.
Microscope Types:
Optical microscopes work by guiding light that passes through a specimen or bounces off a specimen
through a series of lenses to bring enlarged views of the specimen to the observer’s eyes. The most
common configurations of optical microscopes are:
Simple Microscope
A simple microscope has a single magnifying lens, which allows objects to be viewed at one set
magnification power. A common example of a simple microscope would be a jeweler’s loupe or a
magnifying glass.
Magnifying Lens

15
Compound Microscope
A compound microscope has two sets of magnifying lenses that are used in tandem to view specimens
at a range of magnifications. The total magnification power of a particular lens combination is
determined by multiplying the magnification of the eyepiece lens and the magnification of the
objective lens. Due to the combination of lenses, compound microscopes have higher magnification
ranges that are ideal for viewing microorganisms.
Eyepiece
Focus Knob
Stage
Microscope Arm
Objective Turrets
Color Filters
Illuminator
Light or Mirror
Base
Stage Clips

16
Stereo Microscope
A stereo microscope has two objective lenses and two eyepieces and moves light from the specimen
along two optical paths, one directed toward the right eye and one to the left. This results in a
three-dimensional view. This type of microscope has a low magnification range that is geared
toward observing larger solid objects like minerals and insects. Stereo microscopes are often used in
dissection.
Eyepieces
Stage
Objective Lens
Illuminator
Light
Base
Stage Clips
Focus Knob

17
Microscope Terms:
Eyepiece:
The eyepiece is the lens that an observer looks through. Some microscopes have interchangeable
eyepieces for more magnification options.
Field of view:
The field of view is the diameter of the circle of light seen through the microscope’s eyepiece.
Filter:
A filter, which is made of colored transparent plastic, can be placed between the illuminator source
and the specimen to help observers better recognized components of colorless or transparent objects.
Many microscopes have a color filter wheel with a range of filters located in the middle of the stage.
Illuminator:
The illuminator is a light source used to direct light through or off a specimen. Illuminators can be
positioned below the stage, above the stage or both.
Interpupillary Distance:
On a binocular microscope, which has two eyepieces, this is the distance between the two eyepieces.
The positioning of the eyepieces can usually be adjusted.
Magnification:
Magnification power corresponds to the difference between observation with the naked eye and
observation through a magnifying device like a microscope. In a compound microscope, magnification
is determined by multiplying the magnifying power of the eyepiece and the magnifying power of the
objective lens. For example, a 10x eyepiece with an objective lens set at 40x will equal to magnification
power of 400x.
Mirror:
A mirror positioned below the stage can be used to direct ambient light up through an opening in the
stage to light a specimen.
Objective lens:
The objective lens is the lens closest to the specimen and is the first to receive light that passes through
or off the specimen.
Stage:
The stage is the flat platform that a specimen sits on for observing. Many are equipped with metal or
plastic clips to secure slides in place.
Turret
The turret, which is also known as a revolving nosepiece, is a revolving set of objective lenses.
Observing tips:
• When using a microscope with multiple magnification options, always start each observation with the
lowest magnification.
• Before you change the objective setting, always make sure the microscope stage is farthest away
from the turret by rotating the focus knob. Separating the stage and turret by rotating the focus knob
will avoid causing damage to the specimen slide or microscope.
• Remember, the highest magnification is not always the best for every specimen.
Magnification = Eyepiece
Magnifying Power
Objective Lens
Magnifying Power
X

18

19

V102022
©2022 National Geographic Partners LLC. All rights reserved.
NATIONAL GEOGRAPHIC and Yellow Border Design are trademarks of the
National Geographic Society, used under license.
©2022 Explore Scientic, LLC
1010 S. 48th Street, Springdale AR 72762.
All rights reserved. Made in China.
explorescientic.com | 866.252.3811
Contents, colors and specications may vary.
20
Table of contents
Other National Geographic Microscope manuals

National Geographic
National Geographic 90-39100 User manual

National Geographic
National Geographic 300X-1200X User manual

National Geographic
National Geographic 40 1024X User manual

National Geographic
National Geographic 300X-1200X User manual

National Geographic
National Geographic 80-60101 User manual

National Geographic
National Geographic 90-11400 User manual

National Geographic
National Geographic 80-10201 User manual

National Geographic
National Geographic 40X-640X MICROSCOPE User manual

National Geographic
National Geographic 40-1024X User manual

National Geographic
National Geographic LCD Microscope User manual