USER INSTRUCTIONS
58471 Fir Road, Mishawaka, IN 46544
Phone: (574) 259-7838 Fax: (574) 259-7939
www.bandbmolders.com Page 6 of 15
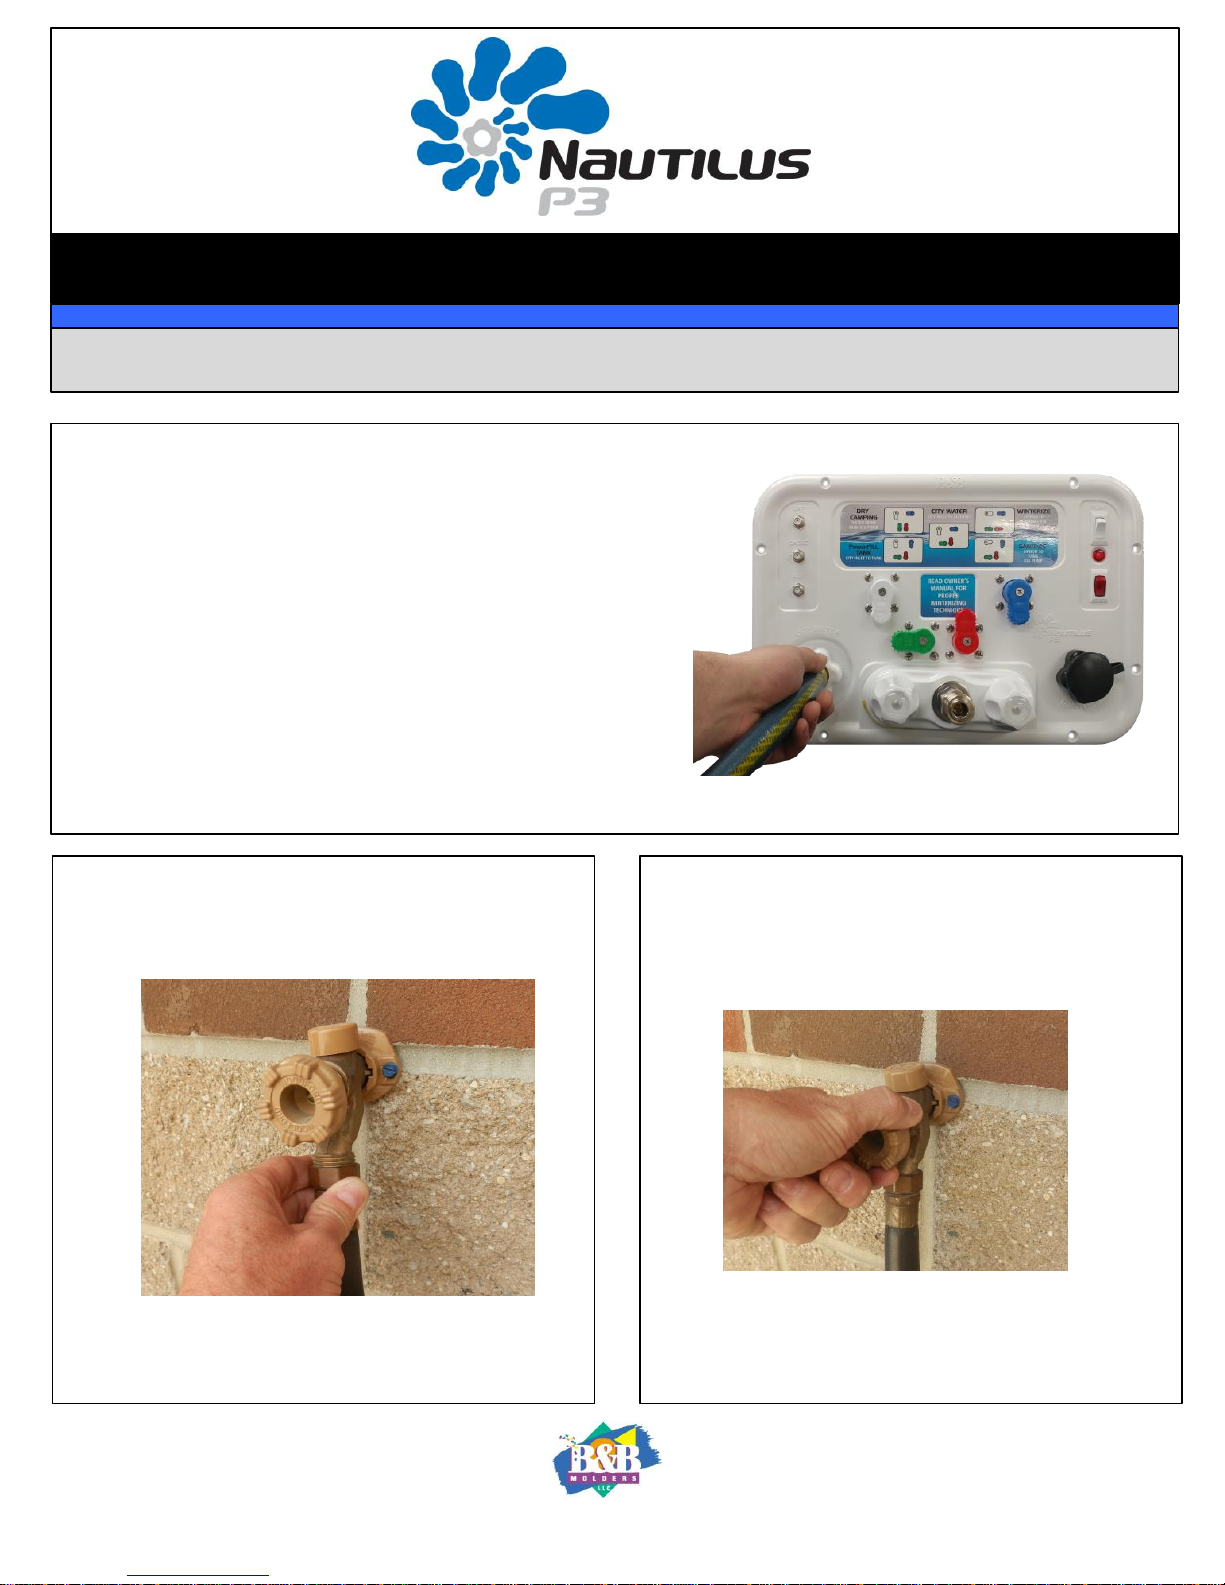
3. Connect other end of hose to water supply
source.
Power Filling Fresh Water Tank "PowerFILL Tank"
4. Turn water supply on at source. Fresh water
tank should begin to fill.
NOTE: Consult your Owner's Manual for tank
capacity. DO NOT OVERFILL TANK!
5. When desired level in fresh water tank is
reached, turn water off at source.
6. Disconnect garden hose from inlet on Nautilus
panel.
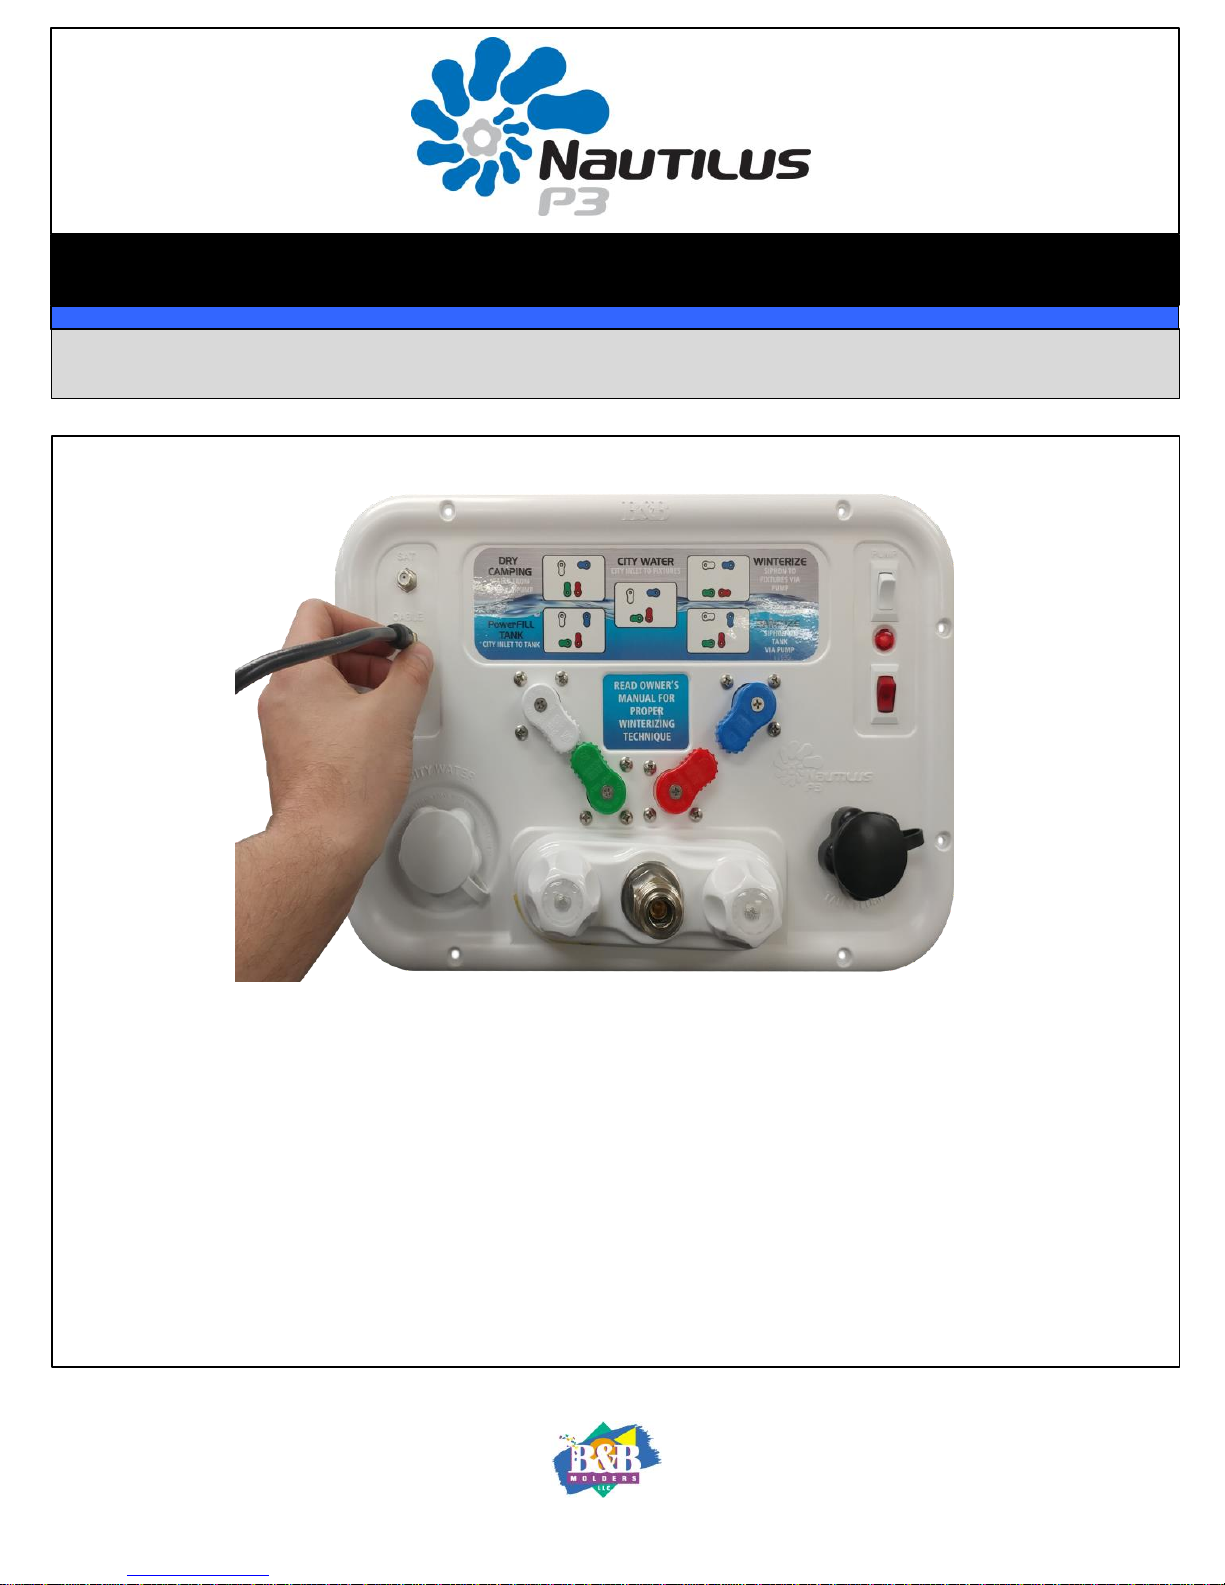
1. Connect garden hose to inlet labeled "CITY
WATER."
2. Turn handles to PowerFILL Tank position as shown.
•BLUE diverter handle should be facing down.
•WHITE diverter handle should be facing down.
•RED diverter handle should be facing up.
•GREEN diverter handle should be facing left.