Navigator PIT BOSS PB150PPS User manual

/ / / / 150
/ / / / 10805
' | '
| | '
IMPORTANT, READ CAREFULLY, RETAIN FOR
FUTURE REFERENCE. MANUAL MUST BE
READ BEFORE OPERATING!
IMPORTANT, PRENEZ CONNAISSANCE DE
CE DOCUMENT ET CONSERVEZ-LE POUR
RÉFÉRENCE ULTÉRIEURE. VOUS DEVEZ LIRE
CE GUIDE AVANT D’UTILISER LE BARBECUE!
IMPORTANTE, LEER DETENIDAMENTE,
CONSERVAR PARA REFERENCIA FUTURA.
LEA EL MANUAL ANTES DEL USO!
WICHTIG: AUFMERKSAM LESEN UND GUT
AUFBEWAHREN BITTE UNBEDINGT VOR
GEBRAUCH DIE BEDIENUNGSANLEITUNG
SORGFÄLTIG DURCHLESEN!
IMPORTANTE: LEGGERE ATTENTAMENTE E
CONSERVARE PER RIFERIMENTO FUTURO.
LEGGERE IL MANUALE PRIMA DELL'USO.
,
.
, .
.
’ ’
’ .
,
.
' .
. ,
, .
,
.
,
, .
,
. ,
.
' ' '
.
, .
'
.
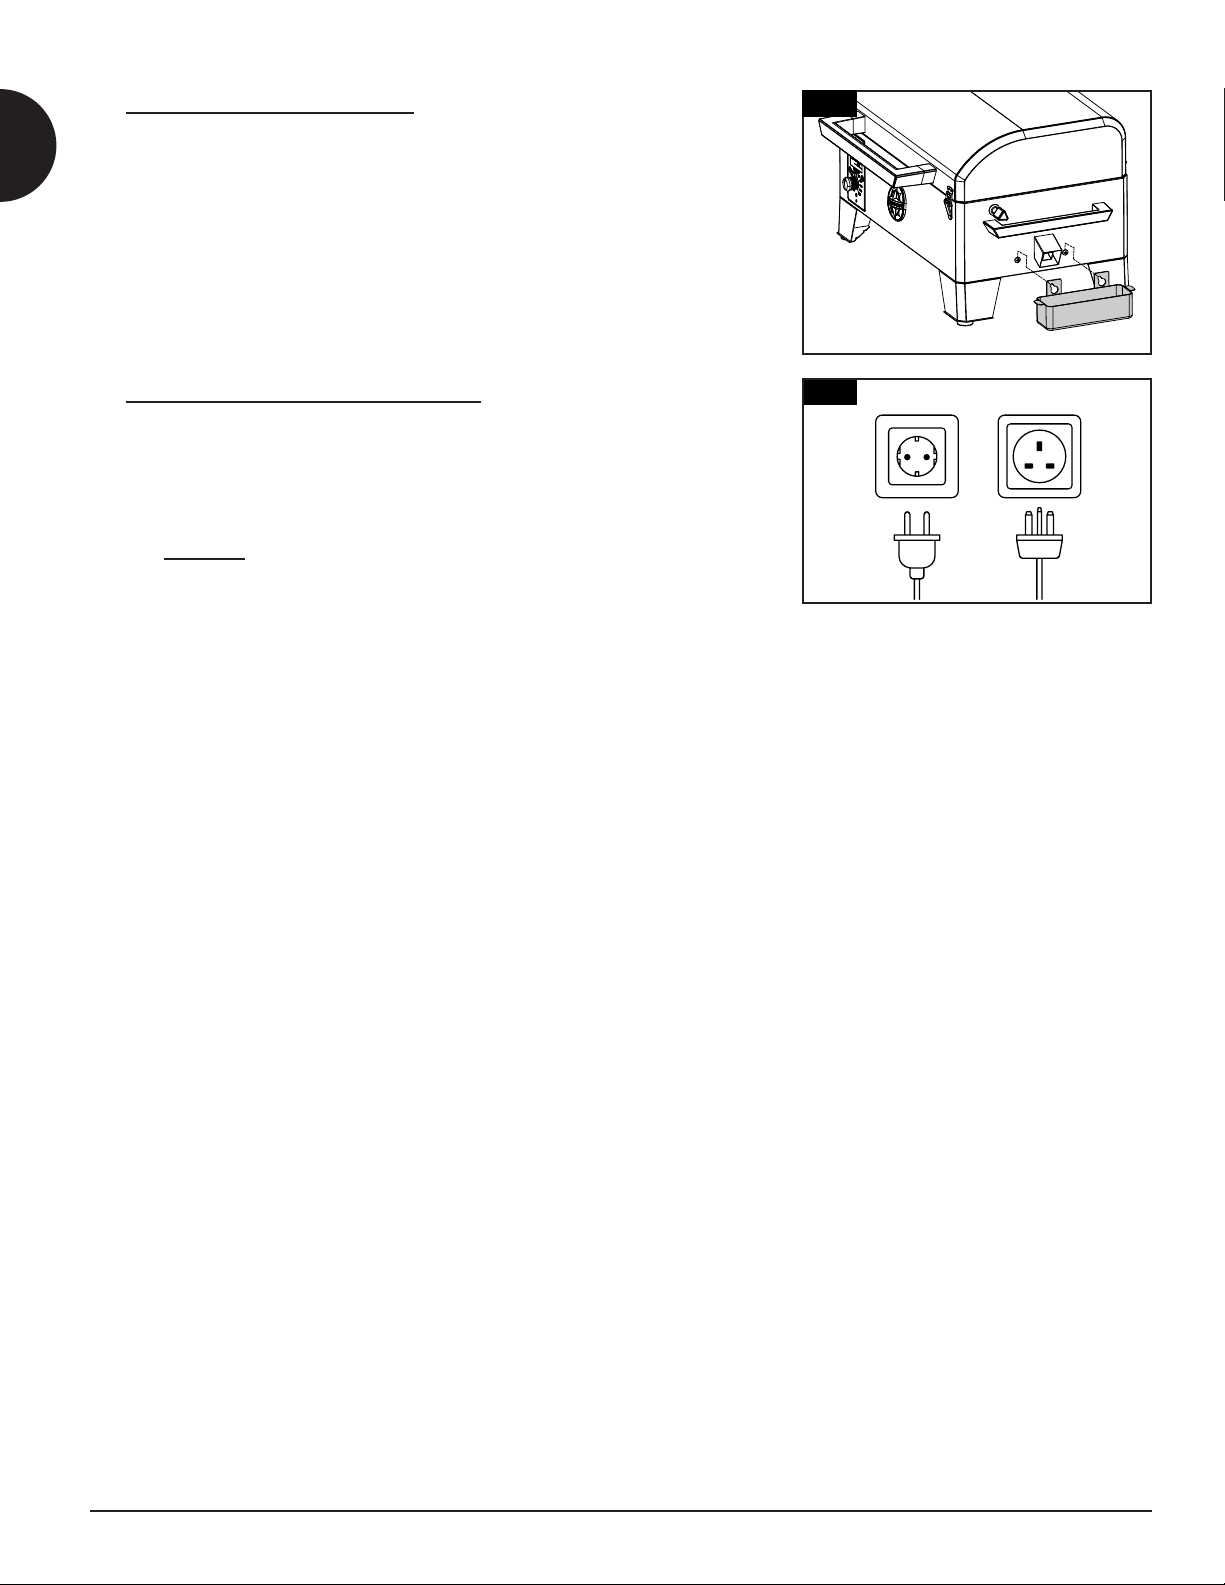
For outdoor and household use only. Not for commercial use.
Réservé à l'usage extérieur et résidentiel uniquement. Non destiné à un usage commercial.
Solo para uso doméstico y en el exterior. No apto para uso comercial.
Bitte nur im Freien und privat nutzen. Nicht für die gewerbliche Anwendung geeignet.
Solo per uso domestico ed esterno. Non per uso commerciale.
PB150PPSPB150PPS

2
EN ENGLISH
.
.
Please read and understand this entire manual before attempting to assemble, operate or install the product. This will ensure
you receive the most enjoyable and trouble-free operation of your new wood pellet grill. We also advise you retain this manual
for future reference.
DANGERS AND WARNINGS
You must contact your local home association, building or fire officials, or authority having jurisdiction,
to obtain the necessary permits, mission or information on any installation restrictions, such as any grill
being installed on a combustible surface, inspection requirements or even ability to use, in your area.
1. A minimum clearance of 305mm (12 inches) from combustible constructions to the sides of the grill, and 305mm (12 inches)
from the back of the grill to combustible constructions must be maintained. Do not install appliance on combustible
floors, or floors protected with combustible surfaces unless proper permits and permissions are obtained by
authorities having jurisdiction. Do not use this appliance indoors or in an enclosed, unventilated area. This wood pellet
appliance must not be placed under overhead combustible ceiling or overhang. Keep your grill in an area clear and free from
combustible materials, gasoline and other flammable vapors and liquids.
Should a grease fire occur, turn the grill OFF and leave the lid closed until the fire is out. Unplug the power
cord from the connected outlet. Do not throw water on the unit. Do not try to smother the fire. Use of an
all-class (class ABC) approved fire extinguisher is valuable to keep on site. If an uncontrolled fire does occur,
call the Fire Department.
2. Keep electrical supply cords and the fuel away from heated surfaces. Do not use your grill in the rain or around any water
source. If the supply cord is damaged, it must be replaced by the manufacturer, its service agent or similarly qualified persons
in order to avoid a hazard.
3. After a period of storage, or non-use, check the Burn Pot for obstructions, the hopper for foreign objects, and any air blockage
around the fan intak, chimney, or rear barrel exhaust holes. Clean before use. Regular care and maintenance is required to
prolong the lifespan of your unit. If the grill is stored outside during the rainy season or seasons of high humidity,
care should be taken to insure that water does not get into the hopper. When wet or exposed to high humidity, wood
pellets will expand greatly, decompose, and may jam the feed system. Always disconnect the power, before performing any
service or maintenance.
Do not transport your grill while in use or while the grill is hot. Ensure the fire is completely out and that
the grill is completely cool to the touch before moving.
4. It is recommended to use heat-resistant barbecue mitts or gloves when operating the grill. Do not use accessories not
specified for use with this appliance. Do not put a barbecue cover or anything flammable in the storage space area under
the barbecue.
5. To prevent fingers, clothing or other objects from coming in contact with the auger feed system, the appliance is equipped
with a metal safety screen, mounted to the interior of the hopper. This screen must not be removed unless directed by
Customer Service or an authorized dealer.

3
EN
ENGLISH
This appliance can be used by children aged from 8 years and above and persons with reduced physical,
sensory or mental capabilities or lack of experience and knowledge if they have been given supervision
or instruction concerning use of the appliance in a safe way and understand the hazards involved.
Children shall not play with the appliance. Cleaning and user maintenance shall not be made by children
without supervision.
6. Parts of the barbecue may be very hot and serious injury may occur. Keep young children and pets away while in use.
7. Do not enlarge igniter holes or Burn Pots. Failure to follow this warning could lead to a fire hazard and bodily harm and will
void your warranty.
8. Product may have sharp edges or points. Contact may result in injury. Handle with care.
DISPOSAL OF ASHES
Ashes should be placed in a metal container with a tight-fitting lid. The closed container of ashes should be placed on a non-
combustible floor or on the ground, well away from all combustible materials, pending final disposal. When ashes are disposed by
burial in soil, or otherwise locally dispersed, they should be retained in a closed container until all cinders have thoroughly cooled.
WOOD PELLET FUEL
This pellet cooking appliance is designed and approved for pelletized, all natural, wood fuel only. Any other type of fuel burned in
this appliance will void the warranty and safety listing. You must only use all natural wood pellets, designed for burning in pellet
barbecue grills. Do not use fuel with additives. Wood pellets are highly susceptible to moisture and should always be stored in an
airtight container. If you are storing your grill, without use, for an extended period, we recommend clearing all pellets from your
grill's hopper and auger, to prevent jams. The pellet fuel mean heating value in 8000-8770 BTU/LB, ash content < 1%.
Do not use spirit, petrol, gasoline, lighter-fluid or kerosene for lighting or refreshing a fire in your grill.
Keep all such liquids well away from the appliance when in use.
At time of printing, there is no industry standard for barbecue wood pellets, although most pellet mills use the same standards
to make wood pellets for domestic use. Further information can be found at
www.pelletheat.org
or the
Pellet Fuel Institute
.
Contact your local dealer on the quality of pellets in your area and for information on brand quality. As there is no control over
the quality of pellets used, we assume no responsibility to damage caused by poor quality of fuel.
CREOSOTE
Creosote, or soot, is a tar-like substance. When burning, it produces black smoke with a residue which is also black in color. Soot
or creosote is formed when the appliance is operated incorrectly, such as: blockage of the combustion fan, failure to clean and
maintain the burn area, moisture affected pellets, or poor air-to-fuel combustion.
It is dangerous to operate this appliance should the flame become dark, sooty, or if the Burn Pot is overfilled with pellets. When
ignited, this creosote makes an extremely hot and uncontrolled fire, similar to a grease fire. Should this happen, turn the unit OFF,
let it cool completely, then inspect for maintenance and cleaning. It commonly accumulates along exhaust areas.
If creosote has formed within the unit, allow the unit to warm up at a low temperature, turn off the appliance, then wipe away
any formation with a hand towel. Similar to tar, it is much easier to clean when warm, as it becomes liquid.

4
EN ENGLISH
CARBON MONOXIDE (“ ”)
Carbon monoxide is a colorless, odorless, tasteless gas produced by burning gas, wood, propane, charcoal or other fuel. Carbon
monoxide reduces the blood’s ability to carry oxygen. Low blood oxygen levels can result in headaches, dizziness, weakness,
nausea, vomiting, sleepiness, confusion, loss of consciousness or death. Follow these guidelines to prevent this colorless, odorless
gas from poisoning you, your family, or others:
• See a doctor if you or others develop cold or flu-like symptoms while cooking or in the vicinity of the appliance. Carbon
monoxide poisoning, which can easily be mistaken for a cold or flu, is often detected too late.
• Alcohol consumption and drug use increase the effects of carbon monoxide poisoning.
Carbon monoxide is especially toxic to mother and child during pregnancy, infants, the elderly, smokers, and people with blood
or circulatory system problems, such as anemia, or heart disease.
SAFETY LISTING
Conforms to EN 60335-2-102:2016, EN 60335-1:2012 + A11:2014 + A13:2017 + A1: 2019 + A14: 2019 + A2: 2019,
EN62233: 2008, EN 55014-1:2017, EN IEC 61000-3-2:2019, EN 61000-3-3:2013+A1:2019, EN 55014-2:2015.

5
EN
ENGLISH
Safety Information .......................................................... 2
Parts & Specs......................................................................6
Assembly Preparation...................................................... 7
Assembly Instructions
Installing The Side Handles........................................................ 7
Mounting The Legs To The Grill ................................................8
Assembling The Lid Handle........................................................8
Installing The Flame Broiler Components...............................8
Installing The Cooking Components........................................9
Mounting The Power Cord Bracket..........................................9
Installing The Power Cord..........................................................9
Attaching the Grease Cup ..........................................................9
Connecting To A Power Source................................................ 10
Operating Instructions
Grill Environment........................................................................11
Grill Temperature Ranges..........................................................12
Understanding The Probes .......................................................12
Understanding The Control Board ..........................................13
Hopper Priming Procedure ..................................................... 14
First Use – Grill Burn-Off......................................................... 14
Automatic Start-Up Procedure............................................... 14
Manual Start-Up Procedure..................................................... 15
Shutting Off Your Grill................................................................15
Care & Maintenance ........................................................16
Tips & Techniques ............................................................17
Troubleshooting ............................................................. 18
Electrical Wire Diagram.................................................20
Replacement Parts...........................................................21
Warranty...........................................................................22
COPYRIGHT NOTICE
Copyright 2021. All right reserved. No part of this manual
may be copied, transmitted, transcribed, stored in a retrieval
system, in any form or by any means without expressed
written permission of,
Dansons
3411 North 5th Avenue, Suite 500, Phoenix, , 85013
sales@pitboss-grills.com | service@pitboss-grills.com
www.pitboss-grills.com
Customer Service
Monday through Sunday, 4am - 8pm PST (EN/FR/ES)
Toll-Free: 1-877-303-3134, Fax: 1-877-303-3135

6
EN ENGLISH
Part# Description
1 Upper Cooking Rack (x1)
2 Cooking Grid (x1)
3 Flame Broiler Slider (x1)
4 Flame Broiler Main Plate (x1)
5 Flame Broiler Adjusting Bar Handle (x1)
6 Flame Broiler Adjusting Bar (x1)
7 Side Handle Bracket (x4)
8 Side Handle (x2)
9 Main Barrel/ Hopper Assembly (x1)
10 Power Cord Bracket (x1)
11 Lid Handle (x1)
12 Grease Cup (x1)
13 Foot A (x2)
14 Foot B (x2)
15 Power Cord Clip (x1)
16 Power Cord - F Plug (x1)
17 Power Cord - G Plug (x1)
18 Meat Probe (x1)
NOTE: Due to ongoing product development, parts are subject to change without notice. Contact
Customer Service if parts are missing when assembling the unit.
220240 , 50 , 220 , 3
1
2
4
35
6
10
11
12
13
15
16
17
18
14
8
9
7
(WDH)
150 684 485 378
/ 26.93 . 19.09 . 14.88 . 19.7 / 43.43
1,235.86 / 191.56
419.85 / 65.0
1,655.71 / 256.56
82260° / 180500°

7
EN
ENGLISH
IMPORTANT: It is advised to read each step entirely before starting assembly on instructions. Do not tighten screws
completely until all screws for that step have been installed.
1.
Parts Required:
4 x Side Handle Bracket (#7)
2 x Side Handle (#8)
1 x Main Barrel/ Hopper Assembly (#9)
Installation:
• Place a piece of cardboard on the floor to prevent scratching the unit
and parts during assembly. Remove all the parts from inside the lid.
• Remove the pre-installed screws, locking washers and washers from
the four Side Handle Brackets. Set aside.
• Remove the two pre-installed screws from the left side panel of the
unit (on the hopper access panel). Secure two Side Handle Brackets to
the left side panel using the same screws just removed. Repeat same
installation for right side panel of the unit with the two other Side
Handle Brackets. Note illustration 1A.
• Next, carefully flip the unit upside-down. Install each Side Handle
into the Side Handle Brackets using the screws, locking washers, and
washers previously removed from the Side Handle Brackets. Note
illustration 1B.
Parts are located throughout the shipping carton, including underneath the grill. Inspect the grill, parts, and hardware blister pack
after removing from the protective shipping carton. Discard all packaging materials from inside and outside of the grill before
assembly, then review and inspect all parts by referencing the parts list. If any part is missing or damaged, do not attempt to
assemble. Shipping damage is not covered under warranty. Contact your dealer or Pit Boss® Customer Service for parts: Monday
through Sunday, 4am - 8pm PST (EN/FR/ES).
service@pitboss-grills.com | Toll-Free: 1-877-303-3134 | Toll-Free Fax: 1-877-303-3135
IMPORTANT: To ease installation, using two people is helpful (but not necessary) when assembling this unit.
Tools required for assembly: screwdriver and level.
Tools not included.
1
1
9
8
7

8
EN ENGLISH
2.
Parts Required:
1 x Main Barrel / Hopper Assembly (#9)
2 x Foot A (#13)
2 x Foot B (#14)
Installation:
• Remove the eight pre-installed screws from the bottom panel
corners of the unit, two from each corner.
• Secure Foot A to the bottom panel corner (closest to the control
board) using two of the screws previously removed. Repeat same
installation on opposite corner with other Foot A.
• Secure each Foot B on the two remaining bottom panel corners, using
two screws in each.
3.
Parts Required:
1 x Lid Handle (#11)
Installation:
• Remove the pre-installed screws, locking washers and washers from the
Lid Handle ends. Add a locking washer and washer onto a screw, then
from inside the barrel lid, insert the screw so that it protrudes to the
outside. Hand-tighten the screw (from the inside) into the Lid Handle.
Repeat same installation for other end of Lid Handle.
4.
Parts Required:
1 x Flame Broiler Slider (#3)
1 x Flame Broiler Main Plate (#4)
1 x Flame Broiler Adjusting Bar Handle (#5)
1 x Flame Broiler Adjusting Bar (#6)
Installation:
• Insert the Flame Broiler Main Plate into the Main Barrel, left side first.
Rest the Flame Broiler Main Plate slot onto the ledge tab on the left
side, then rest the right side on the built-in ledge (on the inside right)
of the Main Barrel that directs grease towards the Grease Cup. It will
sit slightly at a downward angle. Note 4.
IMPORTANT: If the Flame Broiler Main Plate is on the base of the
barrel, it is installed incorrectly. The Flame Broiler Main Plate should
sit at an angle, with the left side sitting higher than the right. Poor
installation of this part may result in damage to your Grill Barrel.
• Place the Flame Broiler Slider on top of the Flame Broiler Main Plate,
covering the slotted openings. Ensure the raised tab is on the right,
to easily adjust for direct or indirect flame when cooking. Note
illustration 4. Both Flame Broiler parts are lightly coated with oil to
avoid rusting when shipped.
4
4
4
4
3
3
11
2
13
13
14
9
14

9
EN
ENGLISH
5.
Parts Required:
1 x Upper Cooking Rack (#1)
1 x Cooking Grid (#2)
Installation:
• Place the Cooking Grid on the ledge inside the Main Grill.
• Position the Upper Cooking Rack onto the Cooking Grid. The Upper
Cooking Rack can be placed as desired.
NOTE: To maintain the searing and grilling performance of your
cooking grids, regular care and maintenance Is required.
6.
Parts Required:
1 x Power Cord Bracket (#10)
Installation:
• Remove the two pre-installed screws from the back panel of the unit.
Secure the Power Cord Bracket to the corner by using the two screws
previously removed.
7.
NOTE: There are two Power Cords supplied. Select the Power Cord that is
required for your region.
Parts Required:
1 x Power Cord Clip (#15)
1 x Power Cord (#16 or #17)
Installation:
• Place the Power Cord Clip on the Power Cord. Then, insert the Power
Cord into the groove at the bottom of the unit. Note 7.
• Secure the Power Clip to the rear panel using the pre-installed screw
below the air vent. Note 7.
• Next, remove the Flame Broiler Adjusting Bar Handle from the Flame
Broiler Adjusting Bar. Insert the Flame Broiler Adjusting Bar through
the opening hole on the right side of the Main Barrel. Add the Flame
Broiler Adjusting Bar Handle back onto the end outside the barrel.
Next, slide the notched end of the Adjusting Bar into the locking tab
on the Flame Broiler Slider, giving you adjustable access to the Flame
Broiler Slider on the Main Plate. Note steps in 4C.
NOTE: When the Flame Broiler Slider is open and direct flame is used,
do not leave the grill unattended for any period of time.
5
6
1
2
10
4
5
6
7
15
7
7 16/17

10
EN ENGLISH
8.
Parts Required:
1 x Grease Cup (#12)
Installation:
• Place the Grease Cup on the two screws of the pre-mounted screws of
the Main Barrel side panel. Press down firmly to ensure it is level on
the screws to avoid grease spills.
• The unit is now completely assembled.
9.
NOTE: Before plugging your Pit Boss® into any electrical outlet,
ensure the temperature dial is in the OFF position.
•
This appliance requires 220-240 volt, 50 hz, 220 w. It must be a 3-prong
grounded plug. Ensure grounded end is not broken off before use. The
control uses a 220-240 volt and fast-blow fuse to protect the board
from the ignitor.
•
Disconnect the igniter from the main wiring harness. Use the manual
start-up procedure. A Pit Boss® unit can operate using a 12 volt,
100 watt inverter plugged into your automobile outlet. To use the
automatic igniter, it is recommended to use a minimum of a 1000 watt
inverter.
IMPORTANT: Disconnect unit from power source when not in use.
9
8
12

11
EN
ENGLISH
With today’s lifestyle of striving to eat healthy and nutritious foods, one factor to consider is the importance of reducing fat
intake. One of the best ways to cut down on fat in your diet is to use a low fat method of cooking, such as grilling. As a pellet
grill uses natural wood pellets, the savory wood flavor is cooked into the meats, reducing the need for high sugar content sauces.
Throughout this manual, you will notice the emphasis on grilling food slowly at LOW or MEDIUM temperature settings.
1.
With all outdoor appliances, outside weather conditions play a big part in the performance of your grill and the cooking time
needed to perfect your meals. All Pit Boss® units should keep a minimum clearance of 305mm (12 inches) from combustible
constructions, and this clearance must be maintained while the grill is operational. This appliance must not be placed under
overhead combustible ceiling or overhang. Keep your grill in an area clear from combustible materials, gasoline and other
flammable vapors and liquids.
2.
As it becomes cooler outside, that does not mean that grilling season is over! The crisp cool air and heavenly aroma of
smoked foods will help cure your winter blues. Follow these suggestions on how to enjoy your grill throughout the cooler
months:
• If smoking at low temperatures fails, increase the temperature slightly to achieve the same results.
• Organize – Get everything you require ready in the kitchen before you head outdoors. During the winter, move your
grill to an area that is out of the wind and direct cold. Check local bylaws regarding the proximity of your grill in
relation to your home and/or other structures. Put everything you need on a cup, bundle up tight, and get it done!
• To help keep track of the outside temperature, place an outdoor thermometer close to your cooking area. Keep a log
or history of what you cooked, the outdoor temperature, and the cooking time. This will help later down the road to
help you determine what to cook and how long it will take.
• In very cold weather, increase your preheating time by at least 20 minutes.
• Avoid lifting the lid any more than necessary. Cold gusts of wind can completely cool your grill temperature. Be
flexible with your serving time; add extra cooking time each time you open the lid.
• Have a heated platter or a dish cover ready to keep your food warm while making the trip back inside.
• Ideal foods for winter cooking are those that require little attention, such as roasts, whole chickens, ribs, and turkey.
Make your meal preparation even easier by adding simple items such as vegetables and potatoes.
3.
As it becomes warmer outdoors, the cooking time will decrease. Follow these few suggestions on how to enjoy your grill
throughout the hot months:
• Adjust your cooking temperatures downward. This helps to avoid unwanted flare-ups.
• Use a meat thermometer to determine the internal temperature of your foods. This helps in preventing your meat
from over cooking and drying out.
• Even in hot weather it is still better to cook with the lid of your grill down.
• You can keep foods hot by wrapping them in foil, and placing them in an insulated cooler. Stuff crumpled up
newspaper around the foil and this will keep food hot for 3 to 4 hours.

12
EN ENGLISH
Temperature readouts on the control board may not exactly match the thermometer. All temperatures listed below
are approximate and are affected by the following factors: outside ambient temperature, the amount and direction of
wind, the quality of pellet fuel being used, the lid being opened, and the quantity of food being cooked.
•
205260° / 401500°
This range is best used to sear and grill at a high heat. Use in tandem with the flame broiler (slide plate) for indirect or
direct flame cooking. With the
flame broiler open
, direct flame is used to create those “blue” steaks, as well as flame-
kissed vegetables, garlic toast or s’mores! When the
flame broiler is closed
, the air circulates around the barrel, resulting
in convection heat. High temperature is also used to preheat your grill, burn-off the cooking grids, and to achieve high heat
in extreme cold weather conditions.
•
135180° / 275356°
This range is best for baking, roasting, and finishing off that slow smoked creation. Cooking at these temperatures will
greatly reduce the chances of a grease flare-up. Ensure that the flame broiler slider in the closed position, covering the
slotted openings. Great range for cooking anything wrapped in bacon, or where you want versatility with control.
•
82125° / 180257°
This range is used to slow roast, increase smoky flavor, and to keep foods warm. Infuse more smoke flavor and keep your
meats juicy by cooking longer at a lower temperature (also known as
low and slow
). Recommended for the big turkey at
Thanksgiving, juicy ham at Easter, or the huge holiday feast.
Smoking is a variation on true barbecuing and is truly the main advantage of grilling on a wood pellet grill.
Hot smoking
,
another name for
low and slow
cooking, is generally done between 82-125C / 180-257F. Hot smoking works best when
longer cooking time is required, such as large cuts of meats, fish, or poultry.
TIP: To intensify that savory flavor, switch to (low) temperature range immediately after putting your food
on the grill. This allows the smoke to penetrate the meats.
The key is to experiment with the length of time you allow for smoking, before the meal is finished cooking. Some outdoor
chefs prefer to smoke at the end of a cook, allowing the food to keep warm until ready to serve. Practice makes perfect!
•
Located inside the main barrel, on the back-left wall, is the Grill Probe. It is a small, vertical piece of stainless steel. The Grill
Probe measures the internal temperature of the unit. When the temperature is adjusted on the Control Board, the Grill Probe
will read the actual temperature inside the unit and adjust to the desired temperature.
IMPORTANT: The temperature of your unit is highly affected on ambient outdoor weather, quality of pellets used,
flavor of pellets, and the quantity of food being cooked.
•
The meat probe measures the internal temperature of your meat in the grill, similar to your indoor oven. Plug-in the meat
probe adapter to the meat probe connection port on the Control Board and insert the stainless steel meat probe into the
thickest portion of your meat and the temperature will be displayed on the control board. To ensure the meat probe is
connected properly to the connection port, feel and hear it snap into place.
NOTE: When placing the meat probe into your meat, ensure the meat probe and meat probe wires avoid direct
contact with flame or excess heat. This can result in damage to your meat probe. When not in use, disconnect from
the meat probe connection port and place aside to keep protected and clean.

13
EN
ENGLISH
FC
Actual
MP1
IGNITOR
NO
PELLET
Set
PRIME F/C
150
175
120
110 205
230
245
SMO KE
OFFHIGH
95
The LCD Screen is used as the information center for your unit. The
LCD screen will display the current grill temperature (ACTUAL) and
meat probe temperature (MP1). The flashing LCD screen indicates
the unit was just connected to AC power. Screen flashes three
times, then turns off.
Indicates the meat probe temperature when probe is connected.
Indicates the current temperature of unit.
Indicates the desired temperature that has been selected.
Indicates the auger motor is turning and feeding pellets to the
Burn Pot.
Indicates the igniter is on. When first starting your unit, the
igniter runs continuously for the start-up cycle.
Indicates the fan is running. If the grill is in operation, the fan is on.
NO
PELLET
Indicates the auger motor is no longer able to feed pellets to the
Burn Pot. Likely, the hopper is empty and requires refilling.
PRIME
Press and hold the Prime Button to activate an extra feed of pellets to the Burn Pot. This can be used to add more
fuel to the fire just before opening the barrel lid, resulting in a quicker heat recovery time. It can also be used to add
more fuel while smoking, to increase the intensity of clean smoke flavor. Overfeeding the Burn Pot may damage to
grill barrel paint.
F/C The Temperature Switch Button is used to change the temperature readout on the LED Screen. Press the button to
switch to Fahrenheit (ºF) or to Celsius (ºC), as preferred. Default is set to Celsius.
The Temperature Control Dial allows you to set your desired temperature. Rotate the knob marker to select from
Smoke, any of the eight temperature presets, or High. Once rotating the dial, the SET Temperature on the LCD Screen
will adjust.
OFF The Off Setting on the Temperature Control Dial is the OFF mode for the unit. The unit will not function on this
setting.
SMOKE The Smoke Setting on the Temperature Control Dial is the lowest smoking mode for the unit. The grill operates at the
lowest temperature, without the fire going out.
HIGH
The High Setting on the Temperature Control Dial is the highest heat level for the unit. The grill operates at the highest
temperature. When the lid is open, the grill will run at this speed to compensate for the loss of heat in the barrel.
The plug-in connection port on the front of the Control Board is for a Meat Probe. When the meat probe is connected,
the temperature is displayed on the LCD Screen. When the meat probe is not in use, disconnect the adapter from the
connection port.
FC
Actual
MP1
IGNITOR
NO
PELLET
Set
PRIME F/C
150
175
120
110 205
230
245
SMOKE
OFFHIGH
95

14
EN ENGLISH
These instructions should be followed the first time the grill is ignited, and each time the grill runs out of pellets in the hopper. The
auger must be primed to allow pellets to travel through the length of the auger, and fill the Burn Pot. If not primed, the igniter
will timeout before the pellets are ignited, and no fire will start. Follow these steps to prime the hopper:
1. Open the hopper lid. Make sure there are no foreign objects in the hopper or blocking the auger feed system at the
bottom.
2. Remove all cooking components from the interior of the grill. Locate the Burn Pot in the bottom of the main barrel.
3. Plug the power cord into a power source. Press the Power Button to turn the unit on, and turn the Temperature Control
Dial to the position. Check the following items:
• That you can hear the auger turning. Place your hand above the Burn Pot and feel for air movement. Do not place
your hand or fingers inside the Burn Pot. This can cause injury.
• After approximately a minute, you should smell the igniter burning and begin to feel the air getting warmer in the
Burn Pot. The igniter tip does not glow red, but gets extremely hot and will burn. Do not touch the igniter.
4. Once verified that all electric components are working correctly, press the Power Button to turn the unit off.
5. Fill the hopper with all natural barbecue wood pellets.
6. Press the Power Button to turn the unit on. Keep the Temperature Control Dial in the SMOKE position. Press and hold the
Prime Button until you see pellets on the inside of the grill from the auger tube. Once pellets begin to drop into the Burn
Pot, release the Prime Button.
7. Press the Power Button to turn the unit off.
8. Re-install the cooking components into the main barrel. The grill is now ready to use.
Once your hopper has been primed and before cooking on your grill for the first time, it is important to complete a grill burn-off.
Start the grill and operate at any temperature over 176°C / 350°F (with the lid down) for 30 to 40 minutes to burn-off the grill
and rid it of any foreign matter.
1. Plug the power cord into a grounded power source. Open the main barrel lid. Check the Burn Pot to ensure there is no
obstruction for proper ignition. Open the hopper lid. Ensure there are no foreign objects in the hopper or auger feed
system. Fill the hopper with dry, all natural barbecue hardwood pellets.
2. Ensure the Temperature Control Dial is in the position. Press the Power Button to turn the unit on. This will
activate the start-up cycle. The auger feed system will begin to turn, the igniter will begin to glow and the fan will
supply air to the Burn Pot. The grill will begin to produce smoke while the start-up cycle is taking place. The barrel lid
must remain open during the start-up cycle. To confirm the start-up cycle has begun properly, listen for a torchy roar, and
notice some heat being produced.
3. Once the heavy, white smoke has dissipated, the start-up cycle is complete and you are ready to enjoy your grill at your
desired temperature!

15
EN
ENGLISH
IGNITER FAILURE PROCEDURE
If for any reason your electric igniter fails or your grill's flame dies out during a cook, check the following steps,
or start your grill using the manual method.
1. Ensure the Temperature Control Dial is in the position. Open the barrel lid. Remove the cooking components
from inside. Remove all unburnt pellets and ash from the Burn Pot. Avoid touching the igniter to avoid injury, as it
may be extremely hot.
2. Once all cooking components are removed and cleaned, press the Power Button to turn the unit on. Check the
following:
• Visually confirm that the igniter is working by placing your hand above the Burn Pot and feeling for heat.
• Visually confirm that the igniter is protruding approximately 13mm / 0.5 inches in the Burn Pot.
• Visually confirm that the auger is dropping pellets into the Burn Pot.
• Confirm that the combustion fan is working by listening for a torchy roar.
3. If any of the above points are not working, follow
Troubleshooting
instructions
.
1. Ensure the Temperature Control Dial is in the position. Plug the power cord into a grounded power source.
2. Check Burn Pot to ensure there is no obstruction for proper ignition. Open the hopper lid. Ensure there are no foreign
objects in the hopper or auger feed system. Fill hopper with dry, all natural hardwood barbecue pellets.
3. Open the barrel lid. Remove the cooking components to expose the Burn Pot. Place a generous handful of pellets into
the Burn Pot. Squirt a gelled fire starter, or other appropriate pellet starter, over the top of the pellets. A small amount
of solid fuel fire starter, such as one composed of sawdust and wax, or wood shavings, is also appropriate. Add another
small amount of pellets in the Burn Pot.
NOTE: Do not use spirit, petrol, gasoline, lighter-fluid or kerosene for lighting or refreshing a fire in your grill.
4. Light the contents of the Burn Pot using a long match or long-nosed lighter. Allow the starter to burn for 3 to 5 minutes.
Do not attempt to add more starter into the Burn Pot. This can cause injury.
5. Quickly and carefully replace the cooking components to the inside of the main barrel. Continue start-up at step two of
Automatic Start-Up Procedure
.
1. When finished cooking, with the main barrel lid remaining closed, press the Power Button to turn the unit off and turn
the Temperature Control Dial to . The grill will begin its automatic cool-down cycle. The auger system will stop feeding
fuel, the flame will burn out, and the fan will continue to run until the cool-down cycle is complete. When the cycle is
complete, the fan will turn off.

16
EN ENGLISH
Any Pit Boss® unit will give you many years of flavorful service with minimum cleaning. Follow these cleaning and maintenance
tips to service your grill:
1.
• Running all pellets out of your auger system is recommended if your grill will be unused for an extended period of
time. This can be done by simply running your grill, on an empty hopper, until all pellets have emptied from the
auger tube.
NOTE: Use a long handled brush or shop-vac to remove excess pellets, sawdust, and debris for a complete
clean-out through the hopper screen.
• Check and clean off any debris from the fan air intake vent, found on the bottom of the hopper. Once the hopper
access panel is removed (see
Electric Wire Diagram
for diagram), carefully wipe off any grease build-up directly on
the fan blades. This ensures airflow is sufficient to the feed system.
2.
• It is recommended to clean your Burn Pot after every few uses. This will ensure proper ignition and avoid any hard
build-up of debris or ash in the Burn Pot.
• Use a long-handled grill cleaning brush, remove any food or build-up from the cooking grids. Best practice is to do
this while they are still warm from a previous cook. Grease fires are caused by too much fallen debris on the cooking
components of the grill. Clean the inside of your grill on a consistent basis. In the event you experience a grease fire,
keep the grill lid closed to choke out the fire. If the fire does not go out quickly, carefully remove the food, turn the
grill off, and shut the lid until the fire is completely out. Lightly sprinkle baking soda, if available.
• Check your grease cup often, and clean out as necessary. Keep in mind the type of cooking you do.
3.
• Wipe your grill down after each use. Use warm soapy water to cut the grease. Do not use oven cleaner, abrasive
cleansers or abrasive cleaning pads on the outside grill surfaces. All painted surfaces are not covered under
warranty, but rather are part of general maintenance and upkeep. For paint scratches, wearing, or flaking of the
finish, all painted surfaces can be touched up using high heat BBQ paint.
• Use a grill cover to protect your grill for complete protection! A cover is your best protection against weather and
outside pollutants. When not in use or for longterm storage, keep the unit under a cover in a garage or shed.
CLEANING FREQUENCY TIME TABLE (NORMAL USE)
ITEM CLEANING FREQUENCY CLEANING METHOD
Bottom of Main Grill Every 5-6 Grill Sessions Scoop Out, Shop-Vac Excess Debris
Burn Pot Every 2-3 Grill Sessions Scoop Out, Shop-Vac Excess Debris
Cooking Grids After Each Grill Session Burn Off Excess, Grill Cleaning Brush
Flame Broiler Every 5-6 Grill Sessions Scrape Main Plate with Slider, Do Not Wash Clean
Grease Cup After Each Grill Session Scrub Pad & Soapy Water
Auger Feed System When Pellet Bag is Empty Allow Auger to Push Out Sawdust, Leaving Hopper Empty
Hopper Electric Components Once A Year Dust Out Interior, Wipe Fan Blades with Soapy Water
Air Intake Vent Every 5-6 Grill Sessions Dust, Scrub Pad & Soapy Water
Grill Probe Every 2-3 Grill Sessions Scrub Pad & Soapy Water

17
EN
ENGLISH
Follow these helpful tips and techniques, passed on from Pit Boss® owners, our staff, and customers just like you, to become more
familiar with your grill:
1.
• Keep everything in the kitchen and cooking area clean. Use different platters and utensils for the cooked meat than
the ones you used to prepare or transport the raw meat out to the grill. This will prevent cross contamination of
bacteria. Each marinade or basting sauce should have its own utensil.
• Keep hot foods hot (above 60ºC / 140ºF), and keep cold foods cold (below 3ºC / 37ºF).
• A marinade should never be saved to use at a later time. If you are going to use it to serve with your meat, be sure
to bring it to a boil before serving.
• Cooked foods should not be left out in the heat for more than an hour. Do not leave hot foods out of refrigeration
for more than two hours.
• Defrost and marinade meats by refrigeration. Do not thaw meat at room temperature or on a counter top. Bacteria
can grow and multiply rapidly in warm, moist foods. Wash hands thoroughly with hot, soapy water before starting
any meal preparation and after handling fresh meat, fish and poultry.
2.
• Be prepared, or
Mise en Place
. This refers to preparing the cooking recipe, fuel, accessories, utensils, and all
ingredients you require at grill side before you start cooking. Also, read the entire recipe, start to finish, before
lighting the grill.
• A BBQ floor mat is very useful. Due to food handling accidents and cooking spatter, a BBQ floor mat would protect
a deck, patio, or stone platform from the possibility of grease stains or accidental spills.
3.
• To infuse more smoke flavor into your meats, cook longer and at lower temperatures (also known as
low and slow
).
Meat will close its fibers after it reaches an internal temperature of 49ºC / 120ºF. Misting, or mopping, are great ways
to keep meat from drying out.
• While searing your meats, cook with the lid down. Always use a meat thermometer to determine the internal
temperature of the foods you are cooking. Smoking foods with hardwood pellets will turn meats and poultry pink.
The band of pink (after cooking) is referred to as a
smoke ring
and is highly prized by outdoor chefs.
• Sugar-based sauces are best applied near the end of cooking to prevent burning and flare-ups.
• Leave open space between the foods and the extremities of the barrel for proper heat flow. Food on a crowded grill
will require more cooking time.
• Use a set of long-handled tongs for turning meats, and a spatula for turning burgers and fish. Using a piercing
utensil, such as a fork, will prick the meat and allow the juices to escape.
• Foods in deep casserole dishes will require more time to cook than a shallow baking pan.
• It’s a good idea to put cooked food onto a heated platter, keeping the food warm. Red meats, such as steak and
roasts, benefit from resting for several minutes before serving. It allows the juices that were driven to the surface
by heat to ease back to the center of the meat, adding more flavor.

18
EN ENGLISH
Proper cleaning, maintenance and the use of clean, dry, quality fuel will prevent common operational problems. When your Pit
Boss® grill is operating poorly, or on a less frequent basis, the following troubleshooting tips may be helpful. For FAQ, please visit
www.pitboss-grills.com
. You may also contact your local Pit Boss® authorized dealer or contact Customer Service for assistance.
WARNING: Always disconnect the electrical cord prior to opening the grill for any inspection, cleaning,
maintenance or service work. Ensure the grill is completely cooled to avoid injury.
PROBLEM CAUSE SOLUTION
No Power Lights On
The Control Board
Temperature Control
Dial is still off.
Turn the Temperature Control Dial to a temperature setting.
Not Connected To Power
Source
Ensure unit is plugged into a working power source. Reset breaker. Ensure GFCI is a minimum 10 Amp
service (see
Electric Wire Diagram
for access to electric components) Ensure all wire connections are
firmly connected and dry.
Fuse Blown On The
Control Board
Remove hopper access panel (see
Electric Wire Diagram
for diagram), press in plastic tabs holding the
control board in place and carefully pull controller inside the hopper to release controller. Check the fuse
for a broken wire or if the wire has turned black. If yes, fuse needs to be manually replaced.
Faulty Control Board Control Board needs to be replaced. Contact Customer Service for a replacement part.
Fire in Burn Pot Will
Not Light
Auger Not Primed Before the unit is used for the first time or anytime the hopper is completely emptied out, the auger
must be primed to allow pellets to fill the auger tube. If not primed, the igniter will timeout before the
pellets reach the Burn Pot. Follow
Hopper Priming Procedure
.
Auger Motor Is Jammed Remove cooking components from the main barrel. Press the Power Button to turn the unit on, turn
Temperature Control Dial to , and inspect the auger feed system. Visually confirm that the auger
is dropping pellets into the Burn Pot. If not operating properly, call Customer Service for assistance.
Igniter Failure Remove cooking components from the main barrel. Press the Power Button to turn the unit on,
turn Temperature Control Dial to , and inspect the igniter. Visually confirm that the igniter
is working by placing your hand above the Burn Pot and feeling for heat. Visually confirm that the
igniter is protruding approximately 13mm / 0.5 inches in the Burn Pot. If not operating properly, follow
Manual Start-up Procedure
to continue use of grill; however, call Customer Service for assistance or a
replacement part.
Insufficient Air Flow
Through Burn Pot
Check Burn Pot for ash build-up or obstructions. Follow Care and Maintenance instructions for ash build-
up. Check fan. Ensure it is working properly and air intake is not blocked. Follow
Care and Maintenance
instructions if dirty.
Flashing Dots On LCD
Screen
The Igniter Is On This is not an error that effects the grill. Used to show that the unit has power and is in Start-Up mode
(igniter is on). The igniter will turn off after five minutes. Once the flashing dots disappear, the grill will
begin to adjust to the desired temperature selected.
Flashing Temperature
On LCD Screen
Grill Temperature Is
Below 65°C /150°F
This is not an error that effects the unit; however, it is used to show that there is some risk that the fire
could go out. Check hopper for sufficient fuel or if there is an obstruction in the feed system. Remove
pellets and follow
Care and Maintenance
instructions. Check grill Grill Probe and follow
Care and
Maintenance
instructions if dirty. Check Burn Pot for ash build-up or obstructions, and follow
Care and
Maintenance
instructions for ash build-up. Check fan. Ensure it is working properly and air intake is not
blocked. Follow
Care and Maintenance
instructions if dirty. Check auger motor to confirm operation
(rotation), and ensure there is no blockage in the auger tube.

19
EN
ENGLISH
"ErH" Error Code The Unit Has
Overheated, Possibly
Due To Grease Fire Or
Excess Fuel.
Press the Power Button to turn the unit off, and allow grill to cool. Follow
Care and Maintenance
instructions. After maintenance, remove pellets, and confirm positioning of all component parts. Once
cooled, press the Power Button to turn the unit on, then select desired temperature. If error code still
displayed, contact Customer Service.
"Er1" Error Code Grill Probe wire not
making connection.
Remove hopper access panel (see
Electric Wire Diagram
for diagram), and check for any damage
to the Grill Probe wires. Ensure Grill Probe molex connectors are firmly connected, and connected
correctly, to the Control Board.
"ErP" Error Code Unit Not Turned Off
Properly When Last
Connected To Power.
Safety feature prevents an automatic restart. Press the Power Button to turn the unit off, wait two
minutes, then press the Power Button to turn the unit on again. Turn Temperature Control Dial to
or desired temperature. If error code still displayed, contact Customer Service.
Power Outage While
Unit In Operation.
"noP" Error Code Bad Connection At
Connection Port
Disconnect meat probe from connection port on the Control Board, and reconnect. Ensure the meat
probe adapter is firmly connected. Check for signs of damage to the adapter end. If still failed, call
Customer Service for replacement part.
Meat Probe Damaged Check for signs of damage to the wires of the meat probe. If damaged, call Customer Service for
replacement part.
Faulty Control Board Control Board needs to be replaced. Contact Customer Service for a replacement part.
Grill Will Not Achieve
Or Maintain Stable
Temperature
Insufficient Air Flow
Through Burn Pot
Check Burn Pot for ash build-up or obstructions. Follow
Care and Maintenance
instructions for
ash build-up. Check fan. Ensure it is working properly and air intake is not blocked. Follow
Care and
Maintenance
instructions if dirty. Check auger motor to confirm operation, and ensure there is no
blockage in the auger tube. Once all the above steps have been done, start the grill, set temperature
to and wait for 10 minutes. Check that the flame produced is bright and vibrant.
Lack Of Fuel, Poor Fuel
Quality, Obstruction In
Feed System
Check hopper to check that fuel level is sufficient, and replenish if low. Should the quality of wood
pellets be poor, or the length of the pellets too long, this may cause an obstruction in the feed system.
Remove pellets and follow
Care and Maintenance
instructions.
Grill Probe Check status of Grill Probe. Follow
Care and Maintenance
instructions if dirty. Contact Customer
Service for a replacement part if damaged.
Grill Produces Excess
Or Discolored
Smoke
Grease Build-Up Follow
Care and Maintenance
instructions.
Wood Pellet Quality Remove moist wood pellets from hopper. Follow
Care and Maintenance
instructions to clean out.
Replace with dry wood pellets.
Burn Pot Is Blocked Clear Burn Pot for ash and other debris. Follow Hopper Priming Procedure.
Insufficient Air Intake
For Fan
Check fan. Ensure it is working properly and air intake is not blocked. Follow Care and Maintenance
instructions if dirty.
Frequent Flare-Ups Cooking Temperature Attempt cooking at a lower temperature. Grease does have a flash point. Keep the temperature under
176°C / 350°F when cooking highly greasy food.
Grease Build-Up On
Cooking Components
Follow
Care and Maintenance
instructions.

20
EN ENGLISH
0.5 /
1.1 /
The Digital Control Board system is an intricate and valuable piece of technology. For protection from power surges and electrical
shorts, consult the wire diagram below to ensure your power source is sufficient for the operation of the unit.
220240 , 50 , 220 , 3
: Electrical components, passed by product safety testing and certification services, comply
with a testing tolerance of ± 5-10 percent.
P
P
R
Y
Y
Y P
S
WW
R R WW
W
W
Y Y
Y
Y
W
K
G
/
200 , 230 ,
9.5 127
0.375" 5.000"
230 , 50 ,
1
230 , 50 ,
2
5
This manual suits for next models
1
Table of contents
Languages:
Popular Smoker manuals by other brands

Kemper
Kemper SB-01 instruction manual

Barbecook
Barbecook BC-SMO-5006 manual

Pit Boss
Pit Boss PBV3A1 Assembly and operation instructions

Landmann
Landmann Vinson 200 480511 Assembly and operating manual

Broil King
Broil King Smoke 923610 owner's manual

Pit Boss
Pit Boss PRO Series PBV6PSE ELITE Assembly and operation

Mustang
Mustang 318243 manual

Woodland
Woodland PK 50 Smoker 'N Roaster Instruction and recipe manual

Southern Pride
Southern Pride DH-65 Specification sheet

oklahoma joes
oklahoma joes 11201716 Product guide

Masterbuilt
Masterbuilt 20070407 DIGITAL SMOKEHOUSE Assembly, care & use manual

Char-Broil
Char-Broil 14202002-A1 Guide