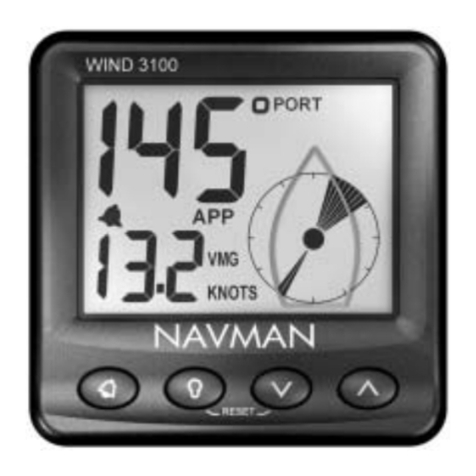
Navman Repeat 3100 User manual

Installation and
Operation Manual
www.navman.com
REPEAT 3100
NAVMAN
English .............2
Français .........15
Español ..........27
Português ......39
DRAFT
Approved by translator
Approved by Plastimo
This document is still under review and is subject to change.
Each completed stage to be marked with

REPEAT 3100 Installation and Operation Manual
NAVMAN
2
FCC Statement
Note: This equipment has been tested and found to comply with the limits for a Class B
digital device, pursuant to Part 15 of the FCC Rules. These limits are designed to
provide reasonable protection against harmful interference in a normal installation.This
equipment generates, uses and can radiate radio frequency energy and, if not installed
and used in accordance with the instructions, may cause harmful interference to radio
communications. However, there is no guarantee that interference will not occur in a
particular installation. If this equipment does cause harmful interference to radio or
television reception, which can be determined by turning the equipment off and on, the
user is encouraged to try to correct the interference by one or more of the following
measures:
Reorient or relocate the receiving antenna.
Increase the separation between the equipment and receiver.
Connect the equipment into an output on a circuit different from that to which the
receiver is connected.
Consult the dealer or an experienced technician for help.
A shielded cable must be used when connecting a peripheral to the serial ports.

REPEAT 3100 Installation and Operation Manual
NAVMAN 3
Contents
1 Introduction ..................................................................................................... 4
2 Operation ......................................................................................................... 5
2-1Turning onandoff ....................................................................................................... 5
2-2Thekeys andbacklight ................................................................................................ 5
2-3Changingthedata displayed ........................................................................................ 5
2-4Changing units ............................................................................................................ 6
2-5Simulate ...................................................................................................................... 6
2-6Keyreference .............................................................................................................. 6
3 Systems of several instruments .................................................................... 7
3-1NavBus ....................................................................................................................... 7
3-2NMEA ......................................................................................................................... 7
4 REPEAT 3100 hardware .................................................................................. 7
4-1 What comes with a REPEAT 3100 .............................................................................. 7
4-2Other partsrequired .................................................................................................... 7
4-3Accessories.................................................................................................................7
5 Installation and setup...................................................................................... 8
5-1Installation ................................................................................................................... 8
5-2Setup......................................................................................................................... 10
5-3Resetting tofactorydefaults ...................................................................................... 10
Appendix A - Specifications .............................................................................11
Appendix B - NMEA function table ................................................................. 12
Appendix C - Troubleshooting ........................................................................ 14
Appendix D - How to contact us ..................................................................... 51
Important
It is the owner's sole responsibility to install and use the instrument in a manner that will not cause
accidents,personal injuryorproperty damage.Theuserofthisproductissolely responsibleforobserving
safe boating practices.
NAVMANNZLIMITED DISCLAIMSALLLIABILITYFORANYUSE OFTHISPRODUCTINAWAYTHAT
MAYCAUSEACCIDENTS, DAMAGE OR THAT MAYVIOLATE THE LAW.
This manual represents the REPEAT 3100 as at the time of printing. Navman NZ Limited reserves the
right to make changes to specifications without notice.
GoverningLanguage:Thisstatement,anyinstruction manuals,userguidesandother informationrelating
to the product (Documentation) may be translated to, or has been translated from, another language
(Translation). In the event of any conflict between any Translation of the Documentation, the English
language version of the Documentation will be the official version of the Documentation.
Copyright © 2002 Navman NZ Limited, New Zealand, All rights reserved. NAVMAN is a registered
trademark of Navman NZ Limited.

REPEAT 3100 Installation and Operation Manual
NAVMAN
4
The REPEAT 3100 is part of the NAVMAN 3100
seriesofinstruments, whichmeasurespeed,depth,
wind, water temperature, battery voltage and other
functions. The REPEAT 3100 can display any data
that is output from 3100 series instruments, as well
as NMEA data from compatible instruments. The
REPEAT 3100 can also act as a GPS repeater and
providesa wealthofinformationondeckfromaGPS
situatedina moreprotectedposition, suchasbelow
decks.
The REPEAT 3100 can obtain its data in two ways:
From other 3100 Series instruments which are
connectedbyNavBus(NavBusisNAVMAN’s
proprietary system for connecting marine
instruments).
From a maximum of three instruments, such
as NAVMAN’sTRACKER Chartplotter, that
send compatible NMEA 0183 V2 data. When
connecting the REPEAT3100 to 3rd party
instruments, ensure that the NMEAdata being
sent is compatible.
For maximum benefit, please read this manual
carefully before installation and use.
Cleaning and maintenance
Clean the unit with a damp cloth or mild detergent.
Avoid abrasive cleaners, petrol or other solvents.
1 Introduction
Display
(backlit)
Fourkeys
(backlit)
Display shows
SpeedoverGround
(SOG)
The REPEAT 3100 display unit
111 x 111 mm
(4.4"x4.4")
Alarm symbol
Display modes (see section 2-3)
Dual mode: two items of data
from SPEED 3100, DEPTH
3100 or MULTI 3100
Wind mode: one item of data
from WIND 3100 NMEA mode: one item of data
from compatible NMEA
instruments

REPEAT 3100 Installation and Operation Manual
NAVMAN 5
2-1 Turning on and off
Turntheunitonandoffwiththeauxiliarypowerswitch
on the boat. The unit does not have its own power
switch. When you turn the unit off, it retains any
settings.
IfthewordSIM flashesatthebottom,rightofthedisplay,
then simulate is on (see section 2-5).
2-2 The keys and backlight
Theunithasfourkeys, labelled +, , and .In
this manual:
Press means to push the key for less than one
second.
Hold for two seconds means to hold the key
down for two seconds or more.
Press one key + another key means to push
bothkeystogether.
Set backlight for screen and keys
You can set the backlight to one of four brightness
levels or off. Press once to display the current
backlight level, press again to change the level:
2-3 Changing the data displayed
The display has three modes:
Dual mode displays speed or depth data.
Wind mode displays wind data.
NMEA mode displays data from compatible
NMEAinstruments.
To change mode, press +one or more times.
Note: If the display is dashes (— —) then it means
thatthedatais not availableortheinstrument which
sends the data to the REPEAT 3100 is turned off or
disconnected.
Dual mode
Backlight
level 2
2 Operation Dual Mode displays two items of data at a time from
a SPEED 3100, DEPTH 3100 or MULTI 3100. To
change the item displayed in the top line of the
display, press one or more times. The choices
are:Speed.
Avgspeed.
Maxspeed.
Trim speed.
Depth.
Temperature.
To change the item displayed in the bottom line of
thedisplay,press one ormoretimes.Thechoices
are:Speed.
Depth.
Trip log (distance).
Total log (distance).
Batteryvoltage.
Countdown timer.
Wind mode
Wind mode displays one item of data at a time from
a WIND 3100. To change the item displayed, press
or one or more times. The choices are:
Apparent wind direction.
True wind direction.
Apparent wind speed.
True wind speed.
Maxwindspeed.
VMG.

REPEAT 3100 Installation and Operation Manual
NAVMAN
6
++
Hold +
Hold
+
5 sec
Increasevalue
or change
NMEAitem
Decreasevalue
or change
NMEAitem
Turn Simulate
on or off
Reset to factory
defaults
Adjust backlight
(4 levels or off)
Change display mode, between
Dual mode, Wind mode and
NMEAmode
SelectNMEA
data to display
++
++
Return to
normal
operation
2-6 Key reference
Setup
Turn power on
Normaloperation
Set Backlight
Group
NMEAmode
NMEAModedisplays oneitemof dataatatimefrom
any compatible NMEA instrument. To select which
NMEA data can be displayed, see section 5-2,
step 2. To change the item displayed, press or
one or more times.
2-4 Changing units
To change the units on the REPEAT 3100, change
the units on the instrument which sends the data to
the REPEAT 3100.
Change item of data displayed
+
Set UTC offset
(for time display)
TurnNMEA
function display
ON or OFF
+
++
Change item of data displayed
2-5 Simulate
Simulate allows you to become familiar with the
REPEAT 3100 off the water. When simulate is on,
theunitfunctionsnormallyexceptthatthedatafrom
other instruments is ignored and the unit generates
this data internally. The word SIM flashes at the
bottom, right corner of the screen if:
The REPEAT 3100 has simulate on.
Any instrument connected to the REPEAT
3100 by the NavBus has simulate on.
To turn simulate on or off in the REPEAT 3100:
1 Turn the power off.
2 Hold down +while you turn the power on.

REPEAT 3100 Installation and Operation Manual
NAVMAN 7
3 Systems of several instruments
Several NAVMAN instruments can be connected
together to share data. There are two ways of
connectinginstrumentstogether,NavBus orNMEA.
3-1 NavBus
NavBusis aNAVMANproprietarysystemthatallows
systems of multiple instruments to be built using a
single set of transducers. When instruments are
connectedbyNavBus:
If you change the units, alarms or calibration in
one instrument, then the values will
automatically change in all other instruments
of the same type.
Each instrument can be assigned to a group of
instruments (see section 5-2, step 2). If you
change the backlight in an instrument in group
1, 2, 3 or 4 then the backlight will automatically
change in the other instruments in the same
group. If you change the backlight in an
instrument in group 0 then no other
instruments are affected.
If an alarm sounds, mute it by pressing on
any NAVMAN instrument which can display
that alarm and which has a key.Alarms can
not be muted from a REPEAT 3100.
NavBus and the REPEAT 3100
The REPEAT 3100 will automatically read and
display data from other instruments connected
byNavBus.
3-2 NMEA
NMEAis an industry standard, but is not as flexible
as NavBus as it requires dedicated connections
betweencompatibleinstruments.TheREPEAT3100
canreadanddisplayNMEAdataoutputbyuptothree
instruments (seeAppendix B).
4 REPEAT 3100 hardware
4-1 What comes with a REPEAT 3100
REPEAT3100 unit with protective cover.
Warranty card.
Mountingtemplate.
This Installation and Operation manual.
4-2 Other parts required
One or more 3100 series instruments will be
connected to the boat 12 V power supply via:
An accessory switch to turn the instruments on
and off.
Afuse: Use a 1Afuse for between one and five
instruments.
The REPEAT 3100 can receive and display:
Data from other NAVMAN instruments
connected via NavBus; settings for units and
backlighting are shared (see section 3-1).
NMEAdata from up to three compatible
instruments (see section 3-2).
Wiring and connectors are required (see section 5
or the NavBus Installation and Operation manual).
4-3 Accessories
NavBus junction boxes are available from your
NAVMANdealer.

REPEAT 3100 Installation and Operation Manual
NAVMAN
8
5 Installation and setup
Clearance 50 mm
(2") minimum
20 mm (0.75")
maximum thickness
Fixing nut
Cables
Display
unit
Fixing hole
50 mm (2")
Side view of display unit mounting
5-1Installation
REPEAT 3100 display unit
1 Choose a location for the display unit that is:
Easily seen and protected from damage.
At least 100 mm (4") from a compass and
at least 500 mm (1.65 ft) from a radio or
radarantenna.
Away from engines, fluorescent lights, and
power inverters.
Accessible from behind; the minimum
clearance required at the back is 50 mm
(2") (see right).
With the back of the unit protected from
moisture.
2 The unit must mount on a flat panel which is
less than 20 mm (0.75") thick. Stick the
mounting template in place. Drill a 50 mm (2")
fixing hole through the centre hole in the
template.
Note that the template allows space around
the unit for the protective cover.
3 Remove the fixing nut from the back of the unit.
Insert the stud at the back of the unit through
the mounting hole. Hand tighten the fixing nut.
Power/data cable wiring
Follow the wiring example on the next page:
1 The REPEAT 3100 requires 12 V DC power.
Fit a power switch and fuse to the power
supply or power the unit from a fused auxiliary
switch. The fuse should be 1 Afor up to five
NAVMAN 3100 series instruments.
2 If the REPEAT 3100 is to receive data from
other instruments via the NavBus, install these
instruments and connect the REPEAT 3100 to
theNavBus.
Note: If an instrument can be connected to the
REPEAT 3100 by both NavBus and by NMEA,
then use the NavBus, because more
information can be shared via the NavBus (see
section 3-1).
Correct installation is critical to the performance of
the unit. It is vital to read this section of the manual
and the documentation that comes with the other
parts before starting installation.
Warnings
Theunitiswaterprooffrom thefront.Protecttherear
of the unit from water, or else water might enter the
breathing hole and damage the unit. The warranty
doesnot coverdamagecausedbymoistureorwater
entering the back of the unit.
Ensure that any holes that you cut will not weaken
the boat’s structure. If in doubt, consult a qualified
boat builder.
3 If the REPEAT 3100 is to receive NMEAdata
from other compatible instruments, install
these instruments and connect each
instrument’s NMEAoutput to one of the three
REPEAT3100 NMEAinputs. Up to three
instruments can be connected.
4 Tape or cover any unused wires or connectors
to protect them from water and keep them from
shorting together.
Setup and test
Set up the unit as described in section 5-3.
Take the boat for a trial run to check that all the
instruments work correctly.
REPEAT 3100 Installation and Operation Manual
NAVMAN 9
REPEAT 3100 wiring example
In this example, the REPEAT3100 receives data from a NAVMAN WIND 3100 and a SPEED 3100 via the
NavBus. Any number of NAVMAN instruments can be connected to the NavBus and send data to the
REPEAT 3100.
TheREPEAT3100alsoreceives NMEAdata fromaGPS andacompass. OnemoreNMEAinstrumentcould
be connected to the third NMEAinput on the REPEAT3100.
Wire any more REPEAT 3100s in parallel with the first.
Use optional junction boxes to simplify wiring, (see
right). For information on how to connect NavBus
and to use junction boxes, refer to the NavBus
Installation and Operation manual.
Tip: Daisychain the power wires between
instruments or groups of instruments.
NAVMAN NavBus Instruments NMEA Instruments REPEAT 3100WIND 3100 SPEED 3100 GPS Compass Wire multiple REPEAT
3100 in parallel
Other
wiring Other
wiring Other
wiring Other
wiring
NMEA
output
NMEA
output
Three
NMEA
inputs
Green Green
White White
Yellow
Yellow
Orange Orange Orange
BlueBlueBlue NavBus wires
It does not matter which NMEA
output is connected to which
REPEAT 3100 NMEA input Unused
NMEA
input
NavBus
connections
Orange
Blue
Red
Black
Red
Black
Switch Fuse 12 V DC
power 12 V DC
power
(see left)
+
-
Power/data cables
Junctionbox
Junctionbox
Power & data
connections
Power/data cable
NavBuscable
Group 1
Group 2
Power & data
connections
To next cluster

REPEAT 3100 Installation and Operation Manual
NAVMAN
10
SIMULATE mode ....................................OFF
Backlight level ............................................0
Backlight group .......................................... 1
NMEA data to display ................ All are OFF
UTC offset ........................................ 0 hours
5-2 Setup
1 If the unit is part of a system of 3100 series
instruments connected by NavBus, set the
backlight group number (see section 3-1):
i Press ++ to display the Backlight
Group screen:
ii Press or to set the backlight group
number.
2 If the unit is to display data sent by NMEA,
select what NMEAdata items will be displayed
(see section 2-3, NMEA mode):
i Ensure that all the instruments which send
NMEAdata to the REPEAT 3100 are turned
on and are transmitting the NMEAdata.
ii Press ++ until the NMEA Selection
screen is displayed:
iii If a NMEA instrument has recently been
connected to or disconnected from the
REPEAT 3100, press + to clear the
detectedNMEAstrings.
iv The REPEAT 3100 automatically detects
NMEAdata sentences from the NMEA
instruments which are sending data and
displays them here.
Press or to show each NMEA
function in turn, note that the data value
itself is not displayed.
For each function, use the NMEA function
number to look up the data description in
the NMEAfunction table (see appendix B).
Then press +if necessary to turn the
function ON (data will be displayed) or OFF
(data will not be displayed).
3 If the unit is to display local time, set the UTC
offset. The UTC offset will be added to the
UTC (GMT) time sent from a GPS instrument
to display the local time. To set the UTC offset:
i Press ++ until the UTC Offset screen
is displayed:
ii Press or to set the UTC offset.
The range is +13 to -13 hours in 0.5 hour
increments.
Note: Daylight saving time must be adjusted
manually.
4 Press to return to normal operation.
5-3 Resetting to factory defaults
Allsettingsmayberesettothemanufacturer’sdefault
settings (see below).
To reset to factory defaults:
1 Turn the power off.
2 Hold down + while you turn the power
on and continue to hold the keys down for at
least 5 seconds.
Backlight
group 2
NMEA
function
number
Function
can be
ON or OFF
Offset is
+ 2.5 hours
NMEAinput number, identifies which
wire the NMEAdata is received on
(seeAppendixA, Power/data cable wires)

REPEAT 3100 Installation and Operation Manual
NAVMAN 11
Physical
Case size 111 mm (4.4") square.
LCD display 82 mm (3.2") wide, 61 mm (2.4")
high; twisted nematic.
LCD digits 30 mm (1.2") high on top line,
20 mm (0.8") high on bottom line.
Four operator keys, laser etched.
Backlighting for display and keys, amber, four
levels and off.
Operating temperature 0 to 50°C (32 to 122°F).
Power cable length 1 m (3.25 ft).
Electrical
Power supply 10.5 to 16.5 V DC, 20 mA without
backlighting, 60 mA with full backlighting.
NavBus interface and display
NavBusinterfaceforNAVMANSPEED3100,
DEPTH 3100, MULTI 3100 and/or WIND 3100
instruments.
Can receive and display these values from the
NavBus:
Current speed, average speed, maximum
speed, trim speed.
Log: trip log and total log.
Temperature.
Countdown timer (from SPEED 3100 or
MULTI 3100).
Depth.
Wind speed and direction (true and apparent).
VMG.
Appendix A - Specifications NMEA interface and display
Three NMEA0183 inputs for compatible NMEA
instruments.
Can receive and display these NMEA sentences:
APB, BEC, BOD, BWC, BWR, BWR, DBT,
DPT, GGA, GNS, HDG, HDT, HSC, MTW,
MWD, MWV, RMA, RMB, RMC, VDR, VHW,
VLW, VPW, VTG, WCV, XTE, XTR, ZDA (see
AppendixB).
Standards compliance
EMC compliance:
USA (FCC): Part 15 Class B.
Europe (CE): EN50081-1, EN50082-1.
New Zealand and Australia (C Tick):
AS-NZS3548.
Environment: IP66 from front when correctly
mounted.
Power/data cable wires
Wire Signal
Red Power positive, 12 V DC
Black Powernegative,NMEA common
Orange NavBus+
Blue NavBus-
White NMEAinput1
Yellow NMEAinput2
Green NMEAinput3

REPEAT 3100 Installation and Operation Manual
NAVMAN
12
Appendix B - NMEA function table
metI .oN noitcnuFstinU AEMN ecnetnes
011htpeDsreteMTPD
021htpeDteeFTBD
031htpeDsreteMTBD
041htpeDsmohtaFTBD
051deepStaoBstonKWHV
061deepStaoBhpKWHV
071ecnatsiDpirTseliMlacituaNWLV
081ecnatsiDlatoTseliMlacituaNWLV
091erutarepmeTretaWsuisleCseergeDWTM
002deepSdniW roeurT(ecnetnesnideificepsstinU )stonKro,s/m,hpKdnatnerappA VWM
012deepSdniWstonK,eurTDWM
022deepSdniWs/m,eurTDWM
032noitceriDdniW roeurT(ecnetnesnideificepsepytriD )tnerappA VWM
042noitceriDdniWcitengaMseergeDDWM
052dniWotlellaraPdeepSstonKWPV
062dniWotlellaraPdeepSs/mWPV
072teStnerruCeurTseergeDRDV
082teStnerruCcitengaMseergeDRDV
092tfirDtnerruCstonKRDV
003gnidaeHeurTseergeDWHV
013gnidaeHcitengaMseergeDWHV
023gnidaeHeurTseergeDGDH
033gnidaeHcitengaMseergeDGDH
043gnidaeHeurTseergeDTDH
053noitisoPsetuniM,seergeDAGG
063noitisoPsetuniM,seergeDSNG
073noitisoPsetuniM,seergeDAMR
083noitisoPsetuniM,seergeDCMR
093)GOS(dnuorGrevOdeepSstonKAMR
004)GOS(dnuorGrevOdeepSstonKCMR
014)GOS(dnuorGrevOdeepSstonKGTV
024)GOS(dnuorGrevOdeepShpKGTV
034)GOC(dnuorGrevOesruoCeurTseergeDAMR
044)GOC(dnuorGrevOesruoCcitengaMseergeDAMR
054)GOC(dnuorGrevOesruoCeurTseergeDCMR
064)GOC(dnuorGrevOesruoCcitengaMseergeDCMR
074)GOC(dnuorGrevOesruoCeurTseergeDGTV
084)GOC(dnuorGrevOesruoCcitengaMseergeDGTV
094)WTB(tniopyaWoTgniraeB)citengaMroeurT(ecnetnesnideificepsepyTBPA
005)WTB(tniopyaWoTgniraeBeurTseergeDCEB
015)WTB(tniopyaWoTgniraeBcitengaMseergeDCEB
025)WTB(tniopyaWoTgniraeBeurTseergeDCWB
035)WTB(tniopyaWoTgniraeBcitengaMseergeDCWB
045)WTB(tniopyaWoTgniraeBeurTseergeDRWB
055)WTB(tniopyaWoTgniraeBcitengaMseergeDRWB
065)WTB(tniopyaWoTgniraeBeurTseergeDBMR
075)WTD(tniopyaWoTecnatsiDseliMlacituaNCEB
085)WTD(tniopyaWoTecnatsiDseliMlacituaNCWB
095)WTD(tniopyaWoTecnatsiDseliMlacituaNRWB
006)WTD(tniopyaWoTecnatsiDseliMlacituaNBMR
016)STH(reetSoTgnidaeH)citengaMroeurT(ecnetnesnideificepsepyTBPA
026)STH(reetSoTgnidaeHeurTseergeDCSH
036)STH(reetSoTgnidaeHcitengaMseergeDCSH
046)ETC(rorrEkcarTssorCseliMlacituaNBPA

REPEAT 3100 Installation and Operation Manual
NAVMAN 13
036)STH(reetSoTgnidaeHcitengaMseergeDCSH
046)ETC(rorrEkcarTssorCseliMlacituaNBPA
056)ETC(rorrEkcarTssorCseliMlacituaNBMR
066)ETC(rorrEkcarTssorCseliMlacituaNETX
076)ETC(rorrEkcarTssorCseliMlacituaNRTX
086 yticoleVerusolCtniopyaW )VCW( stonKBMR
096 yticoleVerusolCtniopyaW )VCW( stonKVCW
007 otnigirO,gniraeB )DOB(noitanitseD roeurT(ecnetnesnideificepsepyT )citengaM BPA
017 otnigirO,gniraeB )DOB(noitanitseD eurTseergeDDOB
027 otnigirO,gniraeB )DOB(noitanitseD citengaMseergeDDOB
037emiTsdnoceStuohtiWCMR
047emiTsdnoceStuohtiWADZ
057emiTsdnoceShtiWCMR
067emiTsdnoceShtiWADZ
077etaDyyyy.dd.mmCMR
087etaDyyyy.dd.mmADZ
metI .oN noitcnuFstinU AEMN ecnetnes
011htpeDsreteMTPD

REPEAT 3100 Installation and Operation Manual
NAVMAN
14
Appendix C - Troubleshooting
This troubleshooting guide assumes that you have
read and understood this manual.
It is possible in many cases to solve difficulties
without having to send the unit back to the
manufacturer for repair. Please follow this
troubleshooting section before contacting the
nearest NAVMAN dealer.
There are no user serviceable parts. Specialized
methods and testing equipment are required to
ensure that the unit is reassembled correctly and is
waterproof. Repairs to the unitmust only be carried
out by a service centre approved by Navman NZ
Limited. Users who service the unit themselves will
voidthewarranty.
More information can be found on our website:
www.navman.com
1 Unit will not turn on:
a Fuse blown or circuit breaker tripped.
b Power supply voltage is outside the range
10.5 to 16.5 V DC.
c Power/data cable damaged.
2 Displays dashes (— —) instead of a data
value:
a The REPEAT 3100 has not been installed
with an instrument that can send
compatible data to the REPEAT 3100.
b The instrument that sends compatible data
to the REPEAT3100 is turned off or the
value is outside the range that the
instrument can display.
c Power/data cable damaged.
3 Values displayed are wrong or erratic:
a The instrument that sends compatible data
to the REPEAT3100 is not operating
correctly. Refer to the troubleshooting
guide in the instrument’s installation and
operation manual.
b Interference from electrical noise. Review
installation.
4 Unit operates erratically or unexpectedly:
Unit set up incorrectly. Reset to factory
defaults (see section 5-3). Then setup the
unit again (see section 5-2).
5 Unit will only display one item of wind or
NMEA data at a time:
This is normal. Two items are only
displayed in dual mode.
6 An item of NMEA data is not displayed:
Turn the NMEAfunction on (see section 5-2,
step 2).
7 ANMEA functionis notdisplayed inthe NMEA
selection screen (see section 5-2, step 2):
Press or to scroll through the
available functions. If a function is not
displayed then it means that the REPEAT
3100 is not connected to a compatible NMEA
instrumentthatoutputsthatNMEAsentence.
8 The word SIM flashes at bottom, right of
screen, values displayed are unexpected:
a The REPEAT 3100 has simulate turned on
(see section 2-5).
b An instrument sending data to the
REPEAT 3100 has simulate turned on
(see section 2-5).
9 The display fogs:
a Moist air has entered the breathing tube at
the rear of the unit.Air the boat or run unit
with backlight fully on.
b Water has entered the breathing tube.
Return unit for service.

REPEAT 3100 Notice de montage et d’utilisation
NAVMAN 15
Sommaire
1 Introduction ................................................................................................... 16
2 Fonctionnement ............................................................................................ 17
2-1Mise en marcheetarrêt ............................................................................................. 17
2-2Touchesdu boîtieret réglagedurétro-éclairage......................................................... 17
2-3Sélection desdonnées affichées ............................................................................... 17
2-4Modification desunités .............................................................................................. 18
2-5Modesimulation ........................................................................................................ 18
2-6Guide d’utilisationdestouches .................................................................................. 18
3 Systèmes composés de plusieurs instruments ......................................... 19
3-1SystèmeNavBus ....................................................................................................... 19
3-2Interfaçage NMEA ..................................................................................................... 19
4 Equipement du REPEAT 3100 ...................................................................... 19
4-1Elémentslivrésavec votreREPEAT3100 ................................................................. 19
4-2Autrematérielnécessaire .......................................................................................... 19
4-3Accessoires............................................................................................................... 19
5 Montage et paramétrage ............................................................................... 20
5-1Montage .................................................................................................................... 20
5-2Paramétrage .............................................................................................................. 22
5-3Retourauxparamètrespardéfaut.............................................................................. 23
Appendice A - Caractéristiques techniques .................................................. 23
Appendice B - Table des fonctions NMEA ..................................................... 24
Appendice C - En cas de problème ................................................................ 26
Appendice D - Comment nous contacter ....................................................... 51
Important
Il incombe au propriétaire de veiller à ce que l'appareil soit installé et utilisé de telle sorte qu'il ne cause
pas d'accidents, de blessures ou de dommages matériels. L'utilisateur est seul responsable du respect
des règles de sécurité en matière de navigation.
NAVMAN NZ LIMITED DECLINE TOUTE RESPONSABILITE DANS LE CAS D'UNE UTILISATION DU
PRODUITOCCASIONNANTDESACCIDENTS,DESDOMMAGESMATERIELSOUUNNON-RESPECT
DELALOI.
CettenoticeprésenteleREPEAT3100à la date d'impression.NavmanNZLimitedse réserve le droit de
modifier les caractéristiques techniques du produit sans préavis.
Langue de référence : cette notice a été traduite de l'anglais. En cas de litige concernant l'interprétation
de la notice, la version anglaise de la notice prévaudra.
Copyright©2002NavmanNZLimited,Nouvelle-Zélande, tousdroitsréservés.NAVMANestunemarque
déposée de Navman Nz Limited.

REPEAT 3100 Notice de montage et d’utilisation
NAVMAN
16
Le REPEAT 3100 fait partie de la nouvelle gamme
d’appareils de navigation NAVMAN, qui mesurent
notamment la vitesse du bateau, la profondeur, la
vitesseetladirectionduvent,latempératuredel’eau
et la tension de la batterie. Le REPEAT 3100 peut
afficherl’ensemble desdonnéesdes instrumentsde
lasérie3100ainsiquelesdonnéesNMEAprovenant
d'appareils compatibles. Le REPEAT 3100 peut
également répéter les données de navigation d’un
instrument GPS.
Le REPEAT 3100 peut recevoir des données
provenant:
d’autres instruments de la série 3100 via le
NavBus (le NavBus est un système déposé
NAVMAN permettant de connecter plusieurs
instruments de navigation entre eux).
d’instruments compatibles NMEA0183 V2, tels
qu'un traceur de cartes TRACKER NAVMAN
(possibilité de connecter au REPEAT 3100
jusqu’à trois instruments via l’interfaçage
NMEA). Lorsque vous connectez un appareil
au REPEAT 3100, veillez à ce que les données
NMEAenvoyées soient compatibles.
Pour un fonctionnement optimal, veuillez lire
attentivement cette notice avant le montage et
l’utilisation de votre appareil.
Nettoyage et entretien
Nettoyer le boîtier à l’aide d’un chiffon humide ou
imprégné d’un détergent doux. Ne pas utiliser de
produits abrasifs, d’essence ou autres solvants.
1 Introduction
Ecran
(rétro-éclairé)
Quatre touches
(rétro-éclairées)
Affichage de la vitesse
sur le fond (SOG)
Boîtier du REPEAT 3100
111 x 111 mm
Symbole alarme
Modes d’affichage (voir section 2-3)
Mode double affichage :
affichage de deux fonctions du
SPEED 3100, du DEPTH 3100
ou du MULTI 3100.
Mode vent : affichage d’une
fonction du WIND 3100. Mode NMEA : affichage d’une
fonction d’un instrument
compatible NMEA.

REPEAT 3100 Notice de montage et d’utilisation
NAVMAN 17
2-1 Mise en marche et arrêt
Allumezetéteignezl’appareilàl’aidedel’interrupteur
auxiliaireinstallésurlebateau. LeREPEAT3100ne
possède pas d’interrupteur intégré. Lorsque vous
éteignez l’appareil, l’ensemble des réglages
effectués est automatiquement mémorisé.
SilemotSIMclignoteenbasàdroitedel’écran,l’appareil
est en mode simulation (voir paragraphe 2-5).
2-2 Touches du boîtier et réglage du
rétro-éclairage
L’appareil possède quatre touches, désignées par
les symboles +, , et . Dans cette notice :
Appuyer sur une touche signifie exercer une
pression sur une touche pendant moins d’une
seconde.
Maintenir une touche enfoncée signifie
appuyer de manière continue sur une touche
pendant au moins 2 secondes.
Appuyer sur une touche + une autre touche
signifie appuyer simultanément sur les deux
touches.
Réglagedurétro-éclairagedel’écranetdestouches
Vous pouvez régler le rétro-éclairage selon quatre
niveauxd’intensitéoubienledésactiver.Appuyerune
premièrefoissur latouche pourafficherleniveau
de rétro-éclairage actuel, puis appuyer à nouveau
sur la touche pour le modifier :
Rétro-
éclairage de
niveau2
2 Fonctionnement Mode double affichage
Le mode double affichage permet d’afficher
simultanément deux fonctions du SPEED 3100, du
DEPTH3100ouduMULTI3100.Appuyersurlatouche
une ou plusieurs fois pour afficher sur la ligne
supérieure de l’écran l’une des fonctions suivantes :
Vitesse (Speed).
Vitesse moyenne (Avg speed).
Vitesse maximale (Max speed).
Accéléromètre (Trim speed).
Profondeur(Depth).
Température (Temperature).
Appuyer sur la touche une ou plusieurs fois pour
afficher sur la ligne inférieure de l’écran l’une des
fonctions suivantes :
Vitesse (Speed).
Profondeur(Depth).
Loch journalier (Trip log).
Loch totalisateur (Total log).
Tension de la batterie.
Compte à rebours.
Mode vent
Lemodeventpermetd’afficherunefonctionduWIND
3100 à la fois.Appuyer sur la touche ou une
ou plusieurs fois pour afficher l’une des fonctions
suivantes:
Direction du vent apparent.
Direction du vent vrai.
Vitesse du vent apparent.
Vitesse du vent vrai.
Vitesse maximale du vent apparent.
VMG (gain au vent).
2-3 Sélection des données affichées
LeREPEAT3100possèdetrois modesd’affichage:
Mode double affichage : affichage de
données de vitesse ou de profondeur.
Mode vent : affichage de données de vitesse
ou de direction du vent.
Mode NMEA: affichage de données provenant
d'instruments compatibles NMEA.
Pour changer de mode, appuyer sur la touche +
autant de fois que nécessaire.
Remarque : si les données ne sont pas disponibles
ousil'instrumentquienvoielesdonnéesauREPEAT
3100estéteintoudébranché,lesvaleurss’afficheront
à l’écran sous forme de pointillés (— —).

REPEAT 3100 Notice de montage et d’utilisation
NAVMAN
18
++
Maintenir la touche
+ enfoncée
Maintenir les touches
+ enfoncées
pendant 5 s
Augmentation
de la valeur ou
sélection d’une
fonctionNMEA
Diminution de
la valeur ou
sélection d'une
fonctionNMEA
Activationou
désactivation du mode
simulation
Retouraux
paramètres par défaut
Réglage du rétro-éclairage
(4 niveaux de réglage ou
désactivation)
Sélection du mode d’affichage
(mode double affichage, mode
vent,modeNMEA)
Sélection des
fonctionsNMEAà
afficher
++
++
Retour au
mode normal
2-6 Guide d’utilisation des touches
Paramétrage
Allumerl’appareil
Mode normal
Sélection du groupe
de rétro-éclairage
Mode NMEA
LemodeNMEApermetd'afficherunefonctionNMEA
à la fois. Pour sélectionner les fonctions NMEA qui
pourrontêtre affichéesparle REPEAT3100, veuillez
vous reporter à la section 5-2-2. Appuyer sur la
touche ou une ou plusieurs fois pour afficher
lafonctionNMEAdevotrechoix.
2-4 Modification des unités
Pour modifier les unités d’affichage du REPEAT
3100,vousdevrez modifierlesunités d’affichagede
l’appareilquienvoielesdonnéesauREPEAT3100.
Sélection de la fonction affichée
+
Activationou
désactivation
d'une fonction
NMEA
+
++
Sélection de la fonction affichée
2-5 Mode simulation
Lemode simulationvous permetde vousfamiliariser
avec l’ensemble des fonctions du REPEAT 3100,
mêmehorsdel’eau.Enmodesimulation,leREPEAT
3100n’utilisepaslesdonnéesqu’ilreçoitmaisaffiche
des données simulées. Le mot SIM clignote en bas
à droite de l’écran si :
le mode simulation du REPEAT 3100 est
activé.
le mode simulation d’un instrument NAVMAN
connecté au REPEAT3100 via le NavBus est
activé.
Pour activer ou désactiver le mode simulation du
REPEAT 3100 :
1 Eteindre l’appareil.
2 Rallumer l’appareil tout en maintenant la
touche +enfoncée.
Réglage du
décalage horaire
UTC

REPEAT 3100 Notice de montage et d’utilisation
NAVMAN 19
3 Systèmes composés de plusieurs instruments
Vous pouvez connecter plusieurs instruments
NAVMANentreeux afindepermettre deséchanges
de données. La connexion peut s’effectuer via le
système NavBus ou l’interfaçage NMEA.
3-1 Système NavBus
Le NavBus est un système déposé NAVMAN. Il
permet de créer des systèmes composés de
plusieurs instruments, utilisant un seul groupe de
capteurs. Lorsque des instruments sont connectés
au NavBus :
Une modification des unités, des valeurs seuil
des alarmes ou de l’étalonnage d'un
instrument se répercute automatiquement sur
l’ensemble des instruments du même type.
Chaque instrument peut être affecté à un
groupe d’instruments (voir section 5-2-1). Si
vous modifiez le rétro-éclairage d'un
instrument du groupe 1, 2, 3, ou 4, le rétro-
éclairage des instruments du même groupe
sera automatiquement modifié. Si vous
modifiez le rétro-éclairage d’un instrument du
groupe 0, ce changement n’aura d'effet sur
aucun autre instrument.
En cas de déclenchement d’une alarme,
appuyer sur la touche de n’importe quel
instrument NAVMAN possédant cette alarme
et la touche pour mettre l’alarme en veille.
Vous ne pouvez pas mettre une alarme en
veille à partir d’un REPEAT 3100.
Connexion NavBus et REPEAT 3100
Le REPEAT 3100 reçoit et lit automatiquement
les données des autres instruments de la série
3100 connectés au NavBus.
3-2 Interfaçage NMEA
NMEA est une norme de l’industrie. Elle n’est pas
aussi souple que le NavBus car elle exige des
branchements spécifiques entre les différents
instruments. Le REPEAT 3100 peut lire et afficher
les données NMEA provenant de trois instruments
maximum (voir appendice B).
4 Equipement du REPEAT 3100
4-1 Eléments livrés avec votre REPEAT
3100
Boîtier avec capot de protection.
Carte de garantie.
Adhésif de montage.
Cette notice.
4-2 Autre matériel nécessaire
Nous vous recommandons de connecter le ou les
instruments de la série 3100 à l’alimentation 12 V
du bateau via :
Un interrupteur auxiliaire servant à allumer et
éteindre les instruments.
Un fusible. Utiliser un fusible 1 A pour une
installation comprenant jusqu’à cinq appareils.
Le REPEAT 3100 peut recevoir et afficher :
Les données provenant d’autres instruments
NAVMAN connectés au NavBus ; le réglage du
rétro-éclairage et des unités est commun (voir
section 3-1).
Les données NMEA provenant de trois
instruments maximum (voir section 3-2).
Veillez à prévoir des câbles et connecteurs
supplémentaires(voirsection5ounoticedemontage
et d’utilisation du NavBus).
4-3 Accessoires
Vouspouvezvousprocurerlesboîtiersdeconnexion
NavBusauprèsde votrerevendeurNAVMAN.

REPEAT 3100 Notice de montage et d’utilisation
NAVMAN
20
5 Montage et paramétrage
Epaisseur
maximum 20 mm
Ecrou
Boîtier
Trou de
montage
50 mm
Montage du boîtier
5-1 Montage
Boîtier du REPEAT 3100
1 Choisir un emplacement où le boîtier sera :
Lisible et protégé de tout risque de choc.
À plus de 10 cm d’un compas et plus de
50 cm d'une antenne radio ou radar.
Éloigné de tout moteur, lampe fluo et
alternateur.
Accessible de l’arrière ; profondeur
minimum côté cabine 50 mm (voir schéma
de montage).
Protégé de l’humidité au niveau de la face
arrière.
2 La surface de montage doit être plane et d’une
épaisseur inférieure à 20 mm. Coller l’adhésif
de montage à l’emplacement choisi. Percer un
trou de montage de 50 mm de diamètre au
niveau du trou central de l’adhésif.
N.B. : l’adhésif de montage prévoit un espace
autour du boîtier pour l’installation du capot de
protection.
3 Dévisser l’écrou à l’arrière du boîtier. Insérer
l’appareil dans le trou de montage. Revisser
l’écrou.
Branchement du câble d'alimentation/
transmission de données
Brancher le câble d'alimentation/transmission de
données du REPEAT 3100 en vous référant au
schéma électrique de la page suivante et en tenant
compte des points suivants :
1 Le REPEAT 3100 fonctionne sous 12 V CC.
Brancher un interrupteur avec fusible incorporé
ou bien un interrupteur et un fusible à la
source d’alimentation du bateau. Utiliser un
fusible 1Apour une installation comprenant
jusqu’à cinq instruments.
2 Pour recevoir les données d’autres
instruments de la série 3100 via le NavBus,
installer ces appareils puis connecter le
REPEAT3100 au NavBus.
Lefonctionnementoptimaldevotre appareildépend
de son installation. Il est indispensable de lire
attentivement cette partie ainsi que les notices
fournies avec les différents éléments utilisés avant
de procéder au montage du REPEAT 3100.
Important
Le boîtier est étanche en façade. Protéger la face
arrière de l’appareil contre les projections d'eau afin
d’éviter toute infiltration susceptible d’endommager
le REPEAT 3100. La garantie ne couvre pas les
dommages causés par l’humidité ou les infiltrations
d'eau au niveau de la face arrière du boîtier.
Veillez à ce que les trous de montage
n’endommagent pas la structure du bateau. En cas
d’hésitation, veuillez vous adresser à un chantier
naval.
Remarque : lorsqu’un appareil peut être
connecté au REPEAT 3100 via le NavBus ou
bien via l’interfaçage NMEA, nous vous
recommandons vivement d’utiliser la
connexion NavBus afin de permettre l’échange
d’un plus grand nombre de données (voir
section 3-1).
3 Pourrecevoirlesdonnées NMEAprovenant
d'instruments compatibles, installer ces
appareils puis connecter la sortie NMEAde
chaque appareil à l’une des trois entrées
NMEAdu REPEAT 3100 (possibilité de
connecter jusqu’à trois instruments).
4 Isoler les fils et connecteurs inutilisés afin de
les protéger des projections d’eau et d’éviter
tout risque de court-circuit.
Paramétrage et tests
Paramétrer le REPEAT3100 en suivant les
instructions de la section 5-2 puis procéder à
un essai en mer afin de vérifier le bon
fonctionnement de tous les instruments.
Profondeur
minimum côté
cabine 50 mm
Câbles
Table of contents
Languages:
Other Navman Measuring Instrument manuals

Navman
Navman FUEL 2100 User manual

Navman
Navman A300 Sport.Tool User manual

Navman
Navman R300 User manual

Navman
Navman MULTI 3100 User manual

Navman
Navman WIND 3150 User manual

Navman
Navman SPEED 2100 User manual

Navman
Navman MULTI 100 User manual

Navman
Navman S300 User manual

Navman
Navman Qube 300 User manual

Navman
Navman A300 Sport.Tool User manual
Popular Measuring Instrument manuals by other brands

Dickey-John
Dickey-John gac 2100 agri User's and operator's manual

LOVATO ELECTRIC
LOVATO ELECTRIC LAWN DME D121 instruction manual

Bedfont
Bedfont iCOquit Smokerlyzer user manual

ZyAura
ZyAura ZG1683R operating instructions

Emerson
Emerson Daniel PT Series Installation and maintenance instructions

Electron Plus
Electron Plus CTL503 user manual