3
Front Panel Basic Operation
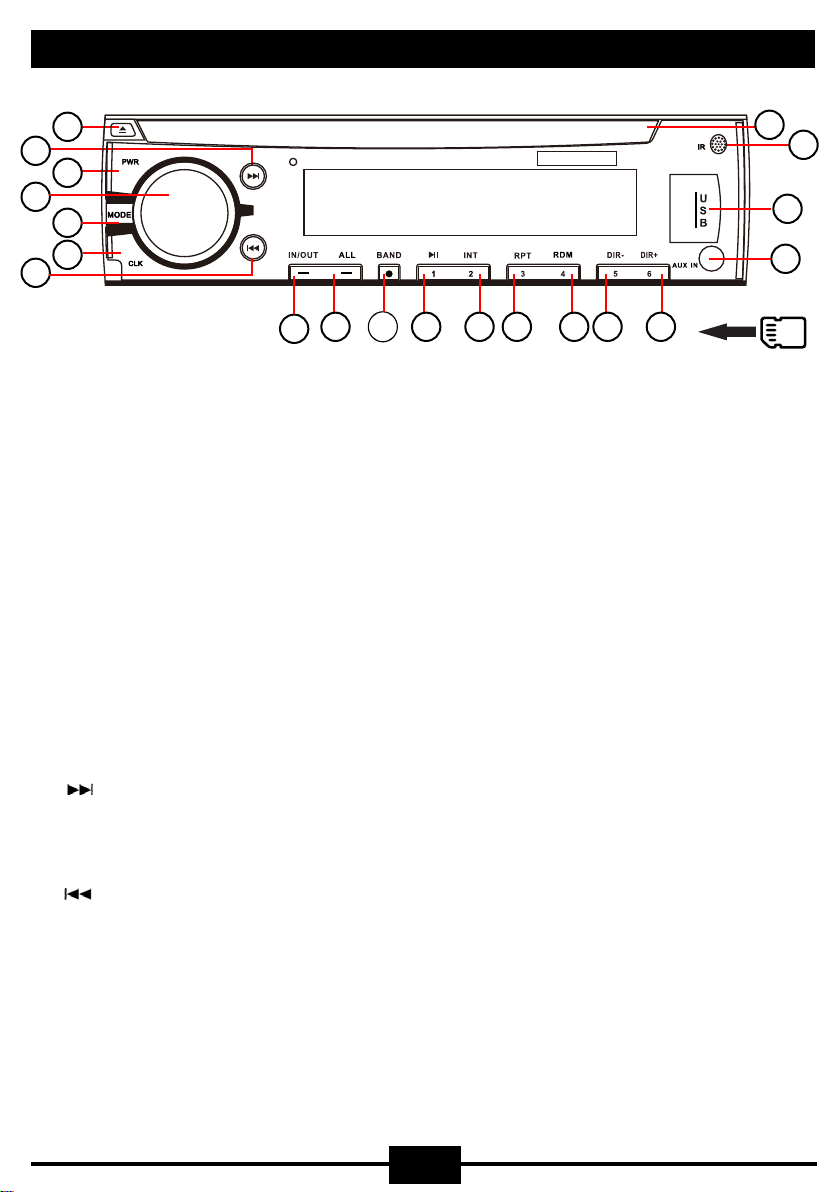
10. BAND
Press to change radio band as follows:
FM1---FM2---FM3---AM1---AM2
11. 1/Play/Pause
- Radio mode, short press to select preset station 1, long press to save
preset station 1
- DVD/CD/BT/USB/SD mode, short pres to play/pause
12. 2/INT
- Radio mode, short press to select preset station 2, long press to save
preset station 2
- CD/BT/USB/SD mode, short press to select track intro (10sec each track)
13. 3/RPT
- Radio mode, short press to select preset station 3, long press to save
preset station 3
- CD/BT/USB/SD mode, short press to repeat track, short press again to
repeat all tracks
14. 4/RDM
- Radio mode, short press to select preset station 4, long press to save
preset station 4
- CD/BT/USB/SD mode, short press to random play tracks
15. 5/DIR-
- Radio mode, short press to select preset station 5, long press to save
preset station 5
- DVD/CD/BT/USB/SD mode, short press to go back 10 chapters/tracks/songs
long press to go to previous folder
16. 6/DIR+
- Radio mode, short press to select preset station 6, long press to save
preset station 6
- DVD/CD/BT/USB/SD mode, short press to go forward 10 chapters/tracks/songs
long press to go to next folder
17. Disc Slot
18. IR Sensor
19. USB/SD
Insert USB or Micro SD into their slot. When first inserted, it will automatically
play the first file
20. AUX IN
Insert a 3.5mm AUX jack plug from your external device.
Press the mode button and select AUX1