manuals.online logo
Brands
  1. Home
  2. •
  3. Brands
  4. •
  5. NEC
  6. •
  7. Speakers
  8. •
  9. NEC LCD5710-2-AV - MultiSync - 57" LCD Flat Panel... User manual

NEC LCD5710-2-AV - MultiSync - 57" LCD Flat Panel... User manual

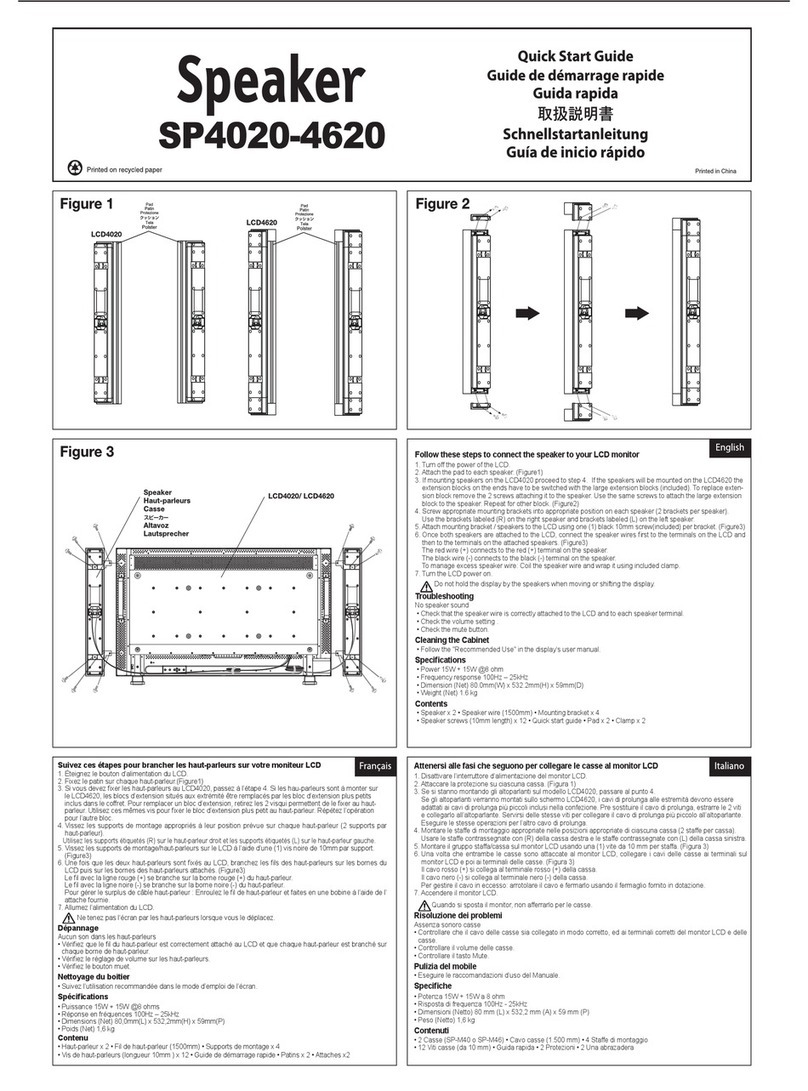
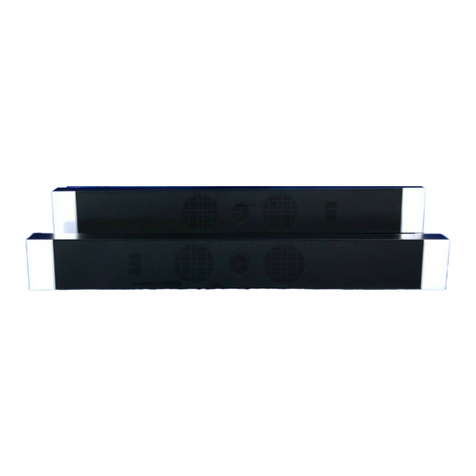
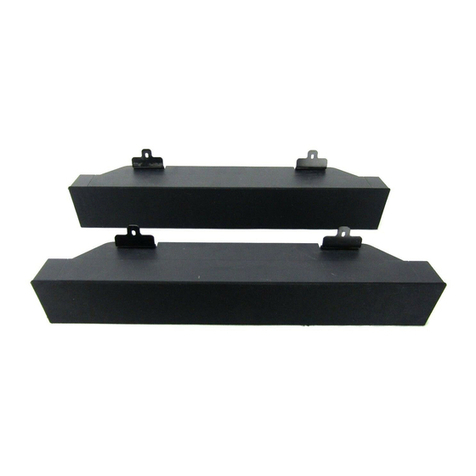
Follow these steps to connect the speaker to your LCD monitor
1. Turn off the power of the LCD.
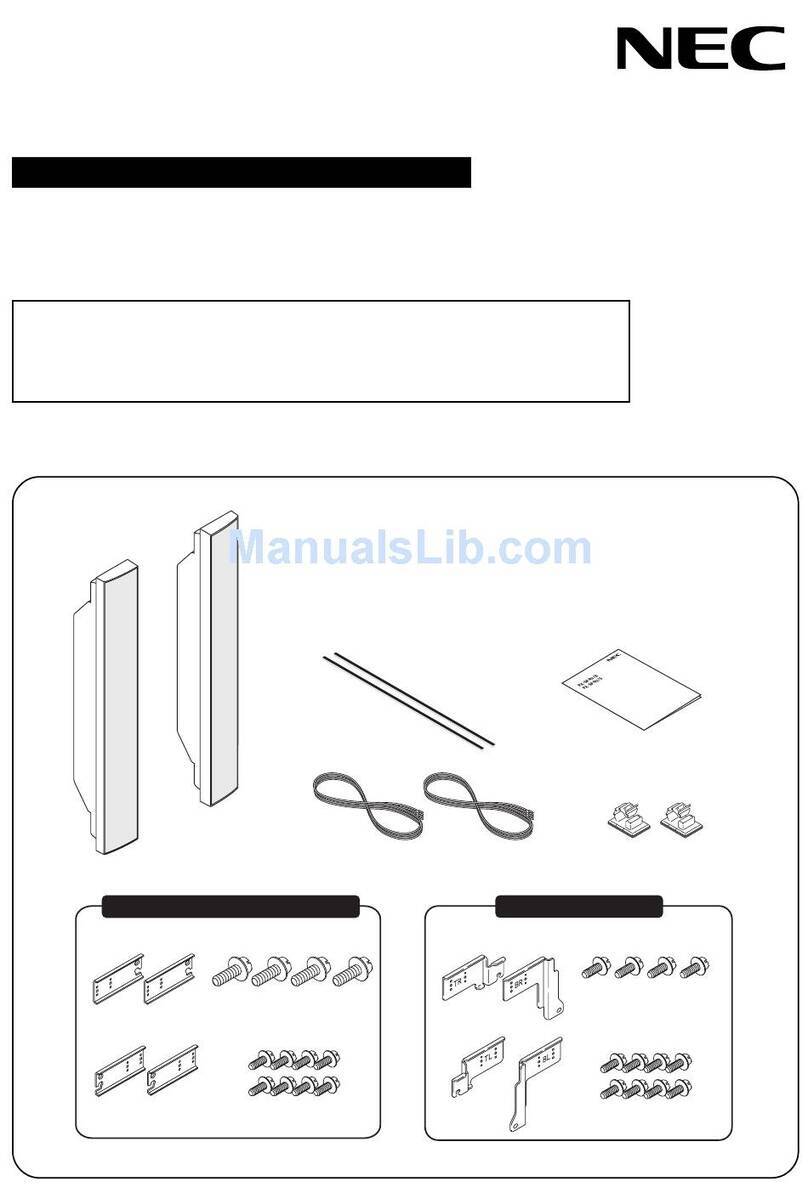
2. Attach the pad to each speaker. (Figure1)
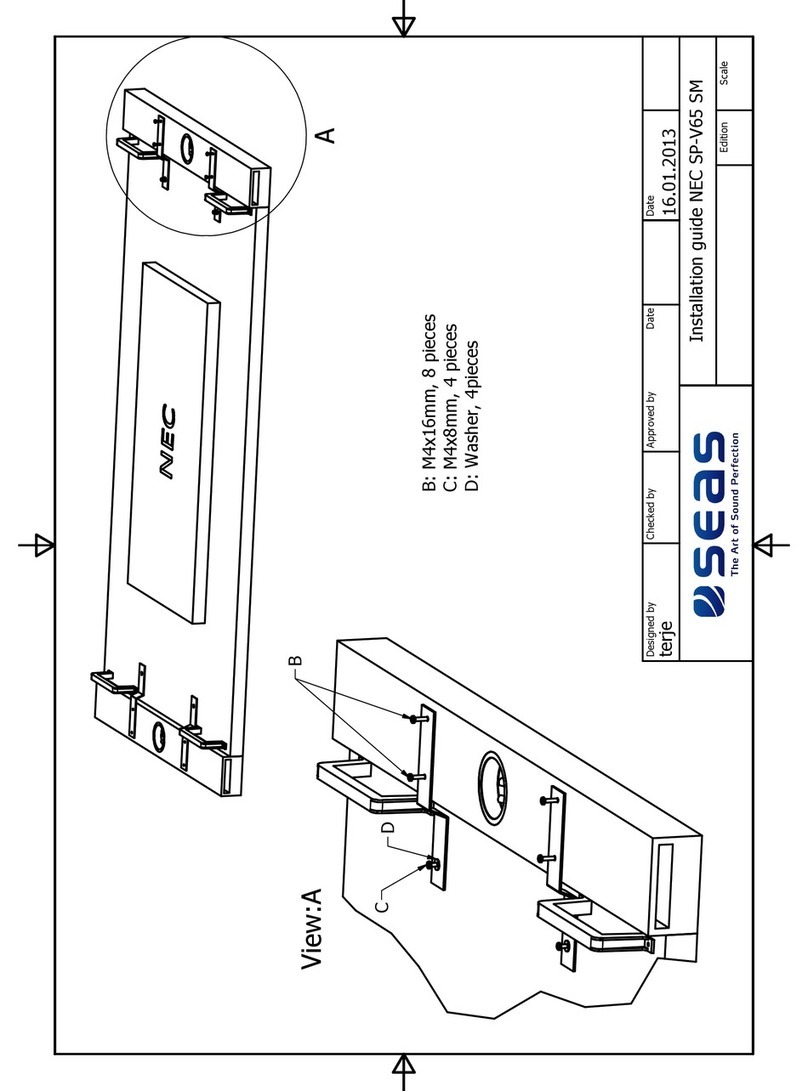
3. Attach mounting bracket / speakers to the LCD using one (1) black 10mm screw (included) per bracket. (Figure2)
4. Once both speakers are attached to the LCD, connect the speaker wires first to the terminals on the LCD and
then to the terminals on the attached speakers. (Figure2)
For detailed information, please refer to the monitor’s user manual. The left speaker connects to the white
terminal on the LCD, and the right speaker connects to the red terminal on the LCD.
To manage excess speaker wire: Coil the speaker wire and wrap it using included clamp.
5. Turn the LCD power on.
Do not hold the display by the speakers when moving or shifting the display.
Follow the safety instructions in the monitor’s user’s manual.
Troubleshooting
No speaker sound
• Check that the speaker wire is correctly attached to the LCD and to each speaker terminal.
• Check the volume setting .
• Check the mute button.
Cleaning the Cabinet
• Follow the "Recommended Use" in the display’s user manual.
Specifications
• Power 15W + 15W @8 ohm
• Frequency response 85Hz – 35kHz
• Dimension* (Net) 80mm(W) x 793mm(H) x 61.5mm(D)
• Weight* (Net) 2.15 kg
Contents
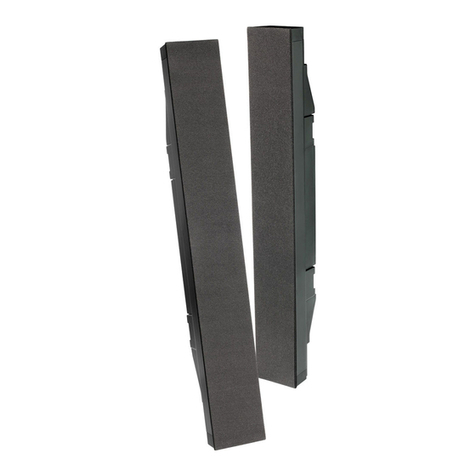
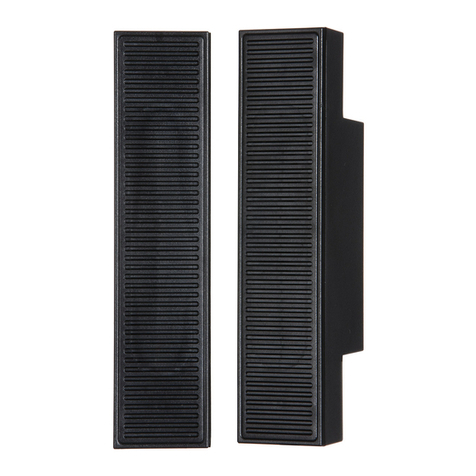
• Speaker x 2 • Speaker wire (1500mm) x 2
• Speaker screws (10mm length) x 4 • Quick start guide • Pad x 2 • Clamp x 2
* Measurements shown are for each individual speaker.
Suivez ces étapes pour brancher les haut-parleurs sur votre moniteur LCD
1. Éteignez le bouton d’alimentation du LCD.
2. Fixez le patin sur chaque haut-parleur.(Figure1)
3. Vissez les supports de montage/haut-parleurs sur le LCD à l’aide d’une (1) vis noire de 10mm par support.
(Figure2)
4. Une fois que les deux haut-parleurs sont fixés au LCD, branchez les fils des haut-parleurs sur les bornes du
LCD puis sur les bornes des haut-parleurs attachés. (Figure2)
Pour des informations détaillées, veuillez vous référer au manuel d’utilisation du moniteur. Le haut-parleur
gauche se branche sur la borne blanche du LCD, et le haut-parleur droit sur la borne rouge du LCD.
Pour gérer le surplus de câble haut-parleur : Enroulez le fil de haut-parleur et faites en une bobine à l’aide de
l’attache fournie.
5. Allumez l’alimentation du LCD.
Ne tenez pas l’écran par les haut-parleurs lorsque vous le déplacez.
Veuillez suivre les consignes de securite du guide utilisateur du moniteur.
Dépannage
Aucun son dans les haut-parleurs
• Vérifiez que le fil du haut-parleur est correctement attaché au LCD et que chaque haut-parleur est branché
sur chaque borne de haut-parleur.
• Vérifiez le réglage de volume sur les haut-parleurs.
• Vérifiez le bouton muet.
Nettoyage du boîtier
• Suivez l’utilisation recommandée dans le mode d’emploi de l’écran.
Spécifications
• Puissance 15W + 15W @8 ohms
• Réponse en fréquences 85Hz – 35kHz
• Dimensions
*
(Net) 80mm(L) x793mm(H) x 61,5mm(P)
• Poids
*
(Net) 2,15 kg
Contenu
• Haut-parleur x 2 • Fil de haut-parleur (1500mm) x 2 • Patins x 2
• Vis de haut-parleurs (longueur 10mm ) x 4 • Guide de démarrage rapide • Attaches x 2
*Les mesures indiquées concernent chaque haut-parleur individuellement.
Attenersi alle fasi che seguono per collegare le casse al monitor LCD
1. Disattivare l’interruttore d’alimentazione del monitor LCD.
2. Attaccare la protezione su ciascuna cassa. (Figura 1)
3. Montare il gruppo staffa/cassa sul monitor LCD usando una (1) vite da 10 mm per staffa. (Figura 2)
4. Una volta che entrambe le casse sono attaccate al monitor LCD, collegare i cavi delle casse ai terminali sul
monitor LCD e poi ai terminali delle casse. (Figura 2)
Fare riferimento al Manuale d’uso del monitor per informazioni dettagliate. La cassa sinistra si collega al ter-
minale di colore bianco del monitor LCD; la cassa destra si collega al terminale di colore rosso del monitor
LCD.
Per gestire il cavo in eccesso: arrotolare il cavo e fermarlo usando il fermaglio fornito in dotazione.
5. Accendere il monitor LCD.
Quando si sposta il monitor, non afferrarlo per le casse.
Attenersi alle istruzioni di sicurezza contenute nel manuale utente del monitor.
Risoluzione dei problemi
Assenza sonoro casse
• Controllare che il cavo delle casse sia collegato in modo corretto, ed ai terminali corretti del monitor LCD e
delle casse.
• Controllare il volume delle casse.
• Controllare il tasto Mute.
Pulizia del mobile
• Eseguire le raccomandazioni d’uso del Manuale.
Specifiche
• Potenza 15W + 15W a 8 ohm
• Risposta di frequenza 85Hz - 35kHz
• Dimensioni* (Netto) 80 mm (L) x 793 mm (A) x 61,5 mm (P)
• Peso* (Netto) 2,15 kg
Contenuti
• 2 Casse • 2 Cavo casse (1.500 mm)
• 4 Viti casse (da 10 mm) • Guida rapida • 2 Protezioni • 2 Una abrazadera
* Le misurazioni riportate qui si riferiscono ad ogni singola cassa.
So verbinden Sie die Lautsprecher mit Ihrem LCD-Monitor
1. Schalten Sie den LCD-Monitor über den Ein-/Ausschalter ab.
2. Bringen Sie an jedem Lautsprecher ein Polster an (Abbildung 1).
3. Befestigen Sie die Lautsprecher mit den Montagebügeln am LCD-Monitor; dazu verwenden
Sie jeweils eine schwarze 10-mm-Schraube pro Bügel (Abbildung 2).
4. Nachdem Sie beide Lautsprecher am LCD-Monitor angebracht haben, verbinden Sie
die Lautsprecherkabel mit den Anschlüssen am LCD-Monitor; das andere Ende der Ka-
belverbindungen verbinden Sie mit den Anschlüssen an den Lautsprechern (Abbildung 2).
Detaillierte Hinweise finden Sie in der Monitor-Bedienungsanleitung. Der linke Lautsprecher
wird mit dem weißen Anschluss des Gerätes verbunden, der rechte Lautsprecher mit dem
roten Anschluss.
So verfahren Sie mit überschüssigem Lautsprecherkabel: Wickeln Sie das Lautsprecherka-
bel auf und befestigen Sie es mit Hilfe der mitgelieferten Klemme.
5. Schalten Sie den LCD-Monitor ein.
Fassen Sie den Monitor nicht an den Lautsprechern, wenn Sie ihn bewegen.
Folgen die Sicherheit Anleitung im Monitor Anweisungshandbuch.
Problemlösung
Kein Ton aus den Lautsprechern
• Überprüfen Sie, ob die Lautsprecherkabel richtig an die Anschlüsse von LCD-Monitor und Lautspre-
cher angeschlossen sind.
• Überprüfun Sie die Lautstärkeeinstellung an den Lautsprechern.
• Überprüfen Sie, ob die Stummschaltungstaste betätigt wurde.
Gehäuse reinigen
• Bitte halten Sie sich an die Empfehlungen in der Bedienungsanleitung des Monitors.
Technische Daten
• Ausgangsleistung: 15 W +15 W bei 8 Ohm
• Frequenzgang: 85 Hz bis 35kHz
• Abmessungen
*
(netto, B x H x T):80 x 793 x 61,5 mm
• Gewicht
*
(netto): 2,15 kg
Lieferumfang
• Lautsprecher x 2 • Lautsprecherkabel (1500 mm) x 2 • Polster x 2
• Lautsprecherschrauben 10 mm x 4 • Schnellstartanleitung • Klemme x 2
* Die gezeigten Messwerte gelten pro Lautsprecher.
Siga estos pasos para conectar el altavoz al monitor LCD
1. Coloque el conmutador del monitor LCD en la posición de apagado.
2. Acople la tela a cada altavoz (Figura 1).
3. Atornille el soporte de montaje y los altavoces al monitor LCD utilizando un (1) tornillo de 10mm de
color negro por soporte (Figura 2).
4. Cuando haya acoplado los dos altavoces al monitor LCD, conecte sus cables a los terminales de
éste y, a continuación, a los terminales de los altavoces montados (Figura 2).
Para obtener información detallada, consulte el manual del usuario del monitor. Los altavoces izqui-
erdo y derecho se conectan a los terminales blanco y rojo, respectivamente. Ambos terminales se
encuentran en la pantalla LCD.
Para administrar el cable sobrante de los altavoces: Enrolle el cable de los altavoces y envuélvalo
utilizando el aglutinador incluido.
5. Encienda el monitor LCD.
No agarre los altavoces cuando mueva o levante la pantalla.
Siga las instrucciones de seguridad del manual de usuario del monitor.
Solucionar problemas
Los altavoces no emiten sonido
• Compruebe que el cable de los altavoces está correctamente conectado al monitor LCD y, a su vez,
aquéllos están perfectamente conectados a sus terminales.
• Compruebe la configuración del volumen de los altavoces.
• Compruebe si el botón de silencio está activado.
Limpiar la carcasa
• Siga las instrucciones de uso recomendado del manual del usuario de la pantalla.
Especificaciones
• Potencia: 15 W + 15 W a 8 ohm
• Respuesta de frecuencia: 85 Hz – 35kHz
• Dimensiones
*
(netas): 80 mm (A) x 793 mm (L) x 61,5 mm (F)
• Peso
*
(neto): 2,15 kg
Contenido
• Altavoz x 2 • Cable de los altavoces (1500 mm) x 2 • Aglutinador x 2
• Tornillos para los altavoces (10 mm de largo) x 4 • Guía de inicio rápido • Tela x 2
* Las medidas mostradas son para cada altavoz individual.

This manual suits for next models

4

Other NEC Speakers manuals

NEC SP-V65SM User manual

NEC

NEC SP-V65SM User manual

NEC SP-RM3 User manual

NEC

NEC SP-RM3 User manual

NEC P42XC10 - PlasmaSync - 42" Plasma Panel User manual

NEC

NEC P42XC10 - PlasmaSync - 42" Plasma Panel User manual

NEC SP-RM3 User manual

NEC

NEC SP-RM3 User manual

NEC P461-AVT - MultiSync - 46" LCD TV User manual

NEC

NEC P461-AVT - MultiSync - 46" LCD TV User manual

NEC S401 User manual

NEC

NEC S401 User manual

NEC NLT-40WT User manual

NEC

NEC NLT-40WT User manual

NEC PX-SP4UB User manual

NEC

NEC PX-SP4UB User manual

NEC P60XC10 User manual

NEC

NEC P60XC10 User manual

NEC DTS - 42 User manual

NEC

NEC DTS - 42 User manual

NEC LCD6520L-BK-AV - MultiSync - 65" LCD Flat Panel... User manual

NEC

NEC LCD6520L-BK-AV - MultiSync - 65" LCD Flat Panel... User manual

NEC SP-RM2 User manual

NEC

NEC SP-RM2 User manual

NEC SP-3040 User manual

NEC

NEC SP-3040 User manual

NEC SP-4046PV User manual

NEC

NEC SP-4046PV User manual

NEC PlasmaSync P42XP10-BK User manual

NEC

NEC PlasmaSync P42XP10-BK User manual

NEC LCD3215 - MultiSync - 32" LCD Flat Panel... User manual

NEC

NEC LCD3215 - MultiSync - 32" LCD Flat Panel... User manual

NEC LCD4020-2-IT - MultiSync - 40" LCD Flat Panel... User manual

NEC

NEC LCD4020-2-IT - MultiSync - 40" LCD Flat Panel... User manual

NEC PX SP2U - Left / Right CH Speakers User manual

NEC

NEC PX SP2U - Left / Right CH Speakers User manual

NEC V321-2 User manual

NEC

NEC V321-2 User manual

NEC P50XC10 User manual

NEC

NEC P50XC10 User manual

NEC MultiSync Soundbar 90 User manual

NEC

NEC MultiSync Soundbar 90 User manual

NEC PX-42XM4A User manual

NEC

NEC PX-42XM4A User manual

NEC MultiSync P521 User manual

NEC

NEC MultiSync P521 User manual

Popular Speakers manuals by other brands

James WEDGE Series installation guide

James

James WEDGE Series installation guide

Pyle Pro PPA10 Specifications

Pyle Pro

Pyle Pro PPA10 Specifications

KYE Systems Corp. Genius SP-S115 Service guide

KYE Systems Corp.

KYE Systems Corp. Genius SP-S115 Service guide

poly-planar MA-6900 Mounting template

poly-planar

poly-planar MA-6900 Mounting template

Ultimate Ears WONDERBOOM user manual

Ultimate Ears

Ultimate Ears WONDERBOOM user manual

Grundig Sonoclock 360 user manual

Grundig

Grundig Sonoclock 360 user manual

JBL FLIP Specifications

JBL

JBL FLIP Specifications

Void Air Vantage user guide

Void

Void Air Vantage user guide

Toa GS-302 instruction manual

Toa

Toa GS-302 instruction manual

Kingsun MA-960-B Operation instructions

Kingsun

Kingsun MA-960-B Operation instructions

Algo 8188 quick start guide

Algo

Algo 8188 quick start guide

Veho VSS-001-360 quick start guide

Veho

Veho VSS-001-360 quick start guide

Wavecor Evaluation Kit 5 user manual

Wavecor

Wavecor Evaluation Kit 5 user manual

Optimus CAL-3150 instruction manual

Optimus

Optimus CAL-3150 instruction manual

KAM SOUNDFORCE15A manual

KAM

KAM SOUNDFORCE15A manual

Fbt MODUS 15 Brochure & specs

Fbt

Fbt MODUS 15 Brochure & specs

Yamaha MSP10 Service manual

Yamaha

Yamaha MSP10 Service manual

Cambridge Audio Go user manual

Cambridge Audio

Cambridge Audio Go user manual

manuals.online logo
manuals.online logoBrands
  • About & Mission
  • Contact us
  • Privacy Policy
  • Terms and Conditions

Copyright 2025 Manuals.Online. All Rights Reserved.