Necespow N7576 User manual

Learn more about NECESPOW,
please check out https://www.necespow-tech.com/
Power Station N7576
User Manual

CONTENTS
.........................................................
.......................................................
......................................................
.........................................................
.......................................................
English
Deutsch
Français
Italiano
Español
01-13
14-26
27-39
40-52
53-65

EN-01
For further assistance, do not hesitate to contact
Learn more about NECESPOW, please check out
https://www.necespow-tech.com/
This product is intended for emergency situations
and cannot replace AC power in household
appliances or digital products. The actual power
outlet and adapter may vary depending on the
customer's location.
NECESPOW Customer Service
Warm Tips

EN-02
Product Details
Fan Air Inlet Hole
LED Light
USB Power Button
Type-C Input/Output Interface
Type-C Output Interface
QC 3.0 USB Output Interface
AC Power Button
AC Power Output Interface
Fan Air Outlet Hole
LED Display
Main Power Switch
LED Ligh Button
DC Input Interface
DC Power Button
DC Output Interface
Cigarette Lighter Interface
2
11
9
10
11
12
13
14
15
16
1
3
4
5
6
7
8

EN-03
1. This product is versatile and suitable for indoor and outdoor use.
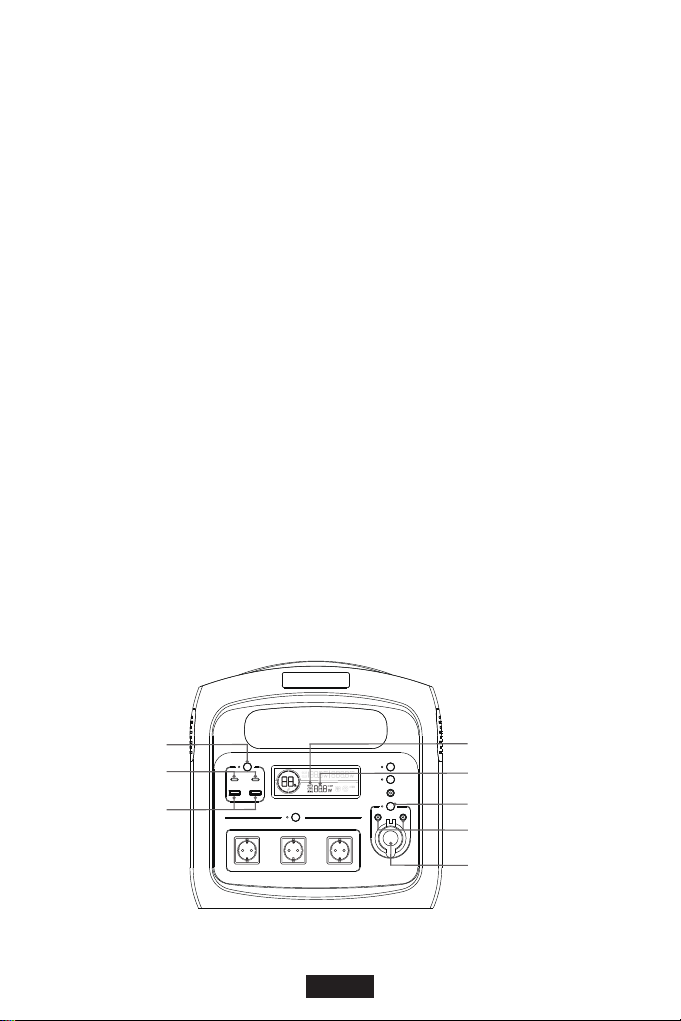
Function Introduction
4. This product has a built-in high-capacity battery, which makes
it suitable for outdoor activities. It is also equipped with a high
brightness LED, which has several modes like adjustable-brightness
lighting, flashing, emergency light and SOS signal.
2. This product has 230V/110V AC inverter function which can
supply power to low-power appliances, such as lights, laptop,
mini fan, mini cooker ect.
3. This product has a DC output interface, cigarette lighter interface,
USB fast charging 3.0 ports and PD charging ports. DC output
function allows it to power digital products such as mobile phones,
GPS units, DVD players and small mobile devices.
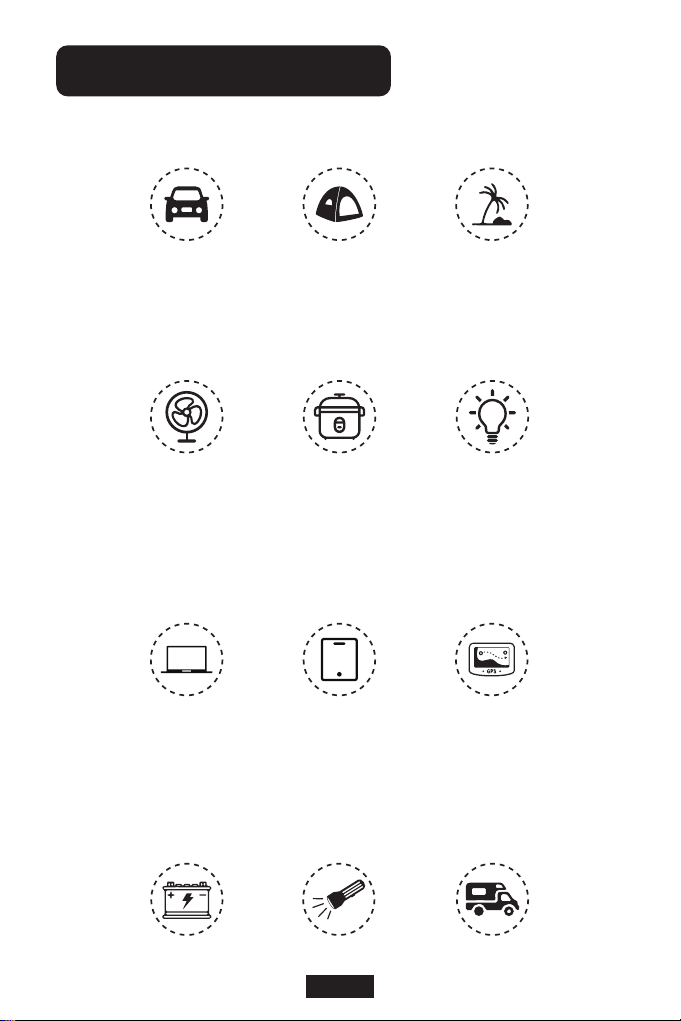
Long-Distance Travel Outdoor Camping Wild Exploration
High-Capacity Battery Emergency Light Outdoor Power Supply
Mini Fan Mini Cooker Lamps
Laptop Tablet PC GPS units

EN-04
1. On/Off
Press the main power switch for 2 seconds to turn the product
on and off.
Using Instruction
After switching on, the display will show the current product
power level and the fan will start to self-test for 3 seconds (the
fan icon will illuminate on the display).
Double-click the main power switch to turn off the LED display
(press any button to awaken the LED display). The device still
supplies power even when the LED display is off.
Auto-off function
- There is an auto-off function in 3 minutes, when all keys are off.
- There is an auto-off function in 24 hours, when either function
is in operation.
- To run the device over 24 hours, you can cancel the auto-off
function by pressing the AC and USB buttons simultaneously
for 5 sec (No.3 & 7 in Product Details Page) until “AC” flashes
on the display. Please note that once the auto-off function is
cancelled, the device will continue to run until the power is
exhausted. To restore factory settings, turn off and reboot the
device.
Battery Capacity Display
Main Power Button
Fan Icon
(1)
(2)
(3)
(4)

EN-05
2. LED Light
After the product is switched on, short press the LED light button
(No.12 in Product Details Page) to switch on the light (the bulb
symbol will illuminate on the display).
The brightness is adjustable by long press LED light button.
The brightness adjustment follows a one-way cycle - first long
press to brighten up until it's brightest, second long press to
lower brightness.
Short press the LED light button to change the mode in turn,
adjustable-brightness lighting, flashing, slow flashing, SOS
signal, switch off the light.
LED Light
LED Light Button
Bulb Symbol
(1)
(2)
(3)

EN-06
To use the USB output interface, switch on N7576 first. Then
activate the USB interface by short pressing the USB power
button. The N7576 starts charging for digital products as soon
as they are connected to the N7576 with a USB cable.
To use the DC output interface, switch on N7576 first. Then
activate the USB interface by short pressing the DC power button.
The N7576 starts charging for digital products as soon as they
are connected to the N7576 with a cable.
When the USB / Type-C / DC / Cigarette lighter interface is in
operation, the corresponding icon and the total output power
are shown on the display.
Type-C output
USB-A output
Interface icon
Total DC output
DC power button
DC output
Cigarette lighter interface
USB power button
3. DC Function
The Type-C output interface supports automatic loading. Once
digital products are connected with N7576 via Type-C cable,
N7576 switches on automatically and starts to charge for digital
products. There is no need to switch on the device or press the
USB button in advance.
(1)
(2)
(3)
(4)

EN-07
4. AC Output Function
Switch on the N7576;
Press the AC power button to enter AC mode first;
Plug the power cable of AC appliance into N7576's AC outlet;
When using the AC function, the AC output icon and the real-time
AC output power are shown on the display;
When not using the AC function, short press the AC power button
to switch it off;
When the AC output power is more than 400W or the internal
operating temperature exceeds the set-point, the fan will start
automatically and the fan icon will appear on the display.
Notes: Make sure the power of the connected AC appliance is
less than 700W...
AC output power
AC output power icon
Fan icon
AC power button
AC output socket
(1)
(2)
(3)
(4)
(6)
(5)

EN-08
When it is charging through the DC or Type-C interface, the
corresponding icon will be shown in the display. Meanwhile, the
display will show the battery capacity, the flashing battery capacity
pie chart and real-time input power.
Methods of Charging the Device
DC Input Interface
Type-C
Input/Output Interface
DC input symbol
Real-time input power
PD input symbol
Fast charge symbol
Battery capacity
Battery capacity pie chart

EN-09
1. Charging via Type-C input / output interface
Use the PD adapter charger to connect the N7576 to the power
outlet (PD adapter charger and cable need to be purchased
separately). The Type-C input interface supports up to 100W of
power. The PD adapter charger is not limited to power, but the
power of the charger will affect the charging speed.
3. Charging via 2 input interface simultaneously
The use of two charging ports will greatly save charging time.
When it is charged through the DC and Type-C interface at the
same time, the display shows the PD symbol, the DC symbol
and the fast charge symbol.
2. Charging via the DC input interface
A. At home: use the home adapter charger to connect the N7576
with the socket (home adapter charger is included);
B. In the car: use the car adapter to connect the N7576 with the
cigarette lighter (car adapter is included);
C. Outdoor: use the solar power cable to connect the N7576 with
the solar panel (solar panel and cable need to be purchased
separately).
4. Estimated charging time
Charging Methods Fully Charge
DC 24V 4A 6-7 hours
6-7 hours
3-4 hours
PD 100W
DC 24V 4A + PD 100W

EN-10
Fault Code
Fault Code
Fault Code: E01
Fault Content: DC output overload
Fault Solution: Disconnect the devices in the DC connection, short
press the DC button to switch on the DC output function.
Fault Code: E02
Fault Content: DC output short-circuit
Fault Solution: Disconnect the devices in the DC connection, short
press the DC button to switch on the DC output function.
Fault Code: E03
Fault Content: AC output/input overload or short-circuit
Fault Solution: Disconnect the AC output device, short press the
AC button to switch on the AC function.
Fault Code: E04
Fault Content: AC output over-temperature
Fault Solution: Disconnect the device in the AC connection. When
the working temperature returns to the normal level, the fault code
will be removed.

EN-11
Fault Code: E05
Fault Content: PD input/output overload or short-circuit
Fault Solution: Disconnect the devices in the PD connection and
reconnect it.
Fault Code: E06
Fault Content: Battery over-temperature
Fault Solution: Disconnect all the devices. When the working temperature
returns to the normal level, the fault code will be removed.
Fault Code: E07
Fault Content: Battery low-temperature
Fault Solution: Disconnect all the devices. When the working temperature
returns to the normal level, the fault code will be removed.
Fault Code: E08
Fault Content: USB-A output overload or short-circuit
Fault Solution: Disconnect the devices in USB-A connection first.
Short press the USB button or connect the PD output interface then.
After that, the fault code will be removed automatically.
Fault Code: E09
Fault Content: DC charging over-voltage
Fault Solution: Disconnect the device in DC connection. Once the
voltage turns to normal, the fault condition will be removed automatically.
Fault Code: E10
Fault Content: DC charging low-voltage
Fault Solution: Disconnect the device in DC connection. Once the
voltage turns to normal, the fault condition will be removed automatically.

EN-12
Fault Code: E11
Fault Content: Battery input/output over-temperature
Fault Solution: Disconnect all the devices. When the working temperature
returns to the normal level, the fault code will be removed.
Specifications
Battery Power
AC Output Voltage
AC Output Power
DC Input
DC / Cigarette Lighter Output
PD Input/Output
PD Output
USB Output
N7576 Working Temperature
Fan Working Temperature
576Wh
230V/110V~50Hz/60Hz
700W (Peak 1400W)
24V 4A (support for 12V~28V)
12V 10A (120W Max)
5V 3A / 9V 3A / 12V 3A /
15V 3A / 20V 5A (PD100W)
5V 3A / 9V 2A / 12V 1.5A (PD18W)
5V 3A / 9V 2A / 12V 1.5A (QC3.0)
-10°C ~ 60°C
AC output power > 400W or
Battery temperature > 50°C or
AC board temperature >70°C
Battery Capacity 180000mAh

EN-13
Accessories
N7576*1
Home adapter charger*1
Car adapter*1
Multi-language manual*1
Cautions
1. Recommend charging the product for at least 3 months when not in use.
2. If the device heats up slightly during use, it is normal heat dissipation.
3. Please use the device at normal temperature, keep away from
moisture, high temperature and fire.
4. Please store in a dry environment, keep away from moisture and
corrosive material.
5. Do not use chemicals, such as soap or detergent, to wash the device.
6. Stop using the device if the batteries are swollen, leaking, or smelly.
7. Do not drop the device during use.
8. Children should use the device under adult supervision.
9. Do not throw or burn the batteries of the device, please protect
our environment.
N7576
(N7576 Wh)

DE-14
Wenn Sie weitere Hilfe benötigen, wenden Sie sich bitte
Weitere Informationen über NECESPOW finden Sie unter
https://www.necespow-tech.com/
Dieses Produkt ist für Notfallsituationen gedacht
und kann nicht als Ersatz für die Netzstromversorgung
von Haushaltsgeräten oder digitalen Produkten
dienen. Die tatsächliche Steckdose und der
Adapter können je nach Standort des Kunden
variieren.
NECESPOW Customer Service
Wärme Tipps

DE-15
Details zum Produkt
Ventilator-Lufteinlassloch
LED-Licht
USB Power-Taste
Typ-C Eingang/Ausgang
Typ-C-Ausgang
USB-A QC 3.0 Ausgang
AC Power-Taste
AC-Stromausgang
Lüfter-Luftauslassöffnung
LED-Anzeige
Hauptnetzschalter
LED-Leuchttaste
DC-Eingang
DC Power-Taste
DC-Ausgang
Zigarettenanzünder-Schnittstelle
2
11
9
10
11
12
13
14
15
16
1
3
4
5
6
7
8

DE-16
1. Dieses Produkt ist vielseitig und für den Innen- und Außenbereich geeignet.
Funktion Einführung
4. Dieses Produkt hat eine eingebaute Batterie mit hoher Kapazität,
die es für Outdoor-Aktivitäten geeignet macht. Es ist auch mit einer
hohen Helligkeit LED ausgestattet, die mehrere Modi wie einstellbare
Helligkeit Beleuchtung, Blinken, Notlicht und SOS-Signal hat.
2. Dieses Produkt hat eine 230V/110V Wechselrichterfunktion, die
Strom für Geräte mit geringem Stromverbrauch liefern kann, wie
z.B. Lichter, Laptop, Mini-Ventilator, Mini-Kochherd ect.
3. Dieses Produkt verfügt über eine DC-Ausgangsschnittstelle, eine
Zigarettenanzünder-Schnittstelle, USB-Schnellladeanschlüsse 3.0
und PD-Ladeanschlüsse. Die DC-Ausgangsfunktion ermöglicht
die Stromversorgung von digitalen Produkten wie Mobiltelefonen,
GPS-Geräten, DVD-Playern und kleinen mobilen Geräten.
Langstreckenreisen Camping im Freien Wilde Erkundung
Batterie mit hoher Kapazität Notlicht Outdoor-Stromversorgung
Mini-Ventilator Mini-Kochherd Lampen
Laptop Tablet-PC GPS-Geräte

DE-17
1. Ein/Aus
Drücken Sie den Hauptschalter für 2 Sekunden, um das Gerät
ein- und auszuschalten.
Anleitung verwenden
Nach dem Einschalten zeigt das Display die aktuelle Leistungsstufe
des Geräts an, und der Lüfter führt 3 Sekunden lang einen
Selbsttest durch (das Lüftersymbol leuchtet im Display auf).
Doppelklicken Sie auf den Hauptnetzschalter, um die LED-Anzeige
auszuschalten (drücken Sie eine beliebige Taste, um die
LED-Anzeige zu aktivieren). Das Gerät liefert weiterhin Strom,
auch wenn die LED-Anzeige ausgeschaltet ist.
Automatische Abschaltfunktion
- Es gibt eine automatische Abschaltfunktion nach 3 Minuten,
wenn alle Tasten ausgeschaltet sind.
- Es gibt eine automatische Abschaltfunktion nach 24 Stunden,
wenn eine der beiden Funktionen in Betrieb ist.
- Um das Gerät über 24 Stunden zu betreiben, können Sie die
automatische Abschaltfunktion deaktivieren, indem Sie die
AC-und USB-Tasten gleichzeitig 5 Sekunden lang drücken (Nr.
3 und 7 auf der Produktdetailseite), bis "AC" auf dem Display
blinkt. Bitte beachten Sie, dass das Gerät nach der Deaktivierung
der automatischen Abschaltfunktion so lange weiterläuft, bis der
Strom aufgebraucht ist. Um die Werkseinstellungen
wiederherzustellen, schalten Sie das Gerät aus und starten
Sie es neu.
(1)
(2)
(3)
(4)

DE-18
Akku-Kapazität
Hauptnetzschalter
Lüfter-Symbol
2. LED-Licht
Drücken Sie nach dem Einschalten des Geräts kurz die LED-
Lichttaste (Nr. 12 auf der Produktdetailseite), um das Licht
einzuschalten (das Glühbirnensymbol leuchtet auf dem Display).
Die Helligkeit kann durch langes Drücken der LED-Lichttaste
eingestellt werden. Die Helligkeitseinstellung folgt einem
einseitigen Zyklus-erstes langes Drücken, um die Helligkeit
bis zur höchsten Stufe zu erhöhen, zweites langes Drücken,
um die Helligkeit zu verringern.
Drücken Sie kurz auf die LED-Licht-Taste, um den Modus der
Reihe nach zu ändern, einstellbar-Helligkeit Beleuchtung, blinken,
langsames Blinken, SOS-Signal, schalten Sie das Licht.
LED-Licht
LED-Licht-Taste
Glühbirne Symbol
(1)
(2)
(3)
Table of contents
Languages:
Popular Portable Generator manuals by other brands

zontec
zontec PA2500 operating instructions

Westinghouse
Westinghouse WHXC3750 instruction manual

Generac Portable Products
Generac Portable Products 6500XL owner's manual

Power Tech Generators
Power Tech Generators PT-8KW Operator's manual

Hagen
Hagen EXO TERRA Fogger PT2080 operating instructions

GW Instek
GW Instek GFG-8219A Tutorial

Chicago Pneumatic
Chicago Pneumatic CPG 90-120 JD instruction manual

Keysight Technologies
Keysight Technologies M8196A Getting started guide

FTI
FTI LB-10 Operation, maintenance, and repair manual

Benchmark
Benchmark BP Series manual

Toyama
Toyama ATS owner's manual

Homelite
Homelite HGCA3000 Series Replacement parts list