Neilsen WWB-05806 User manual

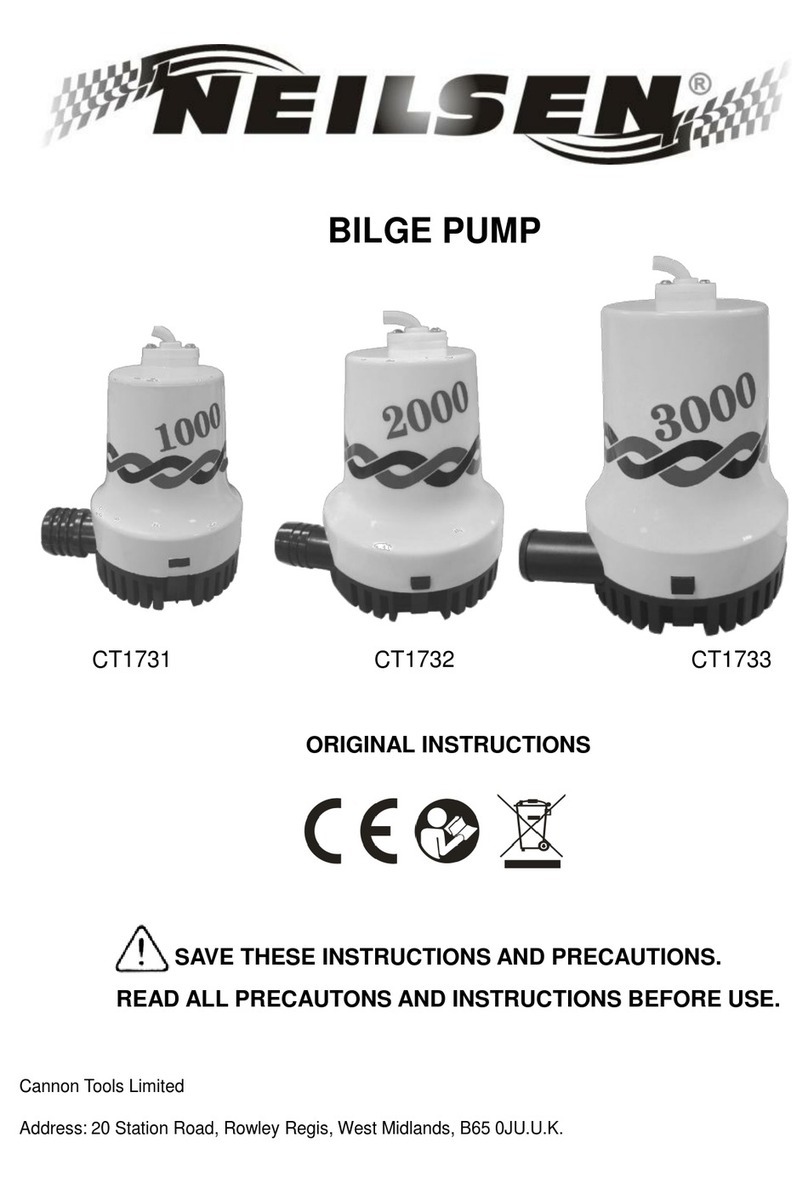
BILGE PUMP
CT1731 CT1732 CT1733
Ref no. WWB-05806 Ref no. WWB-05808 Ref no. WWB-06928
ORIGINAL INSTRUCTIONS
SAVE THESE INSTRUCTIONS AND PRECAUTIONS.
READ ALL PRECAUTONS AND INSTRUCTIONS BEFORE USE.
Cannon Tools Limited
Address: 20 Station Road, Rowley Regis, West Midlands, B65 0JU.U.K.


EC DECLARATION OF CONFORMITY
We CANNON TOOLS LTD
20 Station road, Rowley Regis, West Midlands,B65 0JU.U.K.
Declare that the following machine complies with the appropriate basic safety
and health requirements of the EC Directive based on its design and type, as
brought into circulation by us.
In case of alteration of the machine, not agreed upon by us, this declaration
will lose its validity.
Product description: BILGE PUMP
Model: CT1731(Ref no. WWB-05806)
CT1732 (Ref no. WWB-05808)
CT1733 (Ref no. WWB-06928)
Applicable EC Directives:
EC Low Voltage Directive 2014/35/EU
EC Directive of Electromagnetic Compatibility 2014/30/EU
Harmonized standards
EN 60335-1:2012+A11:2014+A13:2017+A1:2019+A14:2019+A2:2019,
EN 60335-2-41:2003+A1:2004+A2:2010,
EN 62233:2008+AC:2008, EN 60034-1:2010+AC:2010,
EN 55014-1:2017, EN 55014-2:2015
20 Station Road, Rowley Regis, West Midlands, B65 0JU.U.K.
Mr. Gurcharan Tony Singh Sanghera
Managing Director
CANNON TOOLS LTD
2020-10-14

1.SPECIFICATION
2. SEFATY INFORMATION
General Pump Safety Warnings
Read the whole manual carefully and make sure you know how to switch the tool
off in an emergency, before operating the tool.
Save these instructions and other documents supplied with this tool for future
reference.
WARNING! Read all safety warnings and all instructions. Failure to
follow the warnings and instructions may result in electric shock, fire
and/or serious injury.
1. Work area
a. Keep work area clean and well lit. Cluttered or dark areas invite accidents.
b. Do not operate pumps in explosive atmospheres, such as in the presence
of flammable liquids, gases or dust. Pumps create sparks which may ignite the
dust or fumes.
c. Keep children and bystanders away while operating a pump. Distractions can
cause you to lose control.
2. Electrical safety
When using 12 Volt equipment, basic safety precautions, including the
following, should always be followed to reduce risk of fire, electric shock,
personal injury and material damage.
a. Do not abuse the cord. Never use the cord for carrying, pulling or unplugging
the pump. Keep cord away from heat, oil, sharp edges or moving parts. Damaged
or entangled cords increase the risk of electric shock.
b. The electric motor has been designed for 12V only. Always check that the
power supply corresponds to the voltage on the rating plate.
3. Personal safety
Model
CT1731
CT1732
CT1733
Open Flow Rating
1000 GPH
2000 GPH
3000 GPH
Power Source
12 Volts
12 Volts
12 Volts
Current
5.5 Amps
11 Amps
13 Amps
Max. Fuse
7 Amps
15 Amps
18 Amps
Outlet Diameter
28.5 mm
28.5 mm
32 mm

a. Stay alert, watch what you are doing and use common sense when operating a
pump. Do not use a pump while you are tired or under the influence of drugs,
alcohol or medication. A moment of inattention while operating pumps may result
in serious personal injury.
b. Avoid accidental starting. Ensure the switch is in the off position before
plugging in. Carrying pumps with your finger on the switch or plugging in pumps
that have the switch on invites accidents.
c. Remove any adjusting key or wrench before turning the pump on. A wrench
or a key left attached to a rotating part of the pump may result in personal injury.
d. Dress properly. Do not wear loose clothing or jewellery. Keep your hair,
clothing and gloves away from moving parts. Loose clothes, jewellery or long
hair can be caught in moving parts.
4. Pump use and care
a. Disconnect the plug from the power source before making any adjustments,
changing accessories, or storing pumps. Such preventive safety measures
reduce the risk of starting the pump accidentally.
b. Maintain pumps. Check for misalignment or binding of moving parts,breakage
of parts and any other condition that may affect the pumps operation. If damaged,
have the pump repaired before use. Many accidents are caused by poorly
maintained pumps.
c. Use the pump, accessories and tool bits etc., in accordance with these
instructions and in the manner intended for the particular type of pump,taking into
account the working conditions and the work to be performed. Use of the pump
for operations different from intended could result in a hazardous situation.
5. Service
a. Have your pump serviced by a qualified repair person using only identical
replacement parts. This will ensure that the safety of the pump is maintained.
Submersible Pump Safety Warnings
CAUTION: Not intended for cleaning and other maintenance of swimming pools.
Do not use it for corrosive, abrasive, explosive or dangerous liquids. Fluids other
than water will damage the submersible pump and/or create a fire hazard.
WARNING! This product is not suitable for use with drinking (potable) water.
This appliance is not intended for use by persons (including children) with
reduced physical, sensory or mental capabilities, or lack of experience and
knowledge, unless they have been given supervision or instruction concerning
use of the appliance by a person responsible for their safety.
Children should be supervised to ensure that they don’t play with the appliance.
• Ensure the submersible pump is disconnected from mains power when installing

• Do not install or operate the submersible pump in an explosive environment or
near flammable material.
• Do not operate the submersible pump without liquid.
• Do not run the submersible pump dry.
WARNING! The submersible pump together with associated pipework
operate under pressure.
Do not disconnect submersible pump or pipework until internal
pressure has bean released. Failure to do this could result in personal
injury and damage to property.
•Avoid inserting hands into the inlets/outlets of the submersible pump while it is
connected to mains power.
•Before using the submersible pump, always inspect it visually. Do not use the
pump if it is cracked and/or damaged. If the submersible pump is damaged,
contact the seller.
3. TECHNICAL DESCRIPTION
1. Power cord 2. Pump housing 3. Strainer tabs
4. Strainer 5. Discharge Outlet

4. UNPACKING AND CHECKING
Carefully remove the product from the packaging and examine it for any sign of
damage that may have happened during shipping. Lay the contents out and
check them against the parts shown below. If any part is damaged or missing;
please contact the seller and do not attempt to use the product.
5. INSTRUCTIONS
1. Remove the strainer from the bottom of the pump by depressing the lock tabs
on both sides of the pump.
CAUTION: Strainer must be properly installed before attaching and running the
pump to prevent any foreign material from entering and damaging pump
components.
2. Determine a suitable mounting location for the pump. If only one pump is being
used, locate it in the vessels bilge where the deepest level of water will gather.
While the vessel is at rest, the installation must allow for complete drainage of
the bilge pump’s outlet hose. All water pockets must be eliminated by having
the outlet hose running level or continuously upward.
3. Position the strainer so that the pump outlet nozzle is in the correct position to
connect the outlet hose.
4. Mounting the strainer:
• If attaching the strainer to wood, fasten with stainless steel screws.
• If attaching the strainer to metal or fiberglass, first mount a wooden block and
then fasten strainer to the wooden block using stainless steel screws. Marine
grade sealant can be used for mounting the wooden block to the vessel.
5. Mount the pump on the strainer so that both lock tabs snap into place. (The
pump may be reversed on these tabs if necessary.)
6. Attach the outlet hose to the outlet nozzle of the pump, Flexible hose is
recommended for the outlet pipe, to prevent any kinks if sharp bends are
unavoidable.
NOTE: If you are replacing a previous bilge pump that has a smaller diameter
outlet hose, you may need to use an adapter to connect to the larger outlet size
on the pump.
Restricting the flow from the pump by using a smaller hose will not damage the
pump, however you will reduce the rated flow capacity.
7. Through hull fittings:
• For most installations, install a through hull fitting to achieve the rated capacity
of the pump. Locate the through hull fitting at least 30cm above the water line to
prevent water from flowing back into the hull when the pump is switched off.
•For stern installations, place the through hull fitting high enough in the stern so
that it cannot be submerged under any conditions.

8. Wiring:
•In order to prevent electrolysis and corrosion to wiring connections, its essential
that all wire ends and terminals be located above the highest possible water
level by fastening with insulated staples or cable ties.
•Using wire that is too small, or running over an extended distance will result in
excess heat in the wiring, resulting in voltage drops and lower performance of
the pump.
9. Fusing:
•To protect your electrical wiring and automatic switch from possible overload
install a fuse in the positive (+) lead from the battery. We recommend to use a
completely sealed, waterproof fuse holder.
•If using a panel switch with a fuse holder, check to see that the proper fuse is
being used, you may wish to install a panel switch with a built-in fuse holder.
10. Follow one of the two wiring diagrams:
•Wiring for manual operation:
The Manual system is the
simplest wiring design, but it only
provides ON-OFF control of the
pump. Consequently, pumps
are often left on longer than
necessary.
•Wiring for automatic operation:
The automatic system
incorporates the Bilge Pump
Float Switch and ensures that
the vessel is always pumped
out, even when unattended.
In addition, it extends the life
of the pump and your battery
by automatically shutting the
Pump off after the water has
been pumped out. The automatic
system can also provide for manual control of the pump by installing a panel
switch. These switches have a "fail safe" feature which automatically returns
the switch to the "OFF" position, preventing the pump from being inadvertently
left on.
POLARITY IS IMPORTANT
•If it is not correct, the pump will spin in the opposite direction as it should.
Water will still pump out, but not to the rated capacity. This could result in the
vessel not being able to clear water from the bilge fast enough.
•To obtain the correct polarity, connect the BROWN wire to the positive (+) side

of the battery.
•To verify the correct direction of rotation (and thus the polarity) is correct is by
looking into the inlet hole on the bottom of the pump while running and see if
the impeller blades rotate in the same direction as the arrow on the base of the
unit. NEVER INSERT FINGERS OR OTHER OBJECTS INTO THE INLET
HOLE.
6. MAINTENANCE & STORAGE
Maintenance
Regularly check the pump to be sure that the filter base and impeller are not
clogged with debris. To clean, push in the tabs and lift up the pump housing.
Note. The discharge hose need not be removed.
Storage
The pump itself is not affected by freezing temperatures .However, if the pump is embedded in
ice or surrounded by ice,it cannot be used. Never turn the pump on if it is embedded in or
surrounded by ice.
IMPORTANT! BEFORE CLEANING YOUR BILGE PUMP OR CARRYING OUT ANY
MAINTENANCE PROCEDURE, MAKE SURE THAT THE UNIT IS OFF AND THE PUMP IS
DISCONNECTED FROM THE POWER SUPPLY TO PREVENT ACCIDENTAL STARTING.

7. TROUBLESHOOTING
Problem
Possible causes
Possible solutions
Pump runs,
but
will not
deliver any
water.
1. Screen and/or impeller
clogged.
2. When starting, the pump
water
height (1/8") falls below the
minimum water level.
3. Low line voltage.
1. Remove screen. Clean out dirt
and debris from screen and
impeller, then replace.
2. There must be at least 1/8" deep
water for the Pump to operate
properly.
3. Replace 12VDC battery.
Pump won't
start
or run.
1. Check power connections
and
circuits/fuses.
2. Water level too low.
3. Impeller clogged.
4. Defective motor.
1. Consult with an electrician.
2. Allow water level to rise above
1/8”.
3. Remove screen. Clean out dirt
and debris from screen and
impeller, then replace.
4. Replace Bilge Pump.
Excessive
noise or
vibration.
1. Worn bearings.
2. Debris in impeller.
1. Replace bilge pump.
2. Remove screen. Clean impeller.
Replace screen.
Pump stops
often.
1. Water temperature too
high.
1. Do not exceed temperatures
above 77° F.

8. DISPOSAL
Pumps that are no longer usable should not be disposed of with household
waste but in an environmentally friendly way. Please recycle where facilities
exist. Check with your local council
authority for recycling advice.
9. SYMBOLS
In this manual and/or on the machine the following symbols are used:
V
Volts
A
AMPS
DC
Direct current
L/H
Litres per hour
Warning
Read instruction
manual

CANNON TOOLS LTD
Add: 20 station road, Rowley Regis, west midlands,B65 0JU.U.K.
Made in China
This manual suits for next models
5
Table of contents
Other Neilsen Water Pump manuals
Popular Water Pump manuals by other brands

Hozelock
Hozelock 7606 manual

Pentair
Pentair Myers 4VL Installation and service manual

Homa
Homa CH235 instruction manual

Aqua
Aqua HC151 Operating and maintenance instructions

MYERS
MYERS HJ Installation & service manual

GORMAN-RUPP PUMPS
GORMAN-RUPP PUMPS SUPER T T6A60S-4045T Series Installation, operation, and maintenance manual with parts list

BRÖTJE
BRÖTJE HEP 25-180-10 Assembly instructions

dosatron
dosatron D3WL Quick start-up

Kamoer
Kamoer FX-STP user manual

CME Medical
CME Medical BODY GUARD 545 Operation manual

Sicce
Sicce PSK SDC Instructional manual

GORMAN-RUPP PUMPS
GORMAN-RUPP PUMPS CE Series Installation, operation, and maintenance manual with parts list