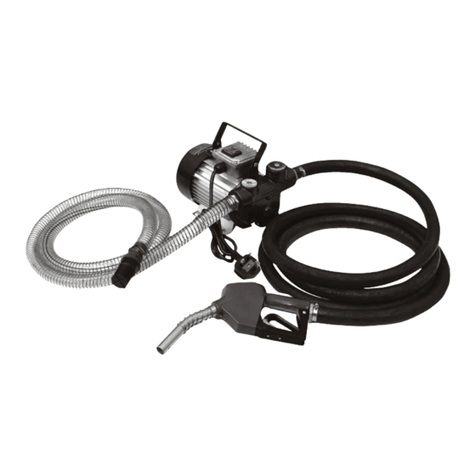
Neilsen CT0848 User manual

2” PETROL WATER PUMP CT0848
OWNER'S MANUAL
BEFORE OPERATIGN THIS EQUIPMENT
PLEASE READ THESE INSTRUCTIONS CAREFULLY
Cannon Tools Limited
Address:20 Station Road, Rowley Regis, West Midlands, B65 0JU.UNITED KINGDOM

1
EC DECLARATION OF CONFORMITY
We CANNON TOOLS LTD
20 Station Road, Rowley Regis, West Midlands, B65 0JU.U.K
Declare that the following machine complies with the appropriate basic safety
and health requirements of the EC Directive based on its design and type, as
brought into circulation by us.
In case of alteration of the machine, not agreed upon by us, this declaration will
lose its validity.
Product description: 2” PETROL WATER PUMP
Model: CT0848
Appropriate EC directives:
EC-Machinery directive 2006/42/EC
EC-Directive on electromagnetic compatibility(EMC)2014/30/EU
EU- Noise Directive 2000/14/EC & 2002/88/EC
Applicable harmonized
EN ISO 12100:2010, EN 55012:2007+A1:2009, EN 809:1998+A1:2009/AC:2010
EN ISO 3744:1995
20 Station Road, Rowley Regis, West Midlands, B65 0JU.U.K.
Mr. Gurcharan Tony Singh Sanghera
Managing Director
CANNON TOOLS LTD
2020-07-02

2
SAFETY INFORMATION
Read and understand this owner's manual before operating your water pump.
You can help prevent accidents by being familiar with your water pump’s controls,
and by observing safe operating procedures.
Operator Responsibility
● Know how to stop the engine quickly in case of emergency.
● Understand the use of all water pump controls.
● Do not let children operate the water pump without parental supervision. Keep
children and pets away from the area of operation.
Refuel With Care
Gasoline is extremely flammable, and gasoline vapor can explode. Refuel
outdoors, in a well-ventilated area, with the engine stopped. Never smoke near
gasoline, and keep other flames and sparks away.
Hot Exhaust
● The muffler becomes very hot during operation and remains hot for a while
after stopping the engine. Be careful not to touch the muffler while it is hot. Let
the water pump cool before storing it indoors.
● To prevent fire hazards, keep the water pump at least 3 feet (1meter) away
from building walls and other equipment during operation.
Carbon Monoxide Hazards
● Exhaust contains poisonous carbon monoxide, a colorless and odorless gas.
Breathing exhaust directly can cause loss of consciousness and may lead to
death.
● If you run the water pump in an area that is confined, the air you breathe could
contain a dangerous amount of exhaust gas. To keep exhaust gas from
accumulating, provide adequate ventilation.

3
CONTROLS & FEATURES
COMPONENT & CONTROL LOCATION

4
CONTROLS
Fuel Valve Lever
The fuel valve opens and closes the passage between the fuel tank and the
carburetor.
The fuel valve lever must be in the ON position for the engine to run.
When the engine is not in use, leave the fuel valve lever in the OFF position to
prevent carburetor flooding and to reduce the possibility of fuel leakage.
Engine Switch
The engine switch enables and disables the ignition system.
The engine switch must be in the ON position for the engine to run.
Turning the engine switch to the OFF position stops the engine.
Choke Lever
The choke lever opens and closes the choke valve in the carburetor.
The CLOSED position enriches the fuel mixture for starting a cold engine.
The OPEN position provides the correct fuel mixture for operation after starting,
and for restarting a warm engine.

5
Throttle Lever
The throttle lever controls engine speed.
Moving the throttle lever in the directions shown makes the engine run faster or
slower.
Recoil Starter Grip
Pulling the starter grip operates the recoil starter to crank the engine.
FEATURES
Oil Alert System
The Oil Alert system is designed to prevent engine damage caused by an
insufficient amount of oil in the crankcase.
Before the oil level in the crankcase can fall below a safe limit, the Oil Alert
system will automatically stop the water pump.

6
BEFORE OPERATION CHECKS
Check the Suction and Discharge Hoses
● Remember that the suction hose must be reinforced construction to prevent
hose collapse.
● Check that the sealing washer in the suction hose connector is in good
condition.
●Check that the hose connectors and clamps are securely installed.
● Check that the strainer is in good condition and is installed on the suction hose.
Check the Engine
● Check the oil lever.
● Check the air filter.
● Check the fuel level.
OPERATION
PUMP PLACEMENT
For best pump performance, place the pump near the water level, and use hose
that are no longer than necessary. That will enable the pump to produce the
greatest output with the least self-priming time.
As head (pumping height) increases, pump output decrease. The length, type,
and size of the suction and discharge hoses can also significantly affect pump
output.
Minimizing suction head (placing the pump near the water lever) is also very
important for reducing self-priming time. Self-priming time is the time it takes the
pump to bring water the distance of the suction head during initial operation.

7
SUCTION HOSE INSTALLATION
Do not use a hose smaller than the pump's suction port size.
Pump performance is best when the pump is near the water level, and the hoses
are short.
Minimum hose size: 50 mm
Use a hose clamp to securely fasten the hose connector to the suction hose in
order to prevent air leakage and loss of suction. Verify that the hose connector
sealing washer is in good condition.
Install the strainer on the other end of the suction hose, and secure it with a hose
clamp. The strainer will help to prevent the pump from becoming clogged or
damaged by debris.
Securely tighten the hose connector on the pump suction port.

8
DISCHARGE HOSE INSTALLATION
It is best to use a short, large-diameter hose, because that will reduce fluid
friction and improve pump output.
Tighten the hose clamp securely to prevent the discharge hose from
disconnecting under pressure.
PRIMING THE PUMP
Before starting the engine, remove the filler cap from the pump chamber, and
completely fill the pump chamber with water. Reinstall the filler cap, and tighten it
securely.
NOTICE
Operating the pump dry will destroy the pump seal. If the pump has been
operated dry, stop the engine immediately, and allow the pump to cool before
priming.

9
STARTING THE ENGINE
1. Prime the pump.
2. Move the fuel valve lever to the ON position.
3. To start a cold engine, move the choke lever to the CLOSED position.
To restart a warm engine, leave the choke lever in the OPEN position.
4. Move the throttle lever from the SLOW position about 1/3 of the way toward
the FAST position.
5. Turn the engine switch to the ON position.

10
6. Operate the starter.
Pull the starter grip lightly until you feel resistance, then pull briskly.
Return the starter grip gently.
7. If the choke lever has been moved to the CLOSED position to start the engine,
gradually move it to the OPEN position as the engine warms up.
STOPPING THE ENGINE
To stop the engine in an emergency, simply turn the engine switch to the OFF
position.
Under normal conditions, use the following procedure.
1. Move the throttle lever to the SLOW position.
2. Turn the engine switch to the OFF position.
3. Turn the fuel valve lever to the OFF position.

11
SETTING ENGINE SPEED
Position the throttle lever for the desired engine speed.
For engine speed recommendations, refer to the instructions provided with the
equipment powered by this engine.
SERVICING YOUR PUMP
If you operate your water pump under severe conditions, such as sustained high-
load or high-temperature operation, or use in unusually wet or dusty conditions,
consult your technician for recommendations applicable to your individual needs
and use.
To ensure the best quality and reliability, use only new, genuine parts or their
equivalents for repair and replacement.
SAFETY PRECAUTIONS
Make sure the engine is off before you begin any maintenance or repair.
This will eliminate several potential hazards:
● Carbon monoxide poisoning from engine exhaust.
Be sure there is adequate ventilation whenever you operate the water pump.
● Burns from hot parts.
Let the water pump cool before touching.
● Injury from moving parts.
Do not run the water pump unless instructed to do so.
Read the instructions before you begin, and make sure you have the tools and
skills required.
To reduce the possibility of fire or explosion, be careful when working around
gasoline. Use only a nonflammable solvent, not gasoline, to clean parts. Keep
cigarettes, sparks and flames away from all fuel related parts.
Remember that a technician knows your water pump best and is fully equipped to
maintain and repair it.

12
MAINTENANCE SCHEDULE
● Emission related items.
(1) Service more frequently when used in dusty areas.
(2) These items should be serviced by an technician.
(3) For commercial use, log hours of operation to determine proper maintenance
intervals.

13
REFUELING
Use unleaded gasoline with a pump octane rating of 86 or higher.
Unleaded gasoline produces fewer engine and spark plug deposits and extends
exhaust system life.
WARNING
!
Gasoline is highly flammable and explosive, and you can be burned or
seriously injured when refueling.
●
Stop engine and keep heat, sparks, and flame away.
●
Refuel only outdoors.
●
Wipe up spills immediately.
Adding Fuel
1. Remove the fuel tank cap.
2. Add fuel to the bottom of the fuel level limit in the neck of the fuel tank.
Do not overfill. Wipe up spilled fuel before starting the water pump.
ENGINE OIL LEVEL CHECK
Check the engine oil level with the engine stopped and in a level position.
1. Remove the filler cap/dipstick and wipe it clean.
2. Insert and remove the dipstick with out screwing it into the filler neck.
Check the oil level shown on the dipstick.
3. If the oil level is low, fill to the edge of the oil filler hole with the recommended
oil.
4. Screw in the filler cap/dipstick securely.

14
ENGINE OIL CHANGE
Drain the used oil while the engine is warm. Warm oil drains quickly and
completely.
Warning! Pay attention that the engine oil may be very hot if it is drained off
directly after the engine is shut off, or allow the engine to cool a
few minutes before draining the oil.
1. Place a suitable container below the engine to catch the used oil, then remove
the filler cap/dipstick, drain plug, and washer.
2. Allow the used oil to drain completely, then reinstall the drain plug, washer, and
tighten drain plug securely.
3. With the engine in a level position, fill to the outer edge of the oil filler hole with
the recommended oil .
4. Screw in the filler cap/dipstick securely.
ENGINE OIL RECOMMENDATIONS
Oil is a major factor affecting performance and service life. Use 4-stroke
automotive detergent oil.SAE 10W-30 is recommended for general use.
Warning! We suggest you take used oil in a sealed container to your local
recycling center or service station for reclamation. Do not throw it in the
trash, pour it on the ground, or down a drain as the oil or gasoline
concerning the toxicity.

15
AIR CLEANER SERVICE
A dirty air filter will restrict air flow to the carburetor, reducing engine performance.
If you operate the engine in very dusty areas, clean the air filter more often than
specified in the MAINTENANCE SCHEDULE.
NOTICE
Operating the engine without an air filter, or with a damaged air filter,
will allow dirt to enter the engine, causing rapid engine wear.
Dual Filter Element Types
1. Remove the wing nut from the air cleaner cover, and remove the cover.
2. Remove the wing nut from the air filter, and remove the filter.
3. Remove the foam filter from the paper filter.
4. Inspect both air filter elements, and replace them if they are damaged.
5. Clean the air filter elements if they are to be reused.
Paper air filter element: Tap the filter element several times on a hard surface to
remove dirt.
Never try to brush off dirt; brushing will force dirt into the fibers.
Foam air filter element: Clean in warm soapy water, rinse, and allow to dry
thoroughly.
Dip the filter element in clean engine oil, then squeeze out all excess oil.
6. Wipe dirt from the inside of the air cleaner base and cover, using a moist rag.
7. Place the foam air filter element over the paper element, and reinstall the
assembled air filter. Be sure the gasket is in place beneath the air filter. Tighten
the air filter wing nut securely.
8. Install the air cleaner cover, and tighten the cover wing nut securely.

16
SEDIMENT CUP CLEANING
1. Move the fuel valve to the OFF position, then remove the fuel sediment cup
and O-ring.
2. Wash the sediment cup and O-ring in nonflammable solvent, and dry them
thoroughly.
3. Place the O-ring in fuel valve, and install the sediment cup. Tighten the
sediment securely.
4. Move the fuel valve to the ON position, and check for leaks. Replace the O-
ring if there is any leakage.
SPARK PLUG SERVICE
Recommended spark plug: F6RTC
1. Disconnect the spark plug cap, and remove any dirt from around the spark
plug area.
2. Remove the spark plug with a spark plug wrench.
3. Inspect the spark plug. Replace it if the electrodes are worn, or if the insulator
is cracked or chipped.
4. Measure the spark plug electrode gap with a suitable gauge. The gap should
be 0.028~0.031 in (0.70~0.80mm). Correct the gap if necessary, by carefully
bending the side electrode.
5. Install the spark plug carefully, by hand, to avoid cross-threading.
6. After the spark plug seats, tighten with a spark plug wrench to compress the
sealing washer.
If reinstalling the used spark plug, tighten 1/8-1/4 turn after the spark plug seats.
If installing a new spark plug, tighten 1 / 2 turn after the spark plug seats.

17
NOTICE
A loose spark plug can overhand and damage the engine.
Overtightening the spark plug can damage the threads in the cylinder head.
7. Attach the spark plug cap.

18
STORING YOUR WATER PUMP
Storage Preparation
Proper storage preparation is essential for keeping your water pump troublefree
and looking good.
Cleaning
If the water pump has been running, allow it to cool for at least half an hour
before cleaning. Clean all exterior surfaces, touch up any damaged paint, and
coat other areas that may rust with a light film of oil.
Fuel
Gasoline will oxidize and deteriorate in storage. Old gasoline will cause hard
starting, and it leaves gum deposits that clog the fuel system.
If the gasoline in your water pump deteriorates during storage, you may need to
have the carburetor and other fuel system components serviced or replaced.
You can extend fuel storage life by adding a fuel stabilizer, or you can avoid fuel
deterioration problems by draining the fuel tank and carburetor.
ADDING A FUEL STABILIZER TO EXTEND FUEL STORAGE LIFE
When adding a fuel stabilizer, fill the fuel tank fresh gasoline.
1. Add fuel stabilizer following the manufacturer's instructions.
2. After adding a fuel stabilizer, run the water pump outdoors for 10 minutes to be
sure that treated gasoline has replace the untreated gasoline in the carburetor.
3. Stop the engine, and move the fuel valve to the OFF position.

19
DRAINING THE FUEL AND CARBURETOR
1. Place an approved gasoline container below the carburetor, and use a funnel
to avoid spilling fuel.
2. Remove the carburetor drain bolt and sediment cup, then move the fuel valve
lever to the ON position.
ENGINE OIL
1. Change the engine oil.
2. Remove the spark plugs.
3. Pour a tablespoon (5~10cc) of clean engine oil into the cylinder.
4. Pull the starter rope several times to distribute the oil in the cylinder.
5. Reinstall the spark plug.
6. Pull the starter rope slowly until resistance is felt. This will close the valves so
moisture cannot enter the engine cylinder. Return the starter rope gently.
Storage Precautions
Select a well ventilated storage area away from any appliance that operates with
a flame, such as a furnace, water heater, or clothes dryer.
Also avoid any area with a spark-producing electric motor, or where power tools
are operated.
If possible, avoid storage areas with high humidity, because that promotes rust
and corrosion.
Unless all fuel has been drained from the fuel tank, leave the fuel valve lever in
the OFF position to reduce the possibility of fuel leakage.
With the engine cool, cover the engine to keep out dust.
Do not use sheet plastic as a dust cover. A nonporous cover will trap moisture
around the engine, promoting rust and corrosion.
Removal From Storage
Check your engine as described in the BEFORE OPERATION chapter of this
manual.
If the fuel was drained during storage preparation, fill the tank with fresh gasoline.
Gasoline oxidizes and deteriorates over time, causing hard starting.
TRANSPORTING
If the engine has been running, allow it to cool for at least 15 minutes before
loading the engine-powerd equipment on the transport vehicle. A hot engine and
exhaust system can burn you and can ignite some materials.
Keep the engine level when transporting to reduce the possibility of fuel leakage.
Move the fuel valve lever to the OFF position.
Table of contents
Other Neilsen Water Pump manuals