NENKO 20325170 User manual

1. Name of the product
Yunique 4-in-1 aroma diffuser
2. Product code
20325170
3. Short description
The Yunique 4-in-1 aroma vaporizer offers various options for air purification, relaxation and well-
being.
With this beautiful aroma vaporizer made of light wood and glass, you can easily combine a
wonderful scent with soothing music and slight colour changes. The Yunique 4-in-1 aroma vaporizer
is both an aroma diffuser and a music player, humidifier, ionizer and light and mist effect in one.
Including timer function (1 or 5 hours) and interval mode in which the diffuser vaporizes for 5
minutes for 10 hours and alternates with 5 minutes of rest. The diffusor has 5 adjustable lighting
colours, but you can also alternate these colours or switch off the light. In terms of sound, you can
choose to play standard pre-programmed Eastern relaxation music (can be turned on or off) or to
play your own music from your own source (MP3 player, I-pod or radio). The cable for this is
included.
5. Sensory stimulations
Hear, see, smell
6. Technical information
Adapter: 24 Volt, 650 mA
Energy: 15 Watt
Moisture evaporation: 70+/- 10 ml./hour
Room range: 40 m2
7. Safety
When using the Essential oils diffuser Yun, please comply with the following safety precautions:
•Do not use for any purpose other than those described in this manual.
•Before connecting to a power outlet, make sure the intended voltage meets the product
specifications indicated above.
•Do not use if the power adapter, power plug, or diffuser unit has obvious signs of damage
and return the unit immediately.
•This product must be used only with the supplied power adapter to avoid damaging diffuser
components.
•Do not allow the power adapter or plug to come into contact with water or other liquids.
•Do not allow water or other liquids to get inside the diffuser body.
•For long periods of unuse or storage, remove the adapter plug, empty any remaining water,
and clean the diffuser unit.
•When unplugging the diffuser, grasp the power adaptor plug instead of the power adaptor
cable itself.
•Keep out of reach of children.
•Use caution when handling the glass lid

8. Product overview
Note: Due to the mist output of the Yun Essential oils diffuser, use with caution on surfaces that are
sensitive to water and oil.

9. Use
1. Open the diffuser package and make sure all parts are present (see page 3).
2. Check for any obvious signs of damage, particularly on the Power Adapter and Power
Adapter Plug.
3. Place the diffuser on a flat surface, out of the reach of children.
4. Connect the Power Adapter Plug “L” to the Power Inlet “K”.
5. Connect the Power Adapter “J” into an appropriate power outlet.
6. Insert the Air Outlet Accessory “U“ into the Air Outlet “E”.
7. Insert the Splash Guard “F” and align the notch
1. Use the supplied Water Cup to add mineral or tap water.
2. Remove the Glass Lid and add water into the Water Reservoir until it reaches the red
Maximum Water Level Indicator.
3. Add several drops of your favorite essential oils into the Water Reservoir.
4. Replace the Glass Lid.
5. Turn the diffuser unit ON using the remote control and select the desired setting (the
remote control operates up to 7.6 meters from the diffuser unit). Alternatively, press the
Power Button to turn ON the diffuser and press repeatedly to cycle through the light setting.
See diagram in LED section in Remote Control Feature for LED cycles.*
6. If the Audio On/Off button is selected on the remote control, a selection of soothing sounds
will play and the lights will turn ON
When Power Button is pressed to turn on the diffuser, diffuser will auto shutdown until water is
used up or turns off at time settling selected by Remote Control. Or press Power Button for 2
seconds to turn off the diffuser.
Remote Control Battery Installation
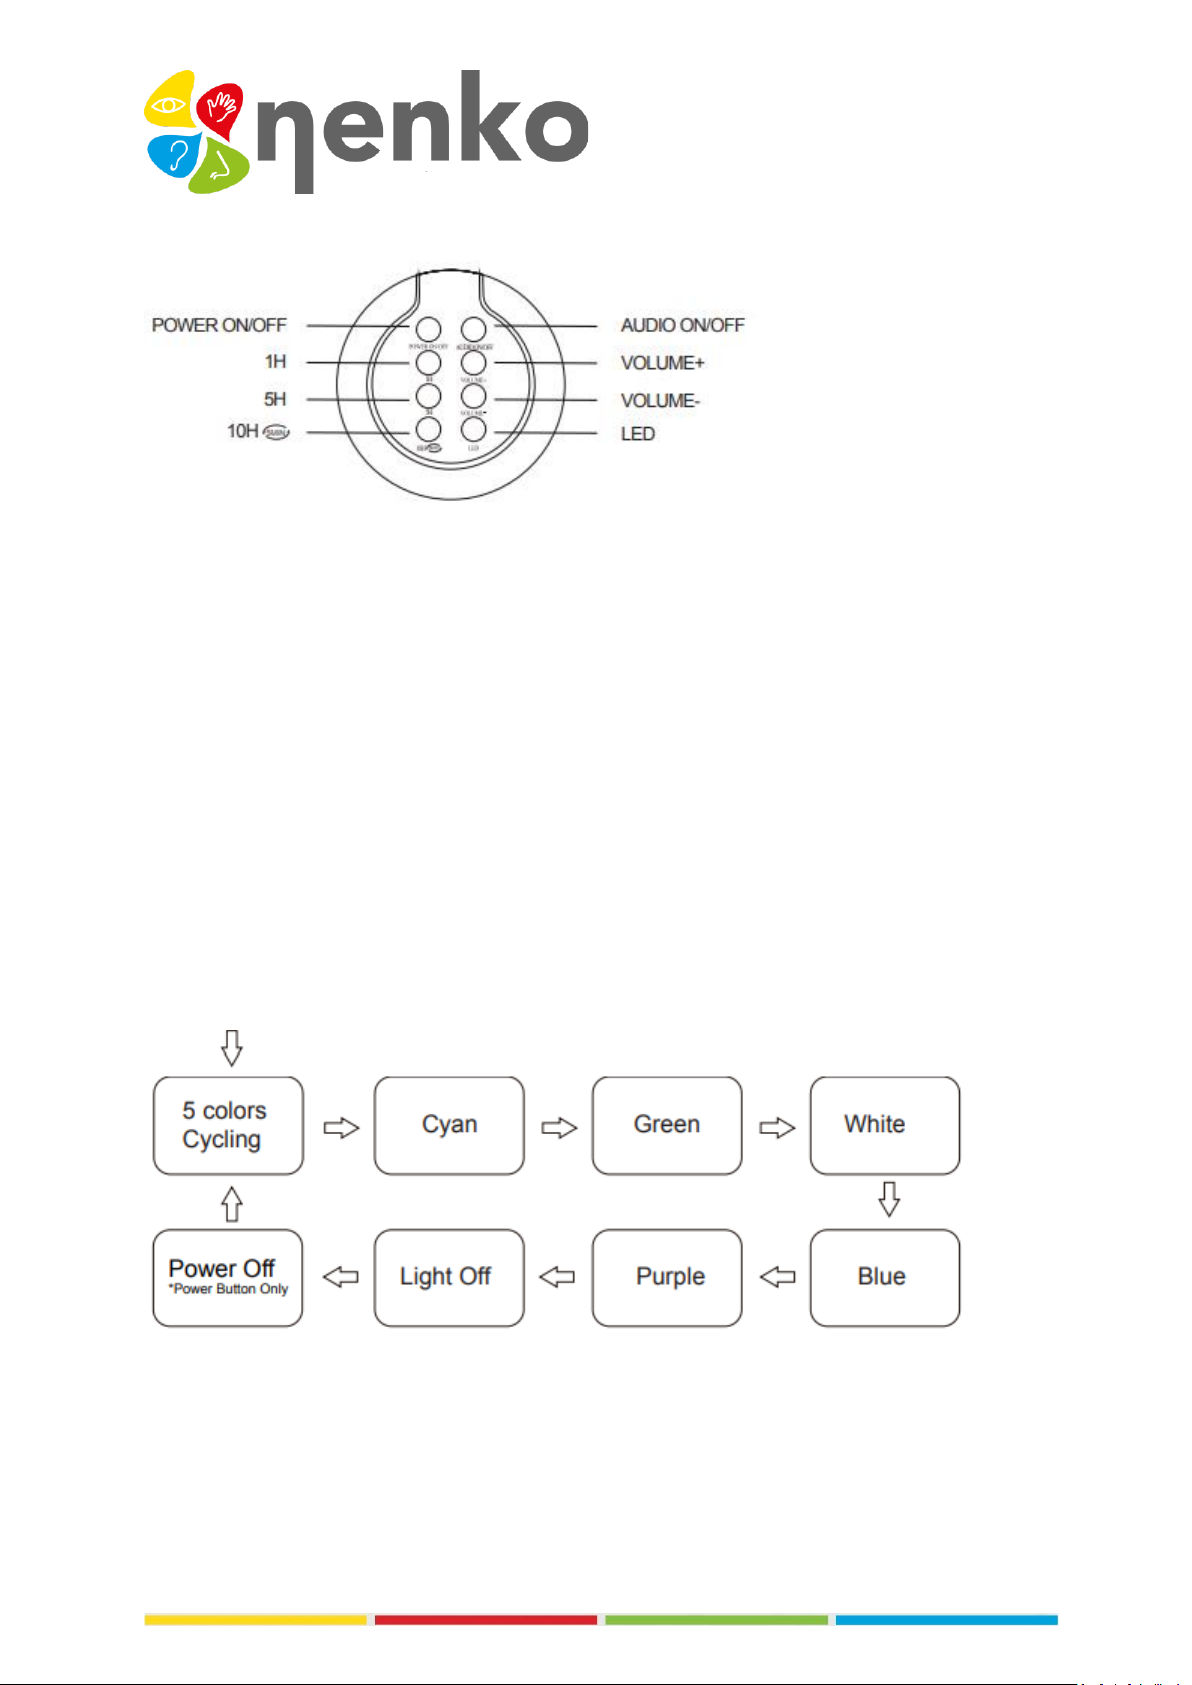
Remote Control Features
Use the included Remote Control to enhance your diffusing experience.
•Power On/Off Press the Power On/Off button once to turn ON the device. The mist, light
and sound will turn ON simultaneously.
•1H Press the 1H button for 1 hours of continuous operation, after which the diffuser unit will
shut off automatically.
•5H Press the 5H button for 5 hours of continuous operation, after which the diffuser unit will
shut off automatically.
•10H Intermittent Mode Press the 10H button for 10 hours of intermittent operation after
which the diffuser will shut off automatically. (Intermittent mode: 5 minute ON 5 minute
OFF).
•Audio On/Off Press the Audio On/Off button to play or stop the built-in selection of
soothing sounds.
•Volume + Press the Volume + button to increase sound level.
•Volume - Press the Volume - button to decrease sound level. • Battery Cover Button Cell
Battery (CR2032) Battery Compartment
•LED Press to cycle through LED light display modes: Five soft LED light settings (5 colors
cycling, cyan, green, white, blue, purple and Power OFF
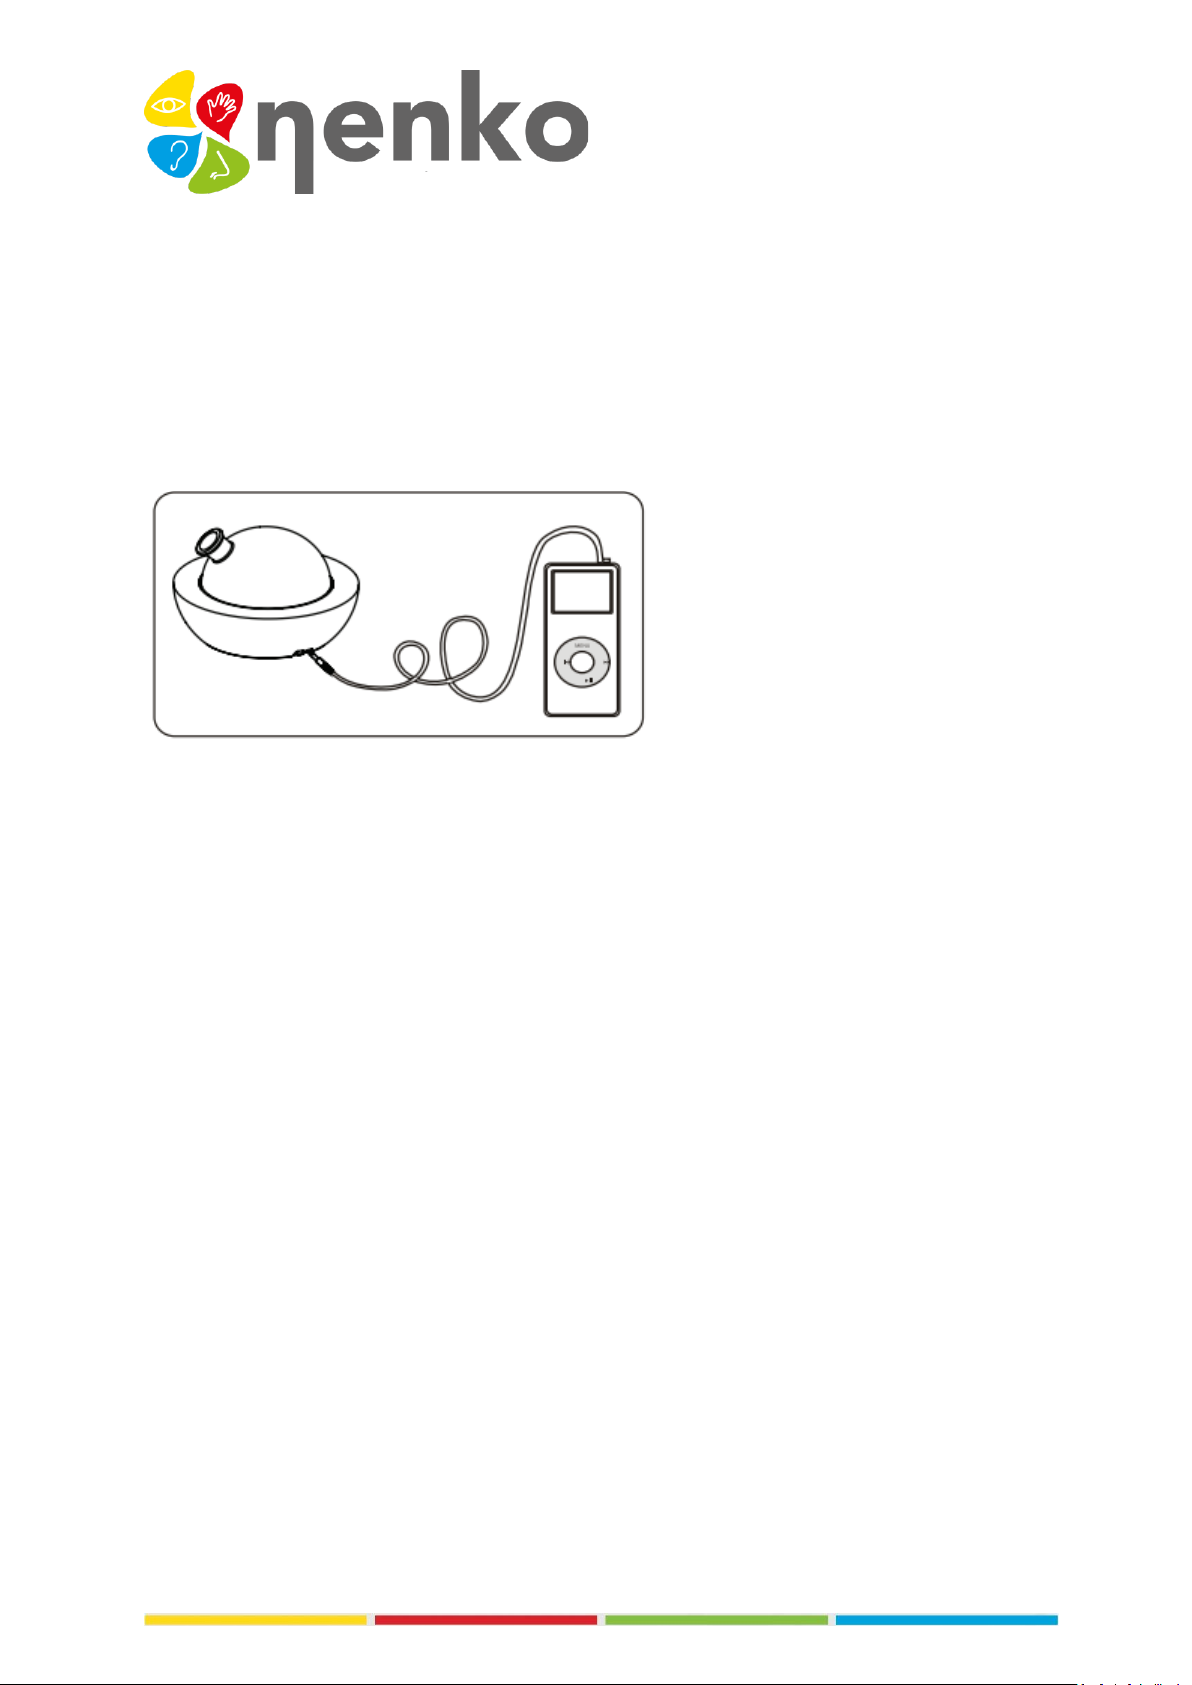
Connecting an External Music Player
1. Plug one end of the Audio Cable into the Audio Input and the other end into the headphone
jack of any external music player (Mobile Phone, MP3, MP4, CD, or DVD) to play your own
music. The built-in sounds will automaticlly turn OFF.
2. To resume playing of the built-in sounds, remove the Audio Cable.
Note: Be sure to completely remove the Audio Cable from the Audio Input, otherwise, the built-in
sounds will not play.
10. Cleaning and Maintenance
To drain the water in the Water Reservoir, tilt the diffuser unit as illustrated in diagram A. Use paper
towel or cloth to wipe up any residual water.
To avoid water entering the unit and damaging diffuser components, do not pour from the Air
Outlet Accessory side (see diagram B).
•Before cleaning, turn the unit OFF and unplug the Power Adapter Plug.
•If essential oil begins to build up on the Mist Plate, gently wipe it off using the included
Cleaning Brush or a cotton swab dipped in rubbing alcohol.
•Use a cotton cloth soaked with non-toxic cleanser to clean the diffuser unit, including the
inside of the Water Reservoir. Remove any residual essential oil stains, rinse the above-
mentioned parts with water, and then dry with a cloth.
•Clean the Water Reservoir and Mist Plate at least twice a week for best performance.
•If any water or essential oil accidentally lands on the wooden base, wipe immediately to
avoid fading or discoloration.
Note: To avoid product damage, do not use any corrosive cleaner on the components mentioned
above

Mist Plate Replacement
Follow the diagram, remove the original Mist Plate by unscrewing the Gasket using the Key
provided. Replace a new Mist Plate and press tightly onto the Silicon ring seal. Screw back the
Gasket with the Key to secure
11. Specifications
Product: Yun Essential oils diffuser
Item No.: PZ-UA040
Dimensions: (220 x 220 x156mm)
Material of Diffuser Base: Maple wood
Material of Diffuser Cover: Glass Material of Diffuser Water Reservoir: Polypropylene
Weight:1109g
Coverage Area: Approx. 40m2
Diffusion Run Time Settings: 1hours/5hours/10hours(intermittent)
LED Colors: 5 different soft LED color settings, cyan, green, white, blue, purple, 5 colors cycling and
off)
Remote Control Range (Infrared): Approx. 8m
Water Reservoir Capacity: 280 +/- 10ml
Ultrasonic Frequency: 1.7 million waves per second
Power Input: DC 24V 12W
Adapter: AC Adapter 100~240V 50/60Hz
Atomized Particle Diameter: 5μm
Water Type: Room-temperature tap or mineral water (Do not use purified or distilled water)
Usage Environment: Indoor
•Check for essential oil buildup on the Mist Plate. If oil buildup is present, read the cleaning
instructions.
•Check that the Air Inlet under the diffuser is free of any obstruction or debris that may
restrict air flow

12. Safety and Care Instructions
Please read and follow these safety guidelines closely to ensure safe operation of the diffuser.
1. Unplug the diffuser immediately and discontinue use in the event of smoke or burning smell.
2. Refill with tap water or mineral water. Do not use distilled water.
3. Never wrap the adapter with cloth, paper, etc. Such actions may result in damage to the
diffuser or fire.
4. Never touch the adapter with wet hands as electric shock or injury may occur.
5. Do not disassemble or attempt to repair the diffuser, this will void the warranty.
6. Never immerse the diffuser in water.
7. Unplug the adapter when refilling, cleaning, or moving the diffuser.
8. Keep the diffuser out of reach of children.
9. Do not remove or place objects in the Water Reservoir during operation.
10. Do not place your fingers in the water during operation, this may result in injury.
11. Do not place acidic or alkaline chemicals in the Water Reservoir.
12. Use only the included Power Adapter provided in the packaging.
13. Do not shake the diffuser.
14. Any damage caused by the user does not qualify for Product Warranty
15. Do not use metal objects to clean the Mist Plate. Use only a cotton swab or cloth dipped in
rubbing alcohol or a neutral detergent.
16. Never use the product for purposes other than those listed in this manual.
17. If the unit will not be used for an extended period or needs to be relocated, unplug the
Power Adapter, empty the Water Reservoir, and wipe the unit clean before storage.
18. Clean the unit before switching to different essential oils.
19. The product is designed for using 100% pure, natural essential oil. Chemical fragrance, spice
or impure essential oil used may cause product damage.
20. Do not fill the water to exceed the red Maximum Water Level Indicator.
21. Do not move the product during its operation. Pull the Power Adapter instead of the wire to
unplug.
22. Do not place the product in direct sunlight or close to a refrigerator, a fan or other hot
environment.
23. Place the device on a flat and solid surface instead of uneven and/or unstable ones like
carpets or rugs etc.
For more information, you can visit our website www.nenko.com .

Table of contents
Popular Accessories manuals by other brands

Axxess
Axxess Relay & Contact Sensor-6 installation guide

Eldom
Eldom KT100 instruction manual

International Biomedical
International Biomedical AirBORNE A750i Service manual

IFM Electronic
IFM Electronic efector180 IX5010 operating instructions

Honeywell
Honeywell DT7550UK2 DUAL TEC installation instructions

Duerkopp Adler
Duerkopp Adler 910 Fitting instructions


