Neo Car Audio AAUD3VD User manual


Installation Instructions
Chapter 1 – Getting Started
1.1 Subject
The NEO AUX adapter – an integration between an MP3 player and a factory installed
car stereo. Equipped with the specific vehicle harness and standard 3.5mm jack the NEO-
AUX interface will allow you to connect your MP3/DVD/XM player or iPod / iPhone to
the car stereo system easily.
1.2 Introduction
Thank you for purchasing the NEO-AUX adapter, which has been designed to provide
endless hours of listening pleasure through most vehicles factory radios. To insure that
your AUX interface performs correctly in your vehicle, we recommend that you read this
entire manual before attempting installation
.
1.3 Precautions
Proper mounting location
Securely install the interface in a location that is free from heat, humidity, moving parts,
or direct sunlight. Beware of hot airflow from your vehicle’s climate control system. We
recommend securing the interface to a suitable location, free of sharp metal edges, using
double-sided tape, Velcro, or wire ties.
1.4 Disclaimer
• This product is not affiliated with any of the OEM manufactures.
• Modifying the radio may void any outstanding warranty.
• The purchase of this product carries with it no warranties, either expressed or implied.
• While every care has been taken to provide a quality product, we cannot guarantee that
the Neo Aux adapter will function correctly if installation is not done according to the
instructions provided in this guide. We also cannot guarantee that the NEO AUX adapter
will function correctly with an MP3 player if the MP3 player is broken or damaged or not
supported.
• Keep your eyes on the road while driving!
• We are not liable for the misuse of this product. Misuse includes improper installation,
damage to the board or radio while trying to install it, and the illegal use of the radio.
1.5 Completeness and connection of set
a) NEO AUX adapter set consists of the following (see figure 1).
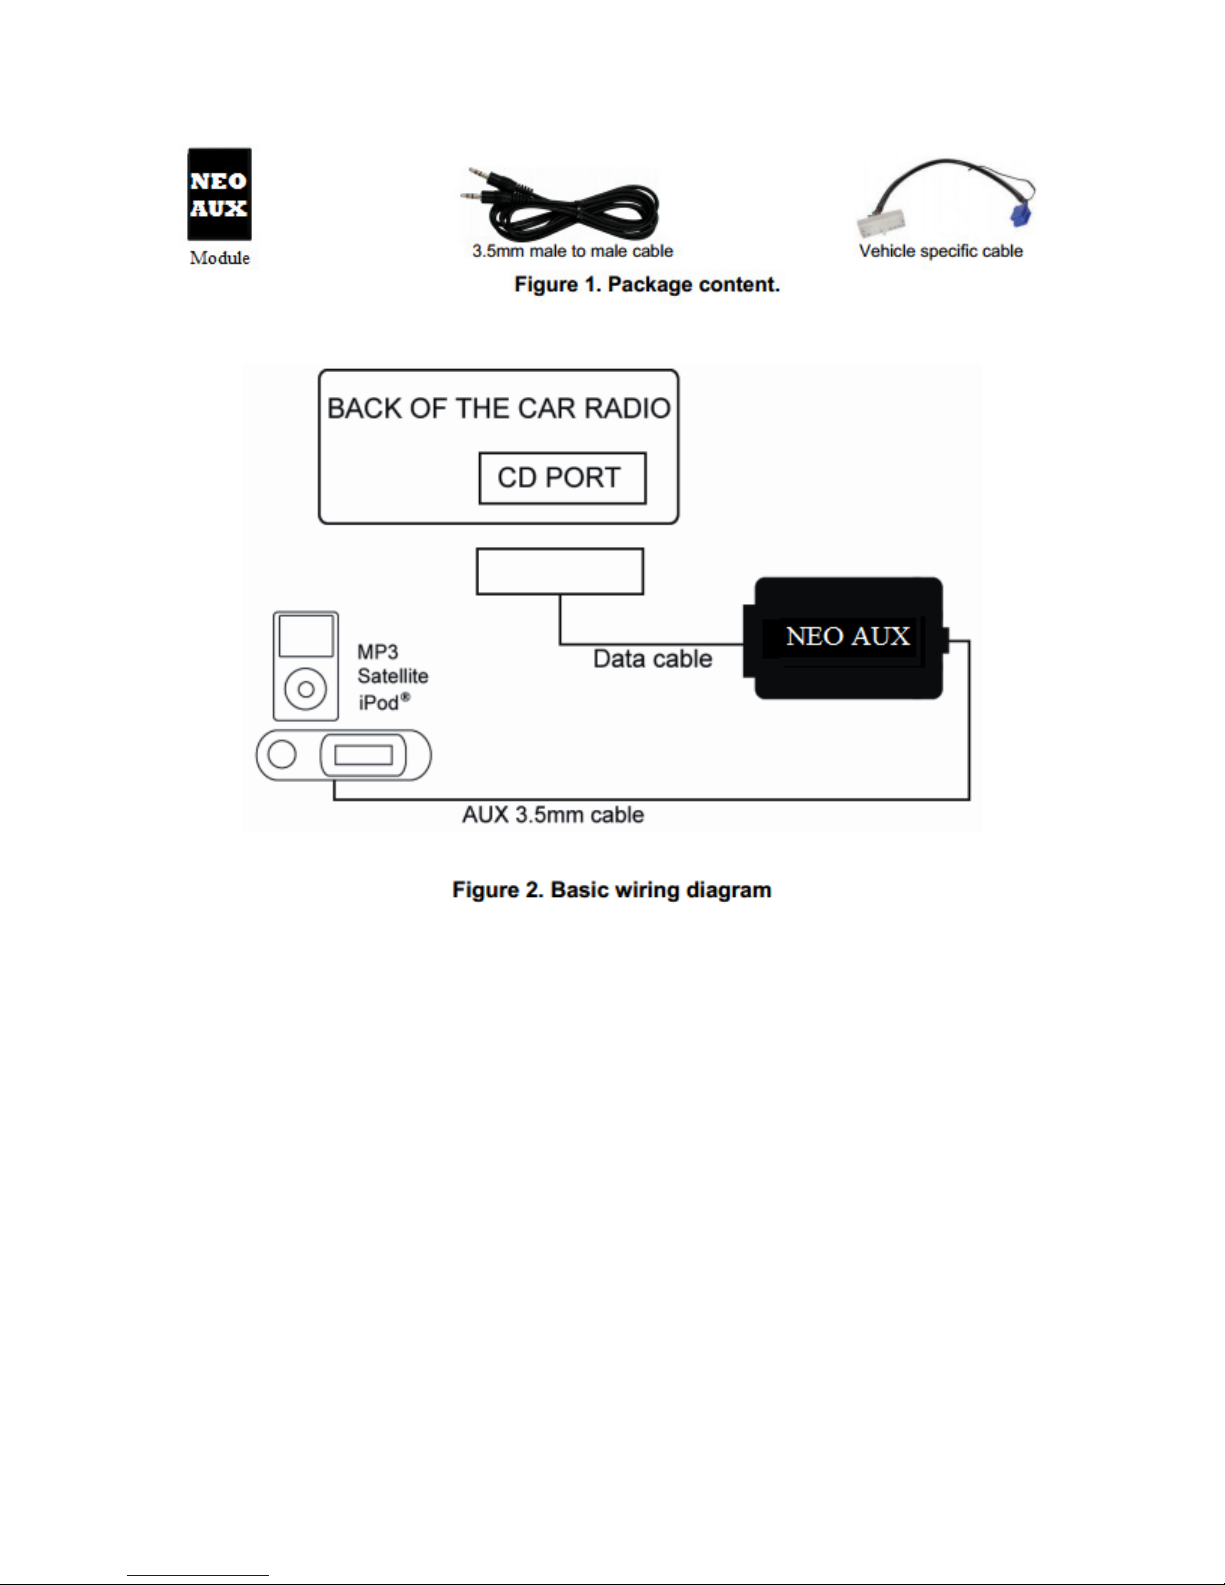
b) Basic wiring diagram of NEO AUX adapter (see Figure 2):
1.6 Important Compatibility Notes
If your vehicle is equipped with an external factory CD changer, you must disconnect it
in order to be able to install the interface. You will lose the use of the external CD
changer to gain the use of your iPod or MP3 player. Any built-in CD changer will remain
working.
Chapter 2 – General Installation
2.1 Installation location:
Most installations will require you to remove the factory radio in order to plug in the
vehicle specific harness.
For some vehicles, you will also have the option to connect the interface to the factory
pre-run CD changer cable located in the trunk or glove box.
2.2 Tools needed:
In many cases, there are no special tools required in order to remove the stereo. Radio
removal tools are available for some stereos to aide in the removal of the radio. Please
consult your local car audio shop or your vehicle’s dealership for instructions or
assistance if necessary.
If you are unsure how to install the interface properly, we recommend contacting your
local car stereo shop for the assistance.
2.3 Preparation and adapter installation
1. Turn off car engine and remove key from ignition.
2. If your radio uses a Security Code, make sure that you have the code before
unplugging the radio.
3. Un-mount your radio from the dash in order to get access to the back side of the
radio. Some vehicles require special tools to remove the radio. Please consult your
vehicle’s dealership or a local car audio professional if necessary.
4. Attach the car harness connector to the back of the stereo to the CD changer port.
Be sure to make a firm connection but do not force it. Connect the other end to the
module.
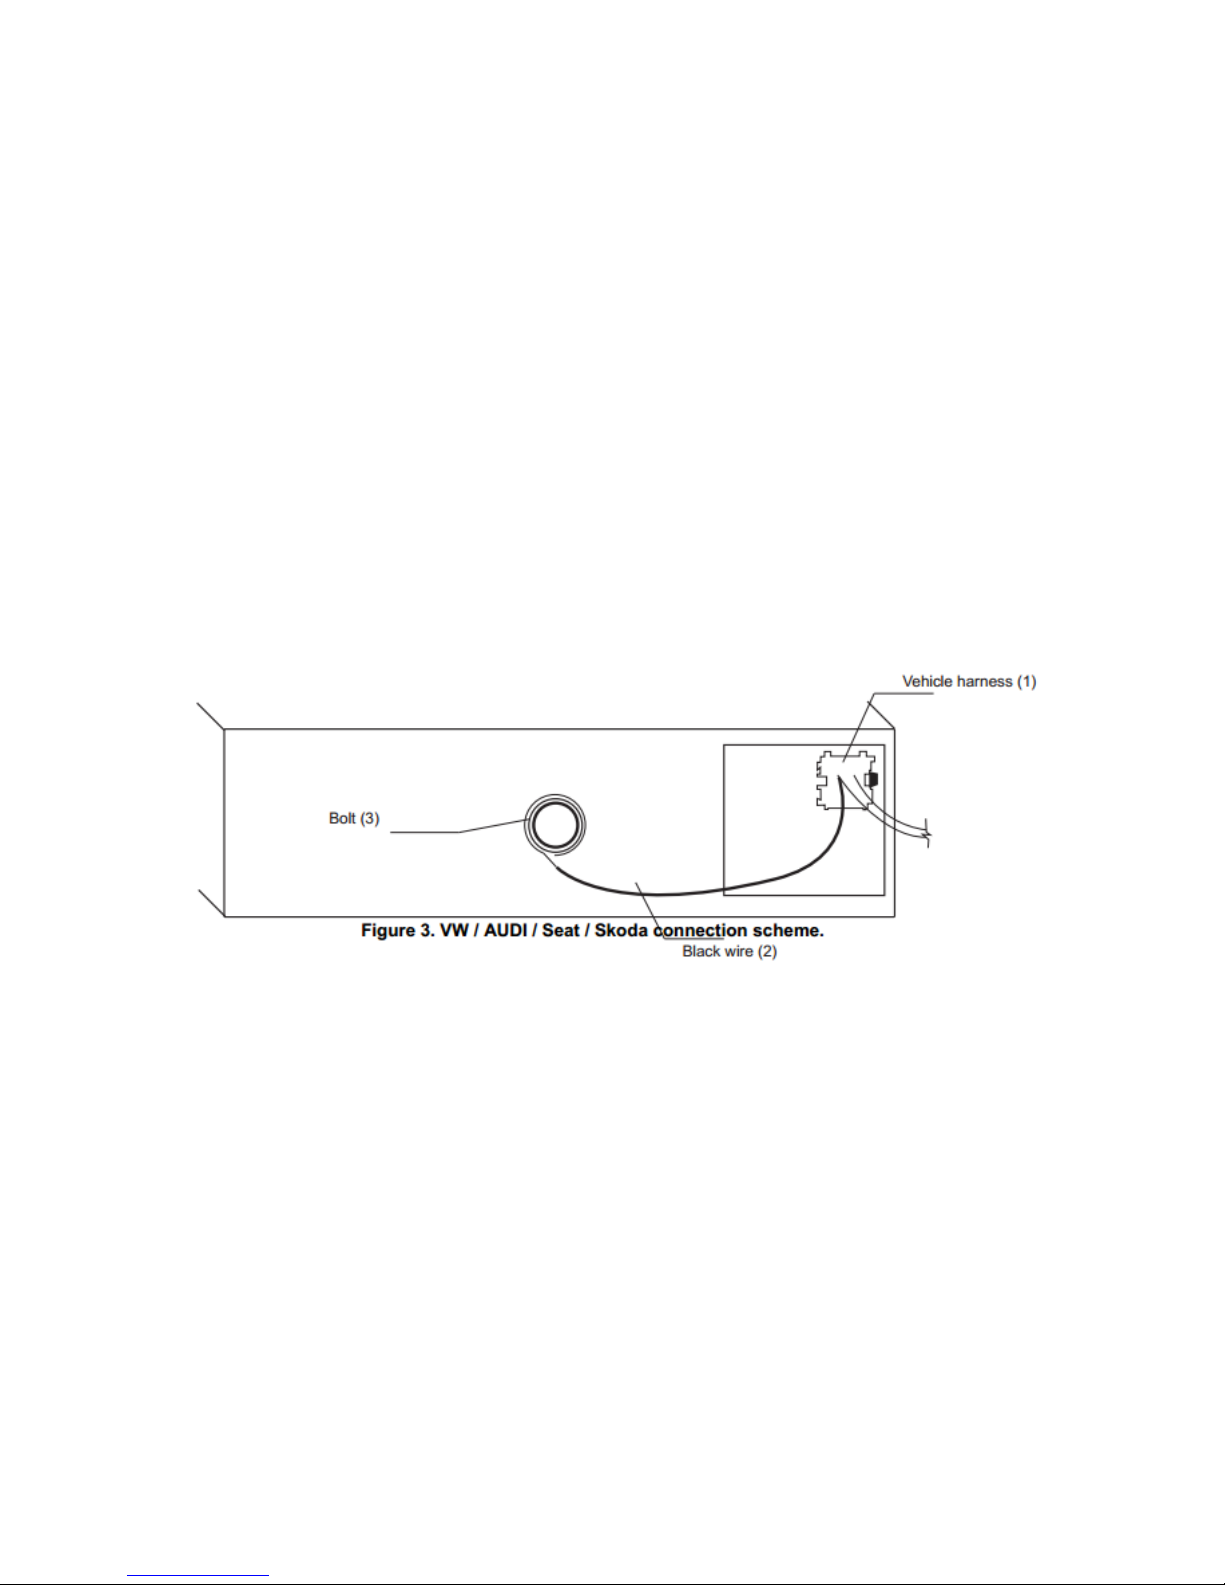
5. WV/AUDI/SEAT/SKODA - there is a black single cable on the vehicle
specific harness (3). You will need to attach it to the back bolt of the car stereo or
to the stereo chassis.
Remove the PVC from the end of the black wire (2)
(a) Connect the end of the black wire (2) to the metal part of the car stereo
chassis. You can connect it under the bolt (3) if present.
(b) Make sure that the solid contact is maintained between the striped black
wire and the metal part of the car stereo body.
The failure to attach the black cable to the chassis of the stereo will mean that the
NEO adapter will not work! All VW / AUDI / Seat / Skoda vehicles require this
black cable to be attached.
6. For AUDI vehicles only: For some AUDI head units an additional part or
harness modification is required in order to gain the access to the CD changer
port. The 8-pin CD changer port on such stereos is occupied by a solid 20-pin
connector. Please contact Neo Car Audio tech support for further information
619-704-0690.

7. For BMW vehicles only: Please refer to the installation insert for the special
guidelines for BMW installation.
8. For Toyota vehicles only: In some Toyota / Lexus / Scion vehicles the CD
changer port is occupied with a factory harness (such as NAV or audio harness).
The NEO package for Toyota includes a Y shaped vehicle cable. In order to
connect interface properly please follow to the scheme below.
Figure 4. Connection scheme for Toyota/Lexus/Scion
If the car does not have NAV or XM leave the female end of the Toyota harness open.
9. For Honda / Acura 03 and never (HON1 adapter) and Chrysler/Dodge/Jeep
with navigation or XM installed you may need HON1-Y Y cable or CHR-Y
cable in order to gain the access to the car stereo port occupied with the factory
connector.
10. Once the interface is connected to the radio, you will need to test the operation of
the interface before re-assembling the dash.
11. Turn your car stereo on and switch it over to the CD Changer mode using the
Disk / Mode / CD / AUX (depending on the stereo type) buttons on your car
stereo until it shows Disk 1, Track 01 on a the display.
12. Connect the AUX cable to the MP3 player or the iPod. Turn on the MP3 player or
the iPod and play some tunes. You should now hear the sound coming from the
car stereo speakers.
13. Once the operation of the interface is confirmed, you may continue with the
installation. If you experience difficulties with the installation, please see our
troubleshooting section.
14. Find a place where you can place the NEO AUX adapter. We recommend placing
the module in a place that is easily accessible.
Note: Make sure you mount the NEO AUX adapter in a place with enough room
so that, when you re-mount the car stereo, you do not break the adapter.
15. You may use the glove box or other spaces inside the dash to direct Audio cables
to a convenient location.
16. Re-mount your car stereo, making sure its clips or strews are secure.

Adapter mounting in the trunk (for select VW and BMW only).
1. Locate the trunk mounting cable in your car (usually located along the left side of
the car in the back).
2. Disconnect the existing CD changer, if present.
3. Attach the matching cables.
4. For BMW trunk installation:
Some BMW’s are factory wired for a cellular phone. Except for wire location, the factory
cellular phone connector looks identical to the factory 3-pin connector used for the CD
changer. The CORRECT 3-pin connector for the CD changer has a BROWN wire
(ground) in the #1 pin position. Please make certain you use this connector.
The INCORRECT factory cellular phone connector has a BROWN wire in the center
position—DO NOT USE THIS CONNECTOR.
Congratulations! You have installed the NEO AUX adapter. You may now use it with
your MP3 player or iPod / iPhone.
2.5 When the car ignition is OFF
NEO-AUX adapter does not control the MP3 player or the iPod. When you turn your car
ignition or car stereo off, the MP3 player or the iPod will remain playing. You will need
to turn the iPod or the MP3 player off manually if you do not want it to continue playing.
2.6 Upgrade to full iPod/iPhone integration
You can upgrade your NEO-AUX package to the iPod/iPhone integration with full
control and charging by purchasing an additional cable. Please contact Neo Car Audio for
more information 619-704-0690.
2.7 If your MP3/XM/DVD player has different size plug
You can easily convert 3.5mm phone jack to the 2.5mm or RCA connectors with the
small plug converters. Call Neo Car Audio for more information.

Chapter 3. - Support
Troubleshooting
For technical support please contact
Neo Car Audio
619-704-0690
This manual suits for next models
15
Table of contents
Other Neo Car Audio Adapter manuals


