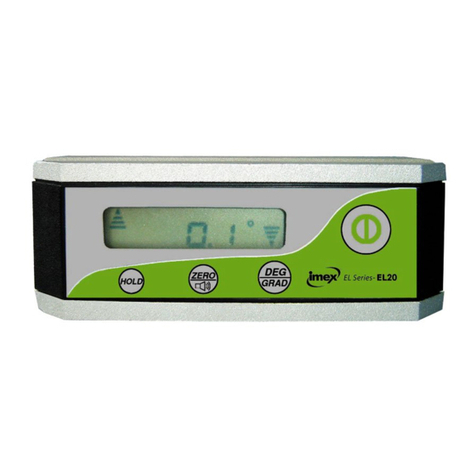
Neoteck NTK033 User manual

USER MANUAL
Digital Level Box
Model:NTK033/NTK034/NTK061

Contents
1. English Manual......................................................1
2. German Manual.....................................................8
3. French Manual.....................................................16
4. Spanish Manual....................................................24
5. Italian Manual.......................................................31
6. Japanese Manual.................................................38

Digital Level Box
DESCRIPTION
This digital level is a highly versatile leveling tool designed
for fast, easy operation
● Measuring range of digital display: 4×90°
● Resolution of Digital Display : ±0.01°
● Precision of Digital Display : ±0.1° at 0° and 90°
±0.2° at other angles
● Unit of measurement (°degrees / % / mm/m / IN/FT)
● Backlight
● Hold function
● 0°calibration
● Battery type : 2x1.5V “AAA” batteries
● Working temperature: 0℃~ 40℃
●Storage temperature: -10℃~ 50℃
●Dimensions: 58*58*32mm
●Weight: 74g (without battery)
1

2. ON/OFF
Press ON/OFF button to turn the equipment on. And it
shows the last mode before shutdown. Hold ON/OFF button
not to put to turn it off.
After about 3 minutes not using the equipment, it will switch
off automatically.
3.Turn on the equipment and put it to the level position for
measuring.
2
Operation instructions
1. Battery replacement
Remove the rear battery cover of the receiver by
unscrewing the battery cover retaining screw. The cover
will now lift off. Open the battery case. Put two “AAA”
batteries and close the case. Your electronic level is now
ready to use.

3
4. Unit of measurement selection (°degrees / % / mm/m
IN/FT)
After switching on, the screen always shows the last mode
before shutdown. By pressing the MODE button you can
change the angles unit display units from degrees (°) to
percent (%), to (mm/m) to pitch (in/ft). Pitch readings are
in 1/8-inch/fee increments.
The icon indicates the current angle’s position,
either up or down away from the horizontal or vertical
position.
5. Angle measure
If the equipment isn’t in level, it will display values on the
screen. Press REF button to set current angle to be zero,

LCD backlight will stay on for approximately 20 seconds
with no movement of the level, then it will be turned off
automatically.
7. Hold
In positions where the display might not be readable, the
actual measured value can then be saved by pressing the
HOLD button, then a saved measured value is displayed
and the icon will show on the screen. By pressing the
HOLD button another time, the measuring mode will get
reactivated.
8. Low battery indicator
Recommend to replace two new “AAA” batteries, when the
low Battery indicator “ ” shows on the screen.
4
enter relative angle measurement mode. The icon will
show on the screen. Press REF button again to cancel the
function.
6. Backlight function
Press any button, backlight of the screen will turn on. The

9. User’s calibration
5
a. Turn off the equipment. Put the equipment on a flat and
smooth solid surface. (see the following figure).
b. In the shutdown status, press and hold HOLD button
first, then press ON/OFF button, until the LCD display
reads “CAL”.
c. Keep the equipment still for a period of time and then
press the HOLD button, display reads “CAL1”.
d. In the same location, rotate the equipment 180°
(see the following figure), then press the HOLD button,
display reads “CAL2”. After the “CAL2” disappears, the
calibration is completed and then the LCD will show the
current angle in high-accuracy-display.

NOTE:
6
● The calibration must be performed on a flat and smooth
surface with the tilt no more than 5°. If it exceeds 5°,
display reads “Err”, that indicates the user can’t proceed
to do the calibration.
● During calibrating, the level also can not be beveled or
moved.
● After completed calibration, the equipment
automatically replaces from original factory data to
consumer’s data, so it must be careful to use this
function.

7
Caution
Please turn off the item when it is not in use in order to
prolong its working life.
Warranty
Thanks for using neoteck product,all neoteck product
comes with warranty of 18 months from the day of
purchase, if you need any support, please feel free to
contact us.
Contact
Email: [email protected]

Digitaler Neigungsmesser
Beschreibung
Dieser digitale Neigungsmesser ist ein hochwertiges
Messinstrument zum Messen der Steigung, leicht und
schnell zu verwenden.
●Messbereich des digitalen Displays: 4 x 90°
●Auflösung des digitalen Displays: ±0.01°
●Genauigkeit des digitalen Displays: ±0.1° at 0° and 90°
±0.2° bei anderen Winkeln
●Maßeinheiten (°degrees / % / mm/m / IN/FT)
●Hintergrundbeleuchtung
●Hold-Funktion
●0 ° Kalibrierung
●Batterietyp: 2 x 1.5V AAA Batterien
● Arbeitstemperatur: 0℃~ 40℃
●Lagertemperatur: -10℃~ 50℃
●Dimensions: 58*58*32mm
●Gewicht: 74g (ohne Batterien)
8

Bedienungsanleitungen
1.Batterieersatz
Entfernen Sie die rückseitige Batterieabdeckung, indem
Sie die Schraube herausdrehen. Die Abdeckung hebt ab.
Öffnen Sie das Batteriefach. Setzen Sie zwei "AAA"
Batterien und schließen Sie den Fall. Ihr Inklinometer ist
einsatzbereit.
2.ON/OFF
Zur Einschaltung des Neigungsmessers drücken Sie
ON/OFF Taste. Vor Ausschalten wird das Gerät das letzte
Modus zeigen. Halten Sie die ON / OFF -Taste gedrückt,
um sie nicht auszuschalten.
Wenn das Gerät nach etwa 3 Minuten nicht benutzt wird,
wird es automatisch abgeschaltet.
3.Schalten Sie das Gerät ein und stellen Sie es auf die
flächige Position zum Messen.
9

4.Wahl der Maßeinheiten(°degrees / % / mm/m IN/FT)
Nach der Anschaltung wird das Gerät das letzte Modus
vor Ausschalten zeigen. Drücken Sie MODE-Taste, um
die Winkeleinheiten von Grad (°) bis Prozent (%),
bis (mm / m) bis Neigung (in / ft) ändern. Der Ablesewert
der Niegung ist in 1/8-inch/ft Inkrement.
Das Symbol zeigt die Position des aktuellen Winkels
an, bewegen entweder nach oben oder unten von der
horizontalen oder vertikalen Position.
5.Winkelmaß
Wenn das Neigungsmesser nicht auf der flächigen
Position ist, wird es einen Wert auf dem Display zeigen.
Drücken Sie REF-Taste, um den aktuellen Winkel auf
10

null zu setzen und relativen Winkelmessmodus zu
erreichen.
Das Symbol zeigt auf dem Display an. Drücken Sie
REF-Taste wieder, um die Funktion abzubrechen.
6.Hintergrundbeleuchtung
Drücken Sie irgendeine Taste, die Hintergrundbeleuchtung
des Displays wird eingeschaltet. Die LCD-
Hintergrundbeleuchtung bleibt für etwa 20 Sekunden.
Ohne Bewegung wird das Gerät automatisch
ausgeschaltet.
7.Hold-Funktion
In Positionen, in denen die Anzeige nicht lesbar ist, kann
der aktuelle Messwert dann durch Drücken der HOLD-
Taste gespeichert werden, dann wird ein gespeicherter
Messwert angezeigt und das Symbol wird auf dem
Bildschirm angezeigt. Durch erneutes Drücken der HOLD-
Taste wird der Messmodus wieder aktiviert.
11

8.Anzeiger der niedrigen Batterie
Wenn die niedrige Batterieanzeige " " auf dem
Bildschirm erscheint, ersetzen Sie zwei neue "AAA"
Batterien.
9.Kalibrierung
a. Das Gerät ausschalten. Dann das Gerät auf eine flache
harte Oberfläche sanft stellen. (wie das Photo)
12
b. Wenn das Gerät ausgeschaltet ist,halten Sie zuerst die
‘HOLD’Taste,dann drücken Sie‘ON/OFF’Taste bis zum der
LCD-Bildschirm‘CAL’anzeigt.
c. lassen das Gerät läuft,dann drücken Sie die ‘HOLD’
Taste bis zum der LCD-Bildschirm’CAL1’anzeigt.
d. drehen Sie das Gerät 180° an derselben Stelle
(wie das Photo), dann drücken Sie die ‘HOLD’Taste,der

13
LCD-Bildschirm wird‘CAL2’anzeigen. Nach Ausblenden
des "CAL2" ist die Kalibrierung abgeschlossen und das
LCD wird den aktuellen Winkel genau anzeigen.

Hinweise:
● Die Kalibrierung muss auf einer flachen und glatten
Oberfläche stellen.Die Neigung der Oberfläche darf nicht
mehr als 5 ° sein. Wenn es mehr als 5 ° ist,wird auf dem
Display "Err" anzeigen. Das bedeutet, dass der Benutzer
die Kalibrierung nicht führen kann.
● Während des Kalibrierens kann die Neigung auch nicht
verändert werden.
● Nach Abschluss der Kalibrierung wird die aktuelle
Daten von der ursprünglichen Fabrikdaten automatisch
ersetzt. Deshalb muss diese Funktion sorgfältig
verwendet werden.
14

Vorsicht
Bitte schalten Sie das Produkt aus, wenn es nicht
verwendet wird, um die Lebensdauer zu verlängern.
Garantie
Danke für Ihre Wahl des NEOTECK Produkts, alle
Produkte NEOTECKs kommen mit einer 18 Monaten
Garantie ab dem Tag des Kaufs. Wenn Sie Hilfen
benötigen, wenden Sie sich bitte an uns.
Kontakt
E-mail: [email protected]
15

Niveau à Bulle Numérique
DESCRIPTION
Ce Rapporteur d'angle numérique est un outil de
nivellement très polyvalent conçu pour un fonctionnement
rapide et facile
● Gamme de mesure de l'affichage numérique : 4×90°
● Résolution de l'affichage numérique : ±0.01°
● Précision de l'affichage numérique : ±0.1° at 0° and 90°
±0.2° à d'autres angles
● Unité de mesure : (°degrés / % / mm/m / IN/FT)
● Rétro-éclairage
● Fonction de hold
● 0° étalonnage
● Type de batterie : 2x Batteries "AAA" 1.5V
Température de fonctionnement : 0℃~ 40℃
Température de stockage : -10℃~ 50℃
Dimensions: 58*58*32mm
Poids: 74g (sans batterie)
16

Instructions d'utilisation :
1.Remplacement de la batterie
Retirez le couvercle de la batterie arrière du récepteur par
dévisser la vis de retenue du couvercle de la batterie. La
couverture va s'élever.Ouvrez le couvercle de la batterie.
Mettez deux
piles "AAA" et fermez le couvercle.
2.ON/OFF
Appuyez sur la touche ON / OFF pour allumer
l'équipement. Et il montre le dernier mode avant l'arrêt.
Tenez le bouton ON / OFF pour ne pas l'éteindre.
Après environ 3 minutes sans utiliser l'équipement, il
s'éteint automatique.
3.Allumez l'équipement et placez-le à la position de
niveau pour la mesure.
17

4. Choix de l'unité de mesure(°degrés / % / mm/
m IN/FT)Après l'allumage, l'écran affiche toujours le dernier
mode avant l'arrêt. En appuyant sur le bouton MODE,
vous pouvez modifier les unités d'affichage de l'unité
angulaire de degrés (°) à pourcentage (%),à (mm / m) au
pitch (in / ft). Les lectures de hauteur sont comprises
dans des incréments de1/8-inch / fee.
L'icône indique la position de l'angle actuel,
en haut ou en bas, en position horizontale ou
verticale.
18
This manual suits for next models
2
Table of contents
Languages:
