Neptune NE7MHDWCB User manual

User Manual
NE7MHDWCB


1- Note:
Avoid facing to direct sunlight or glass windows.
f
Note:
Motion activity by horizontal movement.
1. Avoid mounting the camera close to windows, air conditioners,
heaters, reigerators, ovens, in direct sunshine and places where the
temperature can change rapidly or
f
lows o
f
air occur
f
requently.

10
9


The system is designed for Micro
SD
card recording. Please
insert a Micro
SD
card into the Micro
SD
card slot in the monitor if
you want to record video. The system supports Micro
SD
cards
with a ma
x
imum capacity of
256GB
.
·f te:
The package doesn't include a Micro SD card.
·f te:
The battery needs to be fully charged before you turn on
the monitor for the first time.

The live screen displays in three views (Quad view, Dual view or
Single view) that depends on how many cameras have been selected
in the Menu (Menu Camera Selection). If only one camera has
been selected, the live view screen will only display a Single view. If
two cameras have been selected, the live view screen can be
switched between Single view and Dual view. If three or four cameras
have been selected, the live view screen can be switched between
Single view and Quad view. If you are in Dual view or Quad view, tap
on the camera image area you want to expand to Single view. Tap on
that image to return to Dual view or Quad view.
9
�
10 8 7
5
4
3
2
1
�
6
·f te: W
hen a certain alert event has been viewed on the device, then
tap the screen or press the Menu button, the LED will turn off.

Camera Number:
Signal Strength:
Resolution:
Recording modes:
Record Status:
Battery Capacity:
Storage: HOD/
te:
Safely remove the HDD, you can tap the icon to quickly and safely
eject the HDD to prevent data loss.
Remote viewing
Upgrade FW:

icon:
2.7
HDMI output
The system is compatible with HDMI 1.4
Recording to hard disk drive
·f
·f
3
Menu Options
·f
2.8
In menu, if you don't tap the screen or press the Menu button
after 1 minute, the screen will return to live view automatically.
Safely remove hard disk: When you use the external HDD, you should safely
remove them before unplugging them to prevent data loss and such problems.
Please click the "HDD" icon on live view to eject the HDD.

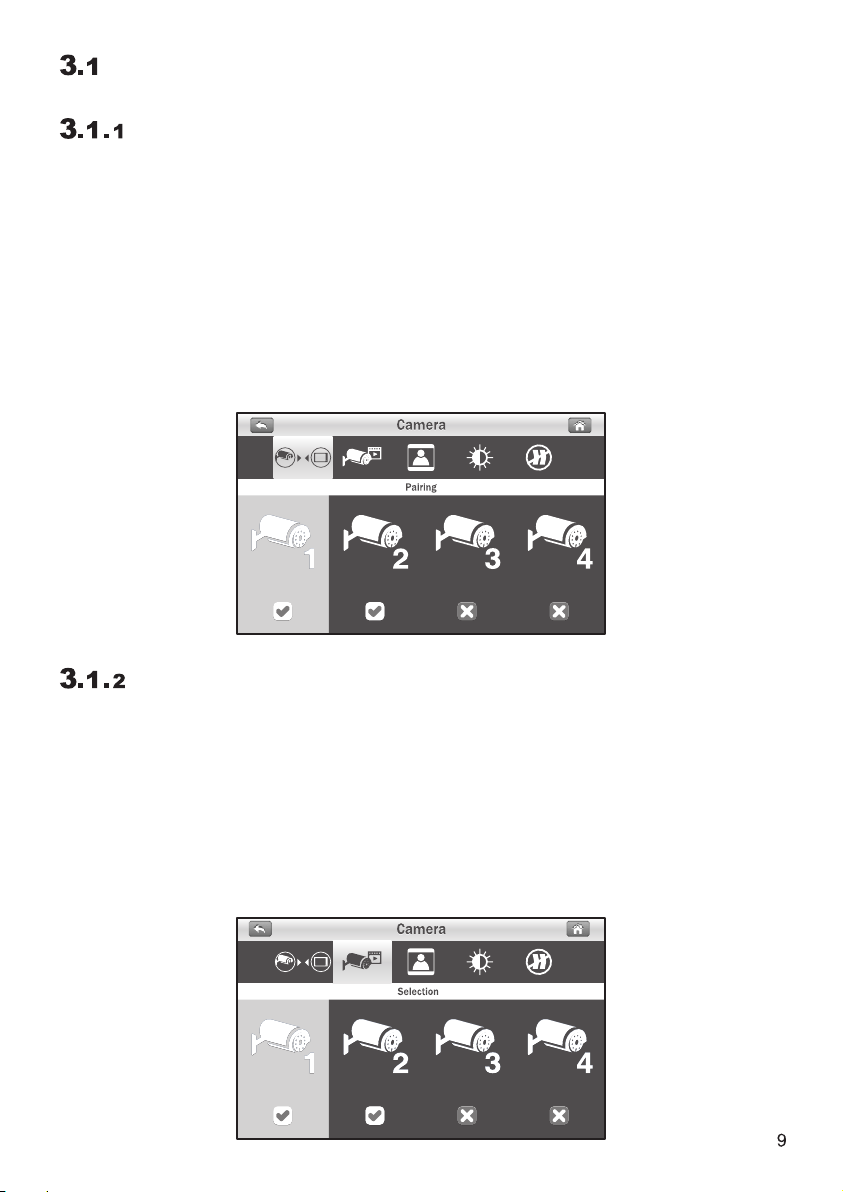
Pairing (Camera 1 -4) Camera ON/ OFF Selection (Camera 1 - 4)
Resolution (FHD/ HD)
Brightness (Lever 1 -8)
Anti-Flicker (50 Hz/ 60 Hz)
t Format HDD/MicroSD card
Overwrite/ Non-Overwrite
O
Camera Setup
The
C
amera menu contains 5 sub-menus.

Resolution:
Anti-flicker:
50Hz : Europe, Australia, Africa, Asia, China and Japan(East).
60Hz: America, Taiwan, Korea and Japan(West).

'f Note:
Motion recording: System only records when motion is
detected by the camera and will stop recording after 30
seconds from when the last motion was detected.
Record Setup @
Th
e record menu contains 4 sub-menus.

No:
The system automatically detects whether or not an SD
card or HDD is connected. When both SD card and HDD are
connected, the system will auto switch to HDD.
No:
The system supports 2 types of storage devices, one is SD card
the other is the HDD
The icon will show up on the monitor.
Format backup device:
Overwrite:
Recording Time:
In this submenu you can select the recording time r each
recording file.
Format

Default setting:
Power Saving:
Date and Time:
Th
e
S
ystem menu contains 6 sub-menus.
No:
Pairing settings will not be affected by the default setting function.
The camera will remain connected with the monitor.

Upgrade FW:
Warning: To make sure your system is working correctly, we strongly
recommend that you update the firmware to the latest version.
Language:
This function allows you to set your preferre
d
language.
·+-
Wa
rning: T
he firmware upgrade process must not be interrupted or the
system may be damaged. If the system firmware is the latest, it
will display the message, as below.

IP Setting: The default setting is DHCP and the IP
address is automatically assigned to the monitor by
your router. You can use a "Static IP" but we do not
recommend this unless you have some experience
with networking.

Battery Alert:
This selection allows you to choose the alert tones or disable the
alerts for low battery.
Alert Setup
The
A
lert menu contains 5 sub-menus.

·j- Note :
When the alert tone has been heard, tap the screen or press the Menu
button; the alert tone will be stopped.
Table of contents
Other Neptune Security System manuals


