STEP 1 LOWER BED STEP 2
STEP 3
LOWER BED
9
1
6
7
5
STEP 4 UPPER BED
9
3
J
ASSEMBLY INSTRUCTION
JAMIE (KING SINGLE)
ASSEMBLY TPS
LEFT
REAR
RIGHT
FRONT
SW8120Q/K
UPPER BED
5
5
5
5
5
A
F
J
H
E
C
D
G
I
J
K
O
M
N
L
G
C
C
F
A
B
J
J
H
I
D
E
91
7
6
C
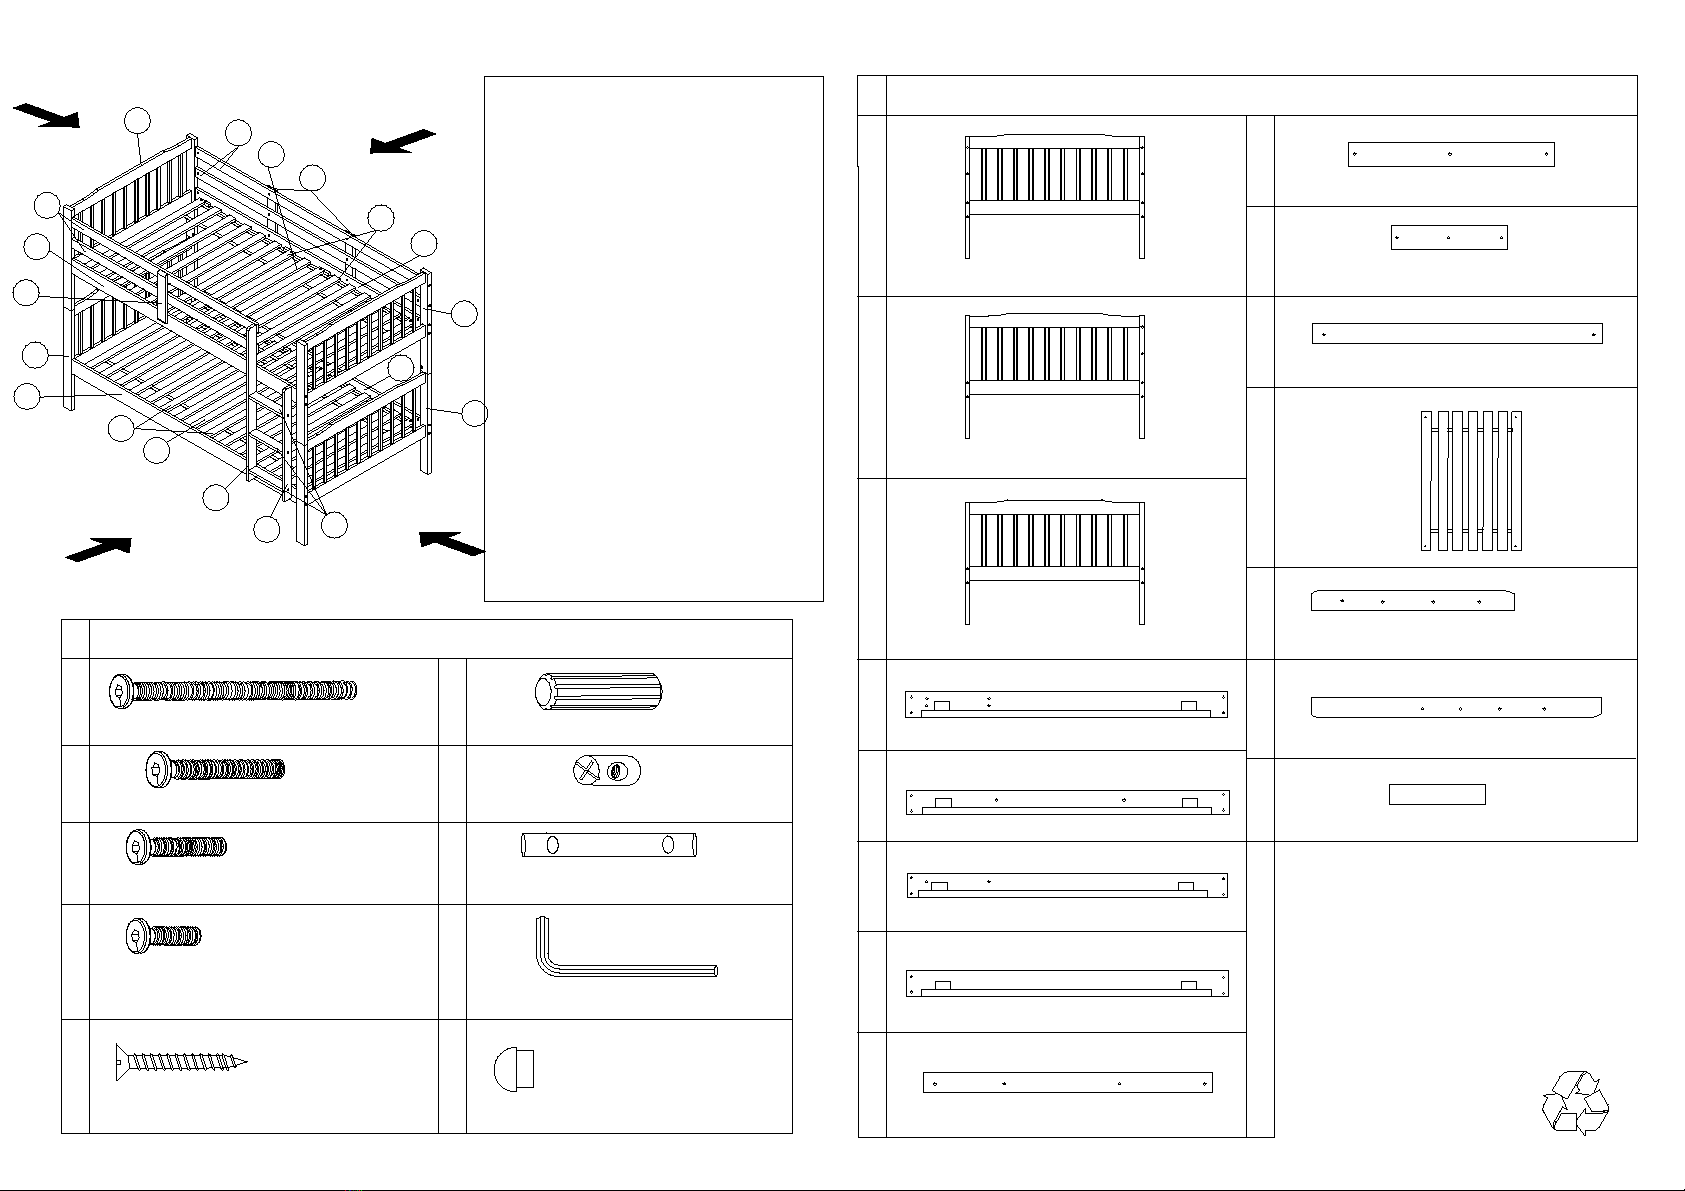
COMPONENT LIST
A
B
C
E
F
G
H
I
J
K
L
M
N
SIDE RAIL (UPPER - FRONT)
SIDE RAIL (UPPER - REAR)
SIDE RAIL (LOWER - FRONT)
SIDE RAIL (LOWER - REAR)
GUARD RAIL UPPER & LOWER (REAR)
GUARD RAIL UPPER & LOWER (FRONT)
GUARD RAIL SUPPORT (FRONT & REAR)
MIDDLE SLAT
LADDER SHORT RAIL
LADDER LONG RAIL
LADDER TREAD
1pcs
1pcs
1pcs
1pcs
2pcs
2pcs
3pcs
2pcs
1pcs
1pcs
3pcs
SLAT
4 sets
1pcs
1pcs
2pcs
HEADBOARD (UPPER)
FOOTBOARD (UPPER)
HEADBOARD & FOOTBOARD (LOWER)
D
O
HARDWARE LIST
1
2
3
4
5
6
7
8
JCBC M6 X 100MM
JCBC M6 X 50MM
JCBC M6 X 30MM
WOODEN SCREW M4 X 25MM
WOOD DOWEL 8 X 35MM
BARREL NUT M6 X 13MM
METAL PIN 10 X 100MM
ALLEN KEY M4
22pcs
6pcs
32pcs
30pcs
1pcs
4pcs
9
JCBC M6 X 15MM
8pcs
WOOD BUTTON
4pcs
L
K
L
L
L
B
K
L
10
Remove hardware from box and sort by size.
Please check to see that hardware and parts are
present prior start of assembly.
Please follow attached instructions in the same
sequences numbered to assure fast and easy
assembly.
WARNING !
1 Don't attempt to repair part that
are broken or defective.
2 Please contact the store immediately.
This product is for home use only and not
intended for commercial establishments.
3 Children under the age of 9 should not use an
upper bunk
or elevated bed suspended over a play area,
furniture
4 Children should be discouraged from playing on
the bunk bed
5 This bunk bed should be checked periodically to
ensure that the
guardrail, ladder and other components are
maintained in the correct position and
state of repair and that all connectors are tight.
6 The upper bunk must be more than 2 m from
any ceiling fan.


