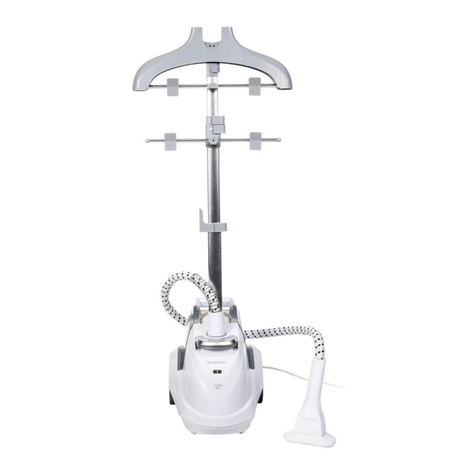
Nesco NC5611 Steam Pro II User manual

Instruction Manual
คู่มือการใช้งาน
STEAM CLEANER
MODEL : NC5611 Steam Pro II
1750 W 230 V 50/60 Hz

1

1750 W 230 V 50/60 Hz
2

3

4

5

6

7

8

9

English
STEAM CLEANER
Description
Dear Customer Thank you for choosing a Nesco appliance.The experience,
design, feature and technology of this appliance, as well as the strict quality
controls used during manufacture, will provide full satisfaction for many years.
A. Power Switch With Lamp
B. Steam Level Control
C. Steam Joint
D. Water Tank
E. Water Knob
F. Steam Hose
G. Telescopic Rod
H. Splint
I. Brush
J. Steam Handle
K. Steam Head Fixing Rack
L. Cloth Hanger
M. Automatic Cord Rewind Switch
N. Plug And Cord
1750 W 230 V 50/60 Hz
10

Tip&safty precautions
Important
When using your appliance, basic precautions should always be followed,
including the following:
1. Read all instructions before use.
2. Use appliance for its intended use only.
3. This product has been designed for domestic use only.
4. Any commercial use, inappropriate use or failure to comply with the instructions,
the manufacturer accepts no responsibility and the guarantee will not apply.
5. This appliance is not designed to be used by people (including children) with
a physical, sensory or mental impairment, or people without knowledge or
experience, unless they are supervised or given prior instructions concerning the
use of the appliance by someone responsible for their safety.
6. Children must be supervised to ensure that they do not play with the
appliance.
7. Do not leave appliance unattended while plugged in or while it is still hot.
8. Do not operate any appliance with a damaged cord, plug or steam hose or
after the appliance malfunctions, or is dropped or damaged in any manner.
9. To reduce the risk of electric shock, do not disassemble or attempt to repair
the appliance.
10. Return appliance to nearest authorized service center for examination, repair
or adjustment.
11. To reduce the risk of contact with hot water emitting from steam vents, check
appliance before each use by holding it away from your body and operating.
12. Steam only in an up and down vertical motion. Never use steam head in a
horizontal position or tilt into a backward position, this may result in water discharge.
13. To reduce the risk of electric shock, do not immerse the appliance in water
or other liquids. Appliance should always be turned off before plugging or
unplugging. Never pull on the cord to unplug from outlet, instead grasp plug
and pull to unplug.
14. Do not allow cord to touch hot surfaces. Let appliance cool completely
before putting away. Loop cord loosely under the appliance when storing.
15. Do not let power cord contact sharp edges or hot surfaces. Do not try to
fasten the hose adapter during operation.
16. Scalding may occur if the hose adapter is removed while using the
appliance.
17. Do not attempt to hang up the unit using the hose.
18. The use of foreign accessory attachments that are not supplied by Cory is not
recommended and may result in re, electric shock or personal injury.
19. Burns could occur from touching hot parts, hot water or steam. Use care
when you empty a steam appliance. There may be hot water in the reservoir.
20. Do not direct steam at people, animals or steam clothes while they
are being worn.
21. Your appliance is intended for household use only. This is a floor
appliance never carry it while in use.
11

Operating Instruction
- Check the Rating informationon product, which should match with your local
supply Voltage.
-This is a 1750 watt appliance. To avoid a circuit overload, do not operate a high
wattage appliance on the same circuit.
- If an extension cord is absolutely necessary, the marked electrical rating should
be at least as great as the electrical rating of the appliance. Cords rated for less
amperage may overheat. Care should be taken to arrange the cord so that it
cannot be pulled or tripped over.
- Do not cut or attempt to extend the steaming hose.
Environment protection rst!
Your appliance contains valuable materials which can be recovered or
recycled.
• Leave it at a civic waste disposal centre.
On/off switch and indicator lamp description
Garment Steamers, you can use the power switch control. Press the power
switch, Power indicator light, Garment Steamer work.Until the steam indica-
tor light.Press the pump control switch on the handle,refer to fig.16,Indi-
cator lights on the handle.Pump work.Steam started out.
When there is less water, please remember to add water.
Installation (Before use)
- Read all instructions before use.
- Remove all electrical packaging.
- Do not power or open the product before installation is complete.
- Removable subassembly of Production, refer to g.1
- Please Telescopic pole into the bracket to the body , refer to g.2
- Make sure the knob tight after insert into the body., refer to g.3
- Open the buckle, pull out aluminum pole.refer to g.4
- Locking clips,refer to g.5
- Put steam pipe connector into the body,refer to g.6
- Put steam handle on the bracket,refer to g.7
12

2. Ironing Description
- Add water from the water inlet. The correct way to water, refer to g.8&9.
- Please do not add hot water.
- Cover the Added outlet cover, Put on a tank in the body.refer to g.10&11.
- Plug in the power,Open the power switch, refer to g.12to g.14
- Wait for the steam power indicator lights and press the pump control switch,
Pump start work. As the water started just entered boiler will be making a sound
to be as normal.
- Hold the steam handle so that steam does not focus on people, Vertical
alignment of steam required to start ironing clothes, refer to g.15.
- You can adjust the size of the shift amount of steam.
- At the beginning, there will be some noise come from the hose. It caused from
the moving of stream inside the hose, it is normal.
- Garment Steamer in order to increase the use of more long time,After use
Discard excess water in the tank inside, Dry out the water inside the boiler,Turn off
the power when not out of steam.
3. Accessories instructions
Before using the accessories, please read the instruction manual, rst use, sug-
gest test with some old or waste cloth.
13

Brush
- Using the brush head to achieve a better ironing result.
- Remind:Brush head is assembled to ensure that before the steam head is cold.
- Install brush head method:Steam panel upward direction, Brush attachment is
gentle buckle down, Fastened the brush will have when the voice of clatter.(1)
- When ironing, should be from top to end. (see picture) (2)
- Before remove the brush, please power off the power control switch, when
there is no steam from the steam brush, remove the brush, please note do not
touch the stainless steal panel, avoid scald hand.
Splint
- Splint can help iron hem and cockle easily.
- Install the splint on the steam brush, push it tightly to its position.(see picture) (3)
- Hold the steam brush, open the splint.(see picture) (4)
- Put the cloth between splint and steam brush.(see picture) (5)
- Release handle, made it clamp cloth, ironing from upside to downside.(see
picture)
- Before remove splint, please power off the power control switch, when there is
no steam from the steam brush, remove the brush, please note do not touch the
stainless steel panel, avoid scald hand.
Storage
- After using, remove the water tank from the body, dump the water in the water
tank. - Make the appliance dry working 5 minutes. Make the boiler dry.
- Power off the power switch,(power indicate lamp will be off),remove the power
cord from the socket,
- Warning: please do not touch the steam brush before it cool down, let the
boiler dry before storage.
Cleaning
- Please use a wet rag clean the body. In order to make your product always
have a good capability, should clean the scale timely, the period depend on
the using period. Clean water tank at least once per year, or once
per 100 hours. The process for clean the scale is as below:
* Remove the water tank, wash the scale at water base with clean water.
* Open the water tank base knob, dump mixture in the water tank then wash
with clean water.
- After clean the scale, if you think there is still scale, please repeat the above
process.
Cleaning and care
14

15
Problem
The security device
does not work.
A noise originates pipe
of steam but the produced
steam is weak.
Spray head is leaked.
Hooking connection of
steam pipe is leaked.
Water spilled out water
tank.
Steam is weak.
Water tank is in distortion.
No steam but the
indicator is lighted.
Cause
One of the circuits has
fault, the plug is loose,
the fuse burned.
The pipe is twisted
below level to iron.
The head is broken, or
the ironing is vertical.
The cushion can be
damaged itself with the
aging, the junction
interface loosen itself.
Water tank is broken or
has a hole.
The power source is lower
or deposits can obstruct
the arrival pipe.
Over heated water is
put. Or other chemical
element is put
The steam creator is
broken.
The internal electric
component is broken.
Solution
Check and maintain by
specialized technician.
Raise the steam pipe
(residual water in top
returns into the device).
Replace the spray
head. Move from top
down to operate.
Replace the cushion.
Rotate the junction of
steam pipe tightly.
Replace the water tank.
Add a stabilizer of
power source. Use a
cleaning respecting the
environment.
Continue to use.
Replace the water tank.
Call a specialized
technician to do an
examination.
Trouble shooting

16
Warranty:
Waranty heater only
- Damage or defective from manufacturer, dealer & service.
- 1 year warranty for house hold use only.
- Use according to this instruction carefully.
- Damage or defect from misunderstand how to use or service from non authorized
people.
- Damage or defect from not follow this instruction manual.
- Electrical shock or any electrical problem.
- Lost or damage some part by accident or natural damage.
- Some parts are shelf life, need replacement.
- Company reserved the right to change all details before notice.

ศูนย์บริการ
www.nescoproduct.com
Table of contents
Languages:
Other Nesco Steam Cleaner manuals
Popular Steam Cleaner manuals by other brands

Teesa
Teesa TSA5051 owner's manual

Morphy Richards
Morphy Richards power steamPro clean+steem user guide

cecotec
cecotec CONGA POPSTAR 29600 AQUA&COLLECT instruction manual

Black & Decker
Black & Decker BHSM15FX08 instruction manual

Monster
Monster SC60 HSD instruction manual

Melchioni
Melchioni FASTER Instruction booklet

DS Produkte
DS Produkte JJ-SC-003A instruction manual

Shark
Shark S6002 Series instructions

Thane Housewares
Thane Housewares M H2O 808.092 user guide

Black & Decker
Black & Decker FSS1600 Original instructions

Philips
Philips 8000 Series user manual

Black & Decker
Black & Decker BHSM15FX08 Original instructions