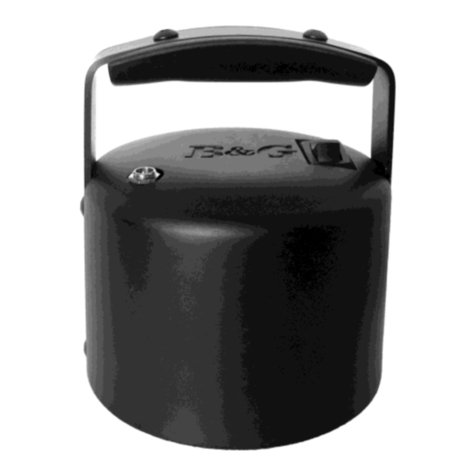
Ness IVY series Assembly instructions

Innovative Electronic Solutions
Ness IVY
Self-Powered Siren for Outdoor Use
INSTALLATION & PROGRAMMING MANUAL

2
Installation and Programming manual
Table of
contents
Table of contents. . . . . . . . . . . . . . . . . . . . . . . . . . . . . . . 2
Chapter 1 Overview . . . . . . . . . . . . . . . . . . . . . . . . . . 3
1-1 anufacturer’s Details . . . . . . . . . . . . . . . . . . . . . . . . . 3
1-2 anual details . . . . . . . . . . . . . . . . . . . . . . . . . . . . . . . 3
1-3 Product description and models . . . . . . . . . . . . . . . . . . . 4
1-4 Box contents . . . . . . . . . . . . . . . . . . . . . . . . . . . . . . . . 5
1-5 Technical description . . . . . . . . . . . . . . . . . . . . . . . . . . 5
Chapter 2 Installation . . . . . . . . . . . . . . . . . . . . . . . . . 7
2-1 Installation guidelines . . . . . . . . . . . . . . . . . . . . . . . . . . 7
2-2 Wiring the device . . . . . . . . . . . . . . . . . . . . . . . . . . . . . 7
2-3 Battery connections . . . . . . . . . . . . . . . . . . . . . . . . . . . 9
Chapter 3 Activation methods . . . . . . . . . . . . . . . . . . . 10
3-1 Types of signal. . . . . . . . . . . . . . . . . . . . . . . . . . . . . . . 10
3-2 anaging multi-alarm conditions . . . . . . . . . . . . . . . . . . 11
Chapter 4 Signalling . . . . . . . . . . . . . . . . . . . . . . . . . . 12
4-1 Types of signalling . . . . . . . . . . . . . . . . . . . . . . . . . . . . 12
4-2 Tamper memory and fault signalling. . . . . . . . . . . . . . . . 13
Chapter 5 Programming . . . . . . . . . . . . . . . . . . . . . . . 14
5-1 The Programming steps . . . . . . . . . . . . . . . . . . . . . . . . 14
5-2 Programming enu . . . . . . . . . . . . . . . . . . . . . . . . . . . 15
5-3 Programming from a PC . . . . . . . . . . . . . . . . . . . . . . . . 17
Appendix A Order codes . . . . . . . . . . . . . . . . . . . . . . . . 20
Notes . . . . . . . . . . . . . . . . . . . . . . . . . . . . . . . . . . . . . . . 21
Warranty . . . . . . . . . . . . . . . . . . . . . . . . . . . . . . . . . . . . 23
Limited warranty . . . . . . . . . . . . . . . . . . . . . . . . . . . . . . . 23
Copyright . . . . . . . . . . . . . . . . . . . . . . . . . . . . . . . . . . . . 23
Directive 2004/108/CE (E C) compliance. . . . . . . . . . . . . . 23

All rights reserved. No part of this publication may be reproduced, transmitted or stored in a retrieval system
in any form or by any means, electronic, mechanical, photocopying, recording, or otherwise, without the prior
written permission of Ness.
Ness reserves the right to make changes to features and specications at any time without prior notication in
the interest of ongoing product development and improvement.
© 2014 Ness Corporation Pty Ltd ABN 28 069 984 372
3
IVY SIREN Installation & Programming Manual
Document Part Number: 890-450
www.nesscorporation.com
National Customer Service Centre
Ph: 1300 551 991

Overview 3
Installation and Programming manual
Chapter 1
OVERVIEW
The IVY series offers a range of self-powered sounder/flashers
especially designed to allow maximum outdoor-installation
flexi ility.
The on- oard microprocessor monitors the device parameters and
assures high-relia ility and first-rate performance. A voltage-free-
relay manages tamper signals and allows full-integration with every
type of system, while a fault output allows remote-management of
fault conditions.
Optimized flexi ility allows you to choose the most suita le wiring
method (activation and signalling using 2 or 3 wires, etc.), and
ready-to-go factory settings (refer to Table 7 "Programming Menu")
ensure fast and easy installation with few or even no setting
adjustments.
Ness Corporation also offers Ivy unit units which can e connected
to SmartLiving intrusion control panels via I-BUS (for remote
programming and management purposes), thus providing first rate
security-system customization capa ilities.
1-1Suppliers Details
Suppliers: Ness Corporation
Address: 4/167 Prospect Hwy
Seven Hills, NSW, 2147, Australia
Tel.: +61 2 8825 9222
e-mail: customerservice@ness.com.au
We : www.nesscorporation.com
ATTENTION!
Any persons authorized y the manufacturer to repair or replace
any part of this device hold authorization to work on Ness
Corporation
devices only.
1-2Manual details
Issue: 2.70
Month and year: March 2014
Code: DCMIINE0IVY

4 Overview
Installation and Programming manual
1-3Product description and
models
Description: Self-powered outdoor sounder/flasher
Year of production: 2014
Applied Normative: CEI 79-2:1998+A :2000 (level 2)
Certification agency: IMQ
1-4Box contents
Inside the ox you will find:
• IVY Sounder/Flasher
• 2 securing screws for the metal guard
Ta le 1:
Models
Name Description
Ivy-F Standard model with foam-tamper protection
Ivy-BF BUS connecta le model with foam-tamper protection
Ta le 2:
Operating features
Features Ivy-
F
Ivy-
BF
Power and alarm input
* *
Programma le input-polarity (
START/STOP
)
*
Programma le ancillary-signal input (
LED
)
* *
Signal output with programma le polarity (
FAULT
)
* *
Tamper signal relay with programma le polarity
* *
Super right LED-technology flasher with high-power driver
circuit
* *
Blow torch protection
* *
Magneto-dynamic horn with automatic function control
* *
Dislodgement and Open-casing protection
* *
Metal guard inside
* *
4 tone sounder
* *
“Squawk” tone
*
Programma le sound-output time
*
Programma le volume
*
Programma le flasher sequence
* *
Programma le flasher time
*
Backup attery with test circuit
* *
Houses 12V, 2.1 Ah ackup attery
* *
IP34 Rated
* *
CEI 79-2:1998 and 79-2/A :2000 compliant (level 2)
* *
Foam protection
* *
Chrome-look casing
Ancillary alarm input (
START
)
*
Stop alarm and alarm-immunity input (
STOP
)
*
Inputs
D
and
S
for I-BUS connection
*
Direct control via SmartLiving intrusion-control panel*
*
SmartLiving intrusion-control panel activation of
LEDs:
STATUS
and
PRG
*
SmartLiving intrusion-control panel activation of
outputs:
TAMPER
and
FAULT
*

Overview 5
Installation and Programming manual
• 2 securing screws for the plastic casing
• 5 wall plugs for mounting the ackplate and tamper racket
• Drilling pattern
• Installation and Programming manual
• Programming Ta le
1-5Technical description
Ta le 3:
Description of parts
AProgramming utton (PAGE)
BProgramming utton (SEL)
CMagneto-dynamic horn
DBattery housing
EBattery wires
FTerminal oard
GLED flasher - left group
HLED flasher - right group
IFoam protection
JBlow-torch protection
KDislodgement/Open tamper protection
LWire entry
MWall-plug locations
NTamper-screw location
OMetal-guard screw locations
PExternal-casing screw locations
QSTATUS LED - Red LED
RPRG LED - Green LED
SMagneto-dynamic horn connector
TExternal casing in plastic
UCasing hinges
VMetal guard
Ta le 4:
Terminal oard
no. icon/
name Description
1 +
Positive power terminal supports 13.8V
2 -
Negative power terminal
3START
D
Ancillary terminal with programma le polarity
for alarm activation
Input D for I-BUS
4STOP
S
"Stop Alarm" terminal, with programma le
polarity for alarm deactivation.
Input S for I-BUS
5 LED
Input for audi le/visual signalling activation
6 FAULT
Open-collector output for fault signalling
I max = 100 mA
7TAMPER
Voltage-free terminals of the relay
8
E
Q G H R
B
F
J
K
S
A
I I I

6 Overview
Installation and Programming manual
CEI 79-2 LEVEL 2
CERTIFICATION
The compliance with CEI 79-2 level 2 is valid only if the installer does as
it follows:
• the siren is installed as indicated in this manual
• the alarm sound is set to “Sound 1”, at the maximum volume
• the alarm status is activated y mains failure, or y a START input
signal, positive or negative removed, or y alarm signal via us (this
option is possi le only for us versions).
C
D
G H
I
K
L
M
M
M
M
N
OO
PP
UU
Ta le 5:
Technical specifications
Operating voltage
nominal
13.8 V
maximum
14.0 V
minim
13.2 V
Minimum current draw
15 mA
Maximum current draw from panel
150 mA
Maximum current draw from
attery
900 mA
Sounder output (l=3m)
104 dB(A)
Carrier frequency
1148 Hz
Flash rate per minute
(programma le)
36 - 46 - 56
Maximum alarm-time
(programma le)
3 - 6 - 9 min
Protection class
IP34
Performance level (CEI 79-2)
2
Operating temperature
-25 to +55 °C
Backup attery
12V - 2.1Ah
Dimensions (W x H x D)
21 x 29 x 9.5 cm
Weight (without attery)
2.2 Kg
GH
O
O
P
P
P
T
P
V
U
U

Installation 7
Installation and Programming manual
Chapter 2
INSTALLATION
The Ivy unit should e mounted high up on a smooth surface, in
such way that it is out of reach ut on view and, therefore, may
serve as a visi le deterrent against reak-in.
2-1Installation guidelines
1. Remove all electrical power.
2. Open the ottom-hinged casing (Table 3, U).
3. Remove the metal guard (Table 3, V).
4. Pull the connection wires through the ca le entry (Table 3, L).
5. Using the wall plugs, attach the plastic ackplate to the wall
(Table 3, M). The wall plug locations are clearly marked on the
drilling-pattern (included).
6. Insert the tamper-protection screw into its location (Table 3,
N).
7. Locate the attery in its housing (Table 3, D), then connect it
y means of the attery wires (Table 3, E). Ensure that the
attery polarity is correct.
8. Complete the device wiring. During this phase, the STATUS
LED will link at 1 second intervals.
9. Configure the device.
Note
If the factory default settings suit the installation requirements, device
configuration will e unnecessary.
10. Replace the metal guard and the plastic casing. The STATUS
LED will link at 0.5 second intervals.
11. Powerup the device. The STATUS LED will go On (solid) for 10
seconds. The LED will go Off when the Ivy unit enters the ope-
rating phase (stand y). If the Ivy unit is connected via I-BUS,
the PRG LED will signal the BUS status for 60 seconds:
- LED On solid = the BUS is not connected.
- LED linking at 1 second intervals = the I-BUS is working ut the
Ivy unit has not een enrolled on the intrusion control panel.
- LED linking at 0.2 second intervals = the I-BUS is working and
the Ivy unit has een enrolled on the intrusion control panel.
2-2Wiring the device
The following paragraphs descri e the various ways of connecting
the Ivy unit to an intrusion control panel (in particular to a Ness
SmartLiving intrusion-control panel as supplied y Ness Corporation
All connections involve the terminals on the mother oard (Table 3,
F). Each terminal can e configured separately during the
programming phase.

8 Installation
Installation and Programming manual
2 WIRE
CONNECTION
This standard wiring method activates the alarm signal y means of
a positive-power-removed signal.
4 WIRE
CONNECTION
This wiring method activates signalling via the START terminal and
deactivates it via the STOP terminal. The polarity of oth inputs is
programma le.
The sounder/flasher is activated y an open-collector output (on the
intrusion control panel). By means of a second open-collector
output, you can deactivate alarm signals and disa le ( lock) the
sounder/flasher from the intrusion control panel, for example,
during maintenance sessions.
I-BUS
CONNECTION
Only the Ivy-BF, can e connected to the I-BUS connections on the
Ness SmartLiving Series panels. This connection allows you to
program the device and activate alarm-signalling directly from the
panel.
In addition, connection of the I-BUS wire to terminal "+", provides a
power source which ena les the Ivy unit to activate alarm-signalling
(in accordance with its programmed parameters) in the event of
wire-cutting tamper.
Each time the SmartLiving panel resets the BUS and restarts the
connected peripherals, the Ivy unit will run a 60-second status
check on the BUS, as descri ed in paragraph 2-1 Ins alla ion
guidelines.

Installation 9
Installation and Programming manual
EXTRA
CONNECTIONS
Connection of the LED terminal to an open-collector output, will
allow management of the STATUS and PRG LEDs, flasher and horn
directly from the intrusion-control panel (as programmed).
Connection of the FAULT and TAMPER outputs to a terminal on the
intrusion control panel allows signalling of the associated events.
This function allows fault and tamper signals to e transmitted
without activating the visual-signalling components.
2-3Battery connections
This device requires a 12V, 2.1Ah attery (not included), which must
e connected y means of the respective wires (Table 3, E) . Take
care to respect the attery polarity during the installation phase
(red=positive; lack=negative).
The attery-efficiency test will run 60 minutes after installation and
every 10 minutes thereafter. In the event of an alarm, the attery
test will e delayed y 60 minutes.
Failure of the attery-efficiency test will generate the respective
signal (Table 6, Ba ery inefficien ). If the attery voltage drops
elow 11V during an alarm event, the horn will deactivate
automatically, however, all other signalling will continue until the
voltage drops elow 10V.
All functions will e re-esta lished when the attery voltage restores
to 12V.

10 Activation methods
Installation and Programming manual
Chapter 3
ACTIVATION METHODS
The Ivy unit can e triggered y signals from the panel, depending
on the wiring method used and also y events generated y the Ivy
unit itself.
signalling will cease when one of the following conditions occurs:
• the alarm condition clears;
• the maximum alarm time expires (in this case, only the audi le
signalling will cease);
• the STOP signal activates.
If, during an active alarm, the maximum audi le-alarm time expires
(Table 7, Max. dura ion of audible signalling), audi le signalling will
cease ut visual signalling will continue until the trigger condition
clears.
3-1Types of signal
SOUNDER/
FLASHER EVENTS
The Ivy unit processes the signals it picks up and then generates the
respective events (which can e associated with one or more
signals).
The Ivy unit can generate the following events:
• Power failure
• Low attery
• Battery inefficient
• Open casing
• Device dislodgement
• Foam tamper (or similar) in the horn
• Blow torch tamper
• Horn damage
• I-BUS loss
Note
The audi le and visual signalling triggered y “open casing”, “foam
tamper” and “ low torch tamper” events will clear after 30s, or
immediately on receiving the STOP signal.
Note
The event "Open casing" of a Ivy connected y BUS unit does not
trigger audi le signalling when the connected anti-intrusion control
panel is in "Programming" mode.
MAINS FAILURE
This signalling method is widely applied as it ensures intrinsic
protection against wire-cutting. This activation method triggers
audi le and visual signals (sounder and flasher) when the primary
mains power fails.

Activation methods 11
Installation and Programming manual
START INPUT
The START ancillary input is completely programma le, therefore, it
can activate the sounder/flasher y means of either positive signals
(Applied/Removed) or negative signals (Applied/Removed).
STOP INPUT
The STOP signal allows you to force the Ivy unit to stand y status
thus locking all signalling. Once this signal is removed, the device
will restart the evaluation process and if the alarm conditions are
still active, it will trigger the respective signals.
Note
Although the STOP input is fully programma le, the manufacturer
strongly recommends an “applied” signal configuration rather than a
“removed” signal configuration, in order to avoid the risk of disa lement
in the event of wire cutting.
LED INPUT
This input (activates when connected to negative) operates as an
ancillary channel which the panel can use to activate any type of
signal, in accordance with the configuration of the Ivy unit.
I-BUS
All I-BUS related activations must e programmed via the intrusion
-control panel. Panel events are capa le of generating signalling
directly on the sounder/flasher, without activating terminals or
outputs.
Each event is capa le of sending 8 programma le patterns to one or
more Ivy-B sounderflashers configured in the control panel
“Outputs” or “Other outputs”.
Ivy-B sounderflashers can e deactivated from the control panel
using the previously mentioned conditions and also y means of the
“Stop alarms” shortcut, when the control panel is in maintenance
status with the appropriate disarm scenarios, or with the events
associated with the 5 possi le “Causes of cut off” (refer to
paragraph 5-3 Programming from a PC).
3-2Managing multi-alarm
conditions
There is no priority amongst the various signals. If the Ivy unit
detects signals, it will activate the programmed signalling cycle and,
in the event of concurrent activations, add on the respective signals.
Restoral of a detected signal annuls the respective alarm cycle
automatically, ut it does not annul alarm cycles relating to other
signals. The Ivy unit will restore to stand y status when all alarm
conditions cease.

12 Signalling
Installation and Programming manual
Chapter 4
SIGNALLING
The Ivy unit provides various signals: audi le, visual, activation of
the FAULT and TAMPER outputs (connecti le to the intrusion-control
panel).
Each signal type can e programmed separately, com ined with
other signals, or deactivated.
4-1Types of signalling
VISUAL
SIGNALLING
The super- right flasher uses new-generation Light Emitting Diode
technology which provides maximum visual-signal clarity with extra-
low power consumption. The flasher circuit is divided into two
groups, the left group (Table 3, G) and the right group (Table 3, H).
This type of circuitry allows you to select the options on the
Programming menus.
STATUS LED
PRG LED
The two ancillary LEDs, reveal the device status and guide you
through the programming operations (STATUS LED - Table 3, Q;
PRG LED - Table 3, R). These can e activated y the control panel
events, using SmartLeague software programme (refer to paragraph
5-3 Programming from a PC).
These two LEDs, if suita ly programmed, will signal device faults
and tamper events, for details refer to paragraph 4-2 Tamper
memory and faul signalling.
AUDIBLE
SIGNALLING
The magneto-dynamic horn provides a choice of 4-tones, which can
e programmed with a maximum alarm time and assigned to
indicate different alarm types.
Ivy units, connected via I-BUS to the intrusion-control panel,
provide a choice of 5 tones with programma le duration and volume
options.
FAULT OUTPUT
Open-collector output with 100mA maximum current draw capacity.
During the programming phase, it is possi le to select the stand y
status (Normally open or Normally closed) and assign the events.
TAMPER OUTPUT
The voltage-free relay can e used to signal tamper conditions to
external devices. During the programming phase, it is possi le to
select the stand y status (Normally open or Normally closed) and
assign the events.

Signalling 13
Installation and Programming manual
4-2Tamper memory and
fault signalling
The STATUS and PRG LEDs provide visual signalling of horn faults
and tamper memory y emitting a series of fast links (at 0.5
second intervals). This visual signalling phase lasts for
approximately 5 seconds after which, the LEDs emit slow links
(duration of 1 second) which signal the type of fault or tamper.
If several conditions are detected simultaneously, oth LEDs are
capa le of signalling the events consecutively.
The following ta le shows the various event types and how they are
signalled on the LEDs (the num er of slow links which signal the
type of event concerned and the related Programming-menu option
which will allow you to ena le/disa le the respective signalling
capacities:
Fault signalling will stop automatically when the cause of the fault
clears.
Tamper memory signalling will clear only after two consecutive
alarm events.
Ta le 6:
Fault and tamper signalling
LED Num er of
links Event Menu options
Num er Option
STATUS
1
Faults
Horn trou le 13
2Low attery 14
3Battery inefficient 14
PRG
1
Tamper memory
Power failure 9
2Open casing 10
3Foam tamper 11
4Blow torch tamper 12
3 2 1 0
3 2 1 0
3 2 1 0
3 2 1 0
3 2 1 0
3 2 1 0
3 2 1 0

14 Programming
Installation and Programming manual
Chapter 5
PROGRAMMING
The programming session cannot egin until after first startup,
therefore, it is necessary to ensure that:
• all power sources to the Ivy unit (mains and attery) are
disconnected;
• the tamper protection is open;
• the Intrusion control panel will allow you to work on the Ivy unit
without generating alarms (for example; put the intrusion-
control panel in Programming status).
The Programming menu allows you to program and change the
device configuration. Access to programming is indicated y linking
on the LEDs (STATUS LED , left flasher, right flasher and PRG LED).
The PAGE utton (Table 3, A) allows you to access the menus.
5-1The Programming steps
1. Remove the cover.
2. Powerup the device; the STATUS LED will link at 1 second
intervals. The device will exit the programming phase and step
ack to this point if no command is received within the allowed
time.
3. Press and hold the PAGE utton until the STATUS LED goes
Off.
4. Use the PAGE utton to move to the different options on the
menu The LED com ination (the LEDs which link) identifies
the option concerned.
5. Press the SEL utton (Table 3, B), to select the required
option. The LED com ination (the LEDs which are On solid)
indicates the current setting of the option concerned.
6. To change a setting, press the SEL utton again until the LED
com ination indicates the desired setting.
7. The PAGE utton will allow you to select the desired menu.
8. To exit the Programming session, wait 20 seconds (do not
press any uttons); the LEDs will link to signal that the ses-
sion has ended. If you wish to exit without saving, select “0”
from the menu.
9. To complete the installation phase, work through the steps
indicated in paragraph 2-1 Ins alla ion guidelines from point
10.
3
Visual signalling
2 1 0
left right
LED
STATUS
LED
PRG

Programming 15
Installation and Programming manual
5-2Programming Menu
The following ta le shows, under the caption “Menu”, all the options on the
Programming menu and their respective LED com inations:
*: Options present on I-BUS- connecta le Ivy models only
**: When this option is ena led, the STATUS LED ecomes ON solid
Ta le 7:
Programming Menu
Menu Options
Num.
LED
com inations
Options
0
Exit without
saving
/ / / / Exit
Address *
+ 8 + 4 + 2 + 1 /
1
START Input
Negative
applied
Positive
applied
Negative
removed
Positive
removed Deactivated
Signal loss
duration
I-BUS *
+ 8 minutes + 4 minutes + 2 minutes + 1 minutes Deactivated
2
STOP Input
Negative
applied
Positive
applied
Negative
removed
Positive
removed Deactivated
I-BUS
lost *
FAULT
Output
TAMPER
Output
Visual
signalling
Sounder Deactivated
3
Audi le
signalling
Tone 4 Tone 3 Tone 2 Tone 1 /
4
Max. duration
of audi le
signalling
** 9 minutes 6 minutes 3 minutes /
5
Flashes
Blinking on
the LEDs of
the LED Input
50 flashes/
minute
42 flashes/
minute
33 flashes/
minute /
6
Outputs:
TAMPER and
FAULT
TAMPER
normally
closed
TAMPER
normally
open
FAULT
normally
closed
FAULT
normally
open
/
7
Activation of
the START
input
LED
STATUS
LED
PRG
Visual
signalling
Sounder Deactivated
(empty) *
/ / / / /
8
Activation of
the LED input
LED
STATUS
LED
PRG
Visual
signalling
Sounder Deactivated
9
Power failure
FAULT
Output
TAMPER Output
PRG LED
Visual
signalling
Sounder Deactivated
10
Open-casing
signal
FAULT
Output
TAMPER Output
PRG LED
Visual
signalling
Sounder Deactivated
11
Foam tamper
signal
FAULT
Output
TAMPER Output
PRG LED
Visual
signalling
Sounder Deactivated
12
Blow-torch
tamper signal
FAULT
Output
TAMPER Output
PRG LED
Visual
signalling
Sounder Deactivated
13
Horn trou le
FAULT
Output
TAMPER
Output / STATUS LED Deactivated
14
Battery fault
FAULT
Output
TAMPER
Output
STATUS LED
(low attery)
STATUS LED
( attery
inefficient)
Deactivated
15
Restore
default
Default Exit
3 2 1 0
3 2 1 0
3 2 1 0
3 2 1 0
3 2 1 0
3 2 1 0

16 Programming
Installation and Programming manual
•0 - PRG LED
•1 - Right LEDs on flasher circuit
•2 - Left LEDs on flasher circuit
•3 - STATUS LED
•
- LED Off
•
- LED On solid
•
- LED linking
Instead (under the caption “Options”), the programma le settings
for each item, highlighted on a grey ackground ( ) are the
options ena led at default.
The following section descri es the menu options.
0 -
Exit without saving
; when you come to this option, wait 20
seconds for the device to exit the programming phase without
saving.
-
Sounderflasher address on BUS; the following ta le shows
the correlation etween the LED com inations and the soun-
derflasher address:
1 -
START input
; allows you to select the polarity of the START
input.
-
I-BUS Loss delay; allows you to select the time (15 minutes
at default) which must pass efore the loss of the I-BUS is
signaled.
2 -
STOP input; allows you to select the polarity of the STOP
input.
-
BUS Loss; allows you to select the type of signalling associa-
ted with the loss of the I-BUS.
3 -
Audi le signalling; allows you to select the type of sound
emitted y the horn.
4 -
Maximum audi le-signal time; allows you to select the
maximum time the horn will sound for, after which only other
types of signalling will continue until the Ivy unit restores to
stand y.
5 -
Visual signals; the first option allows linking on the STATUS
and PRG LEDs activated y the LED input; the other options
allow you to select the visual signal on the flasher.
6 -
TAMPER and FAULT Outputs
; allows you to select the type of
contact (normally open or normally closed) of the outputs during
stand y status.
7/8 -
START/LED Input Activation; allows you to select the
signalling associated with the activation of this input.
9/14 -
Power failure; Open-casing tamper; Foam tamper,
Blow-torch tamper; Horn damage; Battery fault; allows
you to select the signalling associated with the event.
15 -
Restore Default / Address; if you select the option with "all
LEDs On solid", the current programming will restore to fac-
tory default settings. Selection of the BUS Address is achieved
y the summing the value corresponding to each LED On solid
(max. 10); restoral to default does not change the assigned
address.
Ta le 8:
LED com inations
Address Address Address
1 4 7
2 5 8
3 6 9
10
3 2 1 0
3 2 1 0
3 2 1 0

Programming 17
Installation and Programming manual
5-3Programming from a PC
Only BUS-connecta le Ivy units can e programmed via PC. The
SmartLeague software will allow you to program/change the
previously mentioned parameters/settings of the Ivy unit.
PATTERN
Additionally, the software application allows you to program the
“patterns”, that is to say, the type of signalling, duration and volume
of the audi le signals.
Using the SmartLeague software programme, open a “SmartLiving”
solution, select the Sounderflasher option from the control panel
layout (on the right side of the page) then, access the
“Programming” section (on the left side of the page) which contains
the parameters of each pattern:
•Pattern description - 16 character description of the pattern
•Activate sounder - ena les/disa les sounderflasher activation
•Duration (sounder) - sounder activation time, expressed in
seconds (from 1 to 125) or in minutes (from 1 to 125)
•Sound type - the sound of the audi le signal; 5 tones availa le
•Volume - 17 volume levels availa le
•Activate flasher - ena le/disa le flasher activation
•Duration (flasher) - flasher activation time, expressed in
seconds, minutes or “ Endless”. If “ Endless” is selected, the
flasher will signal continuously or at least until receives a cut-off
pattern signal. If the event that triggers the “ Endless” signalling
mode is a zone alarm, terminal tamper, partition alarm, partition
tamper the flasher will e cut-off y memory reset operations.
•Flash mode - 4 visual signals are availa le.
- 1=36 flash/min
- 2=46 flash/min
- 3=56 flash/min
- 4=On solid
•Activate STATUS LED - ena le/disa le activation of the
STATUS LED
•Activate PRG LED - ena le/disa le activation of the PRG LED
•Activate TAMPER output - ena le/disa le activation of the
TAMPER output
•Activate FAULT output - ena le/disa le activation of the
FAULT output

18 Programming
Installation and Programming manual
The 8 availa le types/patterns, preset at default, are programmed
as indicated in the ta le:
Select a sounderflasher from the control panel layout (on the right
side of the page), then access the “Programming” section (on the
left side of the page) where you will find the following 5 sections:
REAL TIME
Press the “Real time” utton to view the current values of the
following sounderflasher options:
•Battery voltage - internal attery voltage of the sounderflasher
•Line voltage - voltage measured of terminals 1 and 2
•Temperature - internal temperature value measured y the
heat gauge (Table 3, J)
•Left/Right foam detector - value detected y the foam-
tamper protection device (Table 3, I)
•Tamper - condition detected y the tamper protection sensor
(Table 3, K)
SOUNDER/
FLASHER
PARAMETERS
The “Read device” and “Write device” uttons will allow you to
download and set the device parameters listed in this section, which
coincide with those descri e in paragraph 5-2 Programming Menu.
Additionally, the device provides the “IBUS monitor” parameter
which, when activated after control panel reset, monitors the BUS
for one minute. The BUS status is indicated on the PRG LED:
• On solid - BUS disconnected
• 1 link per second - BUS connected and sounderflasher not
enrolled
• 2 links per second - BUS connected and sounderflasher enrolled
Ta le 9:
Pattern - default
n
Description
of pattern
Activate
sounder
Sounder
duration
(seconds)
Sound
type Volume Activate
flasher
Flasher
duration
(seconds)
Flash
mode
(flash/min)
Activate
STATUS LED
PRG LED
TAMPER
output
FAULT output
1 Burgulary ON 180 Tone 1 16 ON 180 56 OFF
2
Low-
volume
urgulary
ON 180 Tone 1 6 ON 180 56 OFF
3 Fire ON 180 Tone 3 16 ON 180 56 OFF
4 Tamper ON 180 Tone 1 16 ON 180 36 OFF
5 Prealarm ON 30 Tone 1 0 ON 30 36 OFF
6 Automation ON 3 Tone 1 6 OFF OFF
7 Squack ON 1 Tone 5 0 ON 3 On solid OFF
8 Chime ON 3 Tone 4 0 ON 3 On solid OFF
A Cut-off pattern can e:
Total cut off OFF ininfluent OFF ininfluent OFF

Programming 19
Installation and Programming manual
TEMPERATURE
DETECTED
If the temperature inside the sounderflasher indicated in the “Real
time” is inaccurate, you can use this section to set the real value of
the temperature adjusting the "Temperature detected" gauge to the
real vaule and y pressing “Offset”.
LED ACTIVATION
EVENTS
This section allows you to programme the PRG and STATUS LEDs of
each sounderflasher. Each LED can e activated y up to 5 control
panel events.
If the “Invert” option is disa led, LED activation occurs when the
respective event is active. If the “Invert” option is ena led, LED
activation occurs when the respective event is not active.
Note
If the assigned event is a “pulse” event, the Off status of the LED will
occur only when you exit the control panel programming session.
SOUNDER/
FLASHER CUT OFF
EVENTS
In this final section, you can select up to 5 control panel events
which cut-off the sounder and flasher.
If the “Invert” option is disa led, the sounder and flasher will cut-
off when the respective event activates. If the “Invert” option is
ena led, the sounder and flasher will cut-off when the respective
event deactivates.
Note
If the assigned event is a “pulse” event, its inversion is una le to trigger
sounder and flasher cut-off.
Table of contents
Popular Marine Equipment manuals by other brands
Simrad
Simrad SX90 - DATASHEET FOR NAVAL AND COAST GUARD REV... quick start guide
VEXILAR
VEXILAR LC-8 owner's manual

Hawkeye Mfg
Hawkeye Mfg DF1000D Installation and operation manual
MEDC
MEDC HORN DB3 Technical manual
Airmar
Airmar SmartFlex SmartBoat ASM-C-T1-1 user manual

Jensen
Jensen MCD5112 - Radio / CD Player owner's manual
