nest Cam IQ User manual

Nest Cam IQ
outdoor security camera
Installation Guide


3
Contents
In the box . . . . . . . . . . . . . . . . . . . . . . . . . . . . . . . . . . . . . . . . . . . . . . . . . . . . . . . . . . . . . . . . . . . . . . . . . . . . . . . . . . . . . . . . . . . . . . . . . . . . . . . . . . . . . . . . . . . . . . . . . . . . . . . . . . . . . . . . . . . . 4
What you’ll need. . . . . . . . . . . . . . . . . . . . . . . . . . . . . . . . . . . . . . . . . . . . . . . . . . . . . . . . . . . . . . . . . . . . . . . . . . . . . . . . . . . . . . . . . . . . . . . . . . . . . . . . . . . . . . . . . . . . . . . . . . . . . . . . . . . 5
Do this first . . . . . . . . . . . . . . . . . . . . . . . . . . . . . . . . . . . . . . . . . . . . . . . . . . . . . . . . . . . . . . . . . . . . . . . . . . . . . . . . . . . . . . . . . . . . . . . . . . . . . . . . . . . . . . . . . . . . . . . . . . . . . . . . . . . . . . . . . 6
Choose a good spot . . . . . . . . . . . . . . . . . . . . . . . . . . . . . . . . . . . . . . . . . . . . . . . . . . . . . . . . . . . . . . . . . . . . . . . . . . . . . . . . . . . . . . . . . . . . . . . . . . . . . . . . . . . . . . . . . . . . . . . . . . . . . . 8
Mount your camera. . . . . . . . . . . . . . . . . . . . . . . . . . . . . . . . . . . . . . . . . . . . . . . . . . . . . . . . . . . . . . . . . . . . . . . . . . . . . . . . . . . . . . . . . . . . . . . . . . . . . . . . . . . . . . . . . . . . . . . . . . . . . . 10
Warranty. . . . . . . . . . . . . . . . . . . . . . . . . . . . . . . . . . . . . . . . . . . . . . . . . . . . . . . . . . . . . . . . . . . . . . . . . . . . . . . . . . . . . . . . . . . . . . . . . . . . . . . . . . . . . . . . . . . . . . . . . . . . . . . . . . . . . . . . . . . . 12
Safety . . . . . . . . . . . . . . . . . . . . . . . . . . . . . . . . . . . . . . . . . . . . . . . . . . . . . . . . . . . . . . . . . . . . . . . . . . . . . . . . . . . . . . . . . . . . . . . . . . . . . . . . . . . . . . . . . . . . . . . . . . . . . . . . . . . . . . . . . . . . . . .14
Want to see how it’s done?
Go to nest.com/installnestcam for installation videos and additional tips.

4
In the box.
8 cable clips
Power cable strap
Camera Wall plate
Hex keyIndoor power adapter
Outdoor power cable (7.5 m) 12 wall anchors
12 Nest screws
IMPORTANT: Nest Cam IQ’s power adapter is not
weatherproof and should only be plugged into an
indoor outlet.

5
• Wi-Fi and a working broadband internet
connection with at least 2 Mbps upload
speed. DSL connections may not have
enough bandwidth.
• A compatible phone or tablet
with Bluetooth 4.0
• A Nest Account
• An indoor power outlet
• A power drill with Phillips driver bit
What you’ll need.
Other items you may need
• Drill bits (2 mm for pilot holes, 6 mm for wall
anchors, 13 mm for cable hole)
• Caulk to seal the wall plate
Want a Pro to do it for you?
We can connect you with an independent installer who’s been trained
to install Nest products. Find a local Nest Pro at nest.com/ca/install

6
2. Connect it to the app
If you’re new to Nest:
• Get the Nest app from the App Store or
Google Play.
• Open the app and tap “Sign up” to create
an account.
• Then tap Add.
If you already have a Nest Account:
• Tap the Settings icon in the top-right corner
of the app home screen.
• Then tap “Add product”.
The app will guide you through a few steps.
You’ll scan the camera’s QR code, name your
camera, and connect it your Wi-Fi network.
If you need help, go to nest.com/pair
Do this first.
1. Turn on Nest Cam IQ indoors
Start by turning on your camera inside your home
to get it set up before you take it outside.
Plug the end of the power cable with the gray
ring into the base of your camera. It will click
into place.
Plug the other end into the power adapter.
Then plug the adapter into an indoor power outlet
close to your Wi-Fi router. Your Nest Cam IQ will
turn on and its light ring will turn blue.
IMPORTANT: Push the latch
to unlock the cable
before trying to remove it.
Connect the end
with gray ring.

7
3. Test your camera’s video
streaming outside
Keep your camera plugged into an outlet and take
it outside. Hold it where you’d like to mount it
and check to make sure it’s streaming video to
the Nest app.
If you don’t see video, the Wi-Fi may not be strong
enough there — you’ll need to find a different spot
or move your Wi-Fi router.
→ See location tips on the next page.
4. Plan the cable path
Before you mount your camera, measure the
cable along the route where you’ll be installing
it. You can disconnect your camera from the
cable to make it easier to measure.
If there’s an existing opening, you may be able
to run the cable through it to the outside. If not,
you can use a 13 mm (½") bit to drill a hole for
the cable. Make sure you know where all in-wall
pipes and electrical wires are before drilling.

360°
360°
360°
65°
Choose a good spot.
Consider the view
Nest Cam IQ has a wide 130-degree field of
view and a fully articulating hinge, so you
can mount it almost anywhere you want and
point it in any direction. Typically, you should
install it where it can look over a large area of
your property: over the garage or patio, or
your back, side or front doors. You can also
use the Nest app to zoom and enhance the
view to get it exactly how you want.
Install it just above head height
2 m to 3 m (7 to 10 feet) above the ground, tilted
downward, is best — this is high enough to let you
see people’s faces and talk to them with the
camera’s speaker and microphone.
1 m
2 m
3 m

Keep it in range of your router
Make sure to pick a place within range of your
network. Thick or insulated walls can greatly
reduce Wi-Fi signal strength even if your router
is close by. So you should test streaming video
with the app before you mount your camera.
Learn more at nest.com/ca/wifihelp
Look for a nearby indoor outlet
Nest Cam IQ has a 7.5 m (25 foot) outdoor-
rated power cable that is designed to be
easily routed through or along a wall to
an indoor power outlet. Look for an outlet
that’s close to where you want to install
your camera.

10
5. Install the wall plate
Use a 2 mm drill bit to drill pilot holes for
the screws.
If the wall is made of a hard material like brick
or stucco, you may need to use the included
wall anchors to hold the screws. Use a 6 mm
(7/32") bit for the anchors.
Spread caulk around the edge of the wall plate
before installing to seal it. Leave a small open
space at the bottom for water to drain out.
• If you’re installing the camera directly over
the cable hole (see illustration), mount the
wall plate over the hole and route the cable
through the center hole.
• If you’re running the cable along the wall
before it goes inside, mount the wall plate
where you want and route the cable through
the notch in the wall plate.
6. Attach the camera
• Plug the end of the power cable that has the
gray rubber ring into the base of your camera.
It will click into place.
• Then push the camera base into the wall
plate until it clicks into place.
• Your Nest Cam will turn on and reconnect
to Wi-Fi.
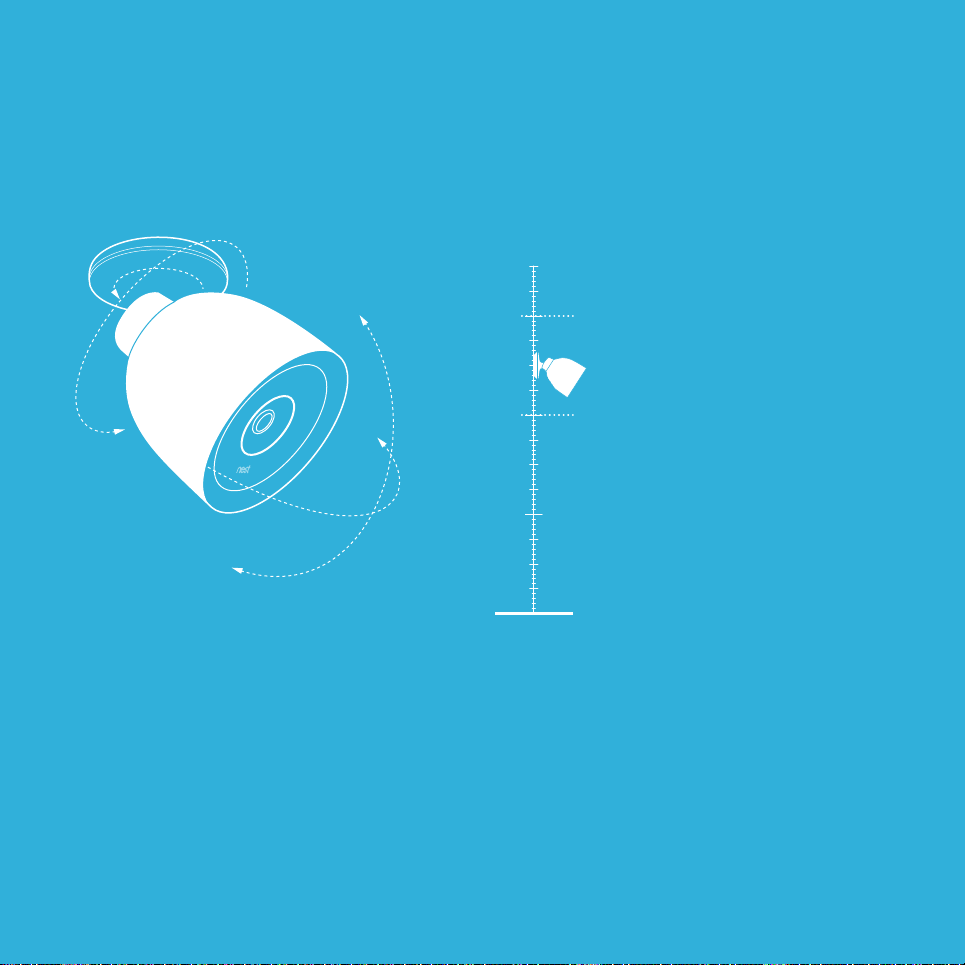
• Check your camera’s video feed with the
Nest app and adjust the camera angle
if needed.
Mount your camera.

11
7. Install the cable
Secure the cable using as many of the
included cable clips as you need.
For a clean looking installation, try to route
the cable along a ledge or corner. You can
also paint the cable and the clips to match
your home. Do not paint the camera.
Using your Nest Cam
For help getting started, learning about
Nest Cam IQ features, tips and more,
go to nest.com/ca/camerabasics
IMPORTANT: If you ever need to unmount
your camera, you can use the included
hex key to disconnect it from the wall plate.

12
Nest Labs, Inc.
Limited Warranty
Nest Cam IQ
Please recycle Nest’s packaging.
RECYCLING AND DISPOSAL
Visit nest.com/ca/recycle
For more information, visit nest.com/ca
Need help? Contact us at nest.com/ca/support
For IC Compliance Statement, visit
nest.com/ca/legal/ic-compliance-notice
THISLIMITEDWARRANTY CONTAINSIMPORTANTINFORMATION
ABOUT YOUR RIGHTS AND OBLIGATIONS, AS WELL AS
LIMITATIONS AND EXCLUSIONS THAT MAY APPLY TO YOU.
1. WHAT THIS LIMITED WARRANTY COVERS;
PERIOD OF COVERAGE
Nest Labs, Inc. (“Nest Labs”), 3400 Hillview Avenue, Palo Alto,
California USA, warrants to the owner of the enclosed product
that the product contained in this box (“Product”) will be free
from defects in materials and workmanship for a period of two
(2) years from the date of delivery following the original retail
purchase (the “Warranty Period”). If the Product fails to
conform to this Limited Warranty during the Warranty Period,
Nest Labs will, at its sole discretion, either (a) repair or replace
any defective Product or component; or (b) accept the return of
the Product and refund the money actually paid by the original
purchaser for the Product. Repair or replacement may be
made with a new or refurbished product or components,
at Nest Labs’ sole discretion. If the Product or a component
incorporated within it is no longer available, Nest Labs may,
at Nest Labs’ sole discretion, replace the Product with a
similar product of similar function. This is your sole and
exclusive remedy for breach of this Limited Warranty. Any
Product that has either been repaired or replaced under this
Limited Warranty will be covered by the terms of this Limited
Warranty for the longer of (a) ninety (90) days from the date
of delivery of the repaired Product or replacement Product,
or (b) the remaining Warranty Period. This Limited Warranty
is transferable from the original purchaser to subsequent
owners, but the Warranty Period will not be extended in
duration or expanded in coverage for any such transfer.
2. TOTAL SATISFACTION RETURN POLICY
If you are the original purchaser of the Product and you are not
satisfied with this Product for any reason, you may return it
in its original condition within thirty (30) days of the original
purchase and receive a full refund.
3. WARRANTY CONDITIONS; HOW TO GET SERVICE IF YOU
WANT TO CLAIM UNDER THIS LIMITED WARRANTY
Before making a claim under this Limited Warranty, the owner
of the Product must (a) notify Nest Labs of the intention to
claim by visiting nest.com/ca/support during the Warranty
Period and providing a description of the alleged failure,
and (b) comply with Nest Labs’ return shipping instructions.
Nest Labs will have no warranty obligations with respect to a
returned Product if it determines, in its reasonable discretion
after examination of the returned Product, that the Product is

13
an Ineligible Product (defined below). Nest Labs will bear all
costs of return shipping to owner and will reimburse any
shipping costs incurred by the owner, except with respect
to any Ineligible Product, for which owner will bear all
shipping costs.
4. WHAT THIS LIMITED WARRANTY DOES NOT COVER
This Limited Warranty does not cover the following (collectively
“Ineligible Products”): (i) Products marked as “sample” or
“Not for Sale”, or sold “AS IS”; (ii) Products that have been
subject to: (a) modifications, alterations, tampering, or improper
maintenance or repairs; (b) handling, storage, installation,
testing, or use not in accordance with the User’s Guide,
Placement Guidelines, or other instructions provided by Nest
Labs; (c) abuse or misuse of the Product; (d) breakdowns,
fluctuations, or interruptions in electric power or the
telecommunications network; or (e) Acts of God, including but
not limited to lightning, flood, tornado, earthquake, or hurricane;
or (iii) any non-Nest Labs branded hardware products, even
if packaged or sold with Nest Labs hardware. This Limited
Warranty does not cover consumable parts, including batteries,
unless damage is due to defects in materials or workmanship
of the Product, or software (even if such consumable parts
or software are packaged or sold with the product). Nest Labs
recommends that you use only authorized service providers
for maintenance or repair. Unauthorized use of the Product
or software can impair the Product’s performance and may
invalidate this Limited Warranty.
5. DISCLAIMER OF WARRANTIES
EXCEPT AS STATED ABOVE IN THIS LIMITED WARRANTY,
AND TO THE MAXIMUM EXTENT PERMITTED BY APPLICABLE
LAW, NEST LABS DISCLAIMS ALL EXPRESS, IMPLIED, AND
STATUTORY WARRANTIES AND CONDITIONS WITH RESPECT
TO THE PRODUCT, INCLUDING THE IMPLIED WARRANTIES
OF MERCHANTABILITY AND FITNESS FOR A PARTICULAR
PURPOSE. TO THE MAXIMUM EXTENT PERMITTED BY
APPLICABLE LAW, NEST LABS ALSO LIMITS THE DURATION
OF ANY APPLICABLE IMPLIED WARRANTIES OR CONDITIONS
TO THE DURATION OF THIS LIMITED WARRANTY.
6. LIMITATION OF DAMAGES
IN ADDITION TO THE ABOVE WARRANTY DISCLAIMERS,
IN NO EVENT WILL NEST LABS BE LIABLE FOR ANY
CONSEQUENTIAL, INCIDENTAL, EXEMPLARY, OR SPECIAL
DAMAGES, INCLUDING ANY DAMAGES FOR LOST DATA
OR LOST PROFITS, ARISING FROM OR RELATING TO THIS
LIMITED WARRANTY OR THE PRODUCT, AND NEST LABS’
TOTAL CUMULATIVE LIABILITY ARISING FROM OR RELATED
TO THIS LIMITED WARRANTY OR THE PRODUCT WILL NOT
EXCEED THE AMOUNT ACTUALLY PAID FOR THE PRODUCT
BY THE ORIGINAL PURCHASER.
7. LIMITATION OF LIABILITY
THE NEST LABS ONLINE SERVICES (“SERVICES”) PROVIDE
YOU INFORMATION (“PRODUCT INFORMATION”) REGARDING
YOUR NEST PRODUCTS OR OTHER PERIPHERALS CONNECTED
TO YOUR PRODUCTS (“PRODUCT PERIPHERALS”). THE TYPE
OF PRODUCT PERIPHERALS THAT MAY BE CONNECTED TO
YOUR PRODUCT MAY CHANGE FROM TIME TO TIME. WITHOUT
LIMITING THE GENERALITY OF THE DISCLAIMERS ABOVE,
ALL PRODUCT INFORMATION IS PROVIDED FOR YOUR
CONVENIENCE,“AS IS”, AND “AS AVAILABLE.” NEST LABS
DOES NOT REPRESENT, WARRANT, OR GUARANTEE THAT
PRODUCT INFORMATION WILL BE AVAILABLE, ACCURATE,
OR RELIABLE OR THAT PRODUCT INFORMATION OR USE OF
THE SERVICES OR PRODUCT WILL PROVIDE SAFETY IN YOUR
HOME. YOU USE ALL PRODUCT INFORMATION, THE SERVICES,
AND THE PRODUCT AT YOUR OWN DISCRETION AND RISK.
YOU WILL BE SOLELY RESPONSIBLE FOR (AND NEST LABS
DISCLAIMS) ANY AND ALL LOSS, LIABILITY, OR DAMAGES,
INCLUDING TO YOUR WIRING, FIXTURES, ELECTRICITY,
HOME, PRODUCT, PRODUCT PERIPHERALS, COMPUTER,
MOBILE DEVICE, AND ALL OTHER ITEMS AND PETS IN YOUR
HOME, RESULTING FROM YOUR USE OF THE PRODUCT
INFORMATION, SERVICES, OR PRODUCT. PRODUCT
INFORMATION PROVIDED BY THE SERVICES IS NOT INTENDED
AS A SUBSTITUTE FOR DIRECT MEANS OF OBTAINING THE
INFORMATION. FOR EXAMPLE, A NOTIFICATION PROVIDED
THROUGH THE SERVICE IS NOT INTENDED AS A SUBSTITUTE
FOR AUDIBLE AND VISIBLE INDICATIONS IN THE HOME AND
ON THE PRODUCT, NOR FOR A THIRD PARTY MONITORING
SERVICE THAT MONITORS ALARM STATE.
8. YOUR RIGHTS AND THIS LIMITED WARRANTY
This Limited Warranty gives you specific legal rights. You may
also have other legal rights that vary by state, province, or
jurisdiction. Likewise, some of the limitations in this Limited
Warranty may not apply in certain states, provinces or
jurisdictions. The terms of this Limited Warranty will apply to
the extent permitted by applicable law. For a full description of
your legal rights you should refer to the laws applicable in your
jurisdiction and you may wish to contact a relevant consumer
advisory service.
064-00004-EF

14
PLACEMENT GUIDELINES
To avoid risk of overheating and burns:
Use only in temperatures between –40° to 45°C
(–40° and 113°F).
Do not block airflow to Nest Cam IQ.
To avoid risk of fire and shock:
Use only provided power cable and power adapter.
Install in accordance with building and installation
codes where you live.
To avoid risk of other serious injury:
Keep camera and all components out of the reach
of children and pets.
Safety
For more information on safety go to nest.com/ca/camsafety
Patent & TM:nest.com/ca/ip-and-other-notices
Open source:nest.com/ca/compliance

Caméra de sécurité
extérieure NestCam IQ
Guide d’installation
064-00171-EF-A


3
Table des matières
Dans la boîte . . . . . . . . . . . . . . . . . . . . . . . . . . . . . . . . . . . . . . . . . . . . . . . . . . . . . . . . . . . . . . . . . . . . . . . . . . . . . . . . . . . . . . . . . . . . . . . . . . . . . . . . . . . . . . . . . . . . . . . . . . . . . . . . . . . . . . . .4
Ce dont vous aurez besoin . . . . . . . . . . . . . . . . . . . . . . . . . . . . . . . . . . . . . . . . . . . . . . . . . . . . . . . . . . . . . . . . . . . . . . . . . . . . . . . . . . . . . . . . . . . . . . . . . . . . . . . . . . . . . . . . . . . . . .5
Premières étapes. . . . . . . . . . . . . . . . . . . . . . . . . . . . . . . . . . . . . . . . . . . . . . . . . . . . . . . . . . . . . . . . . . . . . . . . . . . . . . . . . . . . . . . . . . . . . . . . . . . . . . . . . . . . . . . . . . . . . . . . . . . . . . . . . . 6
Choisissez un bon emplacement . . . . . . . . . . . . . . . . . . . . . . . . . . . . . . . . . . . . . . . . . . . . . . . . . . . . . . . . . . . . . . . . . . . . . . . . . . . . . . . . . . . . . . . . . . . . . . . . . . . . . . . . . . . . .8
Installez la caméra . . . . . . . . . . . . . . . . . . . . . . . . . . . . . . . . . . . . . . . . . . . . . . . . . . . . . . . . . . . . . . . . . . . . . . . . . . . . . . . . . . . . . . . . . . . . . . . . . . . . . . . . . . . . . . . . . . . . . . . . . . . . . . 10
Garantie limitée . . . . . . . . . . . . . . . . . . . . . . . . . . . . . . . . . . . . . . . . . . . . . . . . . . . . . . . . . . . . . . . . . . . . . . . . . . . . . . . . . . . . . . . . . . . . . . . . . . . . . . . . . . . . . . . . . . . . . . . . . . . . . . . . . . 12
Sécurité. . . . . . . . . . . . . . . . . . . . . . . . . . . . . . . . . . . . . . . . . . . . . . . . . . . . . . . . . . . . . . . . . . . . . . . . . . . . . . . . . . . . . . . . . . . . . . . . . . . . . . . . . . . . . . . . . . . . . . . . . . . . . . . . . . . . . . . . . . . . . 14
Vous voulez une démonstration?
Vous trouverez des vidéos d’installation et des conseils supplémentaires à la page nest.com/installnestcam

4
Dans la boîte.
8pinces pour câble
Attache pour câble
d’alimentation
Caméra Plaque murale
Clé hexagonaleAdaptateur
d’alimentation intérieur
Câble d’alimentation
extérieur de 7,5m (25pi)
12chevilles d’ancrage
12vis Nest
IMPORTANT: L’adaptateur d’alimentation de la caméra extérieure
NestCam IQ n’est pas à l’épreuve des intempéries et doit être
branché uniquement sur une prise de courant intérieure.

5
• Réseau Wi-Fi et connexion Internet haute
vitesse fonctionnelle avec débit minimal de
téléversement de 2Mbit/s. Les connexions DSL
pourraient ne pas être suffisamment rapides.
• Un téléphone ou une tablette compatible avec
Bluetooth4.0
• Un compte Nest
• Une prise de courant intérieure
• Une perceuse avec embout cruciforme
Ce dont vous aurez besoin.
Autres articles dont vous pourriez avoir besoin
• Mèches de 2mm (3/32po) pour les avant-trous,
de 6mm (7/32po) pour les chevilles d’ancrage
et de 13 mm (1/2 po) ou plus pour le trou du câble
• Produit de calfeutrage pour sceller la plaque murale
Vous voulez qu’un NestPro fasse le travail pour vous?
Nous pouvons vous mettre en contact avec un installateur indépendant qui a reçu
la formation nécessaire pour installer les produits Nest. Trouvez un NestPro près
de chez vous à la page nest.com/ca/fr/install

6
2. Connectez la caméra à l’application
S’il s’agit de votre premier produit Nest:
• Téléchargez l’application Nest à partir
de l’App Store ou de GooglePlay.
• Ouvrez l’application, puis touchez «S’inscrire»
pour créer un compte.
• Touchez ensuite «Ajouter».
Si vous possédez déjà un compte Nest:
• Touchez l’icône des réglages dans le coin
supérieur droit de l’écran d’accueil.
• Touchez ensuite «Ajouter un produit».
L’application vous guidera à travers quelques
étapes. Vous aurez à numériser le code QR
de la caméra, à donner un nom à votre caméra
et à la connecter au réseau Wi-Fi.
Si vous avez besoin d’aide, consultez la page
nest.com/pair
Premières étapes.
1. Activez la NestCam IQ à l’intérieur
Commencez par activer la caméra à l’intérieur afin
de la configurer avant de l’apporter à l’extérieur.
Connectez l’extrémité du câble d’alimentation
avec l’embout gris à la base de la caméra.
Le câble se verrouillera en place.
Connectez l’autre extrémité à l’adaptateur
d’alimentation.
Branchez ensuite l’adaptateur sur une prise de
courant intérieure située près de votre routeur Wi-Fi.
La caméra extérieure NestCam IQ s’allumera et son
anneau lumineux deviendra bleu.
IMPORTANT: Poussez le loquet
pour déverrouiller le câble avant
d’essayer de le déconnecter.
Connectez l’extrémité du
câble avec l’embout gris.
Other manuals for Cam IQ
5
Table of contents
Languages:
Other nest Security Camera manuals