Netac U600 User manual

USB Flash Drive (U600/U610)
Indicator Professional
User’s Manual
Copyright
This manual contains content protected by copyright laws. All rights are reserved.
No part of this document may be used, reproduced, or/and stored in a database/
retrieval system in any form without prior written permission of Netac Technology
Co., Ltd.
The information in this manual is subject to changing without notice. Please visit
Netac website http://www.netac.com to download the latest user's manual.
Patent Number: US 6829672, CN 99117225.6, CN 00114081.7
Driver Installation on Windows 98
You can download the driver from http://www.netac.com for installation.
Note:
1) Don’t insert USB Flash Drive into the computer when installing, if it was
already connected, please replug USB Flash Drive for completion.
2) The Format Tool would be installed while the driver installing.
PN: UM11012201
Usage
Storage Disk
Windows98/Me/2000/XP/Server2003
1) Boot your computer. Connect USB Flash Drive with the computer directly or
through USB cable. It would appear animation with sound prompt. Click
the animation, you would enter the normal disk or explore directly.
2) Double click “My Computer”, you will find two new icons, one is normal disk
as “Removable Disk”; another is “Netac”. There would be two new icons
and appears at the taskbar on Windows Me/2000/XP/Server 2003.
Note: The description of operations takes model U600 for example. Except for
special description, the operations of model U610 is same as model U600.
Introduction
Thank you for purchasing Netac Indicator Professional USB Flash Drive. It isanew
type ofstorage disk withcapacityindicatefunction.
Features
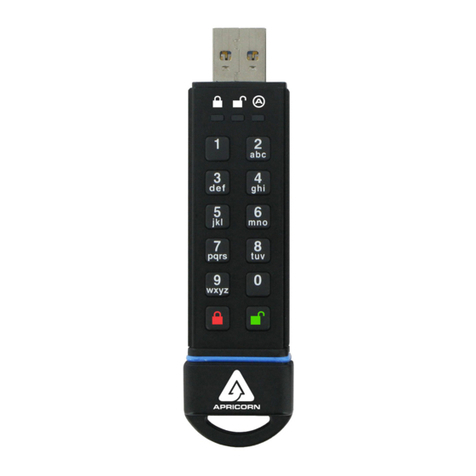
l5LED (U600): The LED indicates the free capacity of current disk. If the used
capacity is 0, the 5 LED brights; if the free capacity is less than 20% of the
total capacity, 1 LED bright.
lLCD (U610): Display the free capacity of current disk.
lUSB ZIP/HDD/CDROM bootable disk: You can make USB Flash Drive as USB
ZIP/HDD/CDROM bootable disk when necessary.
3) Under Windows 98 and the administrator mode of Windows 2000/XP/Server 2003,
click icon, USB Flash Drive would enter normal disk directly; under
Windows Me and the guest mode of Windows 2000/XP/Server 2003, click
icon, USB Flash Drive would enter explore directly.
4) Now you can use USB Flash Drive just as on a traditional hard disk.
5) To unplug USB Flash Drive, please choose one of the following methods:
Windows 98: You can unplug USB Flash Drive from the USB port directly
when the LED stops blinking.
Windows Me/2000/XP/Server 2003 (Windows 2000 e.g.): Please ensure
the LED stops blinking, click the icon at the taskbar, then click the prompt
menu “Stop USB Mass Storage Device - Drive”, and click “OK” button in the
pop-up window, then you can remove USB Flash Drive safely.
Note: Even if the system prompt that user can remove USB Flash Drive safely,
please ensure the LED stops blinking before unplug USB Flash Drive on Windows 98/Me
and the guest mode of Windows 2000/XP/Server 2003.
Mac OS 9.x/X or above
1) Boot your computer.
2) Connect USB Flash Drive with the computer directly or through USB cable.
3) A new icon named “NO_NAME” (“Untitled” on Mac OS 9.x) would appear on
the desktop of your computer,representing USB Flash Drive. Now you can
enjoy using USB Flash Drive, just as on a traditional hard disk.
4) To unplug USB Flash Drive, select the icon representing USB Flash Drive,
click “File”, select “Exit NO NAME”, then unplug USB Flash Drive from the
computer. (You can also drag USB Flash Drive icon into Trash, then unplug
it on Mac OS 9.x.)
Linux 2.4.x or above
1) Boot your computer.
2) Connect USB Flash Drive with the computer directly or through USB cable.
3) Enter the system by user ID “root” and input the command “mount /dev/sda /mnt”.
Now you can enjoy using USB Flash Drive, just as on a traditional hard disk.
4) Input the command “umount /mnt” before unplugging USB Flash Drive.
Note: “sda” is an unfixed input item, please make relevant changes according to
Linux operating discipline.
Bootable Disk
You may boot the computer with USB Flash Drive after it is made as bootable disk.
Please specify “USB ZIP”, “USB HDD” or “USB CDROM” as “First Boot Device”on the
BIOS Setup interface.
Format Tool
Installation
You can download Format Tool from http://www.netac.com for installation. Once
the installation process is completed, the icon of Format Tool would appear on
the desktop.
How to Use
Double click the icon of Format Tool on the desktop, then you can format or make
bootable disk on USB Flash Drive.
Format
Select “Format type” as “Format” and click “Format”; click “Yes” in the pop-up window,
USB Flash Drive would be formatted automatically. Click “OK” button in the last
window and replug USB Flash Drive for completion.

Remarks
1) The actual useable capacity may not be identical as labeled.
2) It is suggested to avoid using USB Flash Drive with other kinds of Flash Drive
together in the same computer.
3) Windows 98 mentioned in this user’s manual refers to the first and the
second edition of Windows 98.
4) Files or data stored in USB Flash Drive can’t completely avoid being
destroyed or lost due to improper use or other reasons. Please backup files
and data if necessary.
5)USB Flash Drive is not guaranteed to work properly on each computer.
Netac Technology Co., Ltd. is not responsible for any loss arising out of
using USB Flash Drive. The government laws for this product are laws of
People’s Republic of China.
Contact Netac
Netac Technology Co., Ltd.
6F, Incubator Building,
China Academy of Science & Tech Development,
No.1 High-tech South St.,
Shenzhen, China 518057
Tel: +86-755-26727800 (Switchboard)
+86-755-26727520, 26727510, 26727500 (Technical Support)
Fax:+86-755-26727610
Website: http://www.netac.com
E-mail: [email protected] (Sales)
Make ZIP Boot Disk
Select “Format type” as “Make ZIP Boot Disk” and click “Format” button, click “Yes”
in the pop-up window, USB Flash Drive would be formatted into USB ZIP bootable
disk automatically. Click “OK” button in the last window and replug USB Flash Drive
for completion.
Make HDD Boot Disk
Select “Format type” as “Make HDD Boot Disk” and click “Format”button, click “Yes”
in the pop-up window, USB Flash Drive would be formatted into USB HDD bootable
disk automatically. Click “OK” button in the last window and replug USB Flash Drive
for completion.
Make CDROM Boot Disk
Select “Format type” as “Make CDROM Boot Disk” and click “Format”button, click
“Yes” in the pop-up window, USB Flash Drive would be formatted into USB CDROM
bootable disk automatically. Click “OK” button in the last window and replug USB
Flash Drive for completion.
Note:
1) USB Flash Drive don’t support “NTFS” format when formatting.
2) When “00000” display on the LCD of U610 after formatted, please replug U610
for completion.
Uninstall
Double click the installation file which you downloaded and follow the instructions
to uninstall Format Tool; or use the “Add/Remove Programs” under the “Control
Panel” to uninstall.
RMA Service
1) Self check (Over 50% claimed fault can be fixed easily).
A) Please check the manual on our website http://www.netac.com to
double-check the failure symptoms you are facing.
B) Please check if there is any latest update of software or firmware to
your product, especially format tools.
C) If you didn’t purchase directly from Netac, please return the goods to
the vendor where you purchased from for repair or replacement.
ANY PHYSICAL DAMAGE, MISUSAGE, OR UNAUTHORIZED DISASSEMBLING
OF ANY PART OF THE PRODUCTS WILL LEAD TO WARRANTY VOID. By default,
the product is only available for personal and office.
2) Obtain RMA (Return to Manufacturer Authorization) number from Netac
(Only for Authorized Dealers).
A) We send you a RMA Request Form by E-mail upon request.
B) Please fill in all related items, like items number, failure symptom(s),
and purchase date and invoice number on RMA Request Form,
E-mail or Fax back to Netac.
C) Upon receiving the filled RMA Request Form, we will check the form
and warranty period. A RMA number will be issued within 2 working
days.
D) Any RMA number is only valid for 14 days, other than that a new
application needs to be filled again.
ANY RETURN WITHOUT PRE-APPROVED RMA NUMBER WILL BE REJECTED
OR DELAYED. IT IS A MUST-HAVE FOR ALL RETURN OR REPAIRING OR
EXCHANGE OR MISSING ISSUES.
3) How to send the defective product(s) to Netac?
The “Netac RMA Request Form” must NOT be enclosed in the RMA package
sent to Netac, but the RMA number is REQUIRED to be written on the top of
the box when you send it/them back. The defective product(s) sent to Netac
without RMA number will NOT be received, repaired and/or returned.
A) Netac doesn’t accept any collect shipment. All RMA shipment must
be prepaid.
B) Don’t make any shipment until having the Shipping Instruction from
Netac. Please ask further advice from Netac Customer Service Dept.
as bellow before you send out the defective products.
4) Contact information
E-mail: [email protected]
Contact: Byele Yu, Alick Liu (Customer Service Dept.)
Contact phone: +86-755-26727573, 26994767
Business hour: 08:30 - 17:40 Beijing Time, Mon. - Fri.
This manual suits for next models
1
Popular Storage manuals by other brands
Fujitsu Siemens Computers
Fujitsu Siemens Computers STORAGEBIRD Solo 25-UP operating manual
Freecom
Freecom LTO2-HH EZ-KIT datasheet
Seagate
Seagate Constellation ST2000NM0041 product manual
HP
HP LeftHand P4000 - SAN Solutions release note

Exabyte
Exabyte LTO Series product manual
Silicon Graphics
Silicon Graphics Total Performance 9300 user guide
