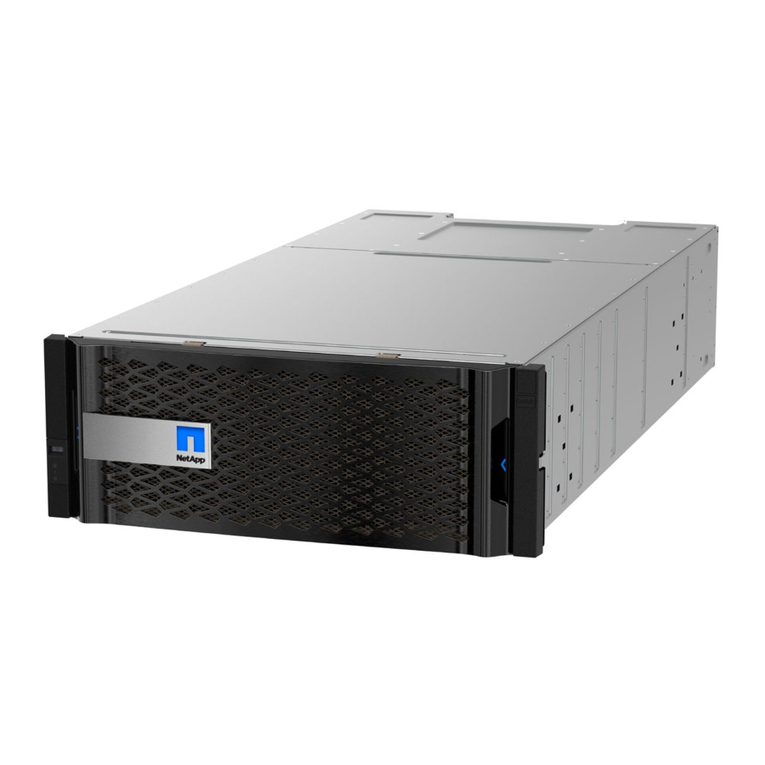
NetApp FAS2600 User manual

Maintain
ONTAP Systems
NetApp
January 28, 2022
This PDF was generated from https://docs.netapp.com/us-en/ontap-systems/fas2600/bootmedia-replace-
overview.html on January 28, 2022. Always check docs.netapp.com for the latest.

Table of Contents
Maintain . . . . . . . . . . . . . . . . . . . . . . . . . . . . . . . . . . . . . . . . . . . . . . . . . . . . . . . . . . . . . . . . . . . . . . . . . . . . . . . . Ê1
Boot media . . . . . . . . . . . . . . . . . . . . . . . . . . . . . . . . . . . . . . . . . . . . . . . . . . . . . . . . . . . . . . . . . . . . . . . . . . . . Ê1
Replace the caching module - FAS2600 . . . . . . . . . . . . . . . . . . . . . . . . . . . . . . . . . . . . . . . . . . . . . . . . . . . . Ê19
Chassis. . . . . . . . . . . . . . . . . . . . . . . . . . . . . . . . . . . . . . . . . . . . . . . . . . . . . . . . . . . . . . . . . . . . . . . . . . . . . . Ê27
Controller module. . . . . . . . . . . . . . . . . . . . . . . . . . . . . . . . . . . . . . . . . . . . . . . . . . . . . . . . . . . . . . . . . . . . . . Ê36
Replace a DIMM - FAS2600 . . . . . . . . . . . . . . . . . . . . . . . . . . . . . . . . . . . . . . . . . . . . . . . . . . . . . . . . . . . . . Ê56
Replace the NVMEM battery - FAS2600 . . . . . . . . . . . . . . . . . . . . . . . . . . . . . . . . . . . . . . . . . . . . . . . . . . . . Ê65
Swap out a power supply - FAS2600 . . . . . . . . . . . . . . . . . . . . . . . . . . . . . . . . . . . . . . . . . . . . . . . . . . . . . . . Ê73
Replace the real-time clock battery . . . . . . . . . . . . . . . . . . . . . . . . . . . . . . . . . . . . . . . . . . . . . . . . . . . . . . . . Ê76

Maintain
Boot media
Replace the boot media - FAS2600
The boot media stores a primary and secondary set of system (boot image) files that the
system uses when it boots. Depending on your network configuration, you can perform
either a nondisruptive or disruptive replacement.
You must have a USB flash drive, formatted to FAT32, with the appropriate amount of storage to hold the
image_xxx.tgz file.
You also must copy the image_xxx.tgz file to the USB flash drive for later use in this procedure.
•The nondisruptive and disruptive methods for replacing a boot media both require you to restore the var
file system:
◦For nondisruptive replacement, the HA pair must be connected to a network to restore the var file
system.
◦For disruptive replacement, you do not need a network connection to restore the var file system, but
the process requires two reboots.
•You must replace the failed component with a replacement FRU component you received from your
provider.
•It is important that you apply the commands in these steps on the correct node:
◦The impaired node is the node on which you are performing maintenance.
◦The healthy node is the HA partner of the impaired node.
Check onboard encryption keys as needed - FAS2600
Prior to shutting down the impaired node and checking the status of the onboard
encryption keys, you must check the status of the impaired node, disable automatic
giveback, and check what version of ONTAP the system is running.
Prior to shutting down the impaired node and checking the status of the onboard encryption keys, you must
check the status of the impaired node, disable automatic giveback, and check what version of ONTAP the
system is running.
If you have a cluster with more than two nodes, it must be in quorum. If the cluster is not in quorum or a healthy
node shows false for eligibility and health, you must correct the issue before shutting down the impaired node;
see the NetApp Encryption overview with the CLI.
Steps
1. Check the status of the impaired node:
◦If the impaired node is at the login prompt, log in as admin.
◦If the impaired node is at the LOADER prompt and is part of HA configuration, log in as admin on the
healthy node.
1

◦If the impaired node is in a standalone configuration and at LOADER prompt, contact
mysupport.netapp.com.
2. If AutoSupport is enabled, suppress automatic case creation by invoking an AutoSupport message:
system node autosupport invoke -node * -type all -message
MAINT=number_of_hours_downh
The following AutoSupport message suppresses automatic case creation for two hours: cluster1:*>
system node autosupport invoke -node * -type all -message MAINT=2h
3. Check the version of ONTAP the system is running on the impaired node if up, or on the partner node if the
impaired node is down, using the version -v command:
◦If <lno-DARE> is displayed in the command output, the system does not support NVE, proceed to shut
down the controller.
◦If <lno-DARE> is not displayed in the command output, and the system is running ONTAP 9.5, go to
[Option 1: Checking NVE or NSE on systems running ONTAP 9.5 and earlier].
◦If <lno-DARE> is not displayed in the command output, and the system is running ONTAP 9.6 or later,
go to [Option 2: Checking NVE or NSE on systems running ONTAP 9.6 and later].
4. If the impaired node is part of an HA configuration, disable automatic giveback from the healthy node:
storage failover modify -node local -auto-giveback false or storage failover
modify -node local -auto-giveback-after-panic false
Option 1: Check NVE or NSE on systems running ONTAP 9.5 and earlier
Before shutting down the impaired node, you need to check whether the system has either NetApp Volume
Encryption (NVE) or NetApp Storage Encryption (NSE) enabled. If so, you need to verify the configuration.
Steps
1. Connect the console cable to the impaired node.
2. Check whether NVE is configured for any volumes in the cluster: volume show -is-encrypted true
If any volumes are listed in the output, NVE is configured and you need to verify the NVE configuration. If
no volumes are listed, check whether NSE is configured.
3. Check whether NSE is configured: storage encryption disk show
◦If the command output lists the drive details with Mode & Key ID information, NSE is configured and
you need to verify the NSE configuration.
◦If NVE and NSE are not configured, it’s safe to shut down the impaired node.
Verify NVE configuration
Steps
1. Display the key IDs of the authentication keys that are stored on the key management servers: security
key-manager query
◦If the Restored column displays yes and all key managers display available, it’s safe to shut down
the impaired node.
◦If the Restored column displays anything other than yes, or if any key manager displays
unavailable, you need to complete some additional steps.
◦If you see the message This command is not supported when onboard key management is enabled,
2
you need to complete some other additional steps.
2. If the Restored column displayed anything other than yes, or if any key manager displayed
unavailable:
a. Retrieve and restore all authentication keys and associated key IDs: security key-manager
restore -address *
If the command fails, contact NetApp Support.
mysupport.netapp.com
b. Verify that the Restored column displays yes for all authentication keys and that all key managers
display available: security key-manager query
c. Shut down the impaired node.
3. If you saw the message This command is not supported when onboard key management is enabled,
display the keys stored in the onboard key manager: security key-manager key show -detail
a. If the Restored column displays yes manually back up the onboard key management information:
▪Go to advanced privilege mode and enter ywhen prompted to continue: set -priv advanced
▪Enter the command to display the OKM backup information: security key-manager backup
show
▪Copy the contents of the backup information to a separate file or your log file. You’ll need it in
disaster scenarios where you might need to manually recover OKM.
▪Return to admin mode: set -priv admin
▪Shut down the impaired node.
b. If the Restored column displays anything other than yes:
▪Run the key-manager setup wizard: security key-manager setup -node
target/impaired node name
Enter the customer’s onboard key management passphrase at the prompt. If the
passphrase cannot be provided, contact mysupport.netapp.com
▪Verify that the Restored column displays yes for all authentication key: security key-
manager key show -detail
▪Go to advanced privilege mode and enter ywhen prompted to continue: set -priv advanced
▪Enter the command to display the OKM backup information: security key-manager backup
show
▪Copy the contents of the backup information to a separate file or your log file. You’ll need it in
disaster scenarios where you might need to manually recover OKM.
▪Return to admin mode: set -priv admin
▪You can safely shutdown the node.
Verify NSE configuration
Steps
1. Display the key IDs of the authentication keys that are stored on the key management servers: security
3

key-manager query
◦If the Restored column displays yes and all key managers display available, it’s safe to shut down
the impaired node.
◦If the Restored column displays anything other than yes, or if any key manager displays
unavailable, you need to complete some additional steps.
◦If you see the message This command is not supported when onboard key management is enabled,
you need to complete some other additional steps
2. If the Restored column displayed anything other than yes, or if any key manager displayed
unavailable:
a. Retrieve and restore all authentication keys and associated key IDs: security key-manager
restore -address *
If the command fails, contact NetApp Support.
mysupport.netapp.com
b. Verify that the Restored column displays yes for all authentication keys and that all key managers
display available: security key-manager query
c. Shut down the impaired node.
3. If you saw the message This command is not supported when onboard key management is enabled,
display the keys stored in the onboard key manager: security key-manager key show -detail
a. If the Restored column displays yes, manually back up the onboard key management information:
▪Go to advanced privilege mode and enter ywhen prompted to continue: set -priv advanced
▪Enter the command to display the OKM backup information: security key-manager backup
show
▪Copy the contents of the backup information to a separate file or your log file. You’ll need it in
disaster scenarios where you might need to manually recover OKM.
▪Return to admin mode: set -priv admin
▪Shut down the impaired node.
b. If the Restored column displays anything other than yes:
▪Run the key-manager setup wizard: security key-manager setup -node
target/impaired node name
Enter the customer’s OKM passphrase at the prompt. If the passphrase cannot be
provided, contact mysupport.netapp.com
▪Verify that the Restored column shows yes for all authentication keys: security key-
manager key show -detail
▪Go to advanced privilege mode and enter ywhen prompted to continue: set -priv advanced
▪Enter the command to back up the OKM information: security key-manager backup show
Make sure that OKM information is saved in your log file. This information will be
needed in disaster scenarios where OKM might need to be manually recovered.
4

▪Copy the contents of the backup information to a separate file or your log. You’ll need it in disaster
scenarios where you might need to manually recover OKM.
▪Return to admin mode: set -priv admin
▪You can safely shut down the node.
Option 2: Check NVE or NSE on systems running ONTAP 9.6 and later
Before shutting down the impaired node, you need to verify whether the system has either NetApp Volume
Encryption (NVE) or NetApp Storage Encryption (NSE) enabled. If so, you need to verify the configuration.
1. Verify whether NVE is configured for any volumes in the cluster: volume show -is-encrypted true
If any volumes are listed in the output, NVE is configured and you need to verify the NVE configuration. If
no volumes are listed, check whether NSE is configured.
2. Verify whether NSE is configured: storage encryption disk show
◦If the command output lists the drive details with Mode & Key ID information, NSE is configured and
you need to verify the NSE configuration.
◦If no disks are shown, NSE is not configured.
◦If NVE and NSE are not configured, it’s safe to shut down the impaired node.
Verify NVE configuration
1. Display the key IDs of the authentication keys that are stored on the key management servers: security
key-manager query
◦If the Key Manager type displays external and the Restored column displays yes, it’s safe to shut
down the impaired node.
◦If the Key Manager type displays onboard and the Restored column displays yes, you need to
complete some additional steps.
◦If the Key Manager type displays external and the Restored column displays anything other than
yes, you need to complete some additional steps.
◦If the Key Manager type displays onboard and the Restored column displays anything other than
yes, you need to complete some additional steps.
2. If the Key Manager type displays onboard and the Restored column displays yes, manually back up
the OKM information:
a. Go to advanced privilege mode and enter ywhen prompted to continue: set -priv advanced
b. Enter the command to display the key management information: security key-manager onboard
show-backup
c. Copy the contents of the backup information to a separate file or your log file. You’ll need it in disaster
scenarios where you might need to manually recover OKM.
d. Return to admin mode: set -priv admin
e. Shut down the impaired node.
3. If the Key Manager type displays external and the Restored column displays anything other than
yes:
5

a. Restore the external key management authentication keys to all nodes in the cluster: security key-
manager external restore
If the command fails, contact NetApp Support.
mysupport.netapp.com
b. Verify that the Restored column equals yes for all authentication keys: security key-manager
key query
c. Shut down the impaired node.
4. If the Key Manager type displays onboard and the Restored column displays anything other than yes:
a. Enter the onboard security key-manager sync command: security key-manager onboard sync
Enter the customer’s onboard key management passphrase at the prompt. If the
passphrase cannot be provided, contact NetApp Support. mysupport.netapp.com
b. Verify the Restored column shows yes for all authentication keys: security key-manager key
query
c. Verify that the Key Manager type shows onboard, and then manually back up the OKM information.
d. Go to advanced privilege mode and enter ywhen prompted to continue: set -priv advanced
e. Enter the command to display the key management backup information: security key-manager
onboard show-backup
f. Copy the contents of the backup information to a separate file or your log file. You’ll need it in disaster
scenarios where you might need to manually recover OKM.
g. Return to admin mode: set -priv admin
h. You can safely shut down the node.
Verify NSE configuration
1. Display the key IDs of the authentication keys that are stored on the key management servers: security
key-manager query
◦If the Key Manager type displays external and the Restored column displays yes, it’s safe to shut
down the impaired node.
◦If the Key Manager type displays onboard and the Restored column displays yes, you need to
complete some additional steps.
◦If the Key Manager type displays external and the Restored column displays anything other than
yes, you need to complete some additional steps.
◦If the Key Manager type displays external and the Restored column displays anything other than
yes, you need to complete some additional steps.
2. If the Key Manager type displays onboard and the Restored column displays yes, manually back up
the OKM information:
a. Go to advanced privilege mode and enter ywhen prompted to continue: set -priv advanced
b. Enter the command to display the key management information: security key-manager onboard
show-backup
6

c. Copy the contents of the backup information to a separate file or your log file. You’ll need it in disaster
scenarios where you might need to manually recover OKM.
d. Return to admin mode: set -priv admin
e. You can safely shut down the node.
3. If the Key Manager type displays external and the Restored column displays anything other than
yes:
a. Enter the onboard security key-manager sync command: security key-manager external
sync
If the command fails, contact NetApp Support.
mysupport.netapp.com
b. Verify that the Restored column equals yes for all authentication keys: security key-manager
key query
c. You can safely shut down the node.
4. If the Key Manager type displays onboard and the Restored column displays anything other than yes:
a. Enter the onboard security key-manager sync command: security key-manager onboard sync
Enter the customer’s onboard key management passphrase at the prompt. If the passphrase cannot be
provided, contact NetApp Support.
mysupport.netapp.com
b. Verify the Restored column shows yes for all authentication keys: security key-manager key
query
c. Verify that the Key Manager type shows onboard, and then manually back up the OKM information.
d. Go to advanced privilege mode and enter ywhen prompted to continue: set -priv advanced
e. Enter the command to display the key management backup information: security key-manager
onboard show-backup
f. Copy the contents of the backup information to a separate file or your log file. You’ll need it in disaster
scenarios where you might need to manually recover OKM.
g. Return to admin mode: set -priv admin
h. You can safely shut down the node.
Shut down the node - FAS2600
After completing the NVE or NSE tasks, you need to complete the shutdown of the
impaired node.
Steps
1. If the impaired node isn’t at the LOADER prompt:
7

If the impaired node displays… Then…
Waiting for giveback... Press Ctrl-C, and then respond ywhen prompted.
System prompt or password
prompt (enter system password)
Take over or halt the impaired node from the healthy node: storage
failover takeover -ofnode impaired_node_name
+ When the impaired node shows Waiting for giveback…, press Ctrl-
C, and then respond y.
+
2. From the LOADER prompt, enter: printenv to capture all boot environmental variables. Save the output
to your log file.
This command may not work if the boot device is corrupted or non-functional.
Remove the controller module, replace the boot media and transfer the boot image
to the boot media - FAS2600
To replace the boot media, you must remove the impaired controller module, install the
replacement boot media, and transfer the boot image to a USB flash drive.
Step 1: Remove the controller module
To access components inside the controller, you must first remove the controller module from the system and
then remove the cover on the controller module.
1. If you are not already grounded, properly ground yourself.
2. Loosen the hook and loop strap binding the cables to the cable management device, and then unplug the
system cables and SFPs (if needed) from the controller module, keeping track of where the cables were
connected.
Leave the cables in the cable management device so that when you reinstall the cable management
device, the cables are organized.
3. Remove and set aside the cable management devices from the left and right sides of the controller module.
4. Squeeze the latch on the cam handle until it releases, open the cam handle fully to release the controller
module from the midplane, and then, using two hands, pull the controller module out of the chassis.
8

5. Turn the controller module over and place it on a flat, stable surface.
6. Open the cover by sliding in the blue tabs to release the cover, and then swing the cover up and open.
Step 2: Replace the boot media
1. If you are not already grounded, properly ground yourself.
2. Locate the boot media using the following illustration or the FRU map on the controller module:
9

3. Press the blue button on the boot media housing to release the boot media from its housing, and then
gently pull it straight out of the boot media socket.
Do not twist or pull the boot media straight up, because this could damage the socket or the
boot media.
4. Align the edges of the replacement boot media with the boot media socket, and then gently push it into the
socket.
5. Check the boot media to make sure that it is seated squarely and completely in the socket.
If necessary, remove the boot media and reseat it into the socket.
6. Push the boot media down to engage the locking button on the boot media housing.
7. Close the controller module cover.
Step 3: Transfer the boot image to the boot media
You can install the system image to the replacement boot media using a USB flash drive with the image
installed on it. However, you must restore the var file system during this procedure.
•You must have a USB flash drive, formatted to FAT32, with at least 4GB capacity.
•A copy of the same image version of ONTAP as what the impaired controller was running. You can
download the appropriate image from the Downloads section on the NetApp Support Site
◦If NVE is enabled, download the image with NetApp Volume Encryption, as indicated in the download
button.
◦If NVE is not enabled, download the image without NetApp Volume Encryption, as indicated in the
download button.
•If your system is an HA pair, you must have a network connection.
•If your system is a stand-alone system you do not need a network connection, but you must perform an
additional reboot when restoring the var file system.
10

Steps
1. Align the end of the controller module with the opening in the chassis, and then gently push the controller
module halfway into the system.
2. Reinstall the cable management device and recable the system, as needed.
When recabling, remember to reinstall the media converters (SFPs) if they were removed.
3. Insert the USB flash drive into the USB slot on the controller module.
Make sure that you install the USB flash drive in the slot labeled for USB devices, and not in the USB
console port.
4. Push the controller module all the way into the system, making sure that the cam handle clears the USB
flash drive, firmly push the cam handle to finish seating the controller module, push the cam handle to the
closed position, and then tighten the thumbscrew.
The node begins to boot as soon as it is completely installed into the chassis.
5. Interrupt the boot process to stop at the LOADER prompt by pressing Ctrl-C when you see Starting
AUTOBOOT press Ctrl-C to abort….
If you miss this message, press Ctrl-C, select the option to boot to Maintenance mode, and then halt the
node to boot to LOADER.
6. For systems with one controller in the chassis, reconnect the power and turn on the power supplies.
The system begins to boot and stops at the LOADER prompt.
7. Although the environment variables and bootargs are retained, you should check that all required boot
environment variables and bootargs are properly set for your system type and configuration using the
printenv bootarg name command and correct any errors using the setenv variable-name
<value> command.
a. Check the boot environment variables:
▪bootarg.init.boot_clustered
▪partner-sysid
▪bootarg.init.switchless_cluster.enable
b. If External Key Manager is enabled, check the bootarg values, listed in the kenv ASUP output:
▪bootarg.storageencryption.support <value>
▪bootarg.keymanager.support <value>
▪kmip.init.interface <value>
▪kmip.init.ipaddr <value>
▪kmip.init.netmask <value>
▪kmip.init.gateway <value>
c. If Onboard Key Manager is enabled, check the bootarg values, listed in the kenv ASUP output:
▪bootarg.storageencryption.support <value>
▪bootarg.keymanager.support <value>
11

▪bootarg.onboard_keymanager <value>
d. Save the environment variables you changed with the savenv command
e. Confirm your changes using the printenv variable-name command.
8. Set your network connection type at the LOADER prompt:
◦If you are configuring DHCP: ifconfig e0a -auto
The target port you configure is the target port you use to communicate with the
impaired node from the healthy node during var file system restore with a network
connection. You can also use the e0M port in this command.
◦If you are configuring manual connections: ifconfig e0a -addr=filer_addr -mask=netmask
-gw=gateway-dns=dns_addr-domain=dns_domain
▪filer_addr is the IP address of the storage system.
▪netmask is the network mask of the management network that is connected to the HA partner.
▪gateway is the gateway for the network.
▪dns_addr is the IP address of a name server on your network.
▪dns_domain is the Domain Name System (DNS) domain name.
If you use this optional parameter, you do not need a fully qualified domain name in the netboot
server URL. You need only the server’s host name.
Other parameters might be necessary for your interface. You can enter help ifconfig at
the firmware prompt for details.
Boot the recovery image - FAS2600
You must boot the ONTAP image from the USB drive, restore the file system, and verify
the environmental variables.
Steps
1. From the LOADER prompt, boot the recovery image from the USB flash drive: boot_recovery
The image is downloaded from the USB flash drive.
2. When prompted, either enter the name of the image or accept the default image displayed inside the
brackets on your screen.
3. Restore the var file system:
12

If your system has… Then…
A network connection a. Press ywhen prompted to restore the backup configuration.
b. Set the healthy node to advanced privilege level: set
-privilege advanced
c. Run the restore backup command: system node restore-
backup -node local -target-address
impaired_node_IP_address
d. Return the node to admin level: set -privilege admin
e. Press ywhen prompted to use the restored configuration.
f. Press ywhen prompted to reboot the node.
No network connection a. Press nwhen prompted to restore the backup configuration.
b. Reboot the system when prompted by the system.
c. Select the Update flash from backup config (sync flash) option
from the displayed menu.
If you are prompted to continue with the update, press y.
4. Ensure that the environmental variables are set as expected:
a. Take the node to the LOADER prompt.
b. Check the environment variable settings with the printenv command.
c. If an environment variable is not set as expected, modify it with the
setenvenvironment_variable_name changed_value command.
d. Save your changes using the saveenv command.
5. The next depends on your system configuration:
◦If your system has onboard keymanager, NSE or NVE configured, go to Restore OKM, NSE, and NVE
as needed
◦If your system does not have onboard keymanager, NSE or NVE configured, complete the steps in this
section.
6. From the LOADER prompt, enter the boot_ontap command.
If you see… Then…
The login prompt Go to the next Step.
Waiting for giveback… a. Log into the partner node.
b. Confirm the target node is ready for giveback with the storage
failover show command.
7. Connect the console cable to the partner node.
13

8. Give back the node using the storage failover giveback -fromnode local command.
9. At the cluster prompt, check the logical interfaces with the net int -is-home false command.
If any interfaces are listed as "false", revert those interfaces back to their home port using the net int
revert command.
10. Move the console cable to the repaired node and run the version -v command to check the ONTAP
versions.
11. Restore automatic giveback if you disabled it by using the storage failover modify -node local
-auto-giveback true command.
Restore OKM, NSE, and NVE as needed - FAS2600
Once environment variables are checked, you must complete steps specific to systems
that have Onboard Key Manager (OKM), NetApp Storage Encryption (NSE) or NetApp
Volume Encryption (NVE) enabled.
Determine which section you should use to restore your OKM, NSE, or NVE configurations:
If NSE or NVE are enabled along with Onboard Key Manager you must restore settings you captured at the
beginning of this procedure.
•If NSE or NVE are enabled and Onboard Key Manager is enabled, go to Option 1: Restore NVE or NSE
when Onboard Key Manager is enabled.
•If NSE or NVE are enabled for ONATP 9.5, go to Option 2: Restore NSE/NVE on systems running ONTAP
9.5 and earlier.
•If NSE or NVE are enabled for ONTAP 9.6, go to Option 3: Restore NSE/NVE on systems running ONTAP
9.6 and later.
Option 1: Restore NVE or NSE when Onboard Key Manager is enabled
Steps
1. Connect the console cable to the target node.
2. Use the boot_ontap command at the LOADER prompt to boot the node.
3. Check the console output:
If the console
displays…
Then…
The LOADER prompt Boot the node to the boot menu: boot_ontap menu
Waiting for giveback… a. Enter Ctrl-C at the prompt
b. At the message: Do you wish to halt this node rather than wait [y/n]? ,
enter: y
c. At the LOADER prompt, enter the boot_ontap menu command.
4. At the Boot Menu, enter the hidden command, recover_onboard_keymanager and reply yat the
14

prompt.
5. Enter the passphrase for the onboard key manager you obtained from the customer at the beginning of this
procedure.
6. When prompted to enter the backup data, paste the backup data you captured at the beginning of this
procedure, when asked. Paste the output of security key-manager backup show OR security
key-manager onboard show-backup command.
The data is output from either security key-manager backup show or security
key-manager onboard show-backup command.
Example of backup data:
--------------------------BEGIN BACKUP--------------------------
TmV0QXBwIEtleSBCbG9iAAEAAAAEAAAAcAEAAAAAAADuD+byAAAAACEAAAAAAAAA
QAAAAAAAAABvOlH0AAAAAMh7qDLRyH1DBz12piVdy9ATSFMT0C0TlYFss4PDjTaV
dzRYkLd1PhQLxAWJwOIyqSr8qY1SEBgm1IWgE5DLRqkiAAAAAAAAACgAAAAAAAAA
3WTh7gAAAAAAAAAAAAAAAAIAAAAAAAgAZJEIWvdeHr5RCAvHGclo+wAAAAAAAAAA
IgAAAAAAAAAoAAAAAAAAAEOTcR0AAAAAAAAAAAAAAAACAAAAAAAJAGr3tJA/
LRzUQRHwv+1aWvAAAAAAAAAAACQAAAAAAAAAgAAAAAAAAACdhTcvAAAAAJ1PXeBf
ml4NBsSyV1B4jc4A7cvWEFY6lLG6hc6tbKLAHZuvfQ4rIbYAAAAAAAAAAAAAAAAA
AAAAAAAAAAAAAAAAAAAAAAAAAAAAAAAAAAAAAAAAAAAAAAAAAAAAAAAAAAAAAAAA
AAAAAAAAAAAAAAAAAAAAAAAAAAAAAAAAAAAAAAAAAAAAAAAAAAAAAAAAAAAAAAAA . . . .
H4nPQM0nrDRYRa9SCv8AAAAAAAAAAAAAAAAAAAAAAAAAAAAAAAAAAAAAAAAAAAAA
AAAAAAAAAAAAAAAAAAAAAAAAAAAAAAAAAAAAAAAAAAAAAAAAAAAAAAAAAAAAAAAA
AAAAAAAA
---------------------------END BACKUP---------------------------
7. At the Boot Menu select the option for Normal Boot.
The system boots to Waiting for giveback… prompt.
8. Move the console cable to the partner node and login as admin.
9. Confirm the target node is ready for giveback with the storage failover show command.
10. Give back only the CFO aggregates with the storage failover giveback -fromnode local -only-cfo
-aggregates true command.
◦If the command fails because of a failed disk, physically disengage the failed disk, but leave the disk in
the slot until a replacement is received.
◦If the command fails because of an open CIFS session, check with the customer on how to close out
CIFS sessions.
Terminating CIFS can cause loss of data.
◦If the command fails because the partner is "not ready", wait 5 minutes for the NVMEMs to
synchronize.
◦If the command fails because of an NDMP, SnapMirror, or SnapVault process, disable the process. See
the appropriate Documentation Center for more information.
15

11. Once the giveback completes, check the failover and giveback status with the storage failover show
and storage failover show-giveback commands.
Only the CFO aggregates (root aggregate and CFO style data aggregates) will be shown.
12. Move the console cable to the target node.
13. If you are running ONTAP 9.5 and earlier, run the key-manager setup wizard:
a. Start the wizard using the security key-manager setup -nodenodename command, and then
enter the passphrase for onboard key management when prompted.
b. Enter the key-manager key show -detail command to see a detailed view of all keys stored in
the onboard key manager and verify that the Restored column = yes for all authentication keys.
If the Restored column = anything other than yes, contact Customer Support.
c. Wait 10 minutes for the key to synchronize across the cluster.
14. If you are running ONTAP 9.6 or later:
a. Run the security key-manager onboard sync command and then enter the passphrase when
prompted.
b. Enter the security key-manager key query command to see a detailed view of all keys stored
in the onboard key manager and verify that the Restored column = yes/true for all authentication
keys.
If the Restored column = anything other than yes/true, contact Customer Support.
c. Wait 10 minutes for the key to synchronize across the cluster.
15. Move the console cable to the partner node.
16. Give back the target node using the storage failover giveback -fromnode local command.
17. Check the giveback status, 3 minutes after it reports complete, using the storage failover show
command.
If giveback is not complete after 20 minutes, contact Customer Support.
18. At the clustershell prompt, enter the net int show -is-home false command to list the logical
interfaces that are not on their home node and port.
If any interfaces are listed as false, revert those interfaces back to their home port using the net int
revert command.
19. Move the console cable to the target node and run the version -v command to check the ONTAP
versions.
20. Restore automatic giveback if you disabled it by using the storage failover modify -node local
-auto-giveback true command.
Option 2: Restore NSE/NVE on systems running ONTAP 9.5 and earlier
Steps
1. Connect the console cable to the target node.
16

2. Use the boot_ontap command at the LOADER prompt to boot the node.
3. Check the console output:
If the console
displays…
Then…
The login prompt Go to Step 7.
Waiting for giveback… a. Log into the partner node.
b. Confirm the target node is ready for giveback with the storage
failover show command.
4. Move the console cable to the partner node and give back the target node storage using the storage
failover giveback -fromnode local -only-cfo-aggregates true local command.
◦If the command fails because of a failed disk, physically disengage the failed disk, but leave the disk in
the slot until a replacement is received.
◦If the command fails because of an open CIFS sessions, check with customer how to close out CIFS
sessions.
Terminating CIFS can cause loss of data.
◦If the command fails because the partner "not ready", wait 5 minutes for the NVMEMs to synchronize.
◦If the command fails because of an NDMP, SnapMirror, or SnapVault process, disable the process. See
the appropriate Documentation Center for more information.
5. Wait 3 minutes and check the failover status with the storage failover show command.
6. At the clustershell prompt, enter the net int show -is-home false command to list the logical
interfaces that are not on their home node and port.
If any interfaces are listed as false, revert those interfaces back to their home port using the net int
revert command.
7. Move the console cable to the target node and run the version -v command to check the ONTAP versions.
8. Restore automatic giveback if you disabled it by using the storage failover modify -node local
-auto-giveback true command.
9. Use the storage encryption disk show at the clustershell prompt, to review the output.
This command does not work if NVE (NetApp Volume Encryption) is configured
10. Use the security key-manager query to display the key IDs of the authentication keys that are stored on the
key management servers.
◦If the Restored column = yes and all key managers report in an available state, go to Complete the
replacement process.
◦If the Restored column = anything other than yes, and/or one or more key managers is not available,
use the security key-manager restore -address command to retrieve and restore all
authentication keys (AKs) and key IDs associated with all nodes from all available key management
servers.
17

Check the output of the security key-manager query again to ensure that the Restored column = yes
and all key managers report in an available state
11. If the Onboard Key Management is enabled:
a. Use the security key-manager key show -detail to see a detailed view of all keys stored in
the onboard key manager.
b. Use the security key-manager key show -detail command and verify that the Restored
column = yes for all authentication keys.
If the Restored column = anything other than yes, use the security key-manager setup
-node Repaired(Target)node command to restore the Onboard Key Management settings.
Rerun the security key-manager key show -detail command to verify Restored column =
yes for all authentication keys.
12. Connect the console cable to the partner node.
13. Give back the node using the storage failover giveback -fromnode local command.
14. Restore automatic giveback if you disabled it by using the storage failover modify -node local
-auto-giveback true command.
Option 3: Restore NSE/NVE on systems running ONTAP 9.6 and later
Steps
1. Connect the console cable to the target node.
2. Use the boot_ontap command at the LOADER prompt to boot the node.
3. Check the console output:
If the console
displays…
Then…
The login prompt Go to Step 7.
Waiting for giveback… a. Log into the partner node.
b. Confirm the target node is ready for giveback with the storage
failover show command.
4. Move the console cable to the partner node and give back the target node storage using the storage
failover giveback -fromnode local -only-cfo-aggregates true local command.
◦If the command fails because of a failed disk, physically disengage the failed disk, but leave the disk in
the slot until a replacement is received.
◦If the command fails because of an open CIFS session, check with the customer on how to close out
CIFS sessions.
Terminating CIFS can cause loss of data.
◦If the command fails because the partner is "not ready", wait 5 minutes for the NVMEMs to
synchronize.
18
This manual suits for next models
1
Table of contents
Other NetApp Disk Array System manuals

NetApp
NetApp ASA A900 User manual

NetApp
NetApp EF Series Manual

NetApp
NetApp AFF A700 Manual

NetApp
NetApp AFF User manual

NetApp
NetApp E2760 User manual

NetApp
NetApp AFF A220 User manual

NetApp
NetApp AFF A900 User manual

NetApp
NetApp AFF A700s User manual

NetApp
NetApp FAS User manual

NetApp
NetApp E Series User manual