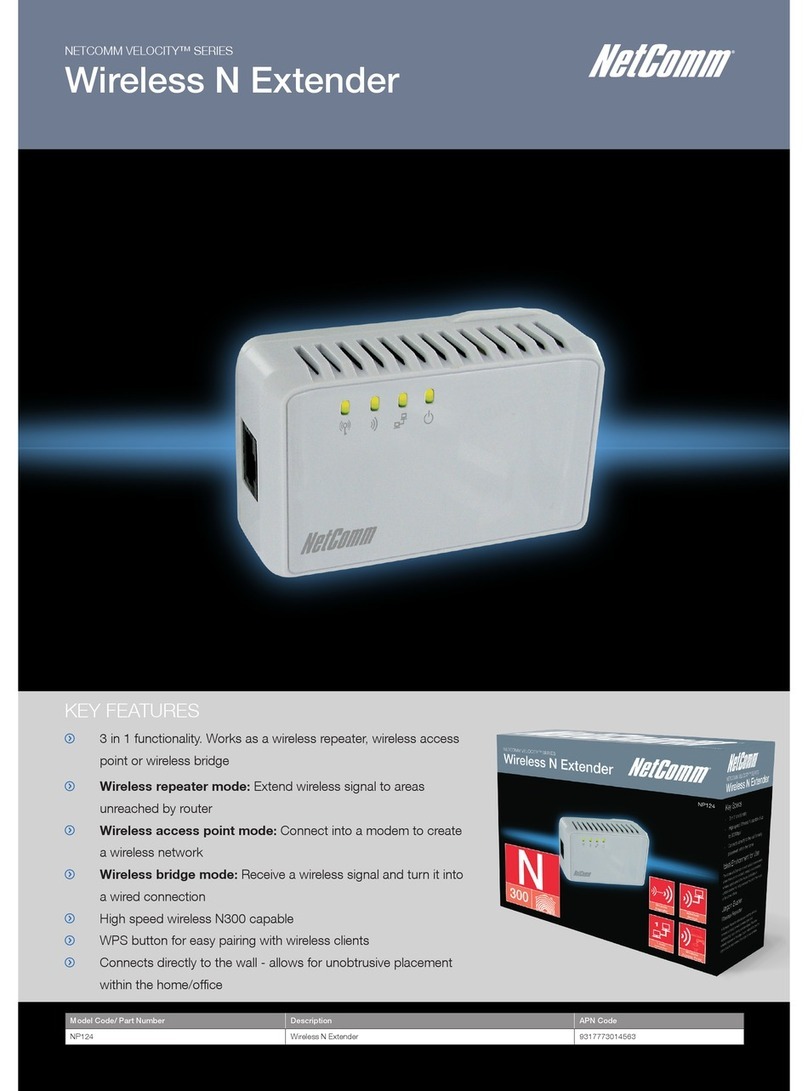
NetComm VELOCITY Series User manual

USER GUIDE
NETCOMM VELOCITY™ SERIES
Wireless N Extender

Wireless N Extender User Guide YML124
2 www.netcomm.com.au
Table of Contents
About the NP124 .......................................................................................................................................................................................4
Minimum System Requirements .......................................................................................................................................................................................5
Package Contents............................................................................................................................................................................................................5
Safety Precautions ...........................................................................................................................................................................................................5
Device Overview ...............................................................................................................................................................................................................6
Front Panel ....................................................................................................................................................................................... 6
Bottom Panel ................................................................................................................................................................................... 6
Setting up the NP124 .................................................................................................................................................................................8
Using the NP124 as a Wireless Access Point ................................................................................................................................... 8
To setup the NP124 as a Wireless Access Point ............................................................................................................................... 8
Placement when used as a Wireless Access Point ...........................................................................................................................9
Conguring the NP124 ...................................................................................................................................................................................................10
Using the NP124 as a Wireless Repeater ....................................................................................................................................... 11
Placement when used as a Wireless Repeater.................................................................................................................................11
Using the NP124 as a Wireless Bridge ........................................................................................................................................... 12
Placement when used as a Wireless Bridge....................................................................................................................................12
Wireless ....................................................................................................................................................................................................14
Changing the Wireless Settings in Access Point mode ................................................................................................................... 14
Changing the Wireless Security Settings ........................................................................................................................................ 14
WPS ..............................................................................................................................................................................................................................15
Conguring Wireless MAC Filtering ................................................................................................................................................. 15
Home Page ...............................................................................................................................................................................................17
The NP124 Home Page ..................................................................................................................................................................17
To view the NP124 Home Page ...................................................................................................................................................... 17
System management ...............................................................................................................................................................................19
Information .....................................................................................................................................................................................................................19
Local ..............................................................................................................................................................................................................................20
Firmware ........................................................................................................................................................................................................................20
Settings ..........................................................................................................................................................................................................................21
Reboot ...........................................................................................................................................................................................................................21
Password .......................................................................................................................................................................................................................21
Setting Static IP ........................................................................................................................................................................................23
Setting a static IP Address .............................................................................................................................................................................................23
For Windows 2000/XP ...................................................................................................................................................................................................23
For Windows Vista-32/64 ...............................................................................................................................................................................................24
For Windows 7-32/64 ....................................................................................................................................................................................................26
For Mac OSX 10.6 .........................................................................................................................................................................................................27
Product Warranty ...........................................................................................................................................................................................................29
Technical Support ..........................................................................................................................................................................................................29

About the NP124

Wireless N Extender User Guide YML124
4 www.netcomm.com.au
About the NP124
The NP124 Wireless N Extender supports the wireless 802.11b/g/n standards with one 10/100Base-T Ethernet port.
The Wireless N Extender is the perfect product to combat weak wireless signals in the home or ofce. With its triple functionality, the NP124
is the perfect product to give users a massive wireless boost. The NP124 can be used as a Wireless Access Point, Wireless Repeater or a
Wireless Bridge.
If you have an existing Internet connection but no wireless or older Wireless G, then the NP124 can connect directly into your modem/
router and act as a wireless N access point. When in access point mode the NP124 connects into your modem/router by Ethernet cable
and makes available a high speed wireless signal that multiple users can connect to.
If you have an existing wireless network that cannot service all areas, the NP124 will work as a wireless repeater. Simply plug the device
into a convenient location, it will pick up the existing weak wireless signal and redistribute a strong wireless signal for users to connect to.
No more non-existent, unstable or inconsistent wireless signals in the upstairs bedrooms, living rooms at the end of the house or the far
corner ofce.
If you have a specic product, like an Internet enabled TV or gaming console that you want a wired connection to, then use the NP124 in
wireless bridge mode.
The NP124 is designed to connect directly into the wall and its tidy housing makes it an unobtrusive xture in any home or ofce. Also
featuring a WPS button and advanced wireless security options, the NP124 is an ideal solution for enabling wireless connectivity throughout
your entire home or ofce.
The NP124 supports 64/128-bit WEP, WIFI Protected Access (WPA), and the latest WPA2 encryption via the TKIP and AES algorithm to
protect your wireless network from unauthorized access. MAC Address Filtering for wireless clients also provides an additional layer of
security for your wireless network.
The NP124 comes with 1 x 10/100M Auto MDI/MDIx Ethernet port that can be used to connect to an existing wired network to serve
as a wireless access point or wireless bridge. It can also be used to upgrade the rmware or congure the device via its web-based
conguration page when connected to a computer.

YML124 Wireless N Extender User Guide
www.netcomm.com.au 5
NetComm Velocity Series - Wireless N Extender
Minimum System Requirements
Your computer must meet the following minimum requirements:
• Any operating system can be used
• Web Browser
• 233MHz processor
• Ethernet (or Wireless) network adapter
Package Contents
The package contents are listed below:
• NP124
• Ethernet cable
• Printed QSG
If there are any items missing, please contact NetComm immediately.
Safety Precautions
• Do not open, service, or change any component.
• Only qualied technical specialists are allowed to service the equipment.
• Observe safety precautions to avoid electric shock

Wireless N Extender User Guide YML124
6 www.netcomm.com.au
Device Overview
Front Panel
LED STATE DESCRIPTION
POWER LED Solid Green Device is powered ON
Off Device is powered OFF
ETHERNET LED Solid Green Ethernet device is connected
Blinking Green Indicates LAN activity
Off No Ethernet device connected
WIRELESS LED Solid Green Wireless interface is UP
Blinking Green Indicates wireless activity
Off Wireless interface is DOWN
WPS LED and BUTTON Solid Green WPS association is successful
Blinking Green WPS authentication is on going
Off WPS disabled
Bottom Panel
FEATURE DESCRIPTION
RESET Press the Reset button for 5 seconds to restore the NP124 to factory
default settings
ETHERNET PORT Connect to computers/Ethernet devices

How to congure WEP/WPA-PSK/WPA2-PSK Wireless SecuritySet up

Wireless N Extender User Guide YML124
8 www.netcomm.com.au
Setting up the NP124
Setting up the NP124 is easy. Follow the steps below to connect the device to your existing modem-router / wireless router or access
point.
Using the NP124 as a Wireless Access Point
You can use the NP124 as a wireless access point to turn a regular modem-router into a wireless capable networking device. Connect an
Ethernet cable from any available Ethernet LAN port on the modem-router to the NP124.
The NP124 will then serve as a wireless interface for your wireless-enabled devices such as computers and smartphones to enable them to
connect to the Internet via your existing modem-router.
To setup the NP124 as a Wireless Access Point
Connect an Ethernet cable from an available port in your modem-router and connect the other end of the Ethernet cable to the Ethernet
port of the NP124.
Please note: By default, no extra conguration is needed for the NP124 to be used as a wireless access point. Connect an Ethernet cable from your existing modem-router to the
NP124 and you should be able to access the Internet wirelessly.
For a Wireless Connection
• You can nd the default SSID and wireless security information on the sticker located on the back of the NP124.
Once a connection to the NP124 is established, your computer will receive an IP address and you can then start conguring the NP124
using the web based conguration pages.
If you have already made conguration changes on the NP124, you can clear these settings by holding the reset button beside the Ethernet
port in for 5 seconds to restore the device to its factory default conguration. You will then need to refer to the sticker on the back of the
NP124 for the default SSID and password in order to connect your wireless devices.
Alternatively, you can manually congure the access point settings as required for your wireless network.

YML124 Wireless N Extender User Guide
www.netcomm.com.au 9
NetComm Velocity Series - Wireless N Extender
Placement when used as a Wireless Access Point
You will need to connect the NP124 directly to the modem that is supplying your Internet. For this reason, the placement of the NP124 will
be bound by the position of your modem

Wireless N Extender User Guide YML124
10 www.netcomm.com.au
Conguring the NP124
NOTE: For use as a wireless repeater or wireless bridge, you will have to enter the web user interface and enter a small amount of information about your existing wireless network.
Before you access the web user interface, connect the NP124 to your computer
• Connect the NP124 to a power outlet.
• Connect the Ethernet cable from your computer to the NP124
To access the web based conguration, complete the following steps:
• Open your browser and type 192.168.20.1 (the factory default IP address) into the address bar at the top of page.
• Enter admin for both the username and password and click on OK.
• Click on Quick Setup at the top of the web page.
Please note: If you are connecting the NP124 to a hidden wireless network, you will need to enter the information from your existing wireless router / access point manually.
• Choose the applicable operation mode from the drop-down box (Steps for each mode are listed below).
• If you selected either Repeater or Wireless Bridge mode, click the Site Survey button to show the list of available wireless networks.
• Click the Connect button located on the right side of the Wireless network you want to connect to.
• Enter the wireless network key / passphrase.
• Click the Apply button to save the settings.

YML124 Wireless N Extender User Guide
www.netcomm.com.au 11
NetComm Velocity Series - Wireless N Extender
Using the NP124 as a Wireless Repeater
Once the wireless connection from the NP124 to the wireless router / access point is established you can connect your wireless devices
like laptops and smartphones to the wireless repeater.
These devices will then obtain an IP address from the wireless router / access point and should be able to access the Internet from
locations previously unreachable by your wireless signal.
Placement when used as a Wireless Repeater
You will need to identify the areas where you have good wireless reception and areas with weak or no wireless signal at all.
Based on this assessment you will need to place the wireless extender in a location between where you have good wireless signal
coverage and where you have poor wireless signal coverage. In the illustration below, the NP124 is repeating the wireless signal broadcast
from the wireless modem-router.
Please note: Correct placement of the NP124 is crucial to get the best possible results for extending your existing wireless signal. The wireless extender should be placed in a
location where it can receive a good wireless signal from the wireless router / access point so as to avoid disconnection and packet loss.

Wireless N Extender User Guide YML124
12 www.netcomm.com.au
Using the NP124 as a Wireless Bridge
Connect wired devices to your wireless network by connecting an Ethernet cable from a wired device, such as a computer, game console
or Internet-ready TV, to the Ethernet port of the NP124.
These devices will then obtain an IP address from the wireless router / access point and should be able to access the Internet.
Placement when used as a Wireless Bridge
You will need to connect the NP124 into a power outlet near the device that you want to connect to the Internet by Ethernet cable. For
this reason, the placement is bound by the position of the device you want to connect. Note however, that the NP124 will need to be in a
position where it can receive a strong wireless signal from your current wireless router.

Wireless

Wireless N Extender User Guide YML124
14 www.netcomm.com.au
Wireless
Changing the Wireless Settings in Access Point mode
You can modify the access point settings to suit your own wireless network requirements.
• Open your browser and type 192.168.20.1 (the factory default IP address) into the address bar at the top of page.
• Enter admin for both the username and password and click on OK.
• At the top of the page, click on the Wireless icon.
Once you have made any required conguration changes, click Apply to save the new settings.
Please note: You will need to re-setup any wirelessly connected devices using the new wireless settings you have selected.
Changing the Wireless Security Settings
You can modify the wireless security settings to suit your own wireless network requirements.
• Open your browser and type 192.168.20.1 (the factory default IP address) into the address bar at the top of page.
• Enter admin for both the username and password and click on OK.
• At the top of the page, click on the wireless icon and then click on the security link underneath it.
Once you have made any required conguration changes, click Apply to save the new settings.
Please note: You will need to re-setup any wirelessly connected devices using the new wireless settings you have selected.

YML124 Wireless N Extender User Guide
www.netcomm.com.au 15
NetComm Velocity Series - Wireless N Extender
WPS
WPS (or Wi Protected Setup) makes it easy for wireless clients to connect to the wireless access point. Press the WPS button on the
NP124 and then press the WPS button on the wireless client within 2 minutes, and the wireless security authentication will be done
automatically.
NOTE: The WPS button can only be used when in wireless access point mode
Conguring Wireless MAC Filtering
Wireless MAC Filtering allows you to select which wireless clients can or cannot have access to the wireless network broadcast by the
NP124.
• Open your browser and type 192.168.20.1 (the factory default IP address) into the address bar at the top of page.
• Enter admin for both the username and password and click on OK
• At the top of the page, click on the wireless icon and then click on the MAC lter link underneath it.
You can select to Allow or Deny access from the Policy pull down menu and then enter the MAC address of the wireless client you wish to
allow or deny access to.
Once you have made any required conguration changes, click Apply to save the new settings.

Home Page

YML124 Wireless N Extender User Guide
www.netcomm.com.au 17
NetComm Velocity Series - Wireless N Extender
Home Page
The NP124 Home Page
The Home Page displays current network information about your NP124.
To view the NP124 Home Page
• Open your browser and type 192.168.20.1 (the factory default IP address) into the address bar at the top of page.
• Enter admin for both the username and password and click on OK
The AP Client Connection Status displays the Connection status and SSID of the wireless router / access point being extended while the
Wireless Client List displays the wireless clients currently connected to the NP124.

System management

YML124 Wireless N Extender User Guide
www.netcomm.com.au 19
NetComm Velocity Series - Wireless N Extender
System management
The System Management menu is used for administering the device settings and rmware.
• Open your browser and type 192.168.20.1 (the factory default IP address) into the address bar at the top of page.
• Enter admin for both the username and password and click on OK
• At the top of the page, click on the System link.
The system management page contains the following items:
• Information
• Local
• Firmware
• Settings
• Reboot
• Password
Information
The Information page shows the current device information. Below is a list of information shown on this page.
LABEL DESCRIPTION
Firmware Version Shows the current rmware version running on the NP124.
Build Date Shows the current rmware release date.
Serial Number Shows the serial number of the NP124.
ETH MAC Address Shows the Ethernet interface MAC address.
Bridge MAC Address Shows the Wireless Bridge interface MAC address.
Wireless MAC Address Shows the wireless interface MAC address.
Wireless Status Shows the status of the wireless interface.

Wireless N Extender User Guide YML124
20 www.netcomm.com.au
Local
This page enables you to change the LAN settings for the NP124.
LABEL DESCRIPTION
Router IP Address Set the LAN IP address of the NP124.
Router Subnet Mask Set the subnet mask for the network the NP124 is
connected to. This is usually set to: 255.255.255.0
Please note: The NP124 will only provide an IP address to your computer / device upon initial setup. Once the NP124 is associated with another wireless router or Access Point,
you will be unable to access the web based conguration pages at the IP address specied above without setting a static IP address on your computer or device rst.
Please see the instructions at the end of this guide for the steps required to do this.
Firmware
The rmware page allows you to see the current rmware version and build date as well as upgrade the rmware running on the NP124.
LABEL DESCRIPTION
Firmware Information Shows the current rmware version and build date.
Firmware Upgrade Upload a rmware upgrade le to the NP124.
Please note: Make sure you connect to the NP124 via an Ethernet cable when upgrading the rmware to avoid corruption during the rmware upgrade procedure.
Other manuals for VELOCITY Series
1
This manual suits for next models
1
Table of contents
Other NetComm Extender manuals
Popular Extender manuals by other brands

Rose electronics
Rose electronics CrystalView EX HDMI Installation and operation manual

Allied Telesis
Allied Telesis AT-MC601 Series Installation and user guide

ADDER
ADDER AdderLink XDIP user guide

SolidRF
SolidRF SR14652002A manual

Amulet Hotkey
Amulet Hotkey DXT-H4 quick start guide

EnGenius
EnGenius ERB9250 user manual