NETGEM i-PLAYER User manual

USER MANUAL
i-PLAYER
Digital TV Receiver
December 2003

Table of Contents
1. Safety Instructions ..............................................................................................................................................3
2. Getting Started ....................................................................................................................................................4
a) Introduction ....................................................................................................................................................4
b) Installation ......................................................................................................................................................4
c) Using the remote control....................................................................................................................................7
d) Using the optional Wireless Keyboard ..................................................................................................................8
e) Navigation basics..............................................................................................................................................
f) On-screen controls ............................................................................................................................................
3. Setting Up i-Player ............................................................................................................................................10
4. atching Digital Television ................................................................................................................................11
a) The Channel List ............................................................................................................................................11
b) “What’s on” programme guide ........................................................................................................................11
c) Programme information and interactions ............................................................................................................11
d) Channel tuning-in............................................................................................................................................12
5. Personalising Digital Television ............................................................................................................................13
a) Channel List personalisation..............................................................................................................................13
b) Audio, video and language personalisation ..........................................................................................................13
c) Parental Lock ................................................................................................................................................13
d) Advanced audio connection ..............................................................................................................................14
6. Recording Digital Programmes ............................................................................................................................15
a) Standard VCR connection ................................................................................................................................15
b) VCR Timers....................................................................................................................................................15
c) Advanced VCR connections ..............................................................................................................................15
7. Using Messaging Services ....................................................................................................................................16
a) Receiving and sending emails............................................................................................................................16
b) Address book ................................................................................................................................................16
c) Creating and modifying mailboxes ....................................................................................................................16
8. Using Interactive Services....................................................................................................................................17
a) My Favourites ................................................................................................................................................17
b) Internet Neighbourhood ..................................................................................................................................17
c) Web Search service ........................................................................................................................................17
d) Changing the Internet connection method ..........................................................................................................18
9. Using Multimedia Services ..................................................................................................................................1
a) Connecting digital USB accessories ....................................................................................................................1
b) Accessing a storage device ..............................................................................................................................20
c) Playing multimedia files ..................................................................................................................................20
10. Help Services ....................................................................................................................................................21
a) Diagnostics services ........................................................................................................................................21
b) Frequently Asked Questions (FAQs) ....................................................................................................................21
c) Customer Support ..........................................................................................................................................22
11. Technical Specifications ......................................................................................................................................23
2

1. Safety Instructions
Your safety is important to us, please read this page first
• Do not try to open i-Player as there is a risk of electrical shock.
• Install i-Player on a firm and flat surface.
• Allow a minimum of 1 cm around each side of i-Player for proper cooling.
• Only use the cables supplied with i-Player.
• i-Player should not be exposed to liquids either dripping or splashing, nor should any objects filled with liquids (such as vases) be
placed close to it.
• Do not place naked flame sources, such as lit candles near i-Player.
• Keep i-Player away from domestic heating equipment, direct sunlight and humidity.
• Always disconnect i-Player from the wall socket before cleaning it. Use a soft cloth and a mild solution of washing-up liquid to
clean the casing.
• Do not insert anything into openings or connectors of i-Player.
A 3 amp fuse is fitted in i-Player’s three-pin mains plug. If replacement is needed, always use a 3 amp rated fuse approved by ASTA
or BSI to BS1362. Check for the BSI mark on the body of the fuse.
If the fitted plug has a removable fuse cover you must ensure that it is refitted when the fuse is replaced. If you lose the fuse cover
the plug must not be used until a replacement cover is obtained.
If the fitted plug is replaced, the fuse should be taken out and the cut-off plug disposed of safely. There is danger of severe electrical
shock if the cut off plug is inserted into any 13 amp socket.
If a new plug is to be fitted please observe the wiring code as shown below. If in any doubt please consult a qualified electrician.
How to replace the fuse:
Lift out the removable fuse compartment with a screwdriver and replace the fuse, then refit securely into the mains plug.
IMPORTANT: The wires in the mains lead of this appliance are coloured in accordance with the following code:
blue = neutral, brown = live
As the colours of the wires in the mains lead of this appliance may not correspond to the markings identifying the terminals in your
plug, proceed as follows:
1. The blue wire must be connected to the terminal marked ‘N’ or coloured black.
2. The brown wire must be connected to the terminal marked ‘L’ or coloured red.
Important note: Under no circumstances should either of these wires be connected to the Earth terminal of the three-pin plug,
marked with the letter ‘E’ or the earth symbol.
If you encounter problems using i-Player, you should never try to repair it by yourself, please follow the instructions listed in the
troubleshooting section of the manual.
This product is for use in the United Kingdom
3
HAZARDOUS VOLTAGE FIGURE
E NETGEM, DECLARE UNDER OUR SOLE RESPONSIBILITY THAT THIS PRODUCT i-Player IS IN CONFORMITY
ITH THE PROVISIONS OF THE FOLLO ING COUNCIL DIRECTIVES:
Europe: 89/336/EEC, 73/23/EEC, 93/68/EEC.
SELVTNV3
Hazardous
voltage
Hazardous
voltage
!

2. Getting Started
a) Introduction
Thank you for choosing i-Player for your new digital television service.
i-Player is the first of a family of smart television devices.
A simple installation will immediately give you access to new digital television and radio services.
You will discover the full potential of i-Player with the optional Wireless Keyboard. The optional Wireless Keyboard is the 21st century remote
control. It gives you one-key access to a range of interactive services, from checking email, to entertainment or information services.
Sit back, relax and enjoy a smarter television
b) Installation
• Package contents
i-Player package contains the following, please check the contents:
4
i-Player
Aerial lead
Remote control
and batteries
Optional Wireless keyboard
TV Scart lead Mains power cable
i-Player is built using recyclable material. Please observe local regulations regarding the disposal of packaging
materials, used batteries and old equipment.
Phone cable and converter

• Connection and switching on
5
Connect the power cable to the main supply.
Connect your SCART Lead to your television
Unplug any device (VCR, DVD or game console) currently connected to the SCART 1
plug of your TV. Then connect i-Player TV SCART to SCART 1 of your TV using the
supplied SCART lead. If needed, re-connect the additional device (VCR, DVD or game
console) to i-Player AUX SCART.
1
2
Connect your aerial lead to i-Player, antenna connector (coaxial).
Connect the phone cable to the phone splitter converter, then to a working phone jack.
3
4
220-240 V AC
50-60Hz
12
TV
Antenna
220-240V AC
50-60 Hz

You can now switch i-Player on. Please observe the following front panel light indicators:
i-Player is off
Use the switch at the back of i-Player to power on
i-Player is powering up
This step takes about 20 seconds. The red light is on and the green light blinks
i-Player is on
The green light stops blinking. The red and green lights stay on. You should see a digital TV programme or an interactive service page
on your TV screen.
i-Player is in stand-by mode
Only the red light is on. Press the power key on your remote control or on your Wireless Keyboard to wake up i-Player.
Netgem
Netgem
Netgem
Status Lights
6
1
2
3
4
Red Green Blinks
Red Green
Red
Netgem

c) Using the remote control
Before using your remote control, make sure the batteries are correctly installed.
• To test your remote control, press any key and check that the red light on the front cover of i-Player is blinking.
7
0-9
Select a channel number (up to 3 digits).
List
Display or hide the Channel List.
0-9 abc…
Input text into a text field (press a key one or more times
until the desired character appears).
V+/ V-
Changes the volume level.
P+P- (Programme UP/DO N)
Go to the next or to the previous digital TV or radio
channel.
Red, Green, Yellow, Blue
Launch the action associated to the corresponding
colour, as indicated on the screen or on the menu.
Arrow keys (up, down, left, right), OK
• Move the highlight on menus and interactive screens
• Press OK in centre to confirm your selection.
C (Cancel)
Cancels current action and closes menus and pop-ups
Deletes the last character when in text input mode.
Previous/next
Go to the previous or the next screen or channel.
Text
Launch the digital Text service if available on the current
digital TV channel.
Info
Display or hide information and interactions about the
current programme or interactive service (when
information is available).
Mute
Switch the sound off or on.
PiP (Picture-in-Picture)
• Display or hide a small TV window with the current
digital TV programme, when using an interactive service
• Freeze live television, when watching TV.
Menu
Display the Interactive Menu.
Power
• Enter or leave stand-by mode
• Hang up when connected to the telephone.

d) Using the optional ireless Keyboard
The optional Wireless Keyboard is the best way to enjoy interactive services (email, Web, Internet) and to take advantage of useful
shortcuts.
Before using the optional Wireless Keyboard, make sure the batteries are correctly installed.
• To test your optional Wireless Keyboard, press any key and check if the red light on the front cover of i-Player is blinking
Display or hide the
Interactive Menu
One-click access to Internet
Neighbourhood categories (News, Sports,
Gaming, Dining, Kids, Money and more)
One-click access to email,
My i-Player (My Player)
and Internet services
Display or hide
the Channel List
Previous
screen/Next
screen
Standard coloured
action keys
Sound
controls
Cancel /
Disconnect /
Stand-by mode
Information
and options
Access to
blue label
functions*
Change
channels
in PiP
Display or hide
the PiP (Picture-
in-picture) window
Access to TV
Channels
Arrow keys
and Page
up/Page down
8
* For example, to access the RED
button, press maintain the Alt key
down, then press the U key.

e) Navigation basics
i-Player has been designed to let you use both digital television and interactive services with the remote control or with the optional
Wireless Keyboard.
• To use interactive services, use the arrow keys to
navigate in the list of items. Then press OK key to
open the currently selected item. The resulting action
depends on the interactive service and on the selected
item.
• In most i-Player interactive services, additional options
that can be applied to the currently selected item are
available through a pop-up menu called “Options”.
When you see a blue button at the bottom of the
screen called “Options”, press blue to display the
available options and actions.
• In most i-Player interactive services, when a red button
is displayed at the bottom of the screen, the red key
cancels any actions you may have performed (such as
entering text or changing a setting) and leaves the
current screen.
• previous/next allows you to return to a previous
screen or to go forward to a previously visited screen.
f) On-screen controls
When using interactive services, Picture-in-picture (PiP) displays a small TV window showing the last current TV channel
• Press to display/hide the picture-in-picture TV window on interactive screens
• Use to change programme in PiP
• You may also press to freeze live television
PiP
Volume Bar
Status Bar
Channel Number
Channel List PiP (Picture-in-picture)

3. Setting up i-Player
The initial set up process configures your digital television services and performs the maintenance procedure to ensure that your i-
Player holds the latest software version.
Once i-Player is correctly connected (TV, mains and phone), switch it on and follow the on-screen instructions.
After a quick tour explaining how to use the remote control, the initial set up process will:
• Automatically tune in all digital services available in your area (TV channels, radio channels and digital Text)
• Check if a newer i-Player software version is available for you. If a service update is available, your i-Player will automatically receive
it (it lasts about 5 to 10 minutes).
• If a software upgrade is available, you will be informed on the TV screen and you can then decide to perform the upgrade. Software
upgrade is free, with the exception of connection time charged at BT’s standard local call rate.
• Set up a free i-Player mailbox
After the initial set up process, i-Player is ready!
10

4. atching Digital Television
a) The Channel List
The Channel List displays all the available digital television and radio channels as well as your favourite interactive services.
Digital channels and interactive services are displayed using three different colours:
• BLUE for television and Text services*
• YELLO for radios and audio services
• GREEN for user-added favourite Interactive services and for the “What’s On” programme guide
To watch a TV channel, to listen to a digital radio or to go to a favourite interactive service you can either:
• Press to open the Channel List, select the channel using the arrow keys then press OK to access the channel
• Enter the channel number directly with the remote control or the optional keyboard (1 to 3 digits)
• Navigate through digital TV and radio channels with
* When available, digital Text may be presented as a channel that you can select as indicated above, but it may also be added to a
TV programme. In this case, pressing on your remote control accesses digital Text.
b) “ hat’s on” programme guide
The “What’s on” programme guide displays information about the current and the following programmes (now and next) for any
digital television and radio service, when available. It can be accessed either by pressing 0on the remote control or from the Channel
List or from the Interactive Menu.
• Use the arrow keys to highlight the desired digital service and to switch between now and next programme information
• Press OK to go to the highlighted channel
Additional services available from the “What’s on” programme guide are:
• VCR Timers: Use this service to program your i-Player to automatically switch on and off when your VCR is programmed to record
digital channels. (This function does not program your VCR)
• Reminders: Use this service to set up an alarm on a coming programme (next). The reminder will alert you two minutes before the
programme starts.
c) Programme information and interactions
Channel information and interactions available while watching a digital programme or while using an interactive service are displayed
in the info bar and in the more info bar. They are presented only when they are available (may depend on the actual broadcasted
programme).
Info bar and more info bar
• Press once to display the
info bar and twice to display
the more info bar. Press
again to close it. Note that
for interactive services, only
the more info bar is
displayed
• When the info bar or the
more info bar is displayed,
use right/left to switch
between the now and next
current programme informa-
tion and up/down to display
information related to other
channels
• You can press OK to go
directly to the channel
displayed in the info or in the
more info bar.
11
More Info Bar
Info Bar
Programme interactions
• Available interactions with a programme or an interactive screen are displayed in the info bar and detailed in the more info bar.
Use the coloured keys on the remote control or on the optional Wireless Keyboard to select the desired interaction.
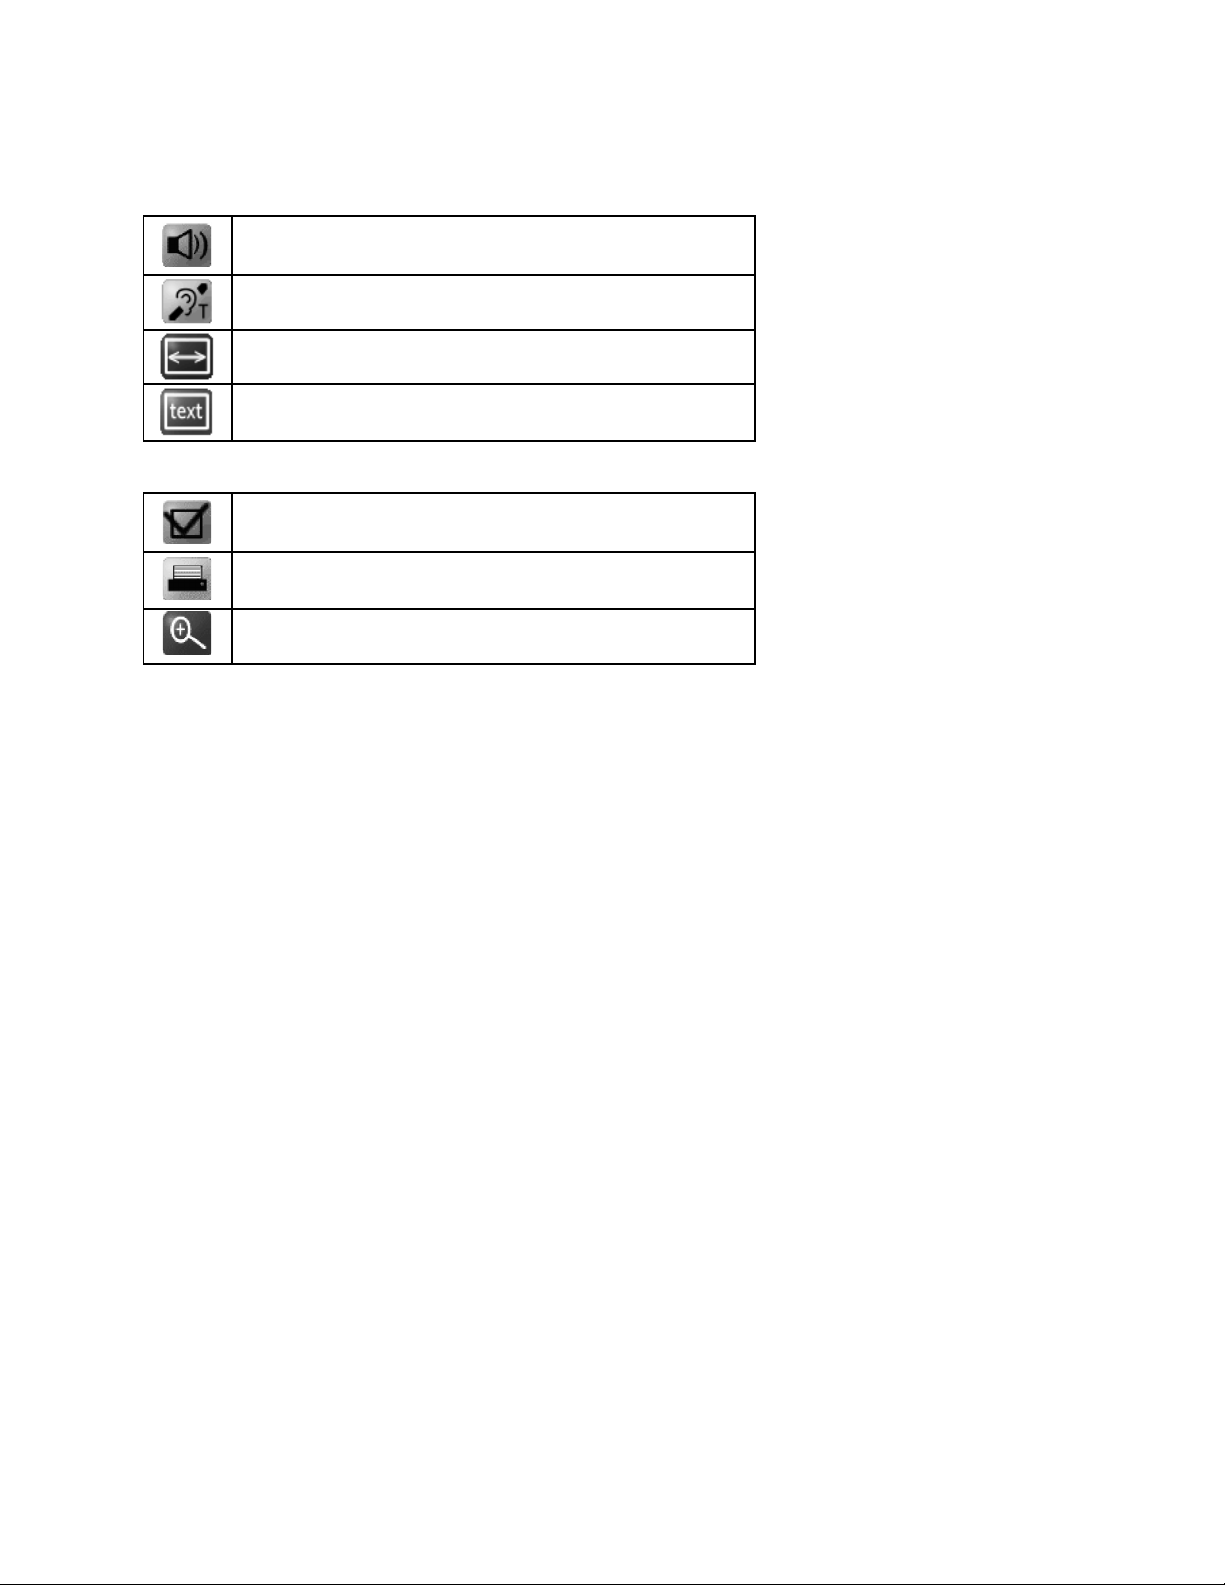
• Common interactions available when watching television are:
• Common interactions available when accessing interactive services are:
d) Channel tuning-in
During the initial set up, i-Player has scanned all digital services available in your area. You may however need to redo the channel
tuning-in, for instance if you change your aerial.
• If you want to re-scan all digital services available in your area, go to: MENU -MY PLAYER -PREFERENCES -TELEVISION -TUNING-
IN, and choose your scanning method
• To control the quality of your digital reception, go to: MENU -MY PLAYER -HELP -DIAGNOSTICS -TV SIGNAL
By default i-Player will automatically scan for new digital services when it is in stand-by mode. If new services are indeed detected, it
will inform you when you turn your i-Player on.
• If you don’t want i-Player to auto-scan digital services during stand-by, go to: MENU -MY PLAYER -PREFERENCES -TELEVISION
-TUNING-IN -OPTIONS and disable this option
12
Switch between audio languages
Turn subtitles on and off
Select TV aspect ratio
Launch digital Text services (info bar must be closed)
Save the current page in your Favourites list
Print the current email or Web page (if you have already connected
a printer)
Zoom in (enlarge the size of displayed text and enable horizontal
scrolling) and out (return to default display mode)

5. Personalising Digital Television
a) Channel List personalisation
i-Player lets you create your own Channel List with your desired digital services and your selection of favourite
Web sites.
Re-number, hide and skip TV channels
• To personalise your Channel List go to: MENU -MY PLAYER -PREFERENCES -TELEVISION -FAVOURITES
• From there you can:
– Re-number digital TV channels
– Hide TV channels in your Channel List
– Skip TV channels (channels will remain available in the Channel List but will not be displayed when using ).
Add a favourite eb site to the Channel list
You can add up to 50 favourite Web sites to your Channel List, numbered from 00 to 4 . Favourite Web sites to which you assign
a channel number can be accessed from the Channel List or through the 3-digit channel number.
b) Audio, video and language personalisation
i-Player offers a set of audio and video settings enabling you to personalise for example your audio or subtitles language, your video
output settings or your TV aspect ratio.
• To access audio, video and language personalisation, go to: MENU - MY PLAYER - PREFERENCES - TELEVISION, then select
LANGUAGES or AUDIO & VIDEO
Additional personalisation services may be found at: MENU -MY PLAYER -PREFERENCES -USER INTERFACE
c) Parental Lock
i-Player lets you control the access to the digital TV and radio channels as well as to interactive services using a
4-digit PIN code. When trying to access a locked channel or service, the PIN code must be entered before the channel or service is
displayed. Once unlocked, the parental control is disabled until i-Player goes to stand-by mode or is switched off.
• To access to the Parental Lock service, go to: MENU - MY PLAYER - PREFERENCES - PARENTAL LOCK, then select channels or
services to be locked
• The default 4-digit PIN code is set to “0000”
• If this PIN code does not work, if you forget your PIN code, or if someone else has changed it, use the backup PIN code
“35832417”. You will then be asked to choose a new PIN code.
13

d) Advanced audio connection
Connect i-Player to a Hi-Fi system
• To connect i-Player to a Hi-Fi system, connect an audio cable (not included) between your Hi-Fi system and i-Player AUDIO OUT
“line” jack, as shown below:
Connect i-Player to a home cinema system
• To enjoy watching programmes with digital 5.1 sound*, connect i-Player S/PDIF output to a home cinema system using an optical
cable (not included) as shown below. Pressing the mute key can mute the audio on the analogue output.
• Then go to: MENU -MY PLAYER -PREFERENCES -TELEVISION -AUDIO & VIDEO, change AUDIO OUTPUT menu to “5.1 DIGITAL
TO S/PDIF” and SAVE.
* Digital 5.1 audio is only available when broadcasted in the programme.
14

6. Recording Digital Programmes
a) Standard VCR connection
To connect your VCR to your television and to i-Player, refer to the initial set up instructions in the “Getting started” chapter.
b) VCR Timers
i-Player lets you set VCR Timers to switch i-Player on and off and to tune in to digital channels when your VCR is programmed to
record. You also need to set your VCR to record on the A/V source connected to i-Player, as this function does not instruct your VCR
to start and to stop recording.
Note that some VCR models can be automatically started and stopped by i-Player simply through the SCART cable. You may wish to
consult your VCR documentation to find out if your VCR does support this feature (called “PIN8 recording”).
• You can set a VCR Timer directly from the “What’s on” programme guide by highlighting a programme then selecting VCR TIMER
in the options menu. An icon is displayed on the selected programme to indicate that a timer has been set.
• To edit existing VCR Timers and set new ones, go to: MENU -MY PLAYER -VCR TIMERS.
c) Advanced VCR connections
Advanced VCR connection
If you have a VCR, by connecting i-Player “RF OUT” to your VCR “ANTENNA” input using a high quality aerial lead, you’ll be able to
record analogue programmes while watching another digital programme. If you then also connect the VCR “RF OUT” to your TV
“ANTENNA” input using the supplied aerial lead, you’ll also be able to record digital programmes while watching another analogue
programme.
If you don’t have a VCR, by connecting the supplied aerial lead from i-Player “RF OUT” to your TV “ANTENNA” input, you’ll be able
to watch analogue programmes in addition to digital channels.
Note that i-Player only provides an RF loop through and doesn’t include a RF modulator. Therefore you must use the SCART lead to
watch digital programmes.
• To use i-Player loop through function with your VCR, use the diagram below:
Add a DVD player or a game console
• To connect i-Player to a TV with 1 SCART input, to a VCR and to a DVD player (or a game console), use the connection diagram
below:
• To connect i-Player to a TV with 2 SCART inputs, to a VCR and to a DVD player (or to a game console), use the connection diagram
below:
15

7. Using Messaging Services
i-Player lets you send and receive emails on your television using up to five email addresses. You can use free i-Player email addresses
or your own existing email addresses.
To access the messaging services, MENU -MESSAGES or press EMAIL on your optional Wireless Keyboard
a) Receiving and sending emails
• If you have more than one email address, you must first select your mailbox from the list of available mailboxes. Press OK to open
the mailbox or press blue to access more options
• Once your mailbox is open, press blue to display available options like checking for newly received emails or writing a new email
• When writing a new email, press blue to see the available options (selecting an address from you address book, sending the
message)
• To attach a photo snapshot from a connected Web cam or from the live television programme, select PHOTO SNAPSHOT in the
options menu
b) Address book
The Address Book lets you store up to 100 names, email addresses and phone numbers for your contacts:
• To access the Address Book, go to: MENU - MESSAGES - ADDRESS BOOK
• Press blue to access the options menu in order to create a new contact or to edit an existing contact
You can also assign an ID photo stored in a supported USB storage device to a contact:
• Select a contact in the Address Book and select MODIFY in the options menu
• Then select CHOOSE PHOTO in the options menu
• Browse your storage device and select the desired photo.
c) Creating and modifying mailboxes
• To create a new mailbox or to edit an existing one, go to: MENU -MY PLAYER -PREFERENCES -INTERNET -EMAIL and press blue
to see the available options.
Using own existing email addresses
Note: some email Providers may not permit you to access your mailbox through i-Player.
• To create a mailbox using your own existing email address, press blue and select EXISITING ADDRESS in the options menu.
• Enter and save your email account details available from your email Provider. You must enter your email address, your user login,
your password and the provider’s POP3 server name.
Using i-Player free email addresses
• To create a free mailbox using a new i-Player email address (such as [email protected]), press blue and select NEW FREE
ADDRESS in the options menu
• Follow the step-by-step on-screen instructions and enter the information requested.
16

8. Using Interactive Services
i-Player lets you surf the world-wide-web on your television. You may access a web site from:
• Your favourite Web sites list
• The Internet Neighbourhood services offered by major Internet content and services providers
• The Web Search service (either by directly entering a Web address or by using a search engine).
a) My Favourites
My Favourites service let you store up to 50 Web sites for easy access.
• To access your favourite Web sites list, go to: MENU -FAVOURITES
• To add a new favourite in your list, you can either:
– Select ADD A FAVOURITE in the OPTIONS menu of YOUR FAVOURITES screen, then enter and save the requested information
– Surf to a Web destination, press then green to save the current Web address in your favourites.
If you assign a 3-digit number (from 00 to 4 ) to a favourite web site, you’ll be able to access it by its number or from the
Channel List.
b) Internet Neighbourhood
The Internet Neighbourhood is a set of interactive services offered by major Internet content and services providers. They are
organised in categories.
• To access an Internet Neighbourhood service, go to: MENU -SERVICES, then select an interactive service category (INFO, FUN…)
or press directly a category on your optional Wireless Keyboard
• From the list of available services, select the one that you wish to launch.
c) eb Search service
• To access the Web Search service, go to: MENU -SERVICES -INTERNET or press WEB on your optional Wireless Keyboard
• Enter a valid Web address (URL) in the SURF TO field to go directly to a Web site. You don’t need to enter “http://”, “.com” or
“.co.uk”. For example, to go to “http://www.yahoo.co.uk/”, simply enter “yahoo” and press OK
• Enter one or several keywords or even a question in the SEARCH field to get a list of Web sites related to your keyword(s) or answers
to your question, then press OK.
eb@tv Report Service
Web@tv Report service lets you inform the i-Player team that the Web site you are visiting is not displaying correctly on the television.
i-Player allows you to access any Web destination. As Web sites are often designed for personal computers display, you may notice
that some Web sites do not display properly (sometimes not at all) on the TV. By informing us about problems you find on the Web
sites that you visit, we can improve i-Player in the future.
• To access the Web@tv Report Service, press while on a Web page, then press red. You will be directed to an automatic email
message that will be sent to the i-Player team.
17

d) Changing the Internet connection method
• To change the way i-Player connects to the Internet, go to: MENU -MY PLAYER -PREFERENCES -INTERNET -CONNECTION
• To diagnose and troubleshoot the current connection, go to: MENU -MY PLAYER -HELP -DIAGNOSTICS -NETWORK.
Share your existing broadband connection
You can use your existing broadband connection by connecting i-Player to your broadband access (ADSL modem, Cable modem,
Ethernet router or Ethernet-ready dwelling unit) with a supported USB-Ethernet adapter. In this configuration, there are no additional
connection charges and your telephone line remains available.
• Simply insert the USB-Ethernet adapter into the USB port of i-Player
• When the Ethernet adapter is detected, i-Player establishes the Ethernet connection automatically
• Manual configuration and advanced options are available from the Internet connection preferences screen
• If you need to switch back to a modem connection, you must unplug the USB-Ethernet adapter.
Use an existing ISP access package
You can set up i-Player to connect using your own Internet Service Provider (ISP) connection package. This feature may depend on
your ISP capabilities and services:
• Select MY OWN ISP in the Access provider list, then press blue to save
• Enter your account details as supplied by your ISP (access telephone number, user login, password and SMTP server name).
• You can also set additional modem preferences through: MENU - MY PLAYER - PREFERENCES - INTERNET - CONNECTION -
MODEM
• You can set up two different Internet telephone connections.
Use i-Player default telephone connection
You can use the i-Player pay-as-you-go default Internet access service charged per minute at BT’s standard local call rate:
• Select DEFAULT CONNECTION in the Access provider list, then press blue to save
• You can also set additional modem preferences through: MENU - MY PLAYER - PREFERENCES - INTERNET - CONNECTION -
MODEM.
Note that the i-Player default connection dials an 0845 telephone number - accessible from a BT line. You may need to use the 1470
prefix to ensure calling line identity is released. If a BT line is not used, check with your telephone Provider to see if an additional or
alternative prefix is required to access this number.
Use your existing iFi network
You can connect i-Player to your existing wireless network using a compatible USB-WiFi adapter. You can use i-Player’s WiFi
capability in either ad-hoc mode (WiFi adapter to WiFi adapter) or architecture mode (WiFi adapter to WiFi base). By connecting to
your wireless network, you’ll be able to share your existing Internet connection.
• To set a WiFi connection, start by connecting a supported USB WiFi adapter to i-Player USB port. When i-Player is detected, you
can configure your WiFi connection.
• Go to: MENU -MY PLAYER -PREFERENCES -INTERNET -WIRELESS to set up the WiFi parameters according to your existing WiFi
device, including if necessary the WEP key.
18

9. Using Multimedia Services
a) Connecting digital USB accessories
i-Player is compatible with a wide range of digital USB accessories making your television a centre point for digital entertainment and
communication.
• To use a digital USB accessory, just connect it to the i-Player USB port. i-Player will detect it and install it automatically
• You must use a USB hub in order to connect more than one USB device to i-Player (for example a USB-Ethernet adapter, a Web
cam and a disk-on-key)
• To check the status of USB accessories connected to i-Player, go to: MENU -MY PLAYER -HELP -DIAGNOSTICS -USB.
The list of supported USB accessories is updated from time to time or when a new software upgrade is made available.
• To check the updated list of supported accessories, go to: MENU -MY PLAYER -GET MORE -ACCESSORIES.
There are five types of USB accessories that you can use with i-Player:
USB-Ethernet adapter
Use a supported Ethernet adapter to share your existing broadband connection.
iFi adapter:
Use a supported Wifi adapter if you want to connect i-Player to your existing wireless network.
Storage devices
Use a supported external USB storage device like a disk-on-key, a pen-drive, a memory key or a USB hard drive to listen to MP3 songs,
view pictures and play videos that you have downloaded using a personal computer
• Connect a supported external storage device to the USB port of i-Player
• i-Player will automatically launch the Multimedia services enabling you to browse and to access the files and folders it contains
• If you need to access your storage device again, simply go to: MENU -MULTIMEDIA.
Printers
Use a supported USB printer if you want to print emails or Web pages.
• Connect a supported printer to the USB port of i-Player
• When reading an email or when watching a Web page, press then yellow to print the current display.
eb cams
Use a supported USB Web cam if you want to attach photo snapshots to email messages or to assign ID photos to your mailboxes or
to your contacts.
• Connect a supported Web cam to the USB port of i-Player
• To take a photo snapshot, either start composing a new mail, go to the mailbox preferences or to your address book.
b) Accessing a storage device
The list of the connected storage devices can be found at: MENU -MULTIMEDIA.
1
USB Port

• To add a new storage device, plug it in to the USB port of i-Player or manually configure a remote storage if you have access to an
FTP server
• To browse a storage device, select it from the list.
c) Playing multimedia files
i-Player lets you play multimedia files like MP3 songs and videos, and view digital pictures. Refer to the Technical Specifications
section for a list of supported multimedia formats.
• To browse a storage device, select it from the list
• You can use the LIST OPTIONS from the options menu to list only photos, videos or songs
• Press OK to play the selected file or to browse the selected folder or storage
• You can also move, delete, copy or rename a file. To do so, highlight it in the list, press blue and select the corresponding command
from the options menu
• To take and save a photo snapshot to a storage device, connect a supported USB Web cam and select PHOTO SNAPSHOT from
the options menu.
20
Other manuals for i-PLAYER
1
Table of contents
Other NETGEM TV Receiver manuals


