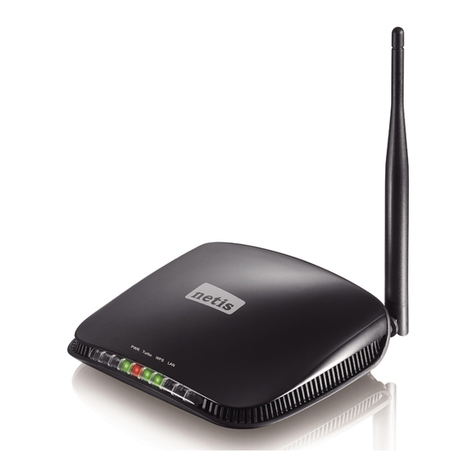
Netis WF2222 User manual

netis Wireless N Ceiling-Mounted Access Point
Quick Installation Guide
R
Model No. WF2222

CONTENTS
1. Package Contents
2. Hardware Information
2.1 Front Panel
2.2 Rear Panel
3. Hardware Connection
A. Via PSE Device
B. Via PoE Power Injector
C. Via Power Adapter
4. Network Configuration
5. Hardware Installation
A. Ceiling Mounting
B. Wall Mounting
Troubleshooting
Appendix A: LED Locator
Appendix B: Set Static IP for Computer
Appendix C: FCC Statement
1
1
1
2
3
3
4
5
6
9
9
12
14
15
16
17

1.Package Contents
2. Hardware Infor mation
Power Adapter Mounting Kits
Wireless N Access Point Quick Installation Guide
netis Wireless N Ceiling-Mounted Access Point
Qui ck Inst al la tio n Gu id e
PoE Power Injector
R
The following items should be found in your package:
*The Mounting Kits should including a Mounting Bracket, Wing Nuts, Washers,
Plastic Wall Anchors, Self-tapping Screw and Pan-head Screws.
Wing Nuts(4) Washers(4) Plastic Wall
Anchors(4)
Self-tapping
Screw(4)
Pan-head
Screws(4)
2.1 Front Panel
R
LED
LED Status Indication
Solid Blue
Solid Orange
Flashing LED locator function is enabled.
Not connected to a local area network.
Connected to a local area network.
netis Wireless N Ceiling-Mounted Access Point Quick Installation Guide
Mounting Bracket
Mod el No. WF 222 2
Off The device is powered off.
1

2.2 Rear Panel
Interface/Button Description
LAN1
LAN2
Default
The LAN1 port is used to connect to a router to transmit
data or to a PSE (Power Sourcing Equipment), such as
a PoE Switch, for both data transmission and Power
over Ethernet through Ethernet cable.
PWR
The LAN2 port is used to a router to transmit data or to
the provided PoE Power Injector, for both data transmission
and Power over Ethernet through Ethernet cable.
The Default button is used to restore the device's factory
default settings.
The PWR port is used to connect to the provided Power
Adapter.
netis Wireless N Ceiling-Mounted Access Point Quick Installation Guide
PWR
Defa ult
LAN1LAN2
2
PWR
Default
LAN1LAN2

3. Hardware Connection
The netis Access Point supports three modes to be powered according different
applications: via three modes: via PSE Device, via PoE Power Injector, via Power Adapter.
A. Via PSE Device
1) Connect the LAN1 port of netis Access Point to your PSE device(PoE Switch)with
an Ethernet cable.
2) Then go to “4. Network Configuration”, to configure WF2222.
Router
Internet
netis Wireless N Ceiling-Mounted Access Point Quick Installation Guide
Please check the correct application according to your network environment, and
follow the corresponding steps for the selected application.
AP AP AP
PoE Switch
3
Typical Application and hardware connection as follows:

B. Via PoE Power Injector
Typical Application and hardware connection as follows:
PoE Power Injector
Power Adapter
Internet
Main Router
1) Connect your main router to the LAN/WAN port on the PoE Power Injector with an
Ethernet Cable.
2) Connect the LAN2 port of netis Access Point to the PoE port on the PoE Power Injector
with an Ethernet Cable.
3) Plug the Provided Power Adapter into the DC-IN jack on the PoE Power Injector and
the other end to a stand electrical wall socket.
4) Then go to “4. Network Configuration”, to configure WF2222.
netis Wireless N Ceiling-Mounted Access Point Quick Installation Guide
4

C. Via Power Adapter
Typical Application and hardware connection as follows:
Internet
R
Power Adapter
1) Connect your computer or main router to the LAN1 port or LAN2 port of
netis Access Point.
2) Plug the Provided Power Adapter into the PWR port of netis Access Point and
the other end to a stand electrical wall socket.
3) Then go to “4. Network Configuration”, to configure WF2222.
netis Wireless N Ceiling-Mounted Access Point Quick Installation Guide
Main Router
5

4. Network Configuration
The netis Access Point supports multiple modes including AP, Multi-SSID (VLAN),
Repeater, WDS and Client. In default, netis Access Point works in AP mode, it can be
used to create one or more wireless networks from an Ethernet connection. It is
suitable for the room where there's already a wired router but you need additional
wireless hotspots.
Here we provide the step-by step configuration process of AP mode.
Step 1: Power on all the devices.
Step 2: Search and connect to the netis Access Point's network “netis_XXXXXX” on
your wireless computers or mobile devices. The XXXXXX is the last 6 digits of the
Access Point's MAC address. The default wireless password is “password”.
If your main router is already connected to the Internet, you'll be online through
your wireless computers or mobile devices now!
If you want to change the default wireless network name and password for netis
Access Point or set up more wireless networks (Multi-SSID mode), please go on with
the steps.
Step 3: Open your browser on your wireless computer and type “http://netisap.cc” in
the address field to visit netis Access Point's web management page.
Step 4: In this Quick Setup page, you will see the blue section for the default wireless
network “netis_XXXXXX”.
http://netisap.cc
netis Wireless N Ceiling-Mounted Access Point Quick Installation Guide
6

Situation A
You may click the icon to change the settings for “netis_XXXXXX”, including the
wireless network name (SSID) and password. Click Save button to make your settings
take effect.
Note: Now you're wirelessly connected to the netis Access Point's network with default
wireless name and password. Once the new settings take effect, you'd better search for
the new one and connect to it with the new password.
Situation B
To create more wireless networks, you can click on the “AP” tab on the left and set
the wireless network name (SSID) and password.
netis Wireless N Ceiling-Mounted Access Point Quick Installation Guide
7

Click Save button to make your settings take effect. Then you will see the settings
updated in the Quick Setup page. There're two blue sections for two wireless networks
broadcasted by netis Access Point.
Note: The netis Access Point supports up to 3 different AP networks in one time. You may
click the icon for each network to change the settings for the corresponding section.
When using Multi-SSID, you can assign different VLAN ID to different wireless network,
to make netis Access Point works with switch which as VLAN assigned for different
access level and authority.
netis Wireless N Ceiling-Mounted Access Point Quick Installation Guide
8

Step 5: Now you can connect your wireless devices to the modified wireless network or
new AP networks for Internet Access wirelessly.
Remark:
The netis Access Point also supports Repeater, Client, WDS modes to bridge or repeat
signal from the existing wireless network, providing various wireless solutions.
You can click on the “Extender” tab in quick setup page. Select the mode which
you need and configure it.
5. Hardware Installation
The netis Access Point can be ceiling mounted or wall mounted according to your
setup, we particularly recommend the ceiling mounted.
Note:
* Make sure the thickness of the ceiling must be over 17mm and the beaver gravity of
ceiling must be over five kilograms.
* If your ceiling do not meet the requirement as above, please add a plate which with
better strength on back of the ceiling.
!
netis Wireless N Ceiling-Mounted Access Point Quick Installation Guide
(For the detail configuration, please refer to “Support” -> “FAQ” on our official
website-http://www.netis-systems.com )
A. Ceiling Mounting
9

Step 1: Remove the selected ceiling and place the mounting bracket on the suitable
location of the ceiling, please note that the smooth-surface of mounting bracket should
face to the ceiling tile, then mark the positions of the four mounting slots, and a hole
which is 5cm in front of the U-shaped notch for the Ethernet cable to feed through.
Mark the positions of the
four mounting slots and
an Ethernet cable hole
Step 2: According to the positions that marked, drill four screw holes and one for
Ethernet cable.
Step 3: Attach the mounting bracket to the ceiling by using the provided mounting kits.
Ethernet cable hole
Wing Nut Pan-head Screw
Washer
netis Wireless N Ceiling-Mounted Access Point Quick Installation Guide
10

Step 4: Feed the Ethernet cable through the hole, and connect the Ethernet cable to the
Ethernet port of netis Access Point.
Step 5: Set the ceiling tile back into place, then fix netis Access Point to the mounting
bracket by aligning arrows as shown below.
R
R
netis Wireless N Ceiling-Mounted Access Point Quick Installation Guide
11

B. Wall Mounting
To mount netis Access Point on a wall, please follow the steps below.
Step 1: Place the mounting bracket on the wall and mark the positions of the four
mounting slots, then drill four holes on the wall. Please note that the U-shaped notch
must be consistent with the actual direction of the network.
Mark the positions of the four
mounting slots
Step 2: Attach the mounting bracket to the wall by using the provide mounting kits.
netis Wireless N Ceiling-Mounted Access Point Quick Installation Guide
12
Step 3: Connect the Ethernet cable to the Ethernet port of netis Access Point.

Plastic Wall Anchor
Self-tapping Screw
Step 4: Fix netis Access Point to the mounting bracket by aligning arrows as shown below.
netis Wireless N Ceiling-Mounted Access Point Quick Installation Guide
R
13

Tip 1:
Default Login Address: http://netisap.cc
Default Wireless SSID: netis_XXXXXX
Default Wireless Password: password
(XXXXXX: Last 6 digits of MAC Address, you may find it from the bottom label of the device.)
Tip 2:
You can click on “Advanced” button on the left for the further settings
Troubleshooting
How do I restore my netis Access Point's configuration to its default settings?
Q
A
A
With the Access Point powered on, use a pin to press and hold the Default button for 8 to
10 seconds before releasing it. The Access Point will reboot and all configurations are
back to factory default.
QWhat can I do if I cannot access my Access Point's web management page?
1) Check the hardware connection according to your Hardware Connection and make sure
that your computer is connected to netis Access Point successfully.
2) If your Access Point is already connected to the main router, please check your computer
is set to obtain IP address automatically.
3) If you Access Point isn't connected to the main router, please try to set a static IP
(such as 192.168.1.110) for the wired/wireless adapter of your computer. Please refer to
“Appendix B: Set Static IP for Computer”.
4) If there's no change, please reset the device by Default button and try all the settings
from the begging.
netis Wireless N Ceiling-Mounted Access Point Quick Installation Guide
14

Appendix A: LED Locator
Once more than one access point is installed in different rooms of the house, so you
can find the device position through LED locator function quickly. Please configure
as follows.
1) Open your browser on your wireless computer and type “http://netisap.cc” in the
address field to visit netis Access Point's web management page.
2) In quick setup page, click on the “LED” tab on the left.
3) Set the LED Locator Timing, and click on the “Start”, then the LED in the
front panel of netis Access Point starts flashing.
Now you can find out the device from where it's installed in the house for a specified time.
netis Wireless N Ceiling-Mounted Access Point Quick Installation Guide
15

Appendix B: Set Static IP for Computer
Please make sure that your computer is connected to netis Access Point with an
Ethernet cable (or wirelessly).
Then you may manually set the IP address of the wired (or wireless) network adapter
on your computer as below.
IP Address/ IPv4 Address: 192.168.1.x (1<x<254)
Subnet Mask: 255.255.255.0
Default Gateway/ Router: 192.168.1.254
Primary DNS: 192.168.1.254 or 8.8.8.8
Secondary DNS: Null
For Window 8/7/Vista
1) Go to “Setting” (Win 8)/”Start” (Win 7/Vista)>”Control Panel”.
2) Left-click on “Network and Internet”>“Network and Sharing Center”>“Change
adapter settings” (Win 8/7)/ “Manage network connections” (Win Vista).
3) Right-click on “Local Area Connection” (wired adapter)/ “Wireless network
Connection” (wireless adapter) and left-click on “Properties”.
4) Double-clicked on “Internet Protocol Version 4 (TCP/IPv4)”.
5) Select “Use the following IP address” and enter the address manually in
corresponding field, then click OK.
For Window XP/2000
1) Go to “Start”>“Control Panel”.
2) Left-click on “Network and Internet Connections”>“Network Connections”.
3) Right-click on “Local Area Connection” (wired adapter)/ “Wireless network
Connection” (wireless adapter) and left-click on “Properties”.
4) Double-clicked on “Internet Protocol (TCP/IP)”.
5) Select “Use the following IP address” and enter the address manually in
corresponding field, then click OK.
For MAC OS
1) Click on the “Apple” menu> “System Preferences”.
2) Click on “Network” icon.
3) Click on “Ethernet” (wired adapter)/ “Airport” (wireless adapter) in the left side
box and click on “Advanced” in the lower right corner.
4) In the top options, select “TCP/IP”.
5) In the pull-down menu next to “Configure Ipv4”, select “Manually” and enter the
address manually in corresponding field, then click Apply.
netis Wireless N Ceiling-Mounted Access Point Quick Installation Guide
16

Appendix C: FCC Statement
This equipment has been tested and found to comply with the limits for a Class B
digital device, pursuant to part 15 of the FCC Rules. These limits are designed to
provide reasonable protection against harmful interference in a residential
installation. This equipment generates uses and can radiate radio frequency energy
and, if not installed and used in accordance with the instructions, may cause harmful
interference to radio communications. However, there is no guarantee that
interference will not occur in a particular installation. If this equipment does cause
harmful interference to radio or television reception, which can be determined by
turning the equipment off and on, the user is encouraged to try to correct the
interference by one or more of the following measures:
—Reorient or relocate the receiving antenna.
—Increase the separation between the equipment and receiver.
—Connect the equipment into an outlet on a circuit different from that to which the
receiver is connected.
—Consult the dealer or an experienced radio/TV technician for help.
FCC Radiation Exposure Statement
This device complies with FCC radiation exposure limits set forth for an uncontrolled
environment and it also complies with Part 15 of the FCC RF Rules. This transmitter
must not be co-located or operating in conjunction with any other antenna or
transmitter.
Operations in the 5150 to 5250MHz band are restricted to indoor use only. (For 5GHz
devices)
This device complies with Part 15 of the FCC Rules. Operation is subject to the
following two conditions: (1) this device may not cause harmful interference, and
(2) this device must accept any interference received, including interference that may
cause undesired operation.
Caution!
Any changes or modifications not expressly approved by the party responsible for
compliance could void the user's authority to operate the equipment.
17
Table of contents
Other Netis Wireless Access Point manuals
