manuals.online logo
Brands
  1. Home
  2. •
  3. Brands
  4. •
  5. NetSuite
  6. •
  7. Indoor Furnishing
  8. •
  9. NetSuite ARLO-GREY-FB-HB/FB + User manual

NetSuite ARLO-GREY-FB-HB/FB + User manual

NOTE : MUST TIGHTEN SCREWS PERIODICALLY WITH USE SCREW WILL BECOME LOOSE.
CHECK TIGHTNESS OF ALL SCREW EVERY 6-8 WEEKS.
A
STEP 2
Component List
Headboard & Headboard Leg
A 1Headboard Panel
B 2
No QtyDescriptions
Leg (L/R)
F
Side Rail
No QtyDescriptions
F 2Side Rail
Adjuster
E
STEP 5
STEP 3
STEP 4
6
D
D
C 1Footboard Panel
D 4Slat
E 4Slat Support
Hardware List In Headboard & Footboard
No QtyDescriptions
1
2
3
4
5
6
JCBC Screw M6 x 30mm
Spring Washer Ø1/4"
Flat Washer Ø1/4" x 13mm
L Key M4
L Key M5
CSK M4 x 32mm
6
6
6
1
1
8
D
E
F
5
F
C
ASSEMBLY INSTRUCTIONS
D
D
"R" Marking behind
the Headboard & Leg
"L" Marking behind
the Headboard & Leg
A
B
STEP 1
4
1
3
2
B
DESCRIPTION : FULL BED HEADBOARD AND FOOTBOARD / TWIN BED/FULL BED SIDE RAILS
ITEM : ARLO-GREY-FB-HB/FB +
ARLO-GREY-TB/FB-SR
REVISION : A
ASSEMBLY COMPLETED
DESCRIPTION : CHEST WITH SLIDING BARN DOOR
ASSEMBLY INSTRUCTIONS
Hardware List
No QtyDescriptions
2
3
4
5
4
4
1
JCBC Screw M6 x 35mm
Spring Washer Ø1/4"
Flat Washer Ø1/4" x 20mm
L Key M4 x 100mm
4
1 4Wood Dowel 8mm x 30mm
CHEST
Push the button upward
Insert the roller into the rail
Component List
Left Leg (L Label) 2
No QtyDescriptions
A
Right Leg (R Label) 2B
STEP 3
Fix the sliding door to the chest according
to step 3.1 to step 3.2. STEP 3.2
STEP 3.1
STEP 2
Align & fasten Leg (A) & (B) to chest according to the
position left and right follow the label correctly.
4
3
2
5
1
"L" Marking at bottom of the
Unit & Top of the Leg
"R" Marking at bottom of the
Unit & Top of the Leg
B
A
STEP 1
Take out the sliding door and put it at a clean and dry place.
Then, take out assembly instructions sheet, hardware pack and
feet packaging from the drawer which marked with the rope.
assembly
instructions
A
B
NOTE : MUST TIGHTEN SCREWS PERIODICALLY WITH USE SCREW WILL BECOME LOOSE.
CHECK TIGHTNESS OF ALL SCREW EVERY 6-8 WEEKS.
ITEM : ARLO-GREY-CH
REVISION : A
DRESSER
ASSEMBLY COMPLETED
DESCRIPTION : DRESSER
ASSEMBLY INSTRUCTIONS
Component List
No QtyDescriptions
A
Hardware List
No QtyDescriptions
2
3
4
5
4
4
1
JCBC Screw M6 x 35mm
Spring Washer Ø1/4"
Flat Washer Ø1/4" x 20mm
L Key M4 x 100mm
4
STEP 3
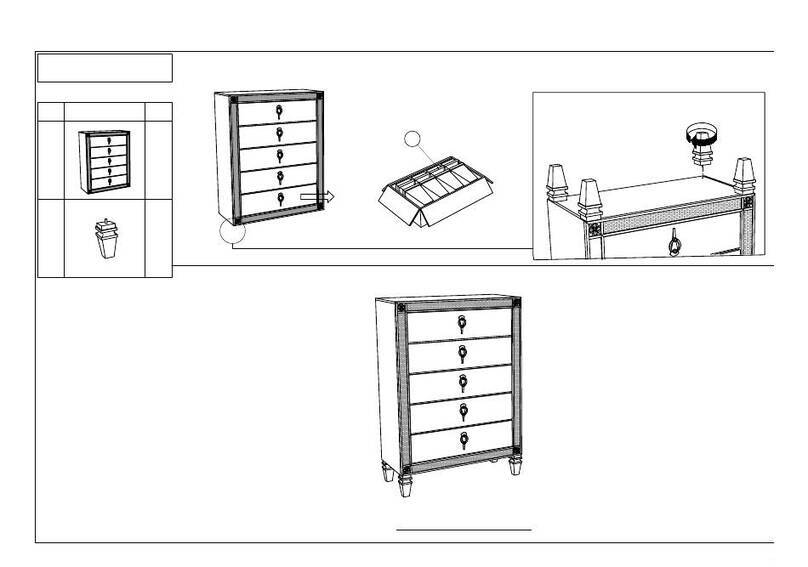
Align and tighten support leg (C) with leveler
to bottom panel of dresser.
Support Leg
C 1
1 4Wood Dowel 8mm x 30mm
Left Leg (L Label) 2
Right Leg (R Label) 2B
assembly
instructions
STEP 2
Align & fasten Leg (A) & (B) to dresser according to the position left and right follow the label correctly.
4
3
2
5
1
"R" Marking at bottom of the
Unit & Top of the Leg
"L" Marking at bottom of the
Unit & Top of the Leg
B
B
A
A
C
STEP 1
Take out assembly instructions sheet, hardware pack and feet
packaging from the drawer which marked with the rope.
NOTE : MUST TIGHTEN SCREWS PERIODICALLY WITH USE SCREW WILL BECOME LOOSE.
CHECK TIGHTNESS OF ALL SCREW EVERY 6-8 WEEKS.
ITEM : ARLO-GREY-DR
REVISION : A
STEP 1
Attach Mirror Support (C) to the Mirror (A) back, then tighten with JCBC
M6 x 35mm (1), Spring Washer Ø 1/4" (2), Flat Washer Ø 1/4" x 20mm (3) and
fully tighten with L Key M4 (4).
STEP 2
Place the mirror with support on the top of dresser (B). Then align center
as shown and tighten with JCBC screw (1), Spring Washer (2), Flat Washer
(3). Tighten using L Key M4 (4).
Component List
A 1Mirror
Hardware List
No QtyDescription
1
B
C
Dresser
Mirror Support
1
2
No QtyDescription
8JCBC M6 x 35mm
A
C
NOTE : MUST TIGHTEN SCREWS PERIODICALLY WITH USE SCREW WILL BECOME LOOSE.
CHECK TIGHTNESS OF ALL SCREW EVERY 6-8 WEEKS.
ASSEMBLY COMPLETED
C
Spring Washer Ø1/4 "
Flat Washer Ø1/4" x 20mm
L Key M4
2 8
3 8
4 1
4
1
2
3
C
B
A
4
123
Adjust according to
the ground level.
Adjuster
DESCRIPTION : DRESSER / MIRROR
ASSEMBLY INSTRUCTIONS
ITEM : ARLO-GREY-DR +
ARLO-GREY-MR
REVISION : A
ASSEMBLY COMPLETED
DESCRIPTION : NIGHTSTAND
ASSEMBLY INSTRUCTIONS
Component List
Left Leg (L Label) 2
No QtyDescriptions
A
Hardware List
No QtyDescriptions
2
3
4
5
4
4
1
JCBC Screw M6 x 35mm
Spring Washer Ø1/4"
Flat Washer Ø1/4" x 20mm
L Key M4 x 100mm
4
4
3
2
5
1 4Wood Dowel 8mm x 30mm
1
NIGHT STAND
STEP 1
Take out assembly instructions sheet, hardware pack and feet
packaging from the drawer which marked with the rope.
assembly
instructions
Right Leg (R Label) 2B
STEP 2
Align & fasten Leg (A) & (B) to nightstand according to the position left and right follow the label correctly.
"L" Marking at bottom of the
Unit & Top of the Leg
"R" Marking at bottom of the
Unit & Top of the Leg
B
B
A
A
NOTE : MUST TIGHTEN SCREWS PERIODICALLY WITH USE SCREW WILL BECOME LOOSE.
CHECK TIGHTNESS OF ALL SCREW EVERY 6-8 WEEKS.
ITEM : ARLO-GREY-NS
REVISION : A

This manual suits for next models

1

Other NetSuite Indoor Furnishing manuals

NetSuite 0318A User manual

NetSuite

NetSuite 0318A User manual

NetSuite U8210 User manual

NetSuite

NetSuite U8210 User manual

NetSuite YLIME 8028A User manual

NetSuite

NetSuite YLIME 8028A User manual

NetSuite ENZO User manual

NetSuite

NetSuite ENZO User manual

NetSuite SB-085 User manual

NetSuite

NetSuite SB-085 User manual

Popular Indoor Furnishing manuals by other brands

Regency LWMS3015 Assembly instructions

Regency

Regency LWMS3015 Assembly instructions

Furniture of America CM7751C Assembly instructions

Furniture of America

Furniture of America CM7751C Assembly instructions

Safavieh Furniture Estella CNS5731 manual

Safavieh Furniture

Safavieh Furniture Estella CNS5731 manual

PLACES OF STYLE Ovalfuss Assembly instruction

PLACES OF STYLE

PLACES OF STYLE Ovalfuss Assembly instruction

Trasman 1138 Bo1 Assembly manual

Trasman

Trasman 1138 Bo1 Assembly manual

Costway JV10856 manual

Costway

Costway JV10856 manual

moss DESIGN Caisson Credenza Assembly instructions

moss DESIGN

moss DESIGN Caisson Credenza Assembly instructions

Aquaglide FULL DECK 15.0 owner's manual

Aquaglide

Aquaglide FULL DECK 15.0 owner's manual

AREBOS AR-HE-SW30 user manual

AREBOS

AREBOS AR-HE-SW30 user manual

Till-Hilft Fulda 87005.330 Assembly instructions

Till-Hilft

Till-Hilft Fulda 87005.330 Assembly instructions

Twoey Outside 2010 quick start guide

Twoey Outside

Twoey Outside 2010 quick start guide

Hettich Easys 200 operating instructions

Hettich

Hettich Easys 200 operating instructions

The bedboss RELAX 404 Series owner's manual

The bedboss

The bedboss RELAX 404 Series owner's manual

Oeseder Möbelindustrie Bern 991 720 Assembly instructions

Oeseder Möbelindustrie

Oeseder Möbelindustrie Bern 991 720 Assembly instructions

Costway HW68469 user manual

Costway

Costway HW68469 user manual

Next ALIX A27743 Assembly instructions

Next

Next ALIX A27743 Assembly instructions

BROSA Hans Assembly guide

BROSA

BROSA Hans Assembly guide

Prodigg MINIKA PBA015T-FUR installation manual

Prodigg

Prodigg MINIKA PBA015T-FUR installation manual

manuals.online logo
manuals.online logoBrands
  • About & Mission
  • Contact us
  • Privacy Policy
  • Terms and Conditions

Copyright 2025 Manuals.Online. All Rights Reserved.