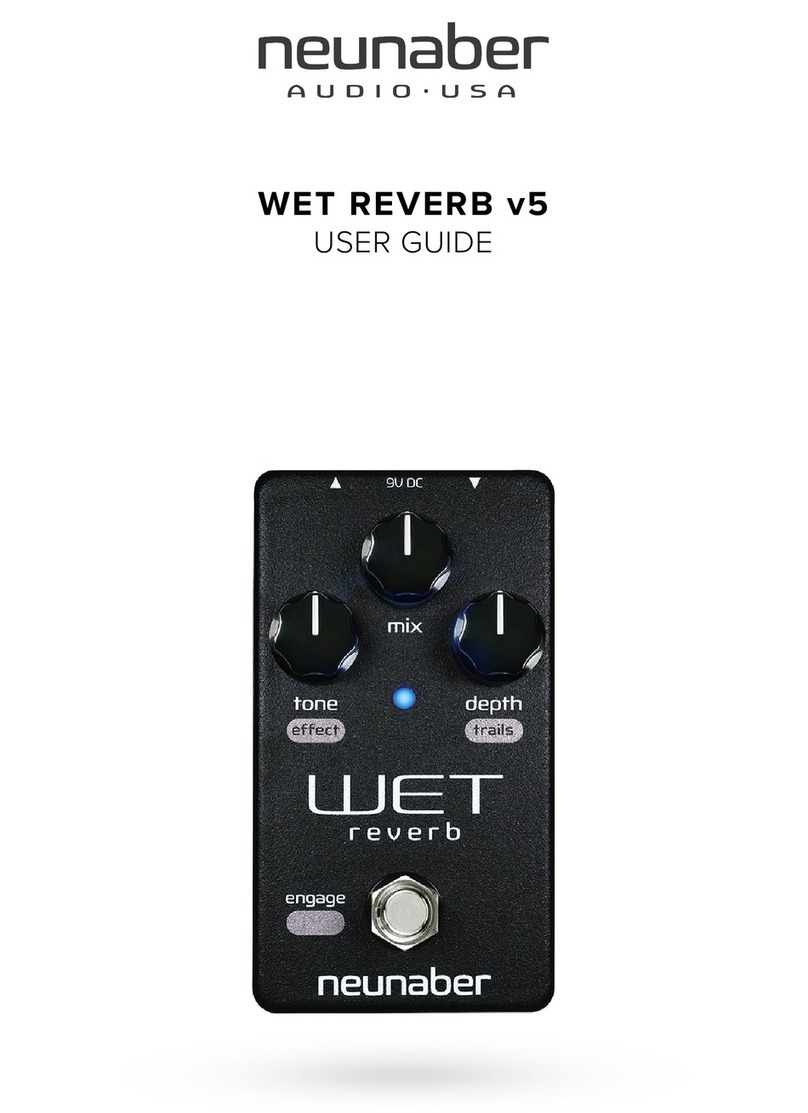
Wet Mono Reverb v4/v4tb
User Guide
Thank you for
purchasing the
Wet™ Mono
Reverb. We really
mean it. We value
that you have
placed your trust in
our product, often
based solely on
what you see and
hear on the
internet. We hope
to earn that trust by
delivering a quality
product that
inspires you to
make better music.
The "tb" stands for "true-bypass". The label on
bottom of the pedal specifies if you have the v4 or
v4tb.
Wet™ Mono Reverb is made in Orange County,
California USA. This User Guide is printed on 100%
recycled paper. Please visit www.neunaber.net for
more information and support.
Warning: This product contains parts that are
sensitive to electro-static discharge (ESD).
Removing the bottom cover may expose these
parts to ESD, which can result in permanent
damage and voids the warranty. For this reason,
we strongly advise that you not remove the
bottom cover or otherwise disassemble the pedal.
Connections
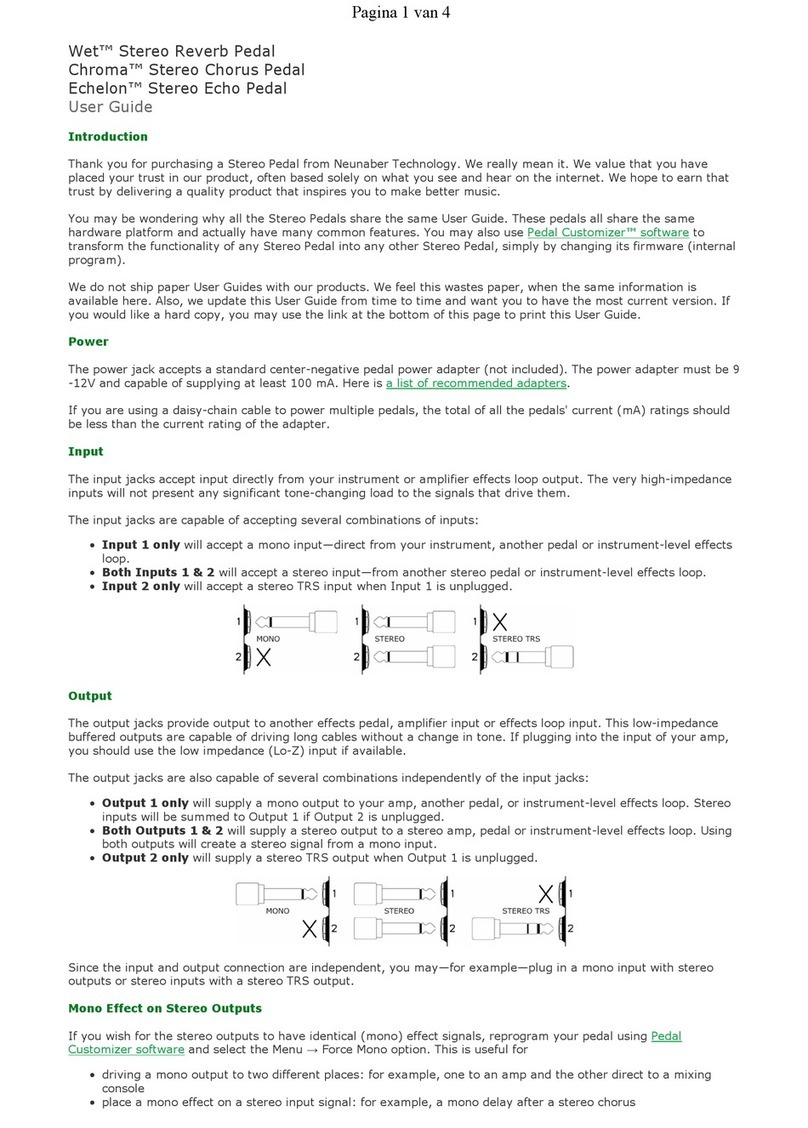
The Power Jack accepts a standard (5.5 mm OD x
2.1 mm ID) center-negative pedal power adapter
(not included). The power adapter must be
between 9V and 12V and capable of supplying
80mA or more. See www.neunaber.net for a list of
recommended adapters.
If you are using a daisy-chain cable to power
multiple pedals, the total of all the pedals' current
(mA) ratings should be less than the current rating
of the adapter.
The Input Jack (right side) accepts input directly
from your instrument or amplifier effects loop
output via a standard 1/4" (6.35 mm) phone
connector.
For line-level (+4 dBu) input, we recommend
keeping the Mix knob below 60% and using a 12V
power adapter.
The Output Jack (left side) provides output to
another effects pedal, an amplifier, or effects loop
return via a standard 1/4" (6.35 mm) phone
connector. The output is buffered and capable of
driving long cables without a change in tone. If
plugging into the input of an amp, you should use
the low impedance (Lo-Z) input if available.
Controls
The Mix Knob controls the mix between the dry
signal and reverb:
•Full counter-clockwise is 100% dry
•Full clockwise is 100% reverb, typically used
with a parallel effects loop
•Approximately 3 o'clock is an even mix: half
dry/half wet
The taper of the Mix knob has been carefully and
painstakingly tailored so that you may easily dial in
just-a-touch through completely awash in reverb.
The Tone Knob controls the tone of the reverb
only. The dry signal is not affected. Counter-
clockwise is darker; clockwise is brighter.
The Depth Knob controls the length of the reverb
tail, or in other words, the size of the acoustic
space.
The Foot Switch bypasses the effect. The LED lights
when the effect is active. Bypassing the effect does
not significantly lower the power consumption, as
it does not turn off power to the pedal.
Bypassing, v4 (Standard Version)
The Wet Mono Reverb v4 implements a buffered
bypass. The signal is always buffered whether the
LED is on or off. The three bypass modes are:
•Buffered Trails—allows the reverb signal to
trail off naturally after the pedal is bypassed
•Buffered Normal—cuts off the reverb tail
immediately when the pedal is bypassed
•Two-stage Bypass—allows the reverb to trail
while the footswitch is held down, then cuts
off when the footswitch is released
Bypassing, v4tb (True-Bypass Version)
The Wet Mono Reverb v4tb replaces the normal
bypass with true bypass, and the bypass modes
become as follows:
•Buffered Trails (same as the v4)
•True Bypass without trails
•Two-stage Bypass—allows the reverb to trail
while the footswitch is held down, then
switches to true bypass when the footswitch is
released
Changing the Bypass Mode
When the pedal powers on, the LED will blink to
indicate the bypass mode:
# Blinks (per sec) Bypass Mode
1 Buffered Trails
To change the bypass mode, unplug the pedal or
turn off the power supply. Hold down the
footswitch while re-applying power to the pedal.
The pedal will cycle to the next bypass mode, and
the number of blinks per second indicates the
current mode.
Repeat this procedure if necessary (by
removing/re-applying power) until you have
reached the desired bypass mode. Release the
footswitch to resume normal start-up.
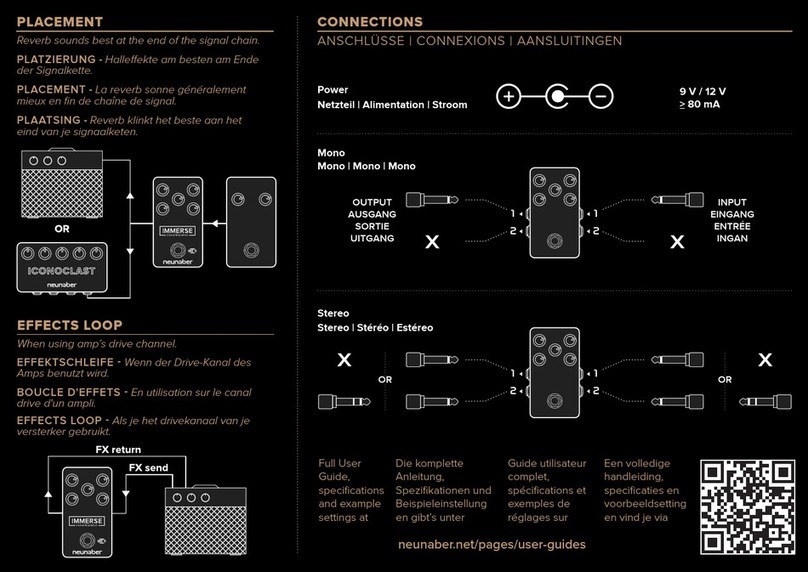
Effect Placement
Reverb should always be placed at the end of the
signal chain, after any distortion or overdrive. If
you are using the distortion in your amplifier, the
Wet Mono Reverb should be placed in the effects
loop.
© 2014 Neunaber Technology, LLC. All rights reserved.
Neunaber logo and Wet™ are trademarks of Neunaber
Technology, LLC. Wet™ Reverb protected by US Patent
#8204240 & China Patent #CN101689840B
