NEUROLIEF Relivion User manual
Neurolief Relivion™ User Manual
Relivion™
User Manual

Manufacturer Neurolief Relivion™ User Manual
2
Important Notice
Copyright © 2018 Neurolief Ltd. All rights reserved.
No part of this publication may be reproduced, transmitted, transcribed, stored in a
retrieval system or translated into any language or any computer language, in any
form or by any third party, without the prior written permission of Neurolief Ltd.
Any software described in this publication is furnished under a license agreement.
All other trademarks are the property of their respective owners. Other company and
brand products and service names are trademarks or registered trademarks of their
respective holders.
Manufacturer
Neurolief Ltd.
12 Giborei Israel
Netanya, Israel
4250412
Tel –+972-9-3730288
Rx Only
Federal (USA) law restricts this device to sale by or on the order of a physician or with
the descriptive designation of any other practitioner licensed by the law of the state
in which he/she practices to use or order the use of the device.
Intended Use
The Relivion™transcutaneous electrical nerve stimulator is intended for the treatment
of headache and is indicated for the acute treatment of migraine with or without
aura in patients 18 years of age or older. It is a prescription device to be self-used at
home.
System Symbols Neurolief Relivion™ User Manual
3
User Manual Purpose
This user manual provides the necessary instructions for safely operating the Relivion™
in accordance with its function and intended use. These instructions include –
•An explanation of the function of controls and indicators.
•The sequence of its operation.
•Maintenance and troubleshooting.
This user manual contains the following chapters –
•Chapter 1, Introducing Relivion™, page 9, introduces the Relivion™device,
describes its components and its package contents.
•Chapter 2, Getting Ready, page 13, describes the preliminary steps to be
performed before using the Relivion™.
•Chapter 3, Using the Device, page 21, describes how to prepare, connect and
use the Relivion™.
•Chapter 4, Troubleshooting and Maintenance, page 33, describes how to
troubleshoot and clean the Relivion™.
•Chapter 5, Technical Specifications, page 37, describes the technical
specifications of the Relivion™device.
•Appendix A, Electromagnetic Compatibility, page 39, provides the
electromagnetic compatibility declaration of the Relivion™.
•Appendix B, FCC Compliance, page 43, describes the FCC compliance of the
Relivion™.
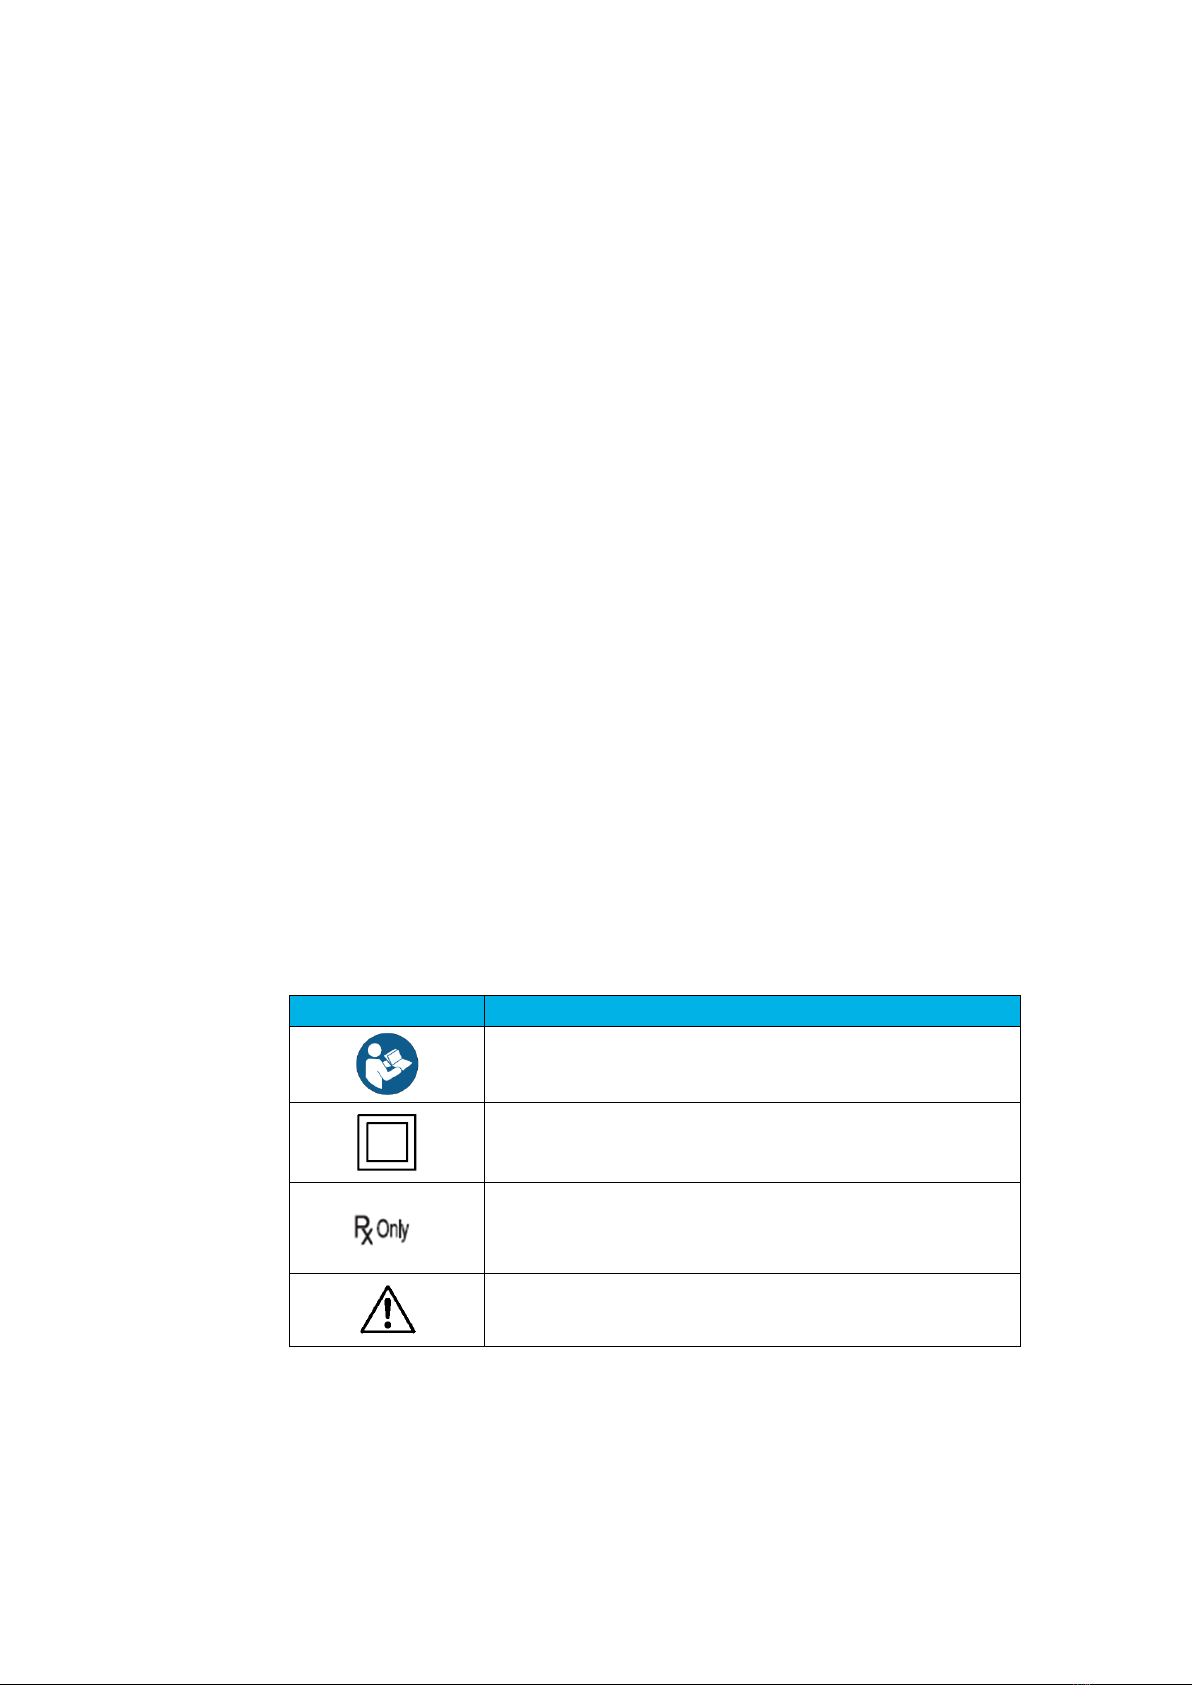
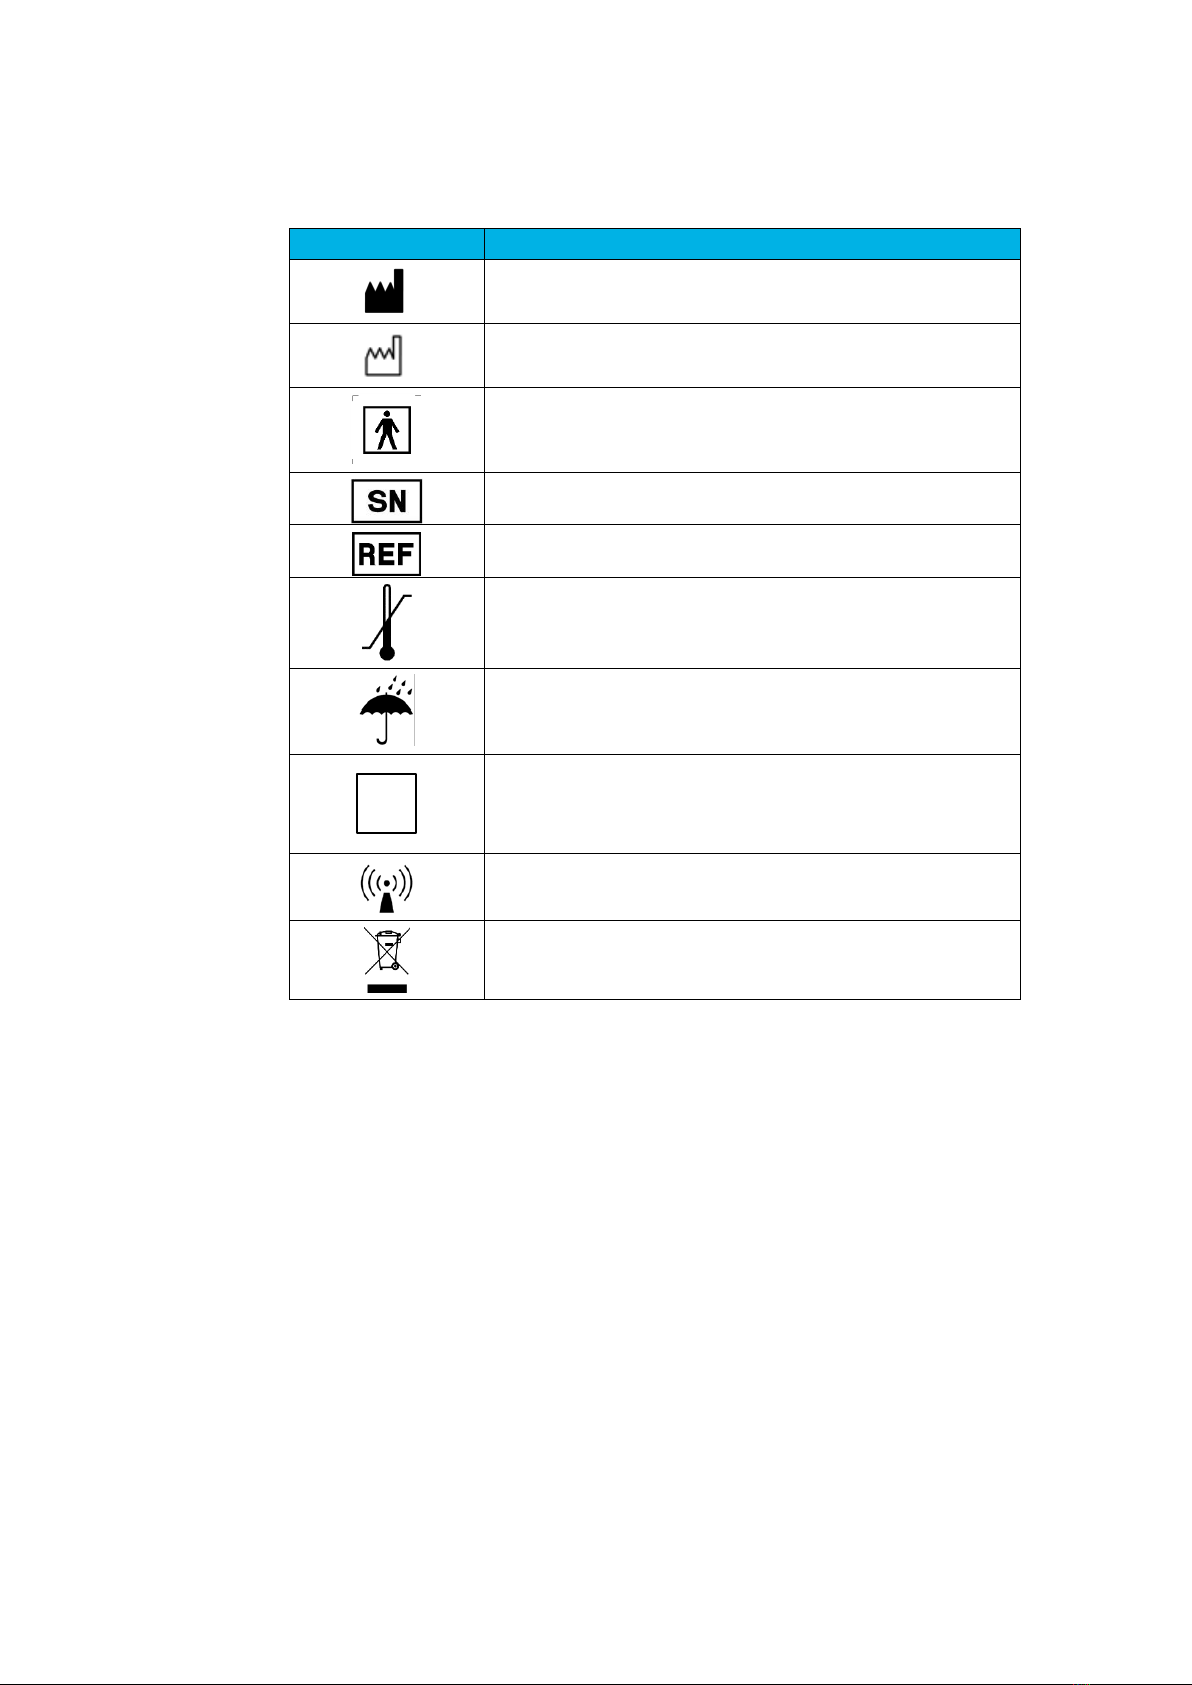
System Symbols
The following describes the symbols used in this document and for this product.
Table 1: System Symbols
Symbol
Description
Consult instruction for use.
Class II equipment.
Prescription only.
Federal law restricts this device to sale by or on the order
of a licensed healthcare practitioner.
Caution, see Instructions for Use.
Safety Information Neurolief Relivion™ User Manual
4
Symbol
Description
Manufacturer.
Manufacturing date.
Type BF Applied part (front and back electrodes).
Serial number.
Catalog number.
Operating conditions
Keep dry.
IP54
IP rating. Indicates the degree of protection.
The Relivion™ device is protected from limited dust ingress
and from water spray from any direction.
RF transmitter.
Waste Electrical and Electronic Equipment Directive
(WEEE).
Safety Information
The following section provides important safety information that must be observed
while using the Relivion™device.
Contraindications
•Subjects with a metal implant or shrapnel in their head, except for dental
implants, should not use the device.
•Subjects with recent brain or facial trauma (less than three months) should not
use the device.

Safety Information Neurolief Relivion™ User Manual
5
•Subjects with skin abrasions on the forehead or occiput at the contact area of
the headset should not use the device.
•Subjects with implanted neurostimulators or any implanted metallic or electronic
device in the head, a cardiac pacemaker or an implanted or wearable
defibrillator should not use the device.
Warnings
•Do not use the device while driving or in conjunction with dangerous activity
during which the user must be alert and focused (for example, while operating
machinery).
•Do not use the device on any other areas apart from the head.
•Do not use the device in the bath or shower.
•Do not use the device while sleeping.
•Do not to use the device in the presence of electronic monitoring equipment
that may not operate properly when the electrical stimulation device is in use.
•Apply stimulation only to intact, clean, healthy skin.
•Do not use this device in locations subject to extreme high or low temperatures
or humidity. Use within the temperature and humidity range according to the
product’s specifications (see Table 7).
•Do not use a device that shows signs of mechanical damage or loose parts.
•No modification of this equipment is allowed.
•Do not interconnect the Relivion™device with other equipment.
Precautions
•The long-term effects of chronic use of the device are unknown.
•The safety of electrical stimulation during pregnancy has not been established.
•Patients with suspected or diagnosed heart disease should follow precautions
recommended by their physicians.
•Patients with suspected or diagnosed epilepsy should follow precautions
recommended by their physicians.
•Keep the device out of reach of children.
•Use this device only with Neurolief electrode pads and the Neurolief charger
supplied with the device. Do not use any accessories, detachable parts and
materials that are not provided by Neurolief.
•If the device does not function as described in this manual, stop using it and
contact customer support.
•The Relivion™ device is designed for use by and on a single adult person. For
hygiene reasons, the device should not be shared.
Conventions Used in This User Manual Neurolief Relivion™ User Manual
6
Adverse Reactions
•Unpleasant sensation during treatment.
•Scalp numbness sensation during and after treatment.
•Persistent tingling sensation after the treatment ends.
•Pain.
•Skin reaction (for example irritation, lesion, burn) beneath the stimulation
electrodes. In this case, treatment should be temporarily discontinued.
•Redness of the skin under or around the electrodes. Skin redness usually
disappears within several hours after treatment.
•Sleepiness, fatigue or sleep disorders.
•Sedative effect during or after treatment.
•Dizziness during or after treatment.
•Tension-type headache after treatment.
•If adverse reactions persist, stop using the device and consult your physician.
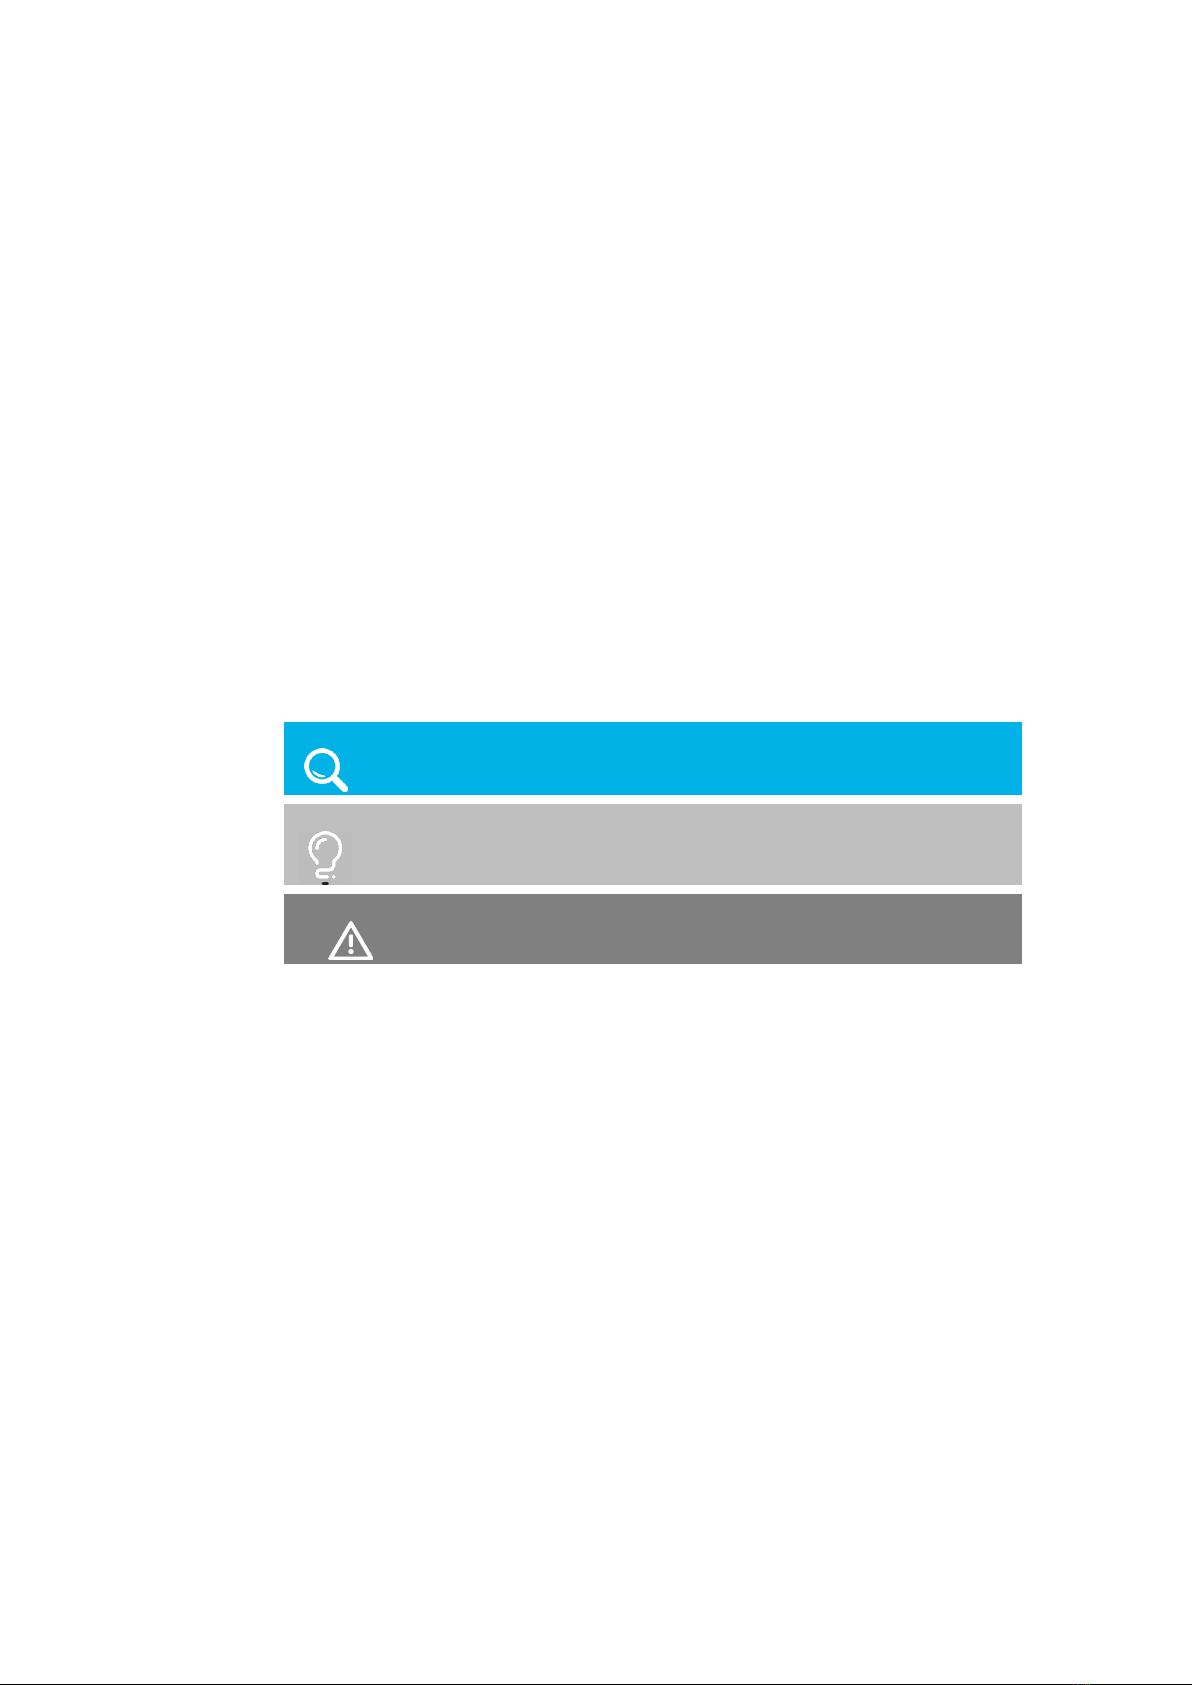
Conventions Used in This User Manual
NOTE
Notes provide additional important information.
TIP
Tips indicate helpful information for using the Relivion™.
WARNING!
Warnings indicate conditions or practices that may result in
damage to the equipment or minor/moderate injury to the patient.

Table of Contents Neurolief Relivion™ User Manual
7
Table of Contents
Chapter 1 –Introducing Relivion™........................................................... 9
1.1 WHAT IS THE NEUROLIEF RELIVION™? ......................................................................... 9
1.1 THE RELIVION™KIT ....................................................................................................... 10
1.2 RELIVION™HEADSET ................................................................................................... 11
Chapter 2 –Getting Ready..................................................................... 13
2.1 STEP 1, CHARGING THE RELIVION™.......................................................................... 13
2.2 STEP 2, ADJUSTING THE RELIVION™TO FIT YOUR HEAD ......................................... 15
2.3 STEP 3, GETTING STARTED WITH THE RELIVION™APP.............................................. 19
Chapter 3 –Using the Device................................................................. 21
3.1 OPERATING BUTTONS AND INDICATORS................................................................. 21
3.2 STEP 1, PREPARING FOR TREATMENT........................................................................ 23
3.3 STEP 2, PERFORMING TREATMENT............................................................................. 29
Chapter 4 –Troubleshooting and Maintenance................................... 33
4.1 TROUBLESHOOTING.................................................................................................... 33
4.2 CLEANING AND MAINTENANCE .............................................................................. 35
4.3 DISPOSAL...................................................................................................................... 35
Chapter 5 –Technical Specifications .................................................... 37
Appendix A –Electromagnetic Compatibility...................................... 39
Electromagnetic Compatibility Warnings ....................................................................... 42
Appendix B –FCC Compliance............................................................. 43
FCC Compliance Statement............................................................................................. 43

Table of Contents Neurolief Relivion™ User Manual
8
Blank page for double-sided printing
9
1
Introducing
Relivion™
This chapter introduces the Relivion™device and describes its components and its
package contents.
IMPORTANT!
To ensure safe and proper usage, you should review this entire
user manual carefully before using the Relivion™ device.
Contact Neurolief customer support at +972 (9) 3730288 or visit
the Neurolief website at www.neurolief.com if you have any
questions.
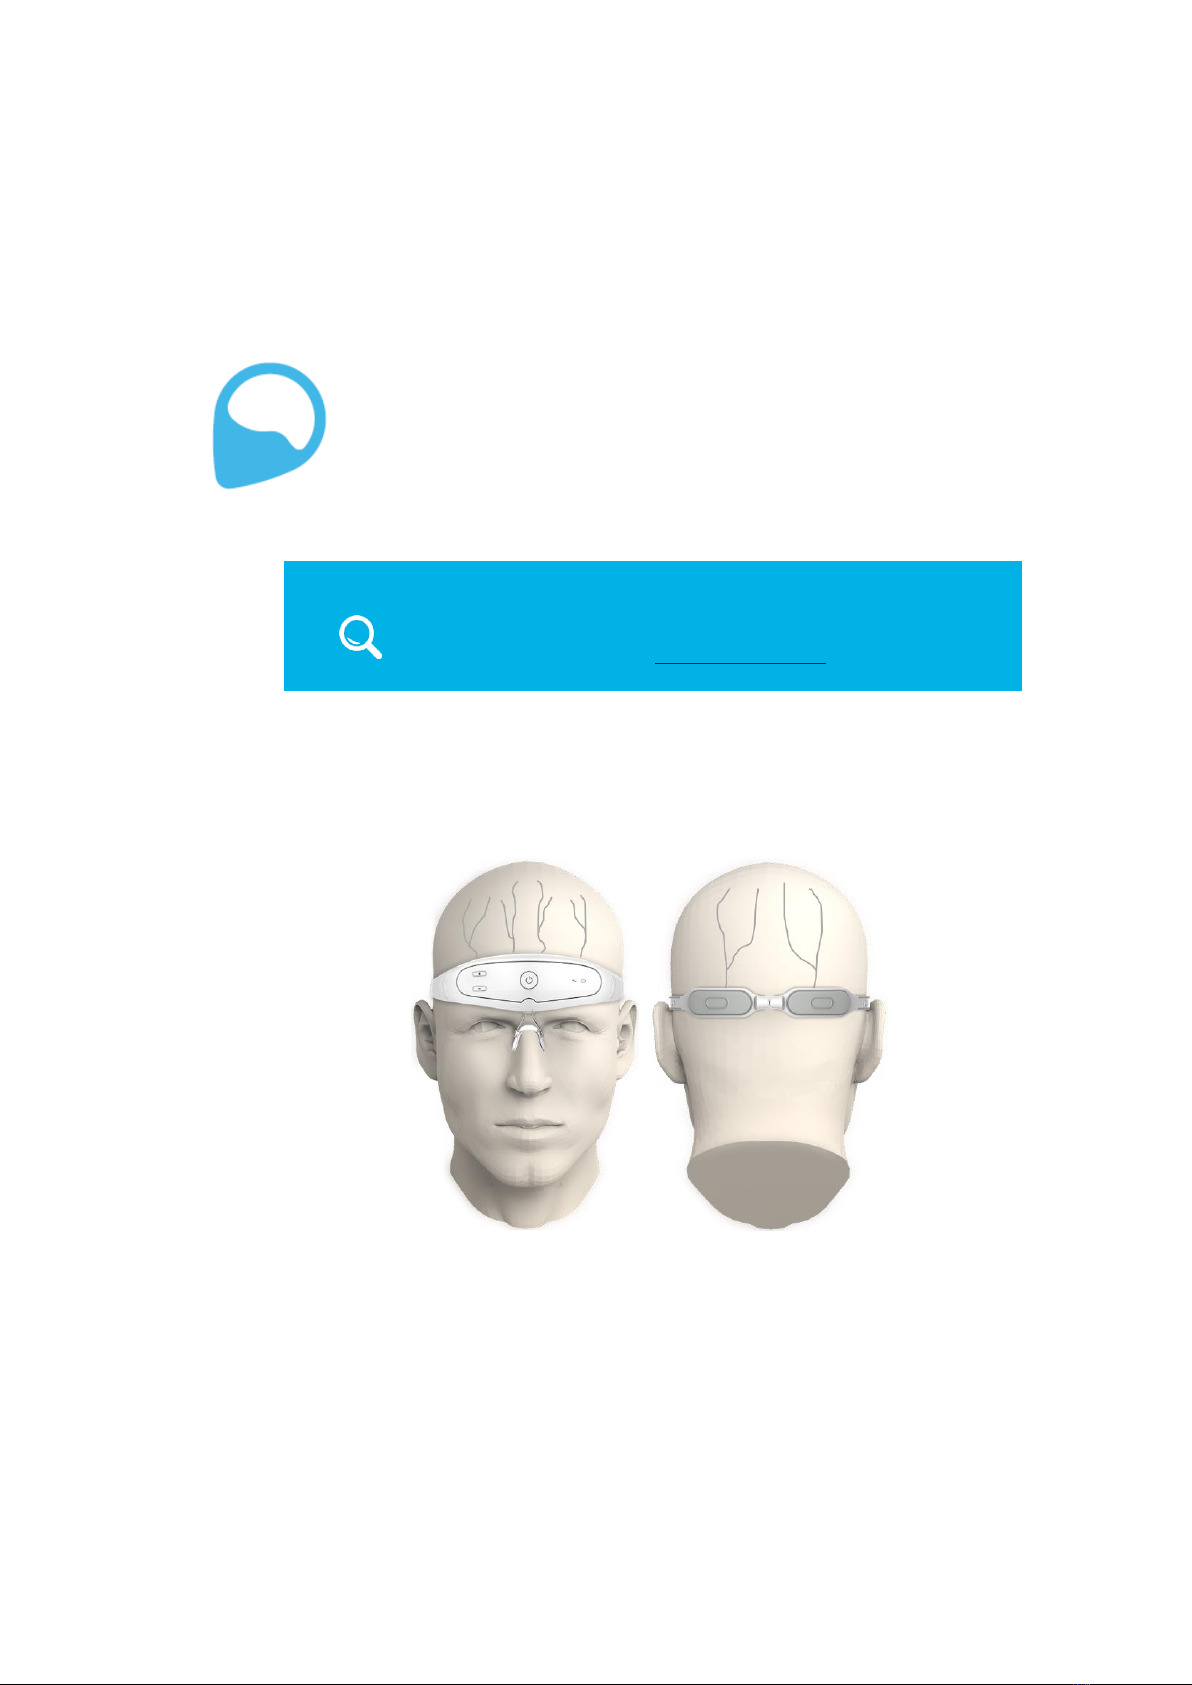
1.1 WHAT IS THE NEUROLIEF RELIVION™?
The Relivion™is a non-invasive neurostimulation device. It transfers mild electrical
pulses to branches of the Trigeminal (Supraorbital and Supratrochlear) and Occipital
nerves to treat headache.
Figure 1: Relivion™and Its Target Nerves

Introducing Relivion™Neurolief Relivion™ User Manual
10
The Relivion™consists of a headset with integrated electrodes, designed to enable
stimulation of the target nerves. The on-board stimulation circuit is adapted to deliver
stimulation patterns to enhance proper nerve activation. The Relivion™adjusts to
various head sizes and contours and can be worn comfortably. Each time it is worn,
the six electrodes are placed over the underlying nerves. The four electrodes on the
forehead stimulate branches of the Trigeminal nerve and the two electrodes at the
back of the head stimulate the greater Occipital nerve.
The Relivion™incorporates an on-board user interface that enables the user to
activate/deactivate the device and to adjust the stimulation intensity. It provides
visual and auditory indications to indicate when the device is active/non-active and
when there is a low battery.
The Relivion™communicates via a Bluetooth link with a dedicated mobile
application on the user’s smartphone. The mobile application displays the device
status and provides indications, such as treatment intensity level, treatment duration
and battery status.
1.1 THE RELIVION™KIT
The Relivion™kit includes the components described in Table 2.
Table 2: Relivion™Kit
Relivion™System Kit Contents
Relivion™Device
Charger
Electrode Pads
Spray Bottle (to Wet Electrodes with Water)
User Manual
Introducing Relivion™Neurolief Relivion™ User Manual
11
Relivion™System Kit Contents
Carrying Case
Do not use other accessories than those provided with the Relivion™kit.
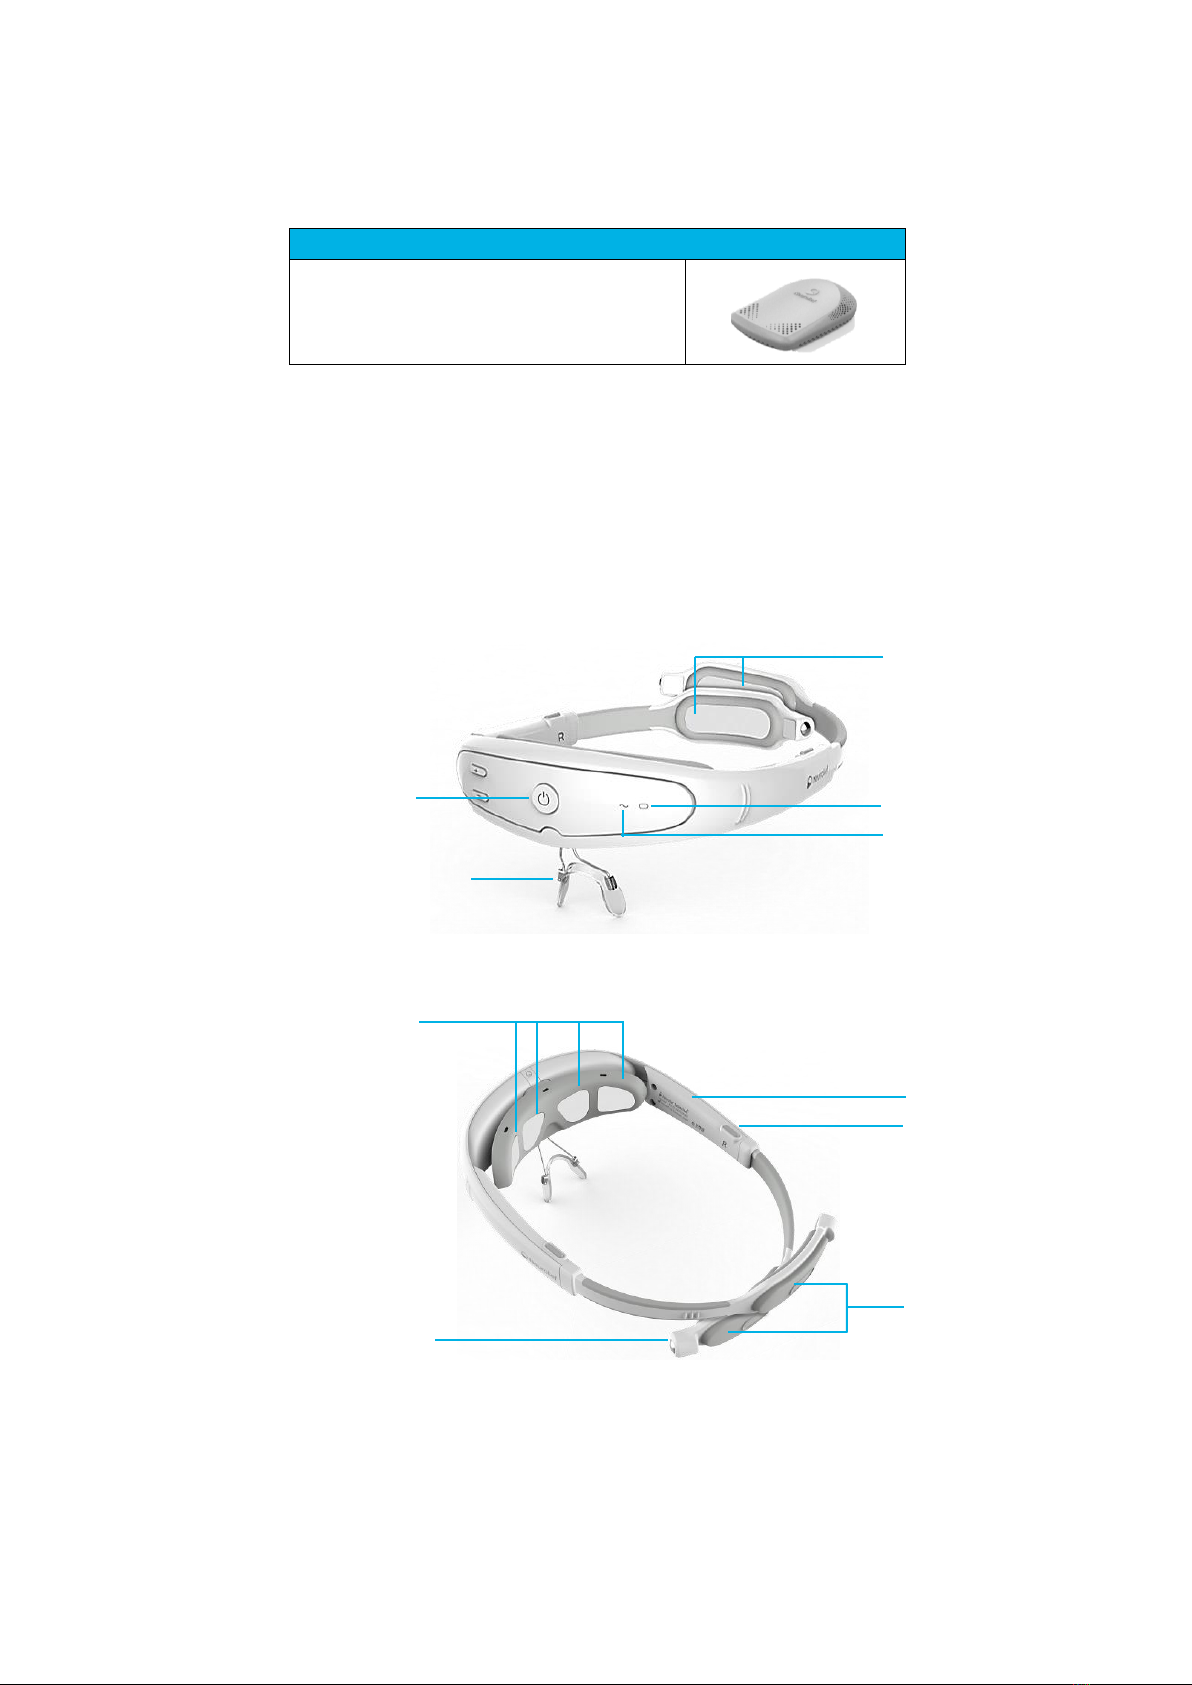
1.2 RELIVION™HEADSET
The Relivion™headset can be comfortably worn on the head during treatment. It
integrates six electrodes –four in the front of the device (forehead) and two in the
back (occiput). It includes two flexible arms that go under hair layers while the
headset is worn. A simple user interface and a nose bridge are located at the frontal
aspect of the headset. A size adjustment mechanism is located on both sides of the
device.
Figure 2: Relivion™–Front View
Figure 3: Relivion™–Top View
Arm
Size Adjustment
Mechanism
Magnet End
Water
Release
Covers
Forehead Electrodes
Main Button
Device Status Indicator
Battery Indicator Light
Occiput
(Back of Head) Electrodes
Nose Bridge

Introducing Relivion™Neurolief Relivion™ User Manual
12
Blank page for double-sided printing
13
2
Getting Ready
Before using the Relivion™for the first time, several preliminary steps must be
performed.
Step 1
Section 2.1
Step 2
Section 2.2
Step 3
Section 2.3
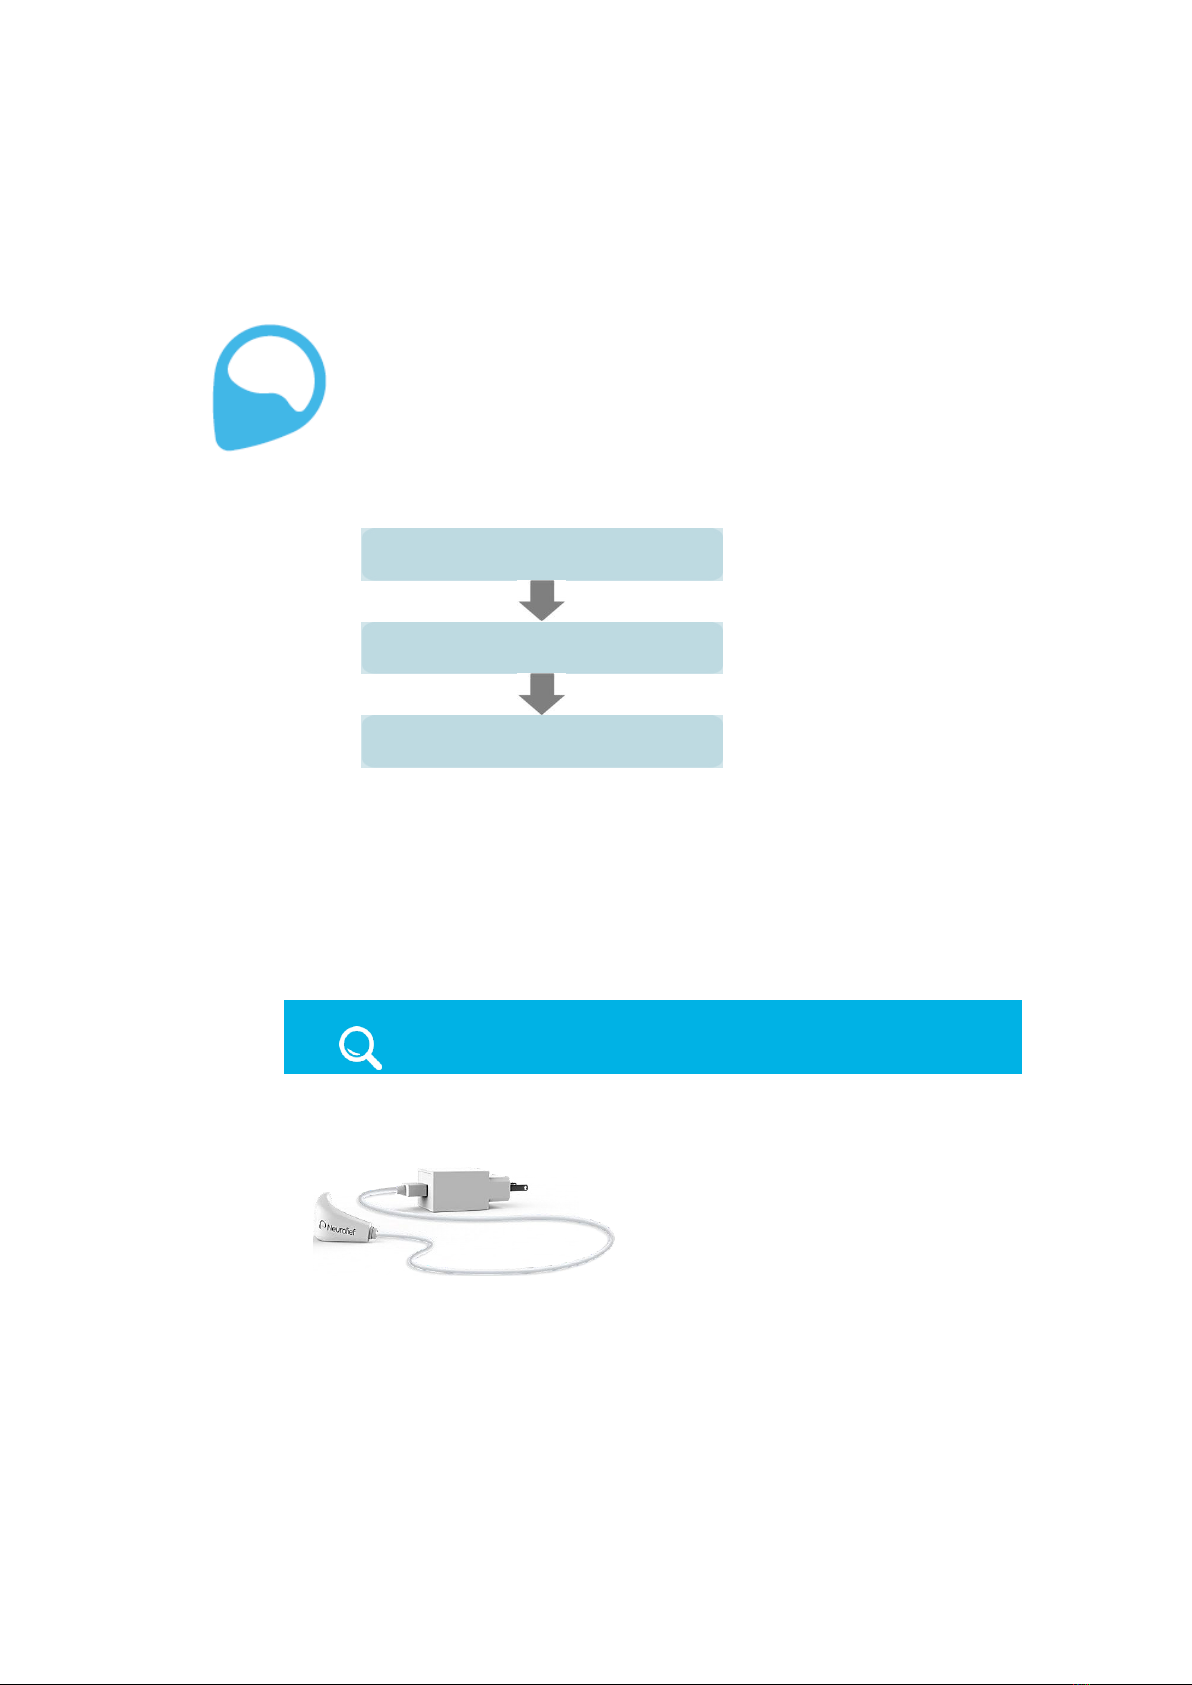
2.1 STEP 1, CHARGING THE RELIVION™
It is recommended to charge the device before first use and after each use, in order
to ensure that it is always ready when needed. It takes approximately three hours to
fully charge the battery. When the battery is low, the battery indicator light blinks
yellow. After the device is fully charged, it is typically sufficient for approximately five
hours of treatment.
IMPORTANT!
Only use the charger supplied with the Relivion™device.
To charge the battery –
1 Plug the charger into a wall socket.
Figure 4: Relivion™Charger
Charging the Relivion™
Adjusting the Relivion™to Fit Your
Head
Getting Started with the Relivion™
App

Getting Ready Neurolief Relivion™ User Manual
14
NOTE
Ensure that the charger socket is not wet before charging the
device.
2Connect the magnetic connector of the charger to the charging socket on the
headset. The charging socket is located on the bottom of the headset. The
connector connects using magnetic force. It must be connected in the proper
direction for the magnet’s polarity to work properly.
Figure 5: Charging Socket Location
Figure 6: The Magnetic Connector Connected to the Headset
3Verify that the battery indicator lights steady yellow. The battery indicator light
blinks yellow when the battery is low and is steady yellow during charging.
Figure 7: Battery Indicator Light on the Headset
Socket
Magnetic Connector
Battery Indicator Light
Getting Ready Neurolief Relivion™ User Manual
15
4When the charging process ends, the battery indicator light turns off and the
status indicator lights blue. When the Relivion™is disconnected from the wall
socket, the status indicator turns off.
WARNING!
Do not use the device while charging.
2.2 STEP 2, ADJUSTING THE RELIVION™TO FIT
YOUR HEAD
Perform the procedure below to adjust the Relivion™to fit your head.
You only need to make these adjustments once, before using the Relivion™for the
first time.
To adjust the Relivion™to fit your head –
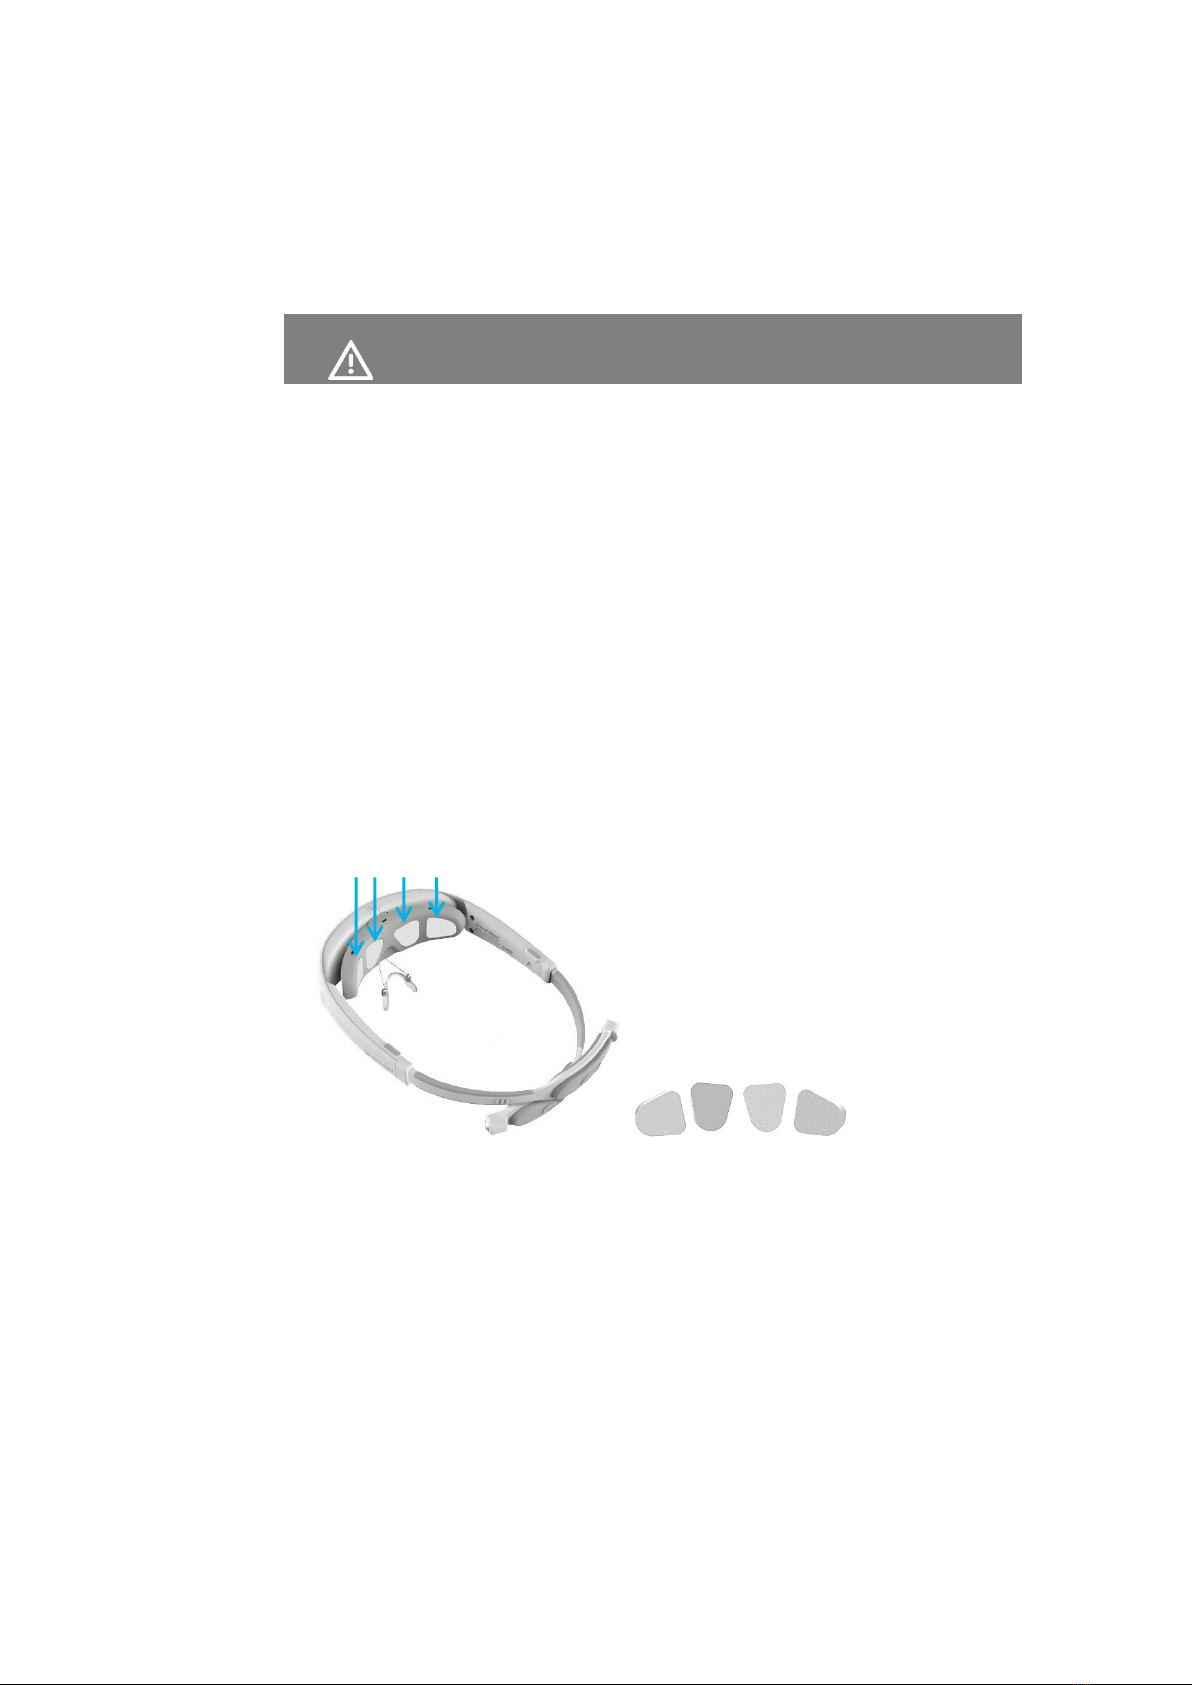
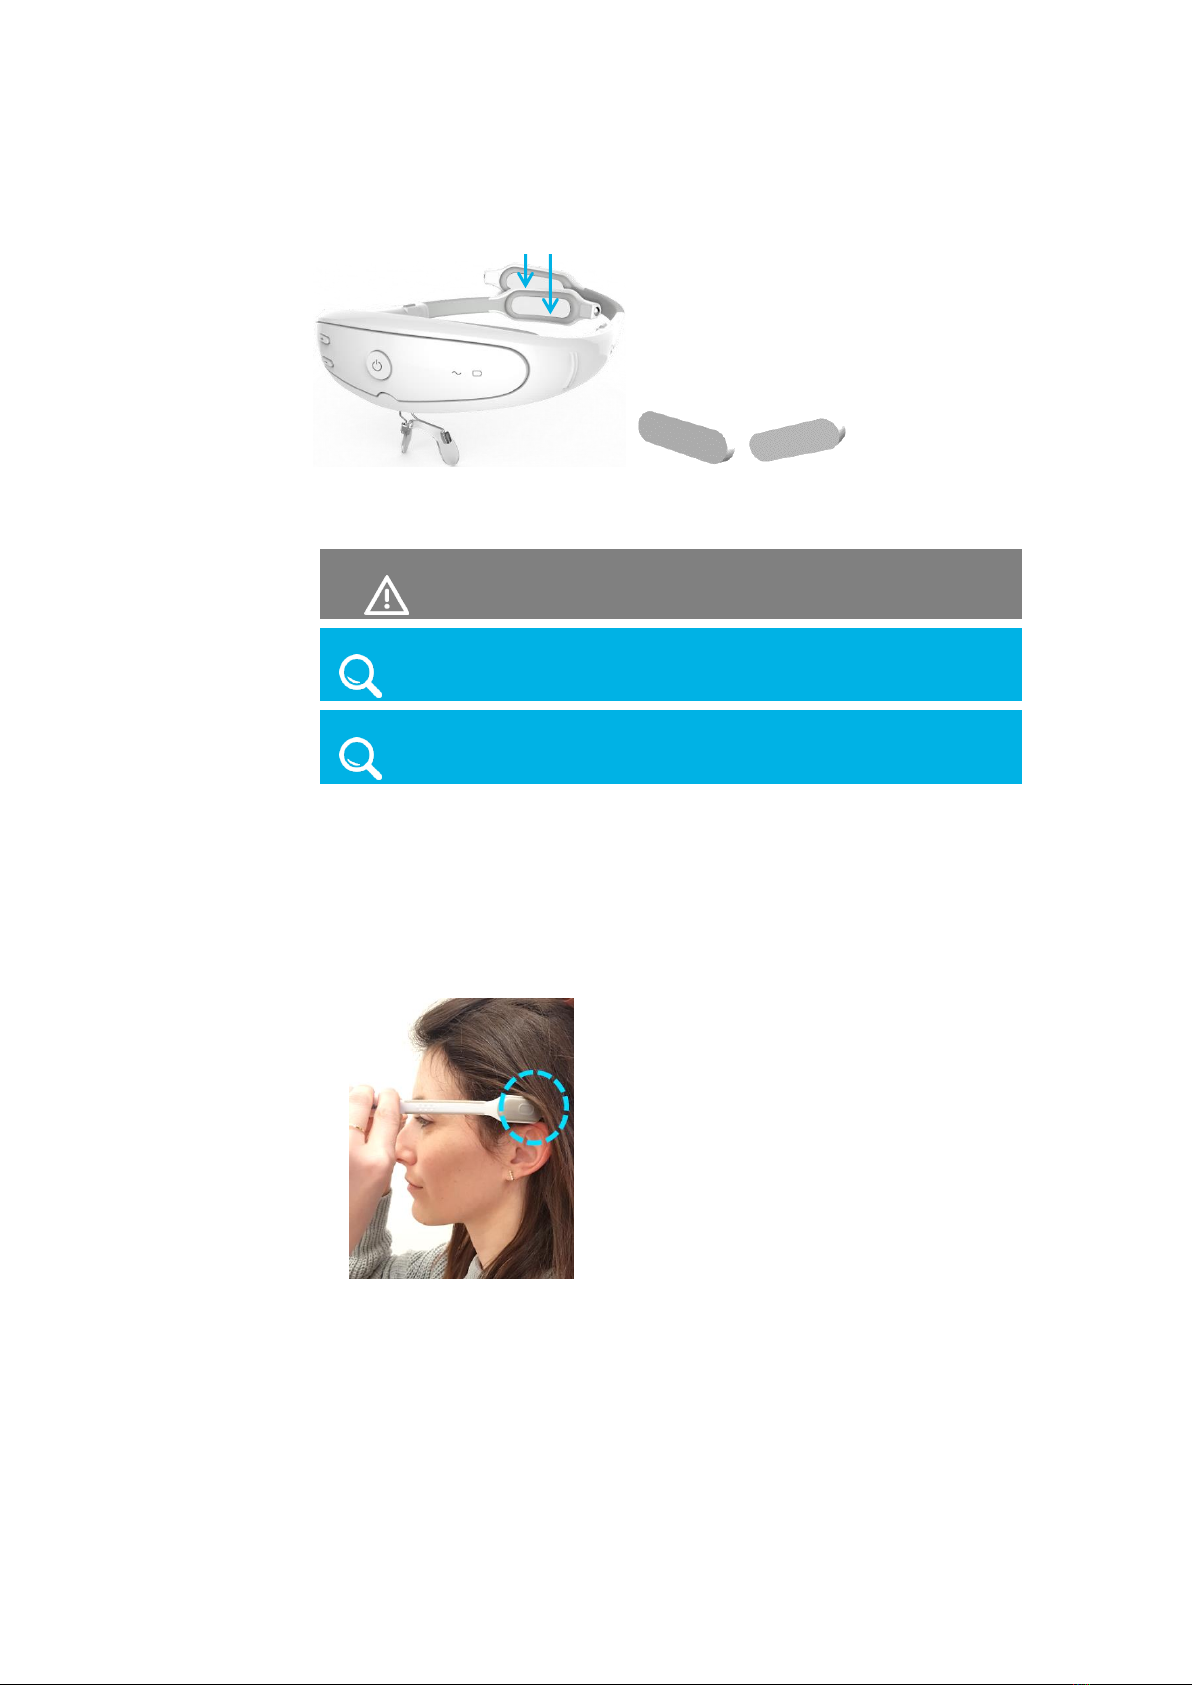
1 Insert the electrode pads, as described below.
The device is provided with the electrode pads to be put on the electrodes.
Electrode pads are provided in a plastic packet.
Six electrode pads are provided –four for the front electrodes and two for the
back (Occiput) electrodes.
The four pads for the front electrodes all have the same shape, but are inserted
in different directions according to the holes in the inside of the front of the
headset, as shown below –
Figure 8: Front Electrode Pads
Getting Ready Neurolief Relivion™ User Manual
16
The long oval pads are for the back electrodes.
Figure 9: Back Electrode Pads
Each set of six electrode pads can be used for one treatment.
WARNING!
Be sure to place the pads correctly before using the device.
NOTE
Contact your supplier when you need more electrode pads.
NOTE
Use only electrode pads provided by the manufacturer.
2Adjust the arms of the headset to fit as tightly as possible on the head.
The arms of the device are set to size 5 before the device is shipped. You must
first determine whether this size (size 5) provides a snug fit, or if you need to adjust
the arms in order to obtain snug fit on your head. To do so, follow the steps
below –
▪Place the magnet ends of the arms at the sides of your head (slightly above
your ears).
Figure 10: Placing the Relivion™Arms on Your Head Above the Ears
Getting Ready Neurolief Relivion™ User Manual
17
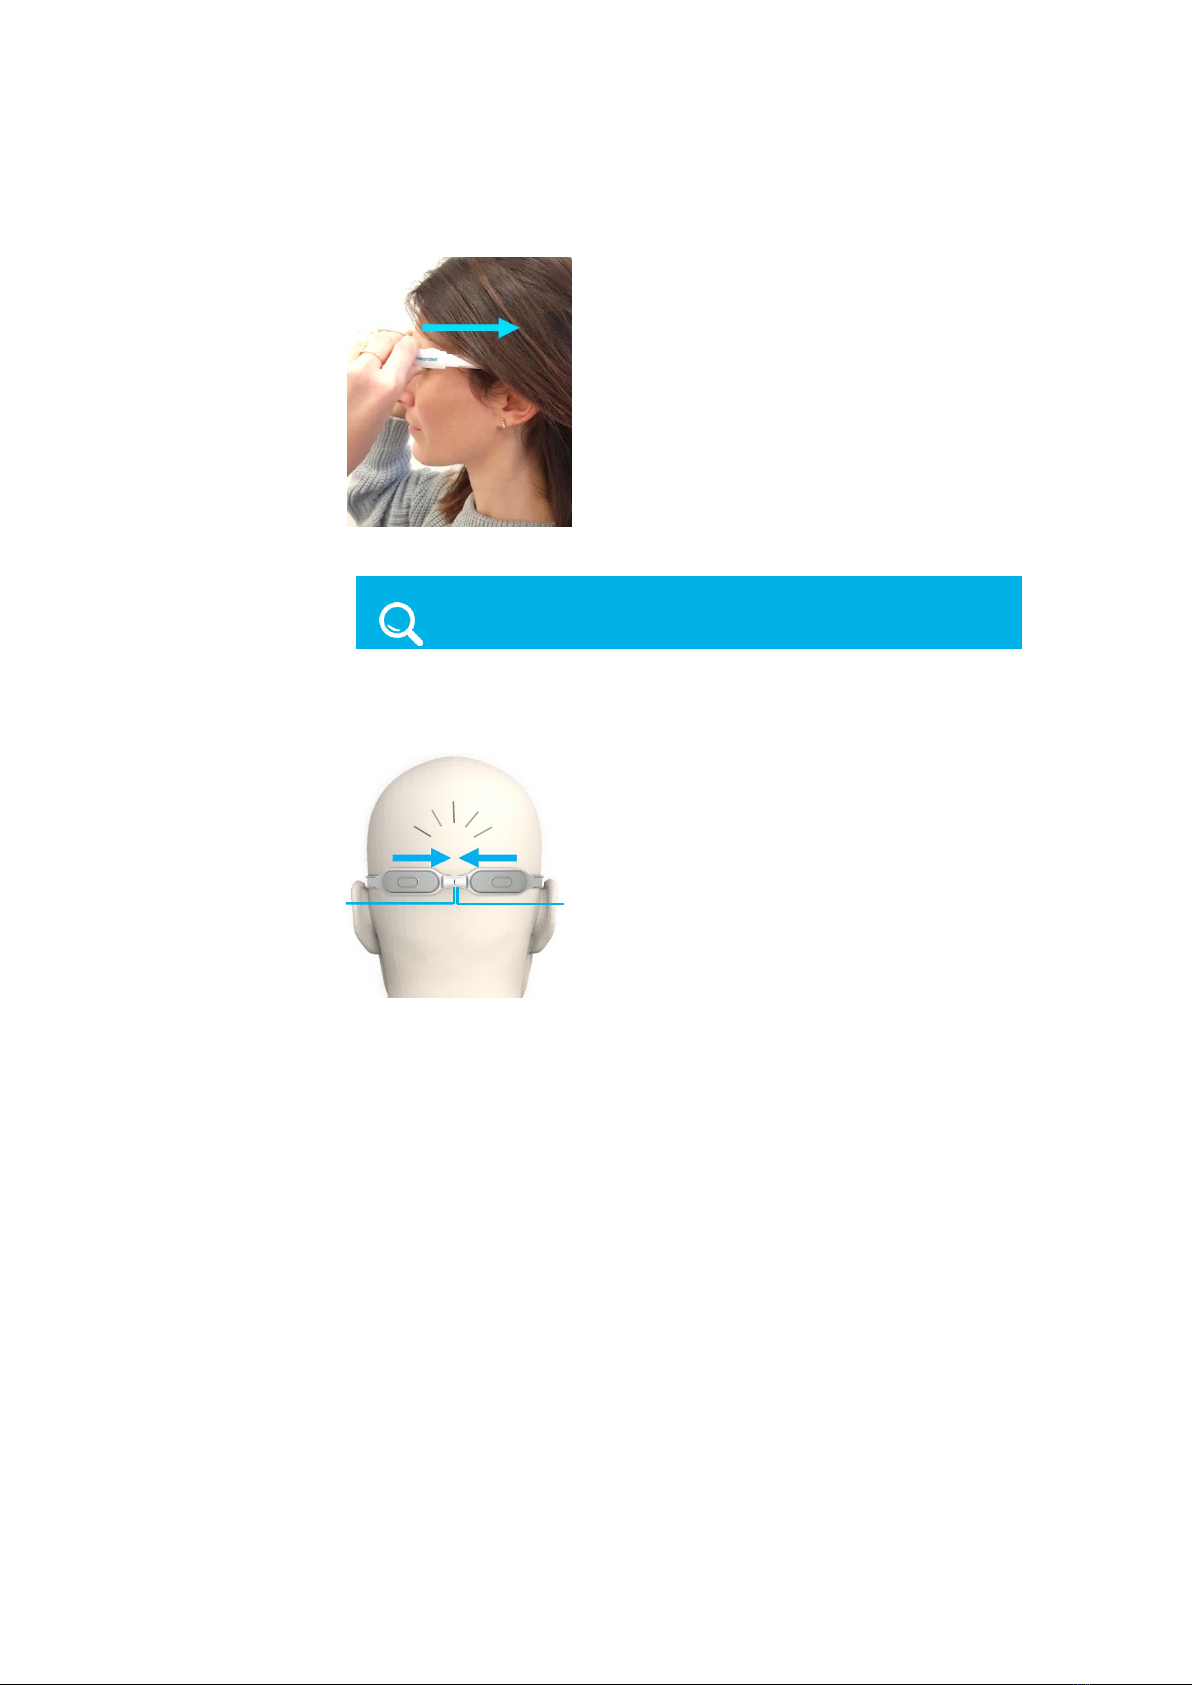
▪Push the device backwards so that the arms penetrate under your hair.
Figure 11: Pushing the Device Backwards on your Head
NOTE
Be sure to place the device arms under your hair.
▪Check to see if the magnets at the ends of each arm meet at the back of
your head. You should hear a click when the magnets click together.
Figure 12: Magnet Ends Meet at the Back of the Head
Magnet
Magnet
Push the magnets together until they click.
Click
Getting Ready Neurolief Relivion™ User Manual
18
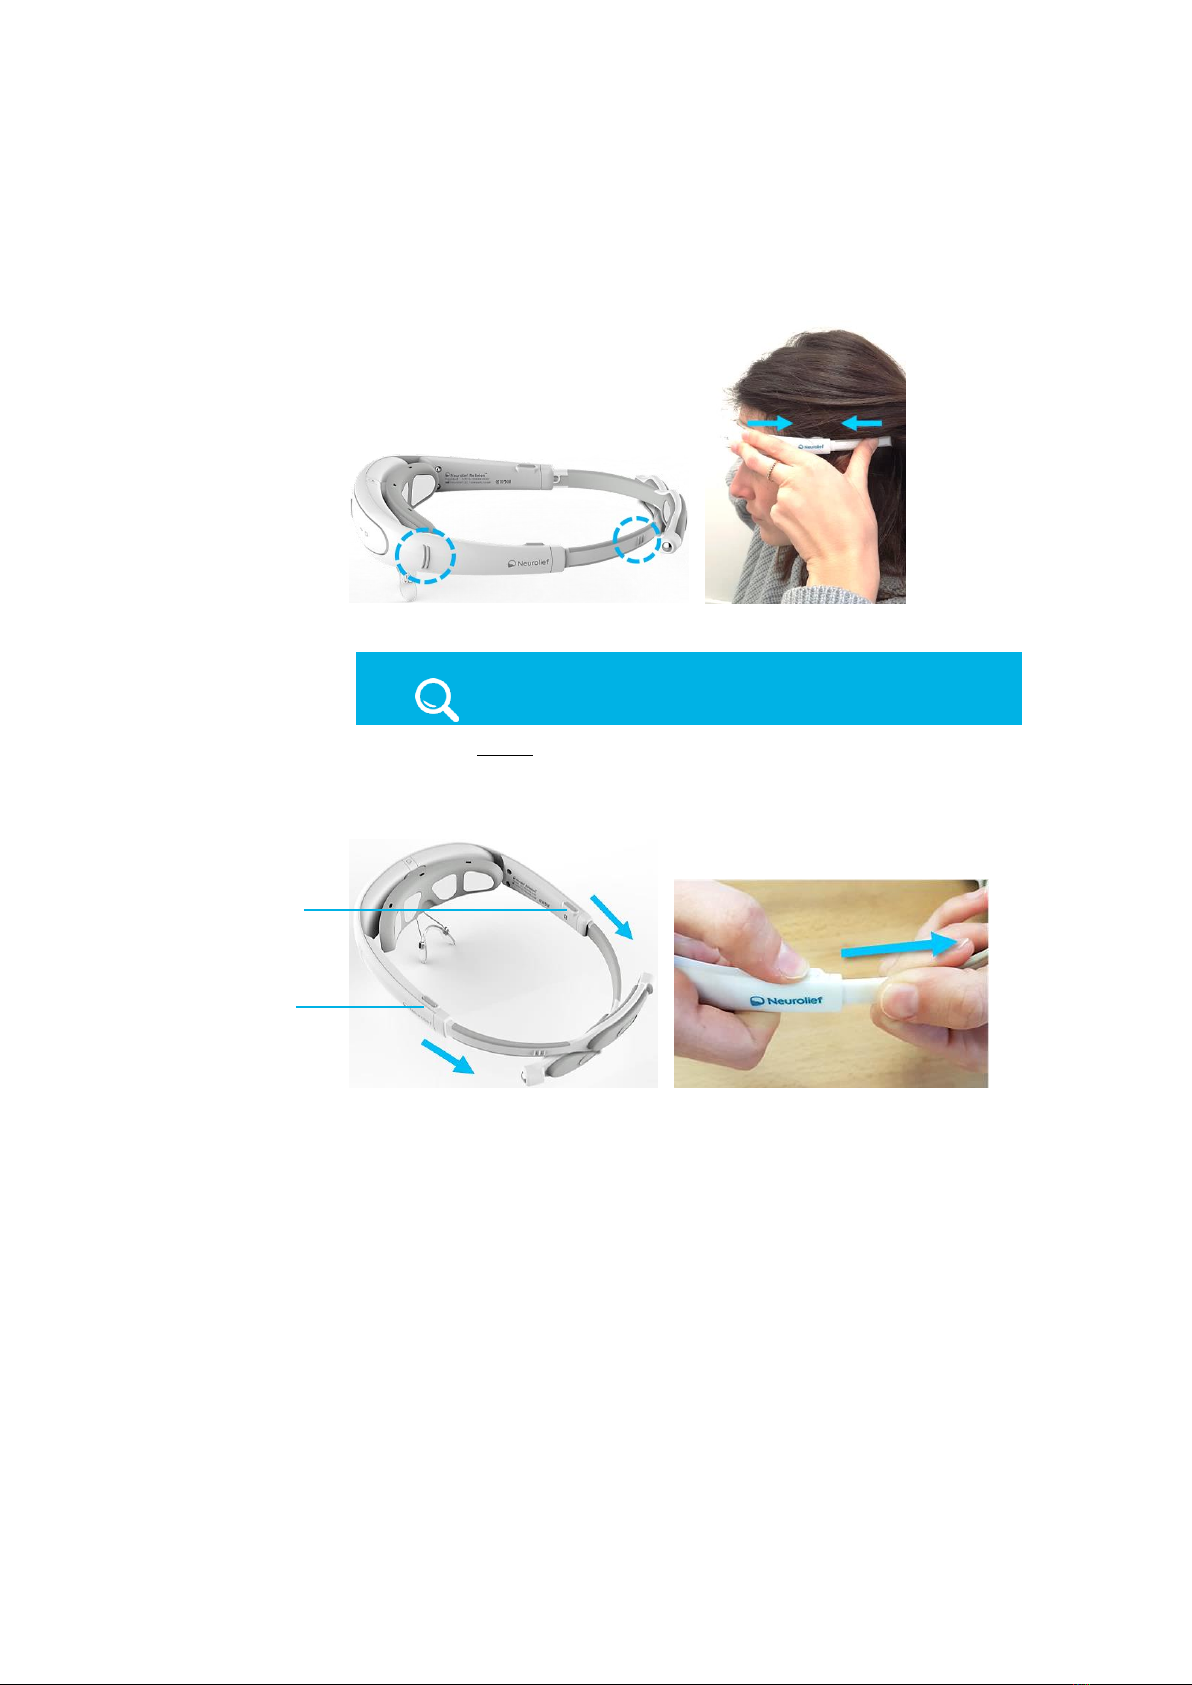
▪If the magnets do meet at the back of the head, then position your fingers on
the back and front grips and gently pull the grips toward each other to
tighten the device on your head.
Figure 13: Front and Back Grips
IMPORTANT!
Make sure that the headset fits snugly and that the
magnets of both arms meet on the back of the head.
▪If the magnets do not meet at the back of the head, you must extend the
arms to make them longer. To do so, press the release button of the size
adjustment mechanism on either the left or right side and extend the arm to
its maximum length. Then, repeat this action on the other arm.
Figure 14: Extending the Headset Arms
Size
Adjustment
Mechanism
Size
Adjustment
Mechanism
Getting Ready Neurolief Relivion™ User Manual
19
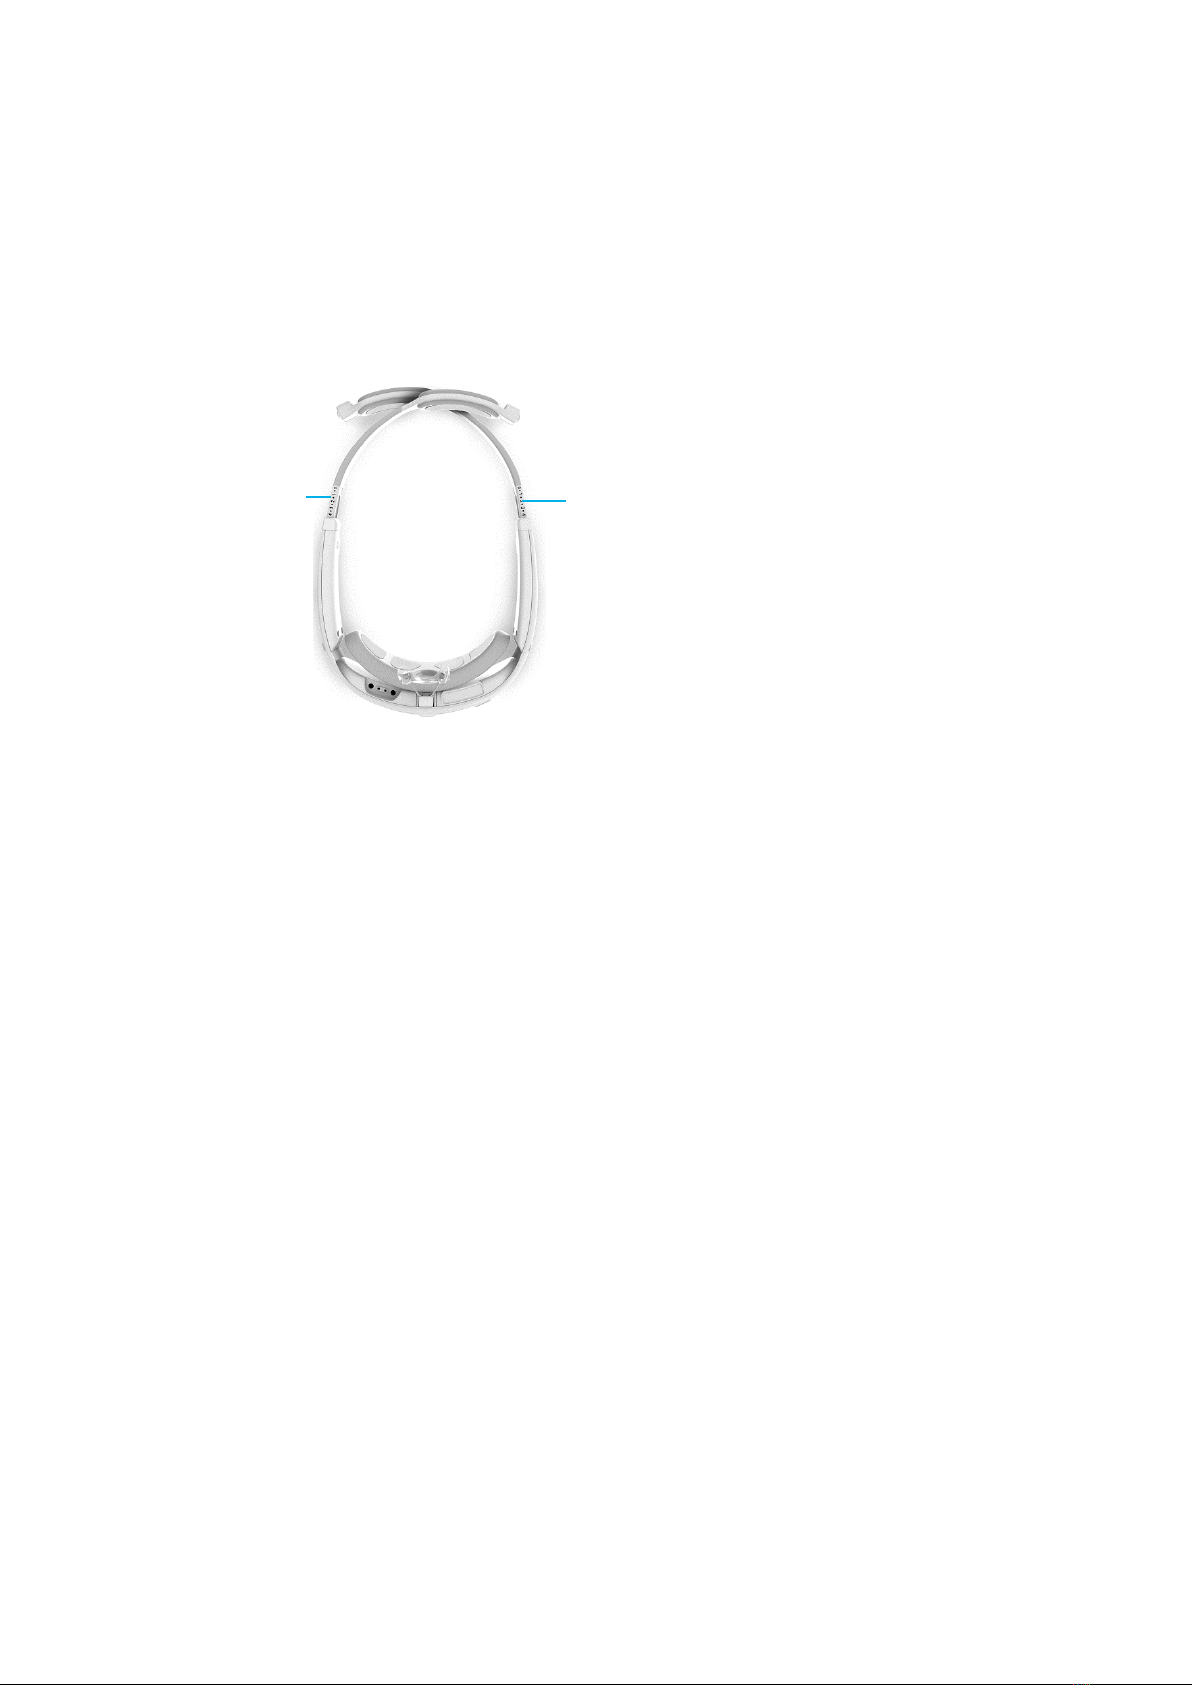
3 Remove the device and check the headset arms’ settings (numerical scale) to
ensure that they are symmetrical. The size setting for both arms must be the
same. Remove the device and check whether they are. If they are not, adjust
each arm’s lengths so that both are the same length, and then repeat step 2as
needed to obtain a tight fit. It may take more than one attempt to get the arm
length to be identical for both arms, while obtaining a tight fit.
Figure 15: Size Adjustment Scale
2.3 STEP 3, GETTING STARTED WITH THE
RELIVION™APP
The Relivion™mobile app is available from the app store. Download the app and
then follow the instructions displayed in the app to register and pair the app with the
Relivion™headset. After successful pairing, the Start Treatment window displays in
the app, as shown in Figure 20 on page 25.
Size Adjustment
Setting (Scale)
Size Adjustment
Setting (Scale)

Getting Ready Neurolief Relivion™ User Manual
20
Blank page for double-sided printing
Table of contents
Other NEUROLIEF Medical Equipment manuals


