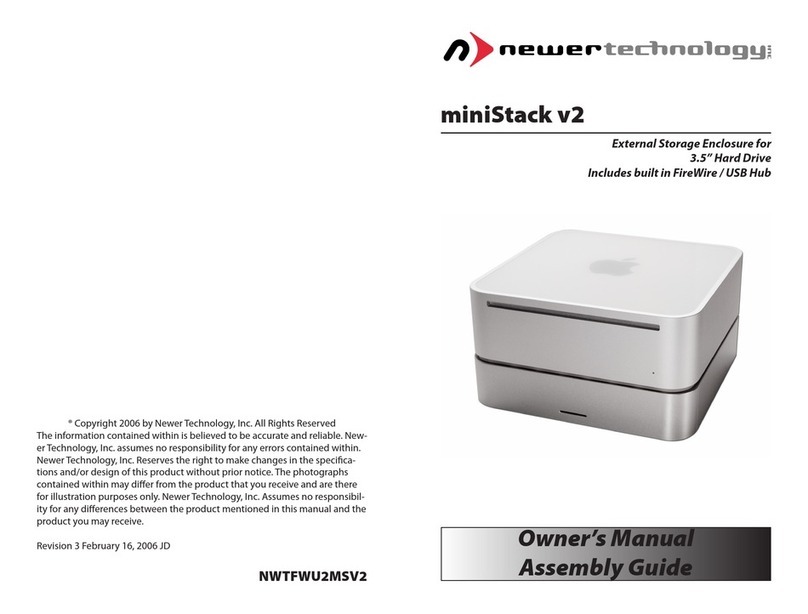
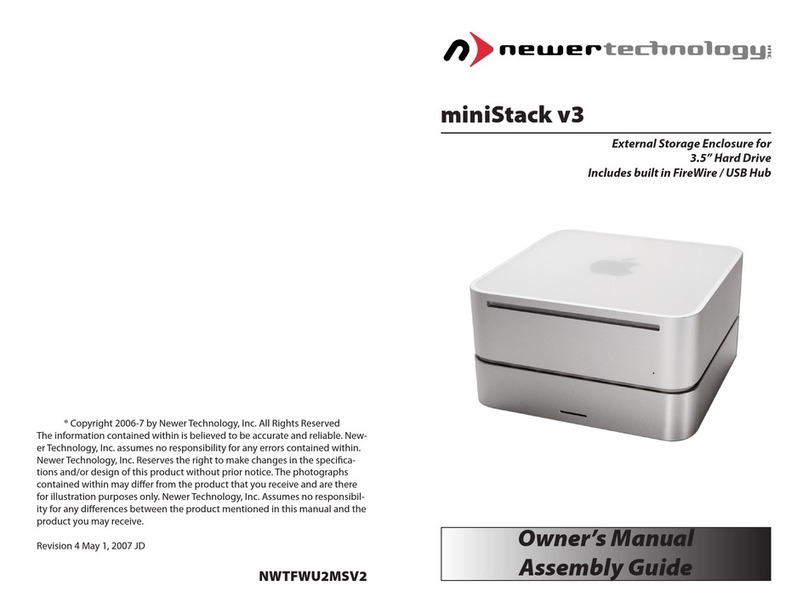
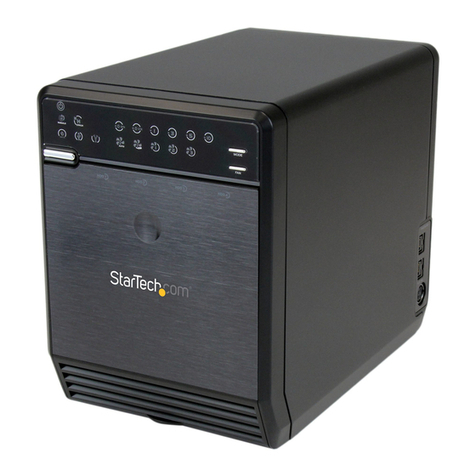
Newer Technology miniStack v3 User manual

External Storage Enclosure for
3.5” Hard Drive
Includes built in FireWire / USB Hub

Your computer is a static-sensitive device.
It is susceptible to invisible damage if not
protected during installation.
We recommend proper grounding by
using a grounding strap. Make sure to work
in a clean and static-free area, and avoid
wearing clothing that retains static charges.
For more information, please visit
http://newertech.com/static
Got tools? If you don’t have the tools necessary to complete this
installation, Newer Technology has a fantastic toolkit with everything
you need included to perform this installation, and most common com-
puter hardware installations.
Table Of Contents
Introduction Page 2
Contents Included Page 3
Getting Started Page 4
Assembly Instructions Page 5
Setting Up Page 8
Initialize your drive - Mac Page 9
Initialize your drive - Windows 98, Windows Me Page 12
Initialize your drive - Windows XP, Vista Page 13
Contact Customer Service Page 14
It’s available at:
http://newertech.com/products/11pctoolset.php
Page 1

Thank you for purchasing your Newer Technology
miniStack v3, the easiest, most compact way to add
storage and expandability to your computer!
The miniStack v3 was designed with the Apple Mac mini
in mind, but works perfectly with ANY computer.
Special Features of the Newer Technology miniStack v3
Cooling:
The Newer Technology miniStack v3 is made of high quality plastic
and integrates a smart interactive cooling system, which automatically
regulates and varies the internal fan speed according to the
temperature of the hard drive. It includes a built in passive aluminum
radiator on the bottom of the miniStack v3, which dissipates heat
away from the hard drive and reduces the internal temperature of the
enclosure without unwanted noise. This system extends the life of your
hard drive by keeping it cooler than a traditional external hard drive
enclosure.
External Expansion:
The Newer Technology miniStack v3 features built in USB 2.0 and
FireWire 400/800 (1394A & 1394B) hubs allowing you to expand your
peripherals without adding external hubs which clutter up your desk.
Simply plug both FireWire and USB cables into your computer and
the miniStack v3’s extra ports are ready to accept your additional
peripherals!
Internal Storage:
The Newer Technology miniStack has a built in SATA connector which
supports large drive technology, oering massive FAST storage
capacity! Simply place your own SATA hard drive inside the miniStack v3
enclosure and connect using any of the 4 interfaces available - eSATA,
FireWire 800, FireWire 400, or USB 2.0.
Page 2

• Newer Technology miniStack v3 Top Plastic Cover
• Newer Technology miniStack v3 Enclosure with heatsink installed
• FireWire 800 (1394B) Connecting Cable
• USB 2.0 Connecting Cable
• External Power Adapter (Input 100-240V, Output +12V/3A, +5V/3A)
• External Power Cable (US Standard Plug)
• Plastic Bag with hard drive screws, and thermal tape inside
• (Not pictured - this manual)
Optionally, some bundles include software.
• Prosoft Data Backup 3 for Mac
• Intech SpeedTools Utilities for Mac
• Bombich Software Carbon Copy Cloner for Mac
• NovaStor NovaBACKUP Solution for Windows
Newer Technology miniStack v3 Package Contents:
Page 3

➀
➁
➂
➈
➇
➅
➄
➃
➆➉
Getting Started with your Newer Technology miniStack v3
Remove the Newer Technology miniStack v3 from it’s packaging and
examine the back and side of the enclosure. You will see the following
ports:
➀ On/O Switch - Used to turn the miniStack v3 on and o. As long as the power
switch is in the ON position, the miniStack v3 will power on and o with your com-
puter - no need to shut the enclosure o at the end of the day! Note: If you have other
devices daisy-chain connected to the miniStack v3, they will also disconnect when
turned o. This applies to devices using the miniStack v3 as a hub as well.
➁Power Receptacle - Used to power the miniStack. Please note that you are re-
quired to power this drive from an outlet, it’s not able to be powered o of any of the
connections to the computer.
➂Fan Exhaust Port - Warm air is vented here from your miniStack v3.
➃Rear USB Ports - Add USB devices to your miniStack v3 here.
➄USB Uplink Port - Connect one of your computer’s USB ports to the miniStack v3
here using the included cable.
➅eSATA Port - The utmost in speed. If you’re trying to make your miniStack v3 the
fastest it can be, attach an eSATA cable (not included) to this port.
➆FireWire 800 (1394B) Ports - Connect one FireWire 800 port to your computer us-
ing the included cable and have an extra FireWire 800 to add peripherals with!
➇Security Slot - Secure your miniStack v3 to your desk using a Kensington Micro-
Saver Security Cable here (not included).
➈ FireWire 400 (1394A) Side Port - Easily connect your FireWire 400 devices here.
➉ USB 2.0 Side Port Easily connect USB devices to your miniStack v3 here.
Page 4

Assembling your Newer Technology miniStack v3
Remove the miniStack housing from it’s protective plastic bag and turn
it over so you can see the bottom of the enclosure. There are 2 Phillips
screws securing the aluminum ribbed heatsink into the enclosure for
transport. Remove the 2 Phillips screws and take the heatsink out of the
enclosure.
Take your hard drive mechanism and place the aluminum heatsink on
the drive as shown. Make sure to orient the cutout notch exactly as
shown, to the left, when looking from the back of the drive. Using the 4
Phillips coarse thread screws from the plastic bag, rmly ax the heat-
sink to the drive.
➀
➁
Page 5

➂
➃
Insert your hard drive into the miniStack v3 enclosure, front rst, as
shown in the photograph. Pivot the hard drive up so you have access
to the SATA power and SATA data cable ports, and plug the SATA power
and SATA data cables into the drive. Also, make sure that the white and
black thermal probe cable is not pinched but accessible as shown. You
will want to orient it so that it comes out the left side of the fan.
Once the cables are inserted, lower the drive into the enclosure fully.
Make sure to tuck the SATA cables you attached to the drive into the
edges and corner around the drive as shown, they need to not protrude
above the hard drive so that the cover will t properly. Take the white
and black thermal probe and using the supplied yellow Kapton tape,
ax it to the center of the hard drive spindle. Do NOT cover the thermal
probe with tape, rather tape the wire to the hard drive not the probe
itself. Covering the probe will cause the fan to run more frequently.
Page 6

➅
➄
Pick up the miniStack v3 and while holding the hard drive down into the
enclosure fully, take the 2 Phillips screws you initially removed from the
heatsink and reinsert them into the heatsink through the bottom of the
enclosure. Then, remove two more screws from the plastic bag and in-
sert those through the remaining two holes to fully secure the heatsink
into the miniStack v3 enclosure.
Place the miniStack v3 on the work surface in front of you with the ports
facing you. Set the top cover on with the logos facing upside down and
snap the cover rmly in place onto the miniStack v3.
Page 7

Setting up your miniStack v3
Your miniStack v3 external drive enclosure and expansion hub is simple
to connect to your computer. Here are a few tips to get the most out of
your new external storage and expansion device.
• Do not place anything behind your miniStack v3 that would block
airow.
• Treat your miniStack v3 just like you treat your computer - keep it dry,
cool, and out of direct sunlight.
• Always check any peripheral cable that you are going to use with the
miniStack v3 for damage before inserting it.
• Do not connect your miniStack v3 to more than one computer at a
time.
Hard Disk Mode:
The miniStack v3 has 4 dierent interfaces for you to hook it up to your
computer with. From the ultra-compatible USB 2.0 (1.1 backwards com-
patible), to the higher bandwidth FireWire 400 and 800 (1394A & B), and
even ultra-fast eSATA.
Choose which primary interface you wish to use with your miniStack
- for most users, this would be the FireWire connection, and also the
USB interface to use the hub features of the miniStack. Connect both of
those cables to the miniStack v3 and your computer, insert the power
cable and turn the power switch on.
The miniStack v3 will automatically connect to your computer using the
fastest possible interface when you have multiple cables plugged into
the miniStack v3. The miniStack v3 will connect via eSATA, FireWire 800,
FireWire 400, and USB 2.0 (in that order), fastest to slowest connection.
Hub Feature:
To use either the USB 2.0 or FireWire Hub feature, you must have both
types of cables connected to your computer and miniStack v3. Once
these are connected, and as long as the miniStack is powered on, it will
act as both an external hard disk drive and as a powered hub for devices
connected to the miniStack v3.
Page 8

Initializing the Newer Technology miniStack v3 - Mac
The instructions that follow are for initializing the Newer Technology
miniStack v3 with a Macintosh system running Mac OS X (any version).
Instructions for formatting using Windows follows this section.
If you wish to view initialization instructions for other operating sys-
tems, please visit our support website at:
http://newertech.com/support
Click on the “Initialize” button.
Select the device with no volumes attached to it; in this picture, that
would be the 320.07GB Newer Technology device. Click on the picture
of the drive icon next to the text.
➀
➁
Page 9

Once you’ve selected the Newer Technology device, you will notice the
above change in the Disk Utility application. Click on the “Erase” tab,
next to the highlighted blue “rst aid” tab in this picture.
You then need to name the volume that you want to format, and erase
it. Name the volume as you want, choose the Volume Format pulldown
(Mac OS Extended (Journaled) is default), and click the Erase button.
➂
➃
Page 10

Click the erase button to conrm you wish to erase the disk.
After a few moments, the erase command will complete and the Newer
Technology miniStack v3 volume will mount on your desktop. You can
quit Disk Utility, you’re all set!
To disconnect or unhook your Newer Technology miniStack v3 hard
drive, follow these important steps to properly dismount your drive.
If you wish to disconnect your drive without shutting down your com-
puter, simply drag the Newer Technology miniStack v3 drive icon to the
trash can icon. Your drive is now safe to power o and unhook. Do not
disconnect, or power o the Newer Technology miniStack v3 until you
have completed this step.
➄
➅
Page 11

Page 12
Initializing the Newer Technology miniStack v3
-Windows 98 SE or Windows ME
1. Go to the Start menu
2. Select “Run”
3. Type in “command” - press OK to conrm.
4. Type in “fdisk” and press Enter
5. Select “Y” and press Enter
6. Enter “5” to change the drive
7. Select the drive you want to format
8. Choose “1” and follow the on-screen instructions.

Page 13
Initializing the Newer Technology miniStack v3
-Windows 2000, Windows XP, or Windows Vista
You need to open the Disk Management Application.
1. Go to the Start menu --> Control Panel --> Administrative Tools -->
Computer Management
2. Select “Disk Management”
3. Choose the drive you want to format and right-click on it for further
commands. Select Choose New Partition.
4. Follow the Partition Wizard to complete setting up your disk.

Contacting Customer Service
Before contacting Customer Service:
• Read the manual and review Chapter 4: Troubleshooting
• Try and conrm the problem is with the hard drive. If you have a sec-
ond computer, move the drive to that system and verify that the drive
does not function with that machine.
• Visit our FAQ section for more suggestions
http://www.newertech.com/support
If you still need support, have the following available to speed up
your contact:
• The serial number of the hard drive
• Your invoice number (if at all possible)
• Which operating system you’re using
•Which kind of computer you’re using
There are 3 ways to contact Technical Support or Customer Service:
Via Email:
Submit your support request via our online form:
http://helpcenter.newertech.com/
Via Phone:
(815) 308-7001
8AM–8PM CST Monday-Friday
9AM–4PM CST Saturday
Via Live Chat:
Newer Technology’s distributor, OWC, oers live technical assistance:
7AM–10PM CST Monday-Friday
10AM–4PM CST Saturday
12PM–4PM CST Sunday
http://newertech.com/Service/index.cfm?page=nochat.html
Page 14

Copyrights
Copyright © 2009 Newer Technology, Inc. All rights reserved. No part of this publication may be reproduced, stored in a
retrieval system, or transmitted in any form or by any means, electronic, mechanical, photocopying, recording or otherwise,
without the prior written consent of Newer Technology.
Changes
The material in this document is for information only and subject to change without notice. While reasonable eorts have
been made in the preparation of this document to assure its accuracy, Newer Technology assumes no liability resulting from
errors or omissions in this document, or from the use of the information contained herein. Newer Technology reserves the
right to make changes or revisions in the product design or the product manual without reservation and without obligation
to notify any person of such revisions and changes.
FCC Statement:
Warning! Modications not authorized by the manufacturer may void the user’s authority to operate this device.
NOTE: This equipment has been tested and found to comply with the limits for a Class A digital device, pursuant to Part 15 of
the FCC Rules. These limits are designed to provide reasonable protection against harmful interference when the equipment
is operated in a commercial environment. This equipment generates, uses, and can radiate radio frequency energy and, if
not installed and used in accordance with the instruction manual, may cause harmful interference to radio communications.
Operation of this equipment in a residential area is likely to cause harmful interference in which case the user will be required
to correct the interference at his own expense.
NOTE: This equipment has been tested and found to comply with the limits for a Class B digital device, pursuant to Part 15 of
the FCC Rules. These limits are designed to provide reasonable protection against harmful interference in a residential installa-
tion. This equipment generates, uses and can radiate radio frequency energy and, if not installed and used in accordance with
the instructions, may cause harmful interference to radio communications. However, there is no guarantee that interference
will not occur in a particular installation. If this equipment does cause harmful interference to radio or television reception,
which can be determined by turning the equipment o and on, the user is encouraged to try and correct the interference by
one or more of the following measures:
• Reorient or relocate the receiving antenna.
• Increase the separation between the equipment and receiver.
• Connect the equipment into an outlet on a circuit dierent from that to which the receiver is connected.
Health And Safety Precautions
• Use proper anti-static precautions while performing the installation of your hard drives into this drive enclosure. Failure to
do so can cause damage to your drive mechanisms, and / or the hard drive enclosure.
• Read this User’s Guide carefully, and follow the correct procedure when setting up the device.
• Do not open your hard drive or attempt to disassemble or modify it. Never insert any metallic object into the drive to avoid
any risk of electrical shock, re, short-circuiting or dangerous emissions. Your hard drive contains no user-serviceable parts. If
it appears to be malfunctioning, have it inspected by a qualied Newer Technology Technical Support representative.
• Never expose your device to rain, or use it near water, or in damp or wet conditions. Never place objects containing liquids
on the drive, as they may spill into its openings. Doing so increases the risk of electrical shock, short-circuiting, re or personal
injury.
General Use Precautions:
• Do not expose the hard drive to temperatures outside the range of 5° C to 40° C (41° F to 104° F). Doing so may damage the
drive or disgure its casing. Avoid placing your drive near a source of heat or exposing it to sunlight (even through a window).
Inversely, placing your drive in an environment that is too cold or humid may damage the unit.
• Always unplug the hard drive from the electrical outlet if there is a risk of lightning or if it will be unused for an extended
period of time. Otherwise, there is an increased risk of electrical shock, short-circuiting or re.
• Use only the power supply shipped with the device.
• Do not use the hard drive near other electrical appliances such as televisions, radios or speakers. Doing so may cause inter-
ference which will adversely aect the operation of the other products.
• Do not place the drive near sources of magnetic interference, such as computer displays, televisions or speakers. Magnetic
interference can aect the operation and stability of your hard drive.
• Do not place heavy objects on top of the drive or use excessive force on it.
• Never use excessive force on your drive. If you detect a problem, consult the Troubleshooting section in this manual.
• Protect your hard drive from excessive exposure to dust during use or storage. Dust can build up inside the device, increas-
ing the risk of damage or malfunction.
• Newer Technology recommends the use of normal glass cleaning products to keep the high lustre nish at it’s nest with this
product. Be sure to not get any moisture inside the holes and if you do, allow time to air dry before use.
• Do not block the ventilation outlets on the rear of the drive. These help to keep your drive cool during operation. Blocking
the ventilation outlets may cause damage to your drive and cause an increased risk of short-circuiting or re.
Copyright ® 2009 Newer Technology, Inc. All Rights Reserved. Newer Technology’s 1 Year Limited Warranty is not transferable and subject to limitations.
NWTMANMSV3AI
R1 9/14/09 JD
Other manuals for miniStack v3
3
Table of contents
Other Newer Technology Enclosure manuals
