19
19SPECIFICATION............................................................................
Contents
CHAPTER 1 GRAPHICS TABLET INTRODUCTION.......................
1
1.1
GENERAL INTRODUCTION
................................................................
1
1.2
FEATURES........................................................................................
1
CHAPTER 2 QUICK-START TUTORIAL
............................................
2
2.1
SETUP STEPS
..................................................................................
2
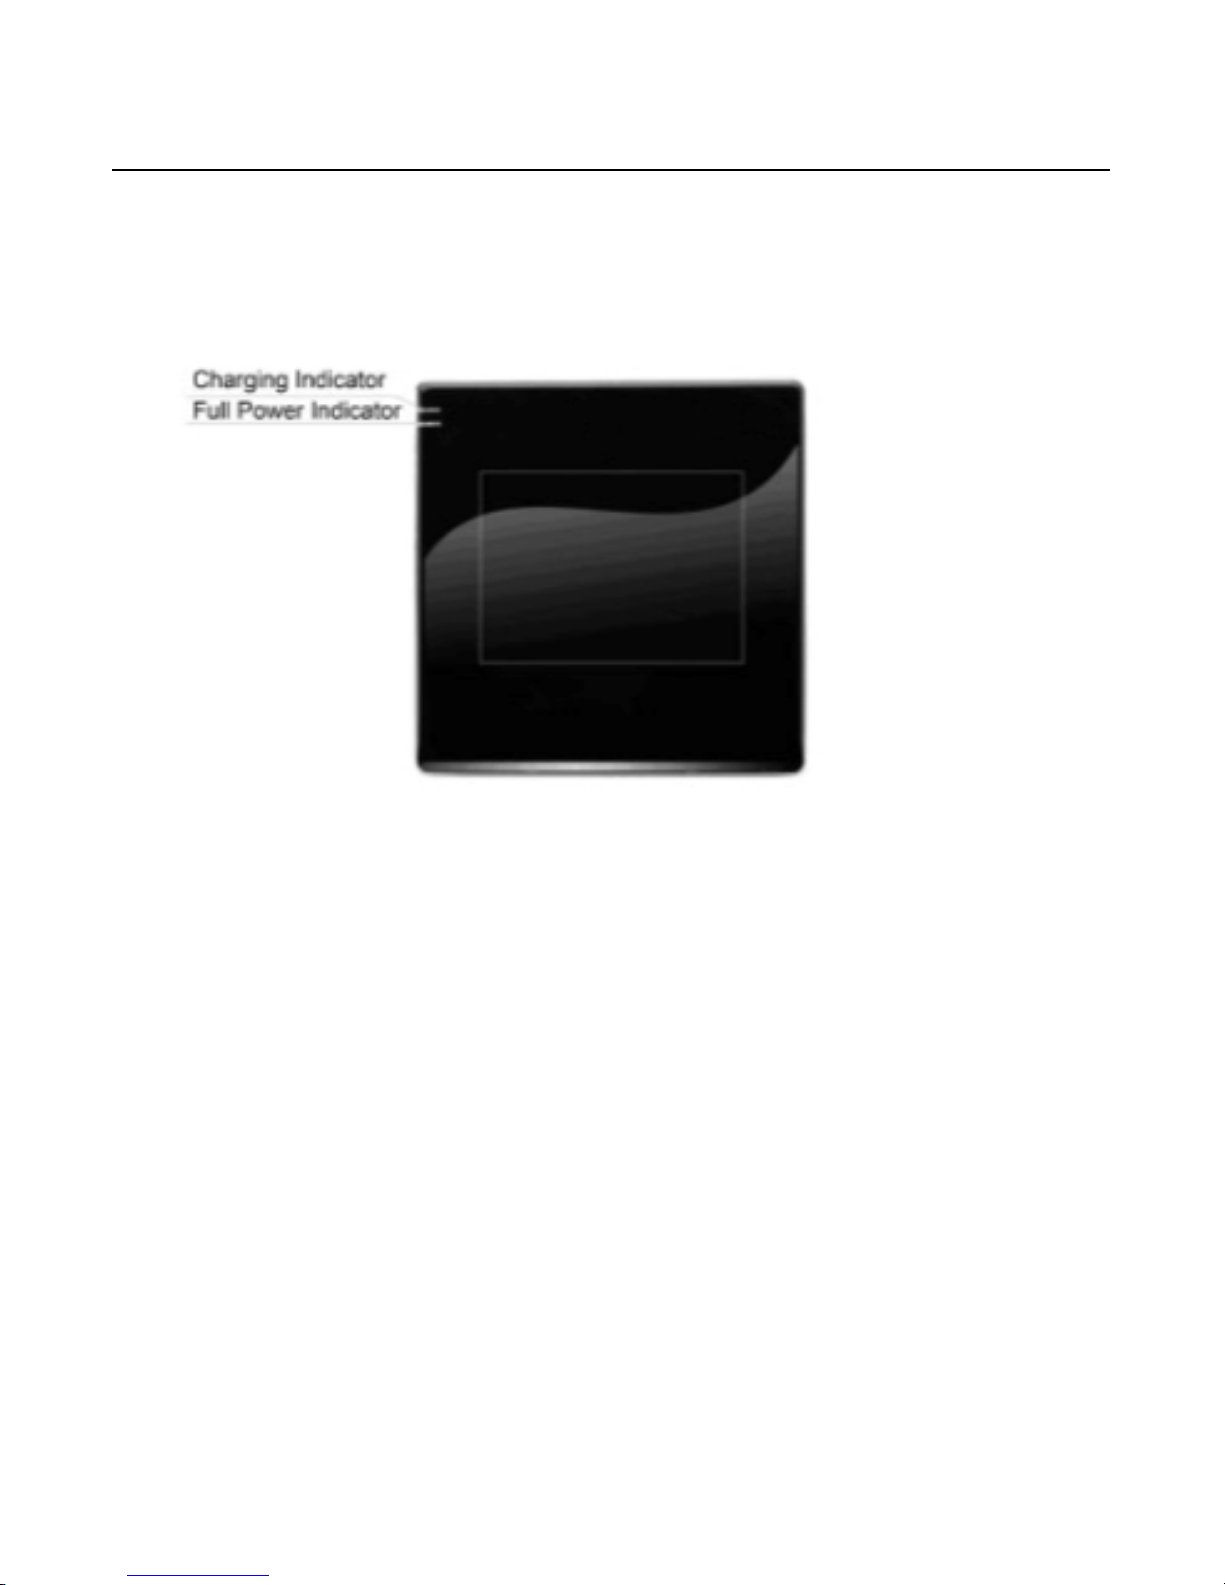
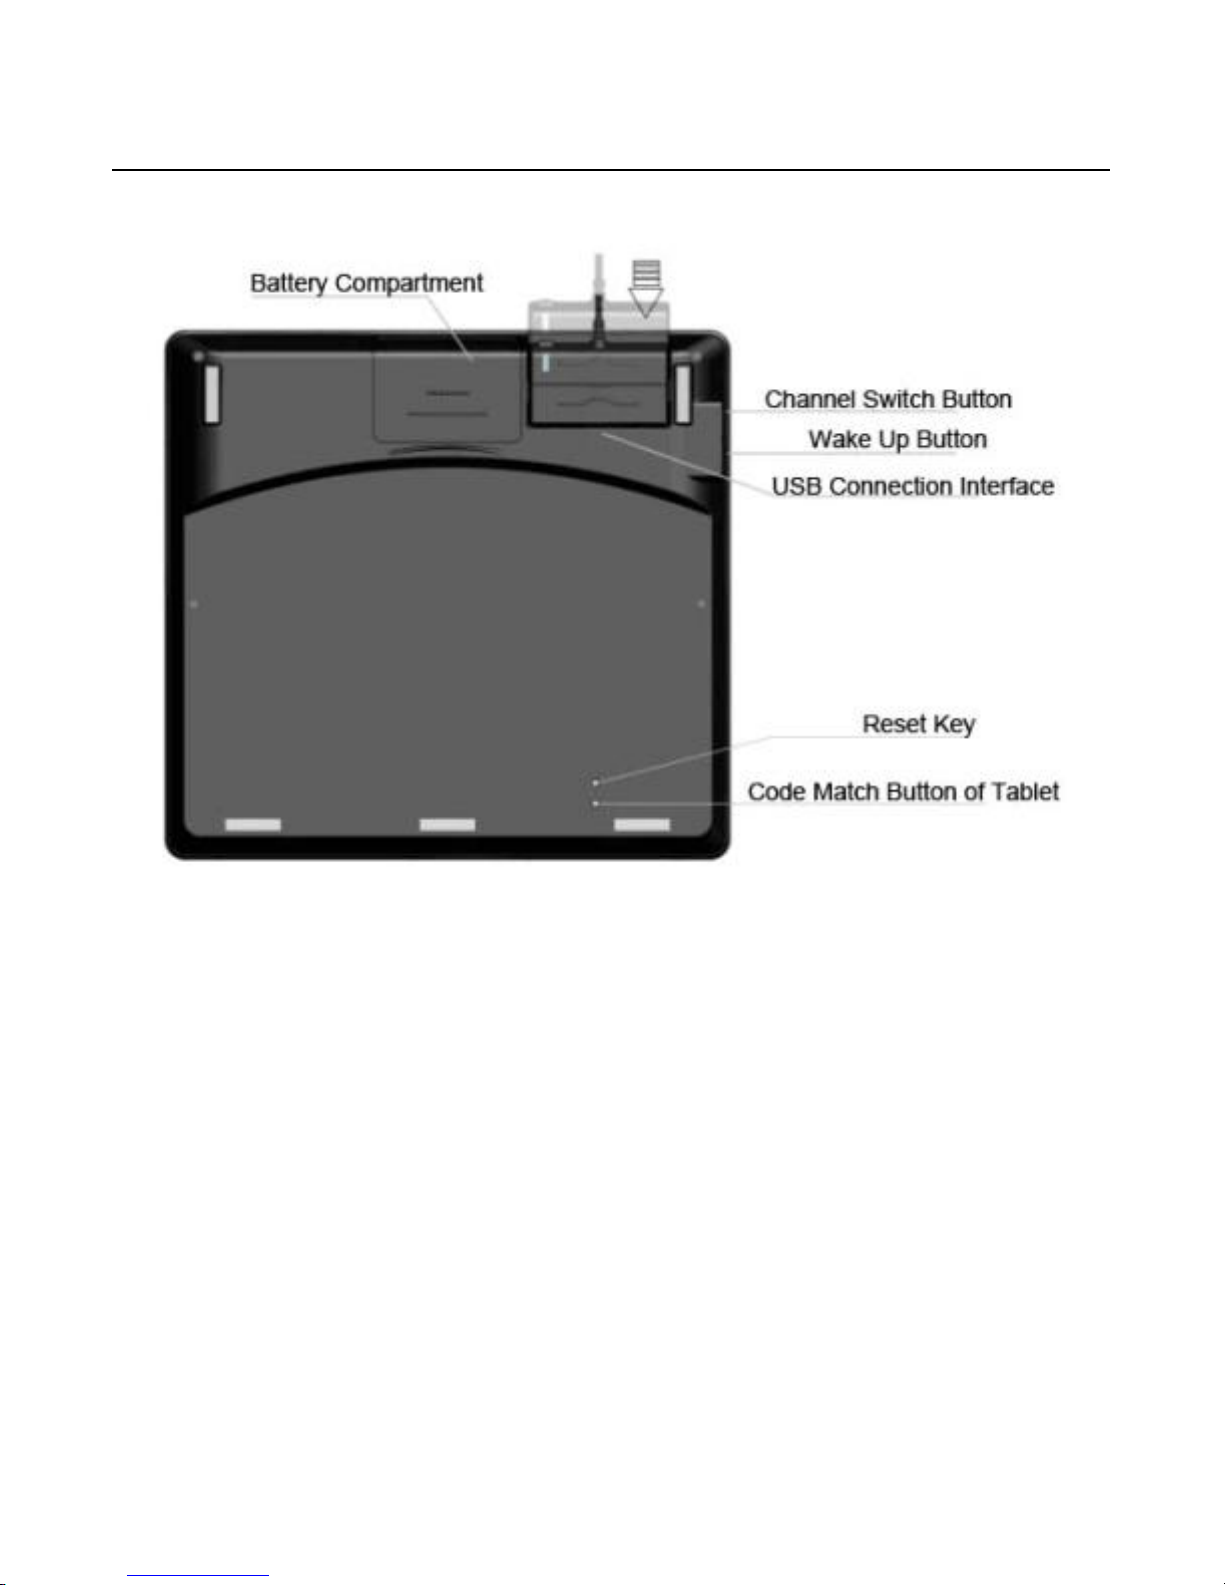
2.2
ILLUSTRATION OF WIRELESS TABLET
..............................................
3
2.3
WAKE UP TABLET
............................................................................
6
2.4
SWITCH CHANNEL OF TABLET
.........................................................
6
2.5
BATTERY CHARGING FOR TABLET
...................................................
7
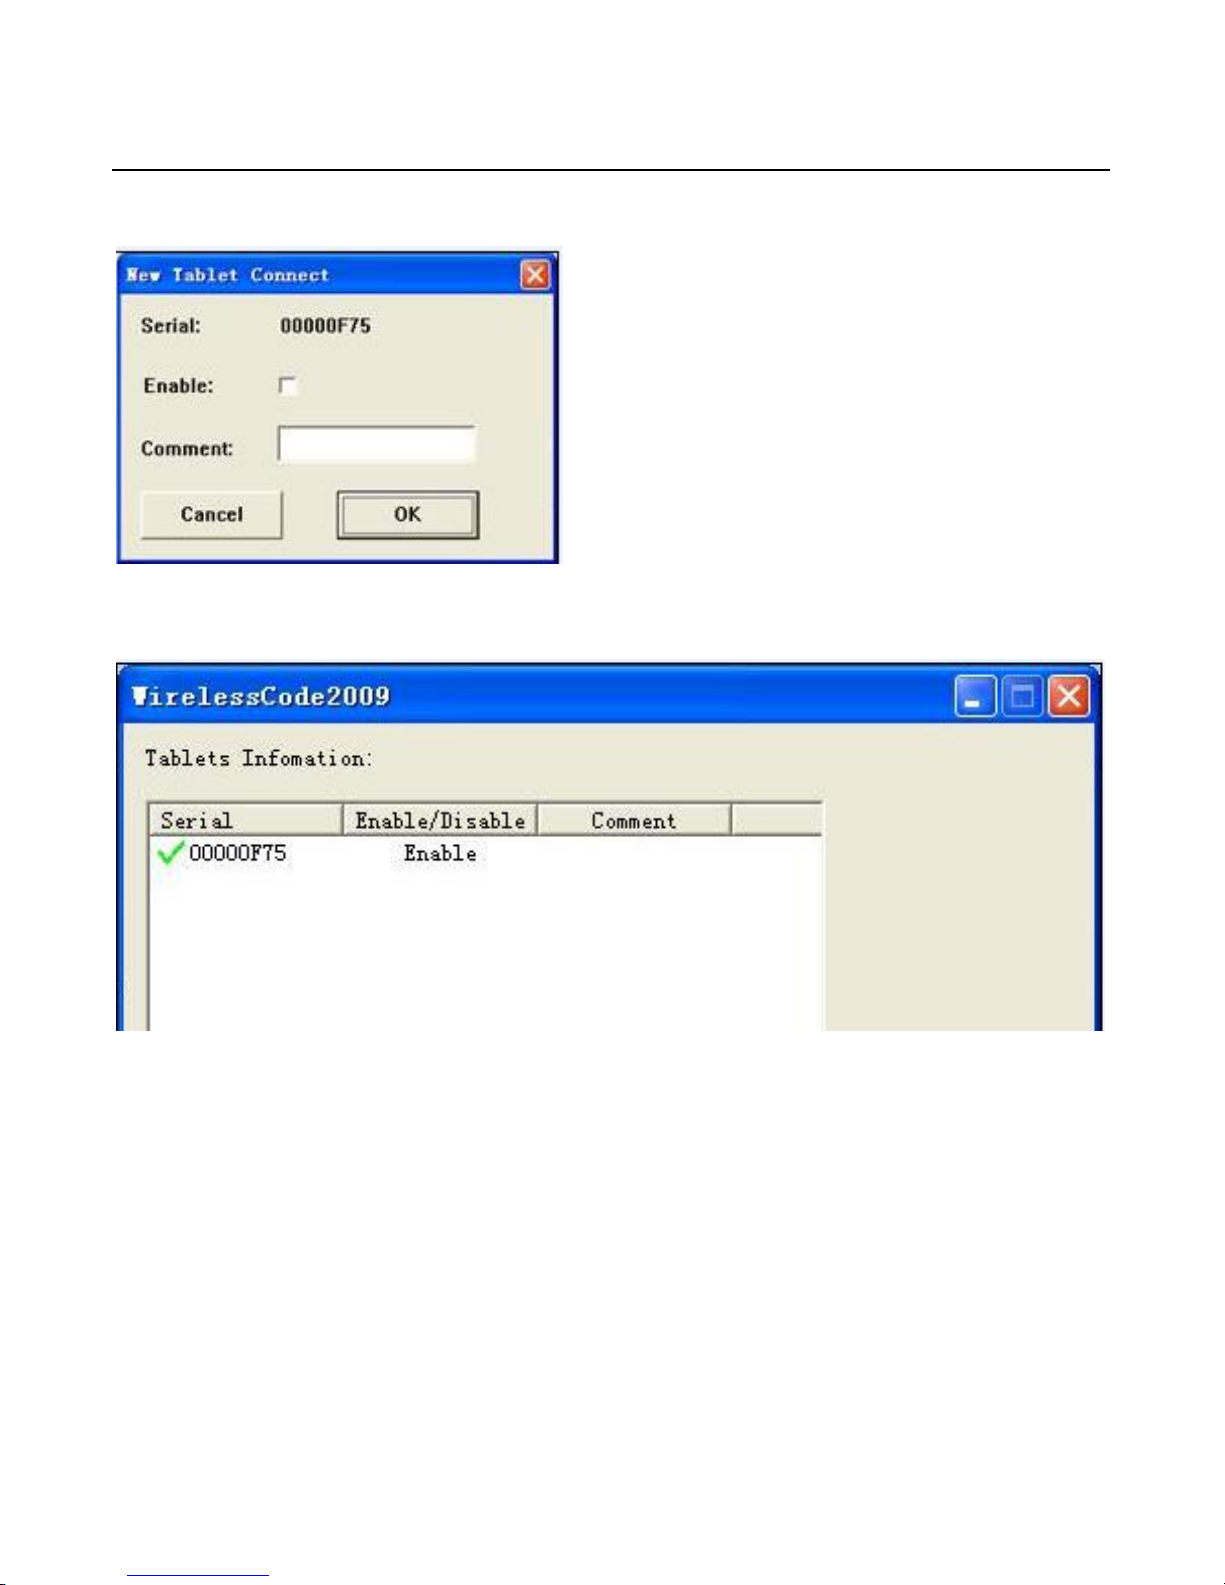
2.6
MATCH CODE OF TABLET
................................................................
7
CHAPTER 3 USAGE OF PEN
..............................................................
9
CHAPTER 4 INSTRUCTION FOR WINDOWS SYSTEMS............13
4.1
SYSTEM REQUIREMENTS
..............................................................
13
4.2
INSTALLATION
................................................................................
13
4.3
UNINSTALLING
...............................................................................
14
CHAPTER 5 MAINTENANCE ............................................................15
5.1
PEN HOLDER
.................................................................................
15
5.2
EXCHANGE PEN NIB
......................................................................
17
CAUTIONS
......................................................................................