Nexar HaloCam User manual

The Complete Package for Safety & Video Evidence
START HERE!
WELCOME TO
DashCam
W1

In this manual, we’ll show you how to install the HaloCam in your vehicle and connect it
to the Nexar app for the safest driving experience possible.
Let’s go!
Detects &
records
events
Download
videos from
any device
Unlimited
cloud storage
Collision and
speed reports
Wide angle
view

| 3
1.
2.
If you haven’t yet downloaded the Nexar app, do so first:*
Download the app by searching for ‘Nexar’ in
the App Store (iPhone) or Google Play (Android)
Open the app, register, and enable all necessary settings when prompted
*It is recommended to do this while
connected to a WiFi network
DOWNLOADING THE NEXAR APP

1.
2.
3.
4.
5.
6.
7.
HaloCam
Holder
USB charger
USB power cable
Installation tool
Micro SD card
Cable clips
USB power cable
Installation tool
Micro SD card
Wire clips
PACKAGE CONTAINS
| 5
1.
2.
3.
4.
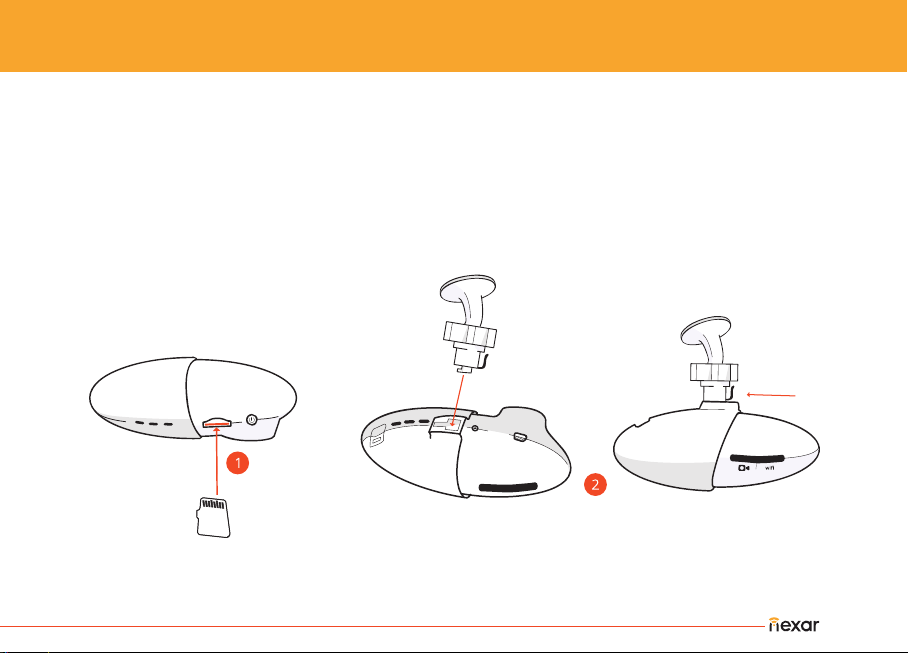
Insert micro SD card into the micro SD slot on the camera until you hear a click
Insert the holder into the holder slot on the camera and slide to lock in place
(The SD card may be pre-slotted for you)
Remove sticker from camera lens
To turn camera on and off, single tap the POWER button.
Double tapping the POWER button might interrupt the camera’s WiFi connection.
ATTENTION: Do NOT remove the micro SD from the camera while camera is ON. Doing
so may cause permanent damage to the camera! Turn camera OFF before ejecting card.
Hold camera with lens
facing downwards
Insert micro SD card
with metal pins
facing upwards
ASSEMBLING THE CAMERA
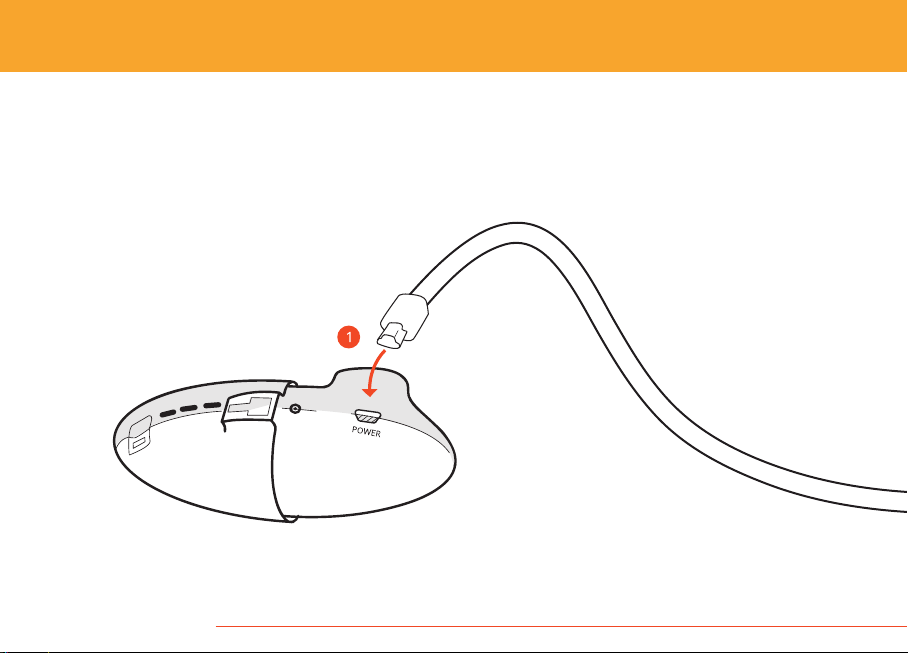
1. Connect the charging cable to the camera’s
POWER port
ACTIVATING THE CAMERA IN YOUR VEHICLE
| 7
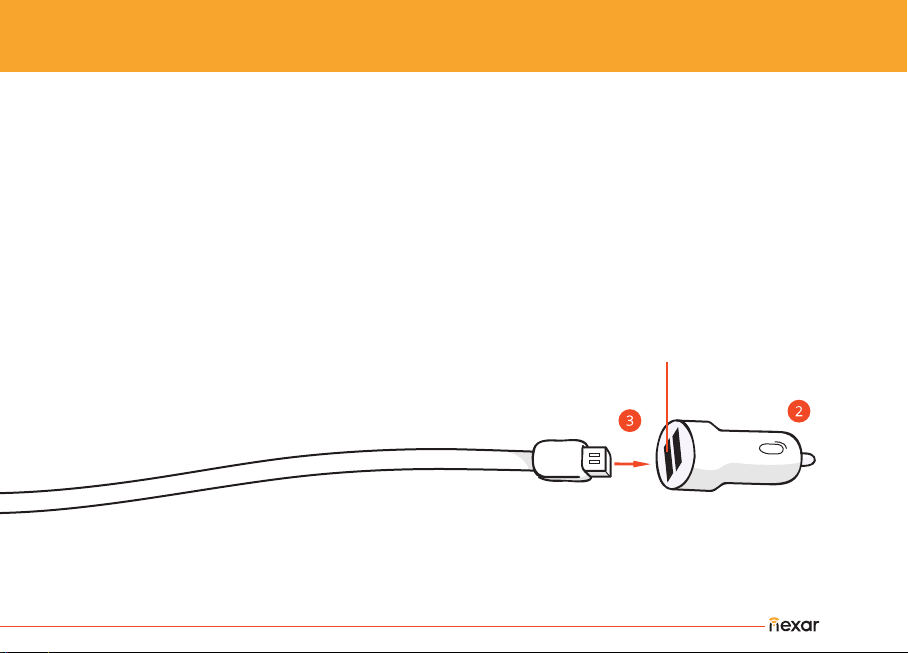
2.
3.
4.
Install the USB charger in your vehicle’s power socket
Connect the other end of the charging cable to the USB charger’s 1A socket
Start your vehicle
1A

1.
2.
3.
4.
5.
Open your iPhone’s settings
Tap on WiFi
Connect to the WiFi network
that begins with ‘Nexar (5G)’
Enter password: 12345678
Don't worry, your cellular data is still
available
Note: Make sure the blue WiFi light is never on.
To turn off the light, double tap the POWER button.
DO YOU HAVE AN IPHONE?
Nexar (5G)
Wi-Fi
Wi-Fi

| 9
DO YOU HAVE AN ANDROID?
SETTINGS
DEVICES
External camera
Note: Make sure the blue WiFi light IS ALWAYS
ON. To do so, double tap the POWER button.
1.
2.
3.
4.
5.
6.
Double-press the camera’s power button
The camera’s WiFi indicator light will now
flash blue
Open the Nexar app
Go to Settings in the top-right corner
Tap External camera
After a few seconds, the camera and your
phone will connect automatically
IN DRIVE
Auto start rides
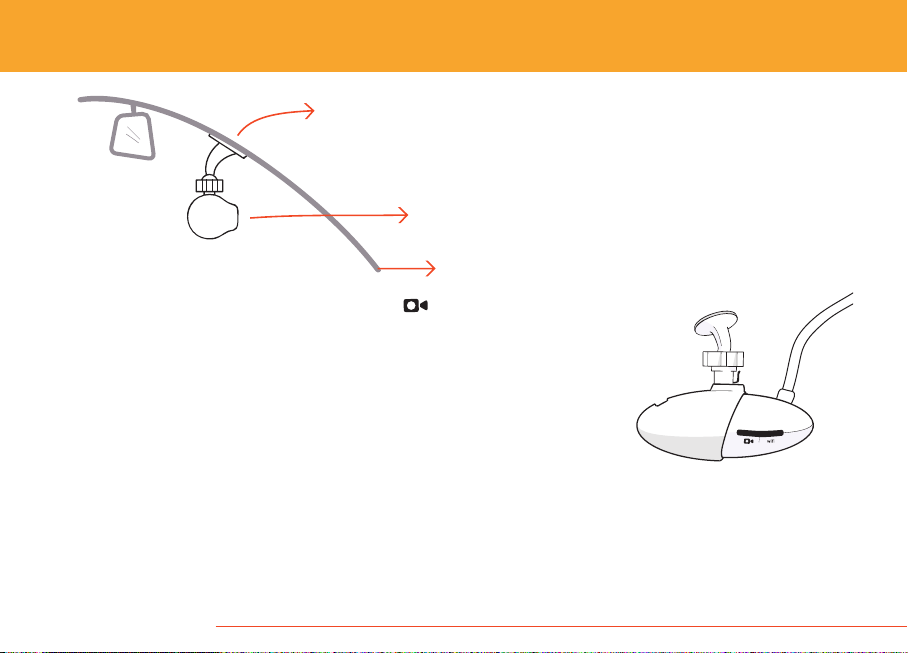
lens towards the road
windshield
sticker
1.
2.
3.
4.
5.
INSTALLING THE CAMERA IN YOUR VEHICLE
Open Nexar and tap the camera icon (for
Android) or the Drive button (for iPhone)
Wait a bit, your camera’s feed will show up in the
Nexar app
Before sticking your camera to the windshield, make sure it
has a clear view of the road. We recommend placing it behind
and to the right of the rearview mirror
After choosing a location, clean any dust and dirt from that portion of
the windshield
Remove the holder’s sticker and fix the camera to your windshield
Other manuals for HaloCam
1
This manual suits for next models
1
Table of contents
Other Nexar Dashcam manuals


