Next Century TR4 Quick start guide

www.nextcenturymeters.com
V. 010621
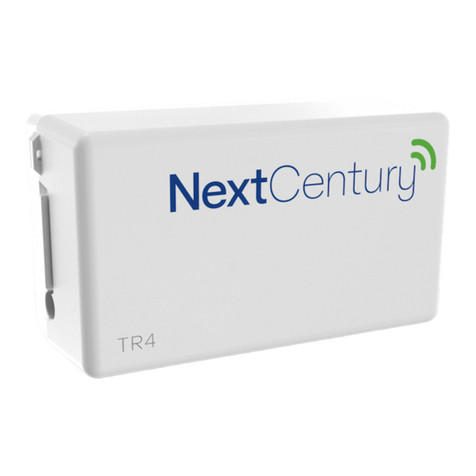
TR4 Transceiver
Indoor Meter Reading and Wireless Transceiver
Operation and Installation Guide
1| Product Overview
The NextCentury TR4 Transceiver introduces the
next generation of superior wireless performance.
Featuring Meter+™ technology, this Transceiver
offers broad meter compatibility in a single model.
Engineered for long maintenance-free operation,
the TR4 provides hourly-read precision with a 10-
year battery life.
Meter+™ Advanced Compatibility
The TR4 Transceiver utilizes Meter+™ technology, making
this single model compatible with virtually all modern
encoded and pulse-output utility meters, including water,
electric, gas, run-time, and thermal meter models.
• Single model supports a pulse or encoded meter
• Easy configuration, external programmer is not
required
• Visual LED indicators to verify meter connections
Intelligent Wireless
The TR4 Transceiver builds on the previous generation’s
longest in-class wireless range, and now boasts up to 3x
more range.
Utilizing two-way NextCentury RF Connect™ wireless,
the TR4 has intelligent routing capabilities ensuring
success in a variety of environments, from spread-out
commercial properties to high-density apartment
complexes in excess of 4,000 meter points.
The TR4 is a drop-in replacement for any previous
generation NextCentury Transceiver. Wireless network
operation is seamlessly compatible with all earlier
generation Repeaters and Gateways.
A Superior Platform
Property setup, configuration, and usage data are
managed on the NextCentury Cloud Platform. This robust
management solution connects you to a wide range of
features facilitating property setup and ongoing operation.
2| Technical Specifications
2.1 – Certifications
FCC: 2AB8I-TR4 (pending) IC: 20949-TR4 (pending)
2.2 – Wireless Communication
• Two-way NextCentury RF Connect™
• 902-928 MHz Unlicensed Band
2.3 – Meter Compatibility
• Pulse or encoded meter types (see section 3)
• Single model supports all configurations
2.4 – In-Field Configuration
• Simple meter configuration—no external
programmer required
2.5 – Battery
• Preinstalled, field-replaceable CR18505
• Estimated 10-year battery life*
*Note: 10-year battery estimated with operating temperatures
between 60ºF-90ºF, and 6-hr device check-in. Achieved battery
life can be greater or less than 10 years depending on the meter
type, system configuration, and lifetime operating temperature.
2.6 – Dimensions
• 3.3in x 1.8in x 1.3in (84mm x 46mm x 33mm)
2.7 – Operation Environment:
• -20°C to 60°C (-4°F to 140°F )
• Should be installed in an indoor, dry environment

www.nextcenturymeters.com
V. 010621
3| Meter Compatibility
3.1 – Pulse Output Meters
• Passive pulse sensing (including reed switch, solid-state
relay, contact relay, open-drain types)
• Active voltage sensing (max. 16 VDC)
• Supports tamper circuit to detect disconnect from meter
(optional)
3.2 – Encoded Output Meters
• Neptune (Including ProRead, ECoder, and ProCoder
register models)
• Sensus UI-1203 (Includes most meter models, from
Sensus, Hersey, Mueller, Master Meter, Badger,
Kamstrup, Elster, Metron-Farnier, and Zenner)
• GWF ECO (Includes all GWF encoder meters)
• Elster/AMCO K-Frame (Includes most meter models,
from Elster, AMCO, ABB and Kent)
4| In-Field Installation
4.1 – Mounting Plate Installation
• Peel off backing on the included adhesive pad and mount
onto the wall
• (Optional) For additional holding strength, the included
screws and plastic anchors can be used. Pre-drill using a
7/32” (5.5mm) drill bit
• When used with the NextCentury M201 Water Meter,
remove the TR4’s mounting plate and slide onto the
meter’s included mounting adapter
• For third-party meters, the Zip Mount Adapter can be
used
4.2 – Meter Wiring
• Strip meter wire ends to 3/16” (5 mm)
• Insert stripped wire ends into the blue terminal
connector and tighten securely using a Phillips (PH-1)
screwdriver
4.3 – Meter Wiring Diagram
5| LED Indicators
The TR4 features two separate LED indicators with simple color-
coded feedback.
6| Configuring Meter Type
6.1 – Entering Configuration Mode
Note: The TR4 is configured for a pulse meter by default. No
configuration change is necessary.
• Press and hold the Test Connect button for 5 seconds to
enter Configuration Mode
• The Meter LED will display a solid color to show the
current meter configuration
6.2 – Toggle Pulse or Encoded
• Tap the Test Connect button to toggle between Pulse
Meter (red) and Encoded Meter (blue) configurations
• After 3 seconds, the meter type is accepted

www.nextcenturymeters.com
V. 010621
7| Pulse Meter
7.1 – Configure for Pulse
• Enter configuration mode
• If the Meter LED is solid blue, the TR4 is configured for a
pulse meter (see previous section)
7.2 – Verify Meter Connection
A pulse from the connected meter is indicated by a fast blue
blink of the Meter LED
8| Encoded Meter
8.1 – Encoded Meter
• To verify which meter type is currently configured, enter
configuration mode
• If the Meter LED is solid red, the TR4 is configured for an
encoded meter (see section 6)
8.2 – Verify Meter Connection
• Press the Test Button
• The TR4 will try to read the connected meter
• A green blink indicates the TR4 can read the meter
• A red blink indicates the meter could not be read and
wiring should be checked
9| Programming & Wireless Check-In
9.1 – Property Setup
The NextCentury website or NCSS mobile app can be used to set
up and configure the property, units, and meters. Visit
support.nextcenturymeters.com for additional property setup
details.
9.2 – Programming
Property programming is the process of associating Transceiver
serial numbers to the meters they are reading. Scan the barcode
to ensure the serial number is entered accurately.
9.3 – Gateway Device Management
After programming, the connected Gateway will automatically
sync and communicate with the TR4.
9.4 – Wireless Connection LED Indicators
The RF LED indicator provides feedback to easily check that the
TR4 is within range of the property’s Gateway (either directly, or
through Repeaters)
• Tap the Test Connect button
• The TR4 RF LED will rapidly blink red, indicating it is
transmitting
• The RF LED will then blink 2x green if a response is
received from the Gateway
9.5 – Wireless Troubleshooting
If the RF LED does not blink green after tapping the Test Connect
button, then the TR4 is not receiving a response from the
Gateway. The following steps can help identify the issue:
• If the TR4 does not blink green, even when close to the
Gateway, make sure it has been programmed to the
property and the Gateway is online
• Try multiple times—if eventually a response is received,
then an additional Repeater may be needed to improve
the wireless network
• Move the TR4 closer to the Gateway or nearest
Repeater. If a response is received, then an additional
Repeater may be needed
10| Advanced Features &
Troubleshooting
Visit support.nextcenturymeters.com for additional guides and
troubleshooting information.
11| Television and Radio Interference
NOTE: This equipment has been tested and found to comply
with the limits for a Class B digital device, pursuant to part 15 of
the FCC Rules. These limits are designed to provide reasonable
protection against harmful interference in a residential
installation. This equipment generates, uses and can radiate
radio frequency energy and, if not installed and used in
accordance with the instructions, may cause harmful

www.nextcenturymeters.com
V. 010621
interference to radio communications. However, there is no
guarantee that interference will not occur in a particular
installation. If this equipment does cause harmful interference to
radio or television reception, which can be determined by
turning the equipment off and on, the user is encouraged to try
to correct the interference by one or more of the following
measures:
—Reorient or relocate the receiving antenna.
—Increase the separation between the equipment and receiver.
—Connect the equipment into an outlet on a circuit different
from that to which the receiver is connected.
—Consult the dealer or an experienced radio/TV technician for
help.
The FCC requires the user to be notified that any changes or
modifications made to this device that are not expressly
approved by Company Name may void the user’s authority to
operate the equipment.
Radiation Exposure Statement:
This equipment complies with FCC radiation exposure limits set
forth for an uncontrolled environment. This equipment should
be installed and operated with minimum distance 20cm between
the radiator & your body.
As per 47 CFR §15.19
(All other devices shall bear the following statement in a
conspicuous location on the device:
This device complies with part 15 of the FCC Rules. Operation is
subject to the following two conditions: (1) This device may not
cause harmful interference, and (2) this device must accept any
interference received, including interference that may cause
undesired operation.
As per 47 CFR §15.21
The user’s manual or instruction manual for an intentional or
unintentional radiator shall caution the user that changes or
modifications not expressly approved by the party responsible
for compliance could void the user's authority to operate the
equipment. In cases where the manual is provided only in a form
other than paper, such as on a computer disk or over the
Internet, the information required by this section may be
included in the manual in that alternative form, provided the
user can reasonably be expected to have the capability to access
information in that form.
ISED Statement
This radio transmitter (identify the device by certification number)
has been approved by Industry Canada to operate with the antenna
types listed below with the maximum permissible gain indicated.
Antenna types not included in this list, having a gain greater than the
maximum gain indicated for that type, are strictly prohibited for use
with this device.
Immediately following the above notice, the manufacturer shall
provide a list of all antenna types approved for use with the
transmitter, indicating the maximum permissible antenna gain
(in dBi).
8.4 User Manual Notice for Licence-Exempt Radio Apparatus
User manuals for license-exempt radio apparatus shall contain
the following text, or an equivalent notice that shall be displayed
in a conspicuous location, either in the user manual or on the
device, or both:
This device complies with Innovation, Science and Economic
Development Canada’s licence-exempt RSSs. Operation is subject to
the following two conditions:
(1) This device may not cause interference; and
(2) This device must accept any interference, including interference
that may cause undesired operation of the device.
Cet appareil est conforme aux flux RSS exemptés de licence
d'Innovation, Science et Développement économique Canada.
L'opération est soumise aux deux conditions suivantes:
(1) Cet appareil ne doit pas provoquer d'interférence; et
(2) Cet appareil doit accepter toute interférence, y compris les
interférences susceptibles de provoquer un fonctionnement
indésirable de l'appareil.
--------------------------
ISEDC Radiation Exposure Statement
[English] Radiation Exposure Statement: This equipment
complies with the IC RSS-102 radiation exposure limits set forth
for an uncontrolled environment. This equipment should be
installed and operated with a minimum distance of 20 cm
between the radiator and your body.
[French] Énoncé d'exposition aux rayonnements: Cet
équipement est conforme aux limites d'exposition aux
rayonnements ioniques RSS-102 Pour un environnement
incontrôlé. Cet équipement doit être installé et utilisé avec un
Distance minimale de 20 cm entre le radiateur et votre corps.
14| Contact Information
For any questions or concerns, please contact NextCentury
Submetering Solutions Product Support:
• Phone: (844) 538.8203
• Email: [email protected]
Other Next Century Transceiver manuals

Next Century
Next Century TR4-X User manual
Next Century
Next Century TR4 Quick start guide
Next Century
Next Century TR4-X Quick start guide

Next Century
Next Century TR4-X Quick start guide
Next Century
Next Century TR-201 Specification sheet
Next Century
Next Century TR4 User manual
Next Century
Next Century RR4-TR User manual
