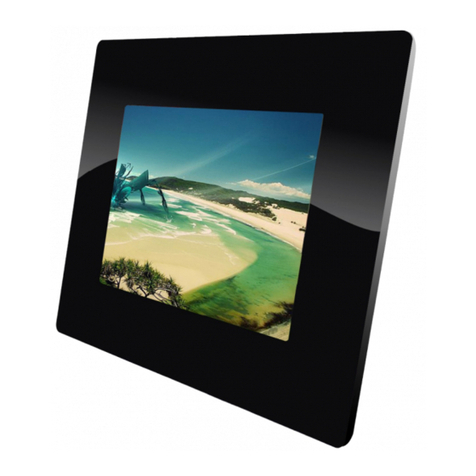
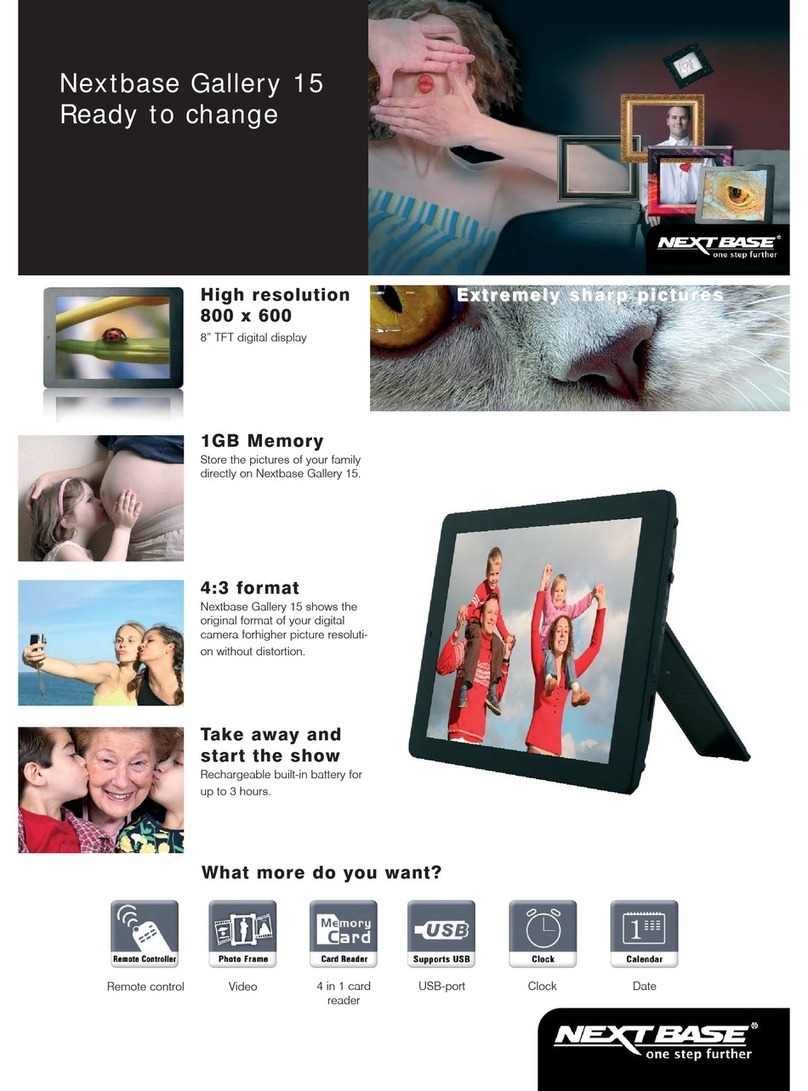
NextBase Gallery 15 User manual

Entertainment Unlimited
www.next-base.com
@Gallery 15
8'' Wi-FiDigital PhotoFrame
Photos without Frontiers

,
Nextbase @Gallery 15 - Users Guide
CONTENTS
CONTENTS......................................................1
IMPORTANT SAFETY INSTRUCTIONS
.........
2
GENERAL INTRODUCTION............................3
PACKAGE CONTENTS
...................................
4
PARTS AND CONTENTS.................................5
Button definitions.........................................5
Front............................................................5
Left...............................................................6
Right............................................................6
Top...............................................................6
Bottom.........................................................7
Back............................................................ 7
Remote control........................................... 8
Notes on using the remote control unit....... 9
Replacing the battery..................................9
Connecting to the 8'' x 6'' frame.................10
Connecting to the 10'' x 8'' frame by using
the frame mount.........................................10
How to use the extendable stand support..11
CONNECTIONS.............................................12
Connecting the adapter to the DC socket..12
Inserting a memory card into
@Gallery 15...............................................12
Inserting a USB stick into @Gallery 15......13
BASIC OPERATIONS.....................................14
Turning on the unit by using the adapter....14
Turning on the unit by using the battery.....14
Select Wi-Fi network..................................14
PICASA RELATED OPERATIONS.................16
Getting a free account with Picasa............16
Logging into Picasa account......................17
Connecting to a wireless network..............18
Viewing Picasa photos...............................19
Send photos..........................................20
Begin slideshow.....................................21
Slideshow settings.................................21
Delay time..............................................21
Slideshow sequence............................. 22
Slideshow effect.....................................22
Copy to..................................................22
Zoom in................................................. 23
Rotate....................................................23
Properties..............................................23
Download and synchronize photos........24
RECEIVING PHOTO MAIL.............................25
Email account............................................25
Receiving photo mail.................................25
VIEWING MEMORY CARD AND USB
PHOTOS.........................................................27
Batch upload..............................................27
Viewing photos from a memory card or
USB stick....................................................28
Upload...................................................29
Delete....................................................30
Viewing Weather Forecast.........................31
Changing Settings.....................................32
Resize resolution...................................32
Wi-Fi network.........................................3. 2
Auto and manual receive.......................3. 4
Language...............................................34
Display settings......................................35
Date and time.........................................35
Slideshow settings.................................37
Reset ....................................................37
Personal profile......................................38
Software update.....................................39
Backup Picasa photo.............................40
Status.....................................................41
Login Picasa..........................................41
OTHER...........................................................42
Dimension and parameter.........................42
Trouble shooting........................................43
Smashed screen identification...................44
General Introduction 1
IMPORTANT SAFETY INSTRUCTIONS
1. Read these instructions.
2. Keep these instructions.
3. Heed all warnings.
4. Follow all instructions.
5. Do not use this device near water.
6. Clean only with a dry cloth.
7. Do not block any ventilation openings. Install in accordance with the manufacturer's
instructions.
8. Do not install near any source, such as radiator, heat register, stove, and any other device
(including amplifiers) that produces heat.
9. Do not defeat the safety purpose of the polarized or grounding-type plug. A polarized plug
has two blades with one wider than the other. Agrounding-type plug has three prongs. The
wide blade or the third prong are provided for your safety. If the provided plug does not fit into
your outlet, consult an electrician for replacement of the obsolete outlet.
10.Prevent the power cord from being walked on or pinched particularly near plugs, especially at
the point where they exit from the device.
11. Only use attachments/accessories specified by the manufacturer.
12.Unplug this device during lightning storms or when unused for long periods of time.
13.Refer all servicing to qualified service personnel. Servicing is required when the device has
been damaged in any way, such as power-supply cord or plug is damaged, liquid has been
spilt or objects have fallen onto the device, the device has been exposed to rain or moisture,
does not operate normally, or has been dropped.
14.To reduce the risk of fire or electric shock, do not expose this device to rain or moisture.
15.The device shall not be exposed to dripping or splashing and any object filled with liquids, shall
be placed on the device.
16. WEEE statement: Please do not throw electronic devices into household waste. Separate
them for correct recycling.
2 General Introduction

,
Nextbase @Gallery 15 - Users Guide
GENERAL INTRODUCTION
Thank you for purchasing this Wi-Fi digital photo frame. Please read this manual carefully before
operating and keep it for future reference.
Nextbase @Gallery 15 is an 8'' Wi-Fi digital TFT photo frame with a 2GB internal memory which
enables you to store up to 5000 photos. It can upload and download photos via a Wi-Fi internet
connection. The built-in Lithium battery (3.7V, 1500 mAh)provides up to 2-hour use. It supports
SD/MMC/MS/MS-PRO/xD memory cards and USB sticks. Pictures can be uploaded to the Picasa
website and viewed from anywhere in the world. @Gallery 15 has been designed to fit all standard
8'' x 6'' photo frames, which enables it to be personalized to suit your photos or your room decor.
@Gallery 15 includes an extendable stand as well as wall fixing points which allow you to use it on
a table or hang it on a wall. On top of this @Gallery 15 has an inbuilt weather forecast function.
Now, open the box and enjoy your digital photos!
General Introduction 3

tosw
itho u
tF
ron
ti
PACKAGE CONTENTS
@Gallery 15 AC-DC Adapter
User Manual Quick Start
Remote Control Extendable Stand
Frame Mount X 2pcs Frame Retaining Screws X 2pcs
4 General Introduction

,
Nextbase @Gallery 15 - Users Guide
PARTS ANDCONTENTS
BUTTON DEFINITIONS
1 2 3 4
1. ESC (Escape) 2. DIR/OK ( )
3. HOT-KEY
(Press to check the weather forecast)
4. STANDBY
FRONT
1. Remote control sensor
The remote control signals are received here.
Remote control sensor
(Do not cover this)
General Introduction 5

LEFT
1. LED indicator
When @Gallery 15 is powered and the DC adapter is connected, the LED indicator will be red to
show the battery is charging. When the battery is fully charged, the indicator will turn green.
When @Gallery 15 is off and the DC adapter is connected, the LED indicator will be red to show
the battery is charging. When the battery is fully charged, the indicator will turn off.
When @Gallery 15 is on and the DC adapter is not connected, the LED indicator will be green to
show the battery is being used. When the battery is discharged, the indicator will turn off.
When @Gallery 15 is in its standby mode and the DC adapter is connected, the LED indicator
will be red to show the battery is charging.
When @Gallery 15 is in its standby mode and is not charging, the LED indicator will turn green.
RIGHT LED indicator
1. USB port
Connect a USB memory stick here to view pictures.
ESC
DIR/OK
HOT-KEY
STANDBY
TOP
USB
1. Wi-Fi antenna
Please pull out the Wi-Fi antenna to connect to the internet.
Wi-Fi antenna
6 General Introduction

,
Nextbase @Gallery 15 - Users Guide
BOTTOM
1. DC IN 5V
Connect the included AC/DC adapter here.
2. Reset
Press it when @Gallery 15 crashes.
3. Power ON/ OFF
4. Card slot
Support SD /MMC /MS /MS Pro /xD cards.
4 3
2 1
BACK
2
3
2
1 1
1. Metal connectors
Pull out metal frame connectors that can be screwed into wooden frames by using screws
provided. (See page 10 for details)
2. Wall hanging mount (horizontal or vertical option)
3. Table top stand. Flip out, and adjust to either vertical or horizontal use. (See page 11)
General Introduction 7

REMOTE CONTROL
1. ESC
To exit the current operation.
Go back to the previous menu.
When operating a slideshow or full screen
display, press ESC to exit the mode, and
move back to the thumbnail.
2. Up /Down /Left /Right
Direction key for Up /Down /Left /Right.
Navigating in sub-directory.
When a picture is viewed in full screen,
Up/Down can be used to view the previous
picture or the next picture.
3. OK
Press OK to confirm.
Press OK to enter the next menu or confirm
the selection.
4. HOT-KEY
Press HOT-KEY to get the weather forecast.
1
ESC
2
OK
3
4
HOT-KEY
5
STANDBY
5. STANDBY
Press for about 3 seconds, then the unit will enter standby mode. Press STANDBY again, then
the unit will wake up and enter normal operation mode.
Note:
1. The buttons on the remote control have exactly the same functions as the ones on the unit of
@Gallery 15.
2. Standby function would not work if the unit is not powered by the AC-DC adapter.
8 General Introduction

,
Nextbase @Gallery 15 - Users Guide
NOTES ON USING THE REMOTE CONTROL UNIT
1. Do not drop or step on the remote control or subject it to shocks. Note that the remote control
may not work if there are obstacles between the remote sensor and itself.
2. Do not expose the remote sensor to strong light. Doing so may make operation impossible.
3. Use the remote control unit within the specified operating range.
4. Do not block the signal between @Gallery 15 sensor and the remote control. If the signal is
blocked, the remote control will not work. Remote control sensor is shown on page 5.
REPLACING THE BATTERY
1. Use your finger nail to press A and
pull out the battery holder according
to the indicated direction.
2. Remove the old battery, and put the
new battery on the battery holder with
the + side facing upwards.
Lithium Battery (CR2025)
3. Fit the battery holder back to its place.
NOTE:
To prevent leakage of fluid from the lithium battery, remove the battery when not using the
remote control unit for long periods of time (one month or more). If the battery leaks fluid,
carefully take the battery out and wipe the battery holder, then replace with a new lithium
battery.
Caution: The battery may present a risk of fire if not handled properly. Do not recharge,
disassemble, or heat it above 100oC.
Replace battery with the same type.
Dispose of used battery properly, keep away from children and do not dispose it in fire.
CAUTION
RISK OF EXPLOSION IF BATTERY IS REPLACED BYAN INCORRECT TYPE.
DISPOSE OF USED BATTERIES ACCORDING TO THE INSTRUCTIONS.
General Introduction 9

CONNECTING TO THE 8'' X 6'' FRAME
Nextbase @Gallery 15 can match with all standard 8'' X 6'' wooden frames as shown below:
1. Attach the standard 8" X 6" frame to @Gallery 15.
2. Move the frame locking latches to secure @Gallery 15 in place.
3. If the chosen frame does not have its own locking latches, then use the built-in metal frame
connectors on @Gallery 15. Pull out the metal frame connectors as shown below. Attach
to the frame by using the screws supplied.
Slide out both sides
Note: Remote controldoes not work if the sensor is blocked by the frame.
CONNECTING TO THE 10'' X 8'' FRAME BY USING THE FRAME
MOUNT
Your Nextbase @Gallery 15 can match with all standard 10'' X 8'' wooden frames byusing the
frame mount included in the accessories:
10 General Introduction

,
Nextbase @Gallery 15 - Users Guide
Attach @Gallery 15 to the frame mount, and make sure that the remote control sensor is aligned
with the remote control window. Press down and click in to place securely.
Remote control sensor
Remote
control window
Frame mount @Gallery 15
1. Choose your favorite 10'' X 8'' frame.
2. Slot @Gallery 15 into the supplied Nextbase frame mount.
3. Then mount the frame (with @Gallery 15) into the standard 10'' X 8'' wooden frames, and fix
securely.
HOW TO USE THE EXTENDABLE STAND SUPPORT
Nextbase @Gallery 15 can be placed on a table by using the extendable stand. It can be placed
horizontally or vertically as desired.
1. Select either horizontal or vertical modes as desired.
2. Pull up the stand on the back of @Gallery 15.
3. Adjust the length of the support by sliding the "Lock-Unlock" latch, and then pull the support
stand to the desired length.
4. Push the latch to Lock to fix the position.
5. Lean @Gallery 15 back to the desired position.
1 2 3 4 5
General Introduction 11

CONNECTIONS
1. CONNECTING THE ADAPTER TO THE DC SOCKET
2. INSERTING A MEMORY CARD INTO @GALLERY 15
Insert the card as shown
Note:
1. Because of various sizes of memory cards provided by different suppliers, please adjust the
angle slightly if the memory card cannot be read.
2. Mini SD adapter or dual voltage SD cards may not be recognized by @Gallery 15.
3. Please do not use the MS-PRO adapter with a surface whose paint has fallen off, or damage
to @Gallery 15 may be caused.
12 General Introduction

,
Nextbase @Gallery 15 - Users Guide
3. INSERTING A USB STICK INTO @GALLERY 15
Insert the USB stick as shown below.
Note:
1. Support USB 2.0.
2. Support USB host to read and write USB disk.
3. Support JPEG decoding.
ESC
DIR/OK
HOT-KEY
STANDBY
General Introduction 13

BASIC OPERATIONS
TURNING ON THE UNIT BY USING THE ADAPTER
1. Plug the AC-DC adapter to a wall outlet.
2. Connect the DC output plug of the adapter to the DC input jack of the main unit.
3. Press ON/OFF for 3 seconds to turn on the power, and the Nextbase opening screen will
appear.
2 3
1
TURNING ON THE UNIT BY USING THE BATTERY
1. @Gallery 15 also works without adapter if the battery is charged.
2. The built-in battery (3.7V/1500mAh) allows up to 2-hour use.
3. Press ON/OFF for 3 seconds to turn on the power, and the Nextbase opening screen will
appear.
SELECTING WI-FI NETWORK
1. Pull out the Wi-Fi antenna.
Lighting
14 Basic Operations

,
Nextbase @Gallery 15 - Users Guide
2. The system will search for wireless network automatically.
Scan for wireless networks...
3. Select Wi-Fi network (AP). Enter the password if it is required.
Nextbase
Security
enable
wirless
network
WEP
Kismet
Security
enable
wirless
network
WEP
Xs
Tsh
Security
enable
wirless
network
WEP
4. Press OK on the unit or on the remote control to confirm your choice.
OK
Note:
1. For first time setup, or first time operation after reset, the network list will pop up to let the
user select the Wi-Fi network. The selected network will be remembered and automatically
connected next time.
2. For later connections, if the previously selected network cannot establish connection, will
appear on the screen. Please enter Wi-Fi Network under Change Settings to search for
network again.
Basic Operations 15

Γ
οογ
λ
ε
PICASA RELATED OPERATIONS
GETTING A FREEACCOUNT WITH PICASA
If you do not have an account with Picasa, go to http://picasaweb.google.com to create your
account.
Please follow the steps below to create a new account.
1. Visit the Picasa website at http://picasaweb.google.com
Http://picasaweb.google.com
Picasa
TMWebAlbums Fast and easy photo sharing from Google
Just added! Try our new photo search.
Sign
in
to
Picasa
Web
Albums
with
your
Search Photos
Google
Account
Email:
Password:
Remember
me
on
this
computer.
Sign
in
I
cannot
access
my
account
Post phot os and vi deos online in sec onds
One-click web upload directly from Picasa, or add photos using a web browser or your Mac.
,
Dont
have
a
Google
Account?
Share photos with friends and family
Create
a
new
Share albu ms exclusive with f riends and family, or make you r albums pubic an d share with the Pic asa
community.
Google
Account
Viewandsaveyour
,photos
friends ,
Keep track of your f avorite people and s ee when they add something n ew. Download friends albums t oo.
Enjoy photos at their best
See big photos, scroll though them quickly, rotate and zoom. Have fun with captions and comments.
Sign Up! Learn More >>
C 2007 Goog le - Google Home - Privacy P olicy - Help
2. Click ''Create a new Google account'' to create your new account.
3. Enter your current email address, select a password and user name, and enter other relative
information as shown below.
Http://picasaweb.google.com
TM Create a Google Account - Picasa Web Albums
Accounts
Create an Account
Your Goog le Account gi ves you access t o Picasa W eb Albums and other G oogle services. If you alr eady have a G oogle
Account, you can sign in here.
Require information for Google account
Your current email address:
Choose a pas sword:
Re-enter password:
e.g.
Myname@example.com.
This
will
be
used
to
sign-in
to
your
account .
Password
strength:
Minimum
of
8
charaters
in
length.
Remember
me
on
this
computer.
Creating
a
Google
Account
will
enable
Web
History.
Web
History
is
a
feature
that
will
provide
you
with
a
more
personalized
experience
on
Google
that incl udes
more
relevant
seach
results
and
recommendations.
Learn
More
Enable
Web
History.
Get
started
with
Picasa
Web
Albums
Desired
username:
4. After entering relevant information, read Google Terms of Service and accept if you agree.
5. Once you have created an account, upload your pictures by following the steps in the user
manual.
16 Basic Operations

,
Nextbase @Gallery 15 - Users Guide
LOGGING INTO PICASA ACCOUNT
Once Wi-Fi Network has been selected under Change Settings, the device will scan for wireless
networks automatically, and then display all available networks. Select the network you wish to
connect to by pressing OK.
Enter your Picasa email address.
Enter your password.
Press OK on the unit or on the remote control
to confirm the information you entered.
Picasa
T
M
Email:
Password:
Save
Not
saved
Picasa
is
a
trademark
of
Google
Inc.
Press OK before entering the password. The key board
will appear on the screen.
Use the navigation keys Up/Down/Left/Right to enter letters
Please enter the email address.
-
1 2 3 4 5 6 7 8 9 0
and numbers, then press OK to confirm. q w e r t y
u i o pa s
d
f g h j k
l ;
z x c v b n
m , . /
Space Shift
@
Enter
- =
\
Press Save to save email address and password
and enter the main menu.
Picasa
T
M
Email:
******
Password:
XXXXXXXXX
Save
Not
saved
Note:
If Not Saved has been selected, you will need to re-enter
your email address and password when turning on the
power next time.
2008/1/17 02:45
Receive Photo M ail
View Memory Card
and USB Photo
View Picasa Photos
Check Weather and
Latest News
Change Settings
Picasa is a trademark of Google Inc.

Basic Operations 17

CONNECTING TO A WIRELESS NETWORK
1. If the icon for network connection '' '' appears
in white, it means the wireless network has not been
connected, and re-searching the network is needed.
If the icon for network connection appears in '' ''
in blue color, it means the wireless network
has been connected. The quantity of the blue lines
represent the reception condition. 3 blue lines
indicate the network signal is strong, while 1 blue
line indicates it is weak.
2008/1/17 02:45
Receiv e Photo Mail
View Memory Card
and USB Photo
View Picasa Photos
Check Weather and
Latest News
Change Settings
Picasa is a trademark of Google Inc.
2008/1 /17 02:45
Resize Resolution
Change Settings
2. Navigate down to Change Settings, and press OK
to confirm.
Wi-Fi Network
Auto and Manual Receive
Language
Display Settings
3. Navigate down to Wi-Fi Network, and press OK to
confirm.
Change Settings
Wi-Fi Network
Scan
for
wireless
networks
IP
address
and
DNS
4. Navigate to Scan for wireless network, and press OK
to confirm. The system will then search for a wireless
network and show the available networks.
Press OK to choose your preferred network. You can
now follow the instructions on page 18 to view your
Picasa images.
Change Settings
Wi-Fi Network
Scan for
wireless
networks
Scan
for
wirel ess
networks...
Note:
The wireless channel of the Wi-Fi module that @Gallery
15 is currently applying is between 1 and 11
Change Settings
2008/1/17 02:45
Nextbase
Security
enable
wirless
network
WEP
(2.412~2.462GHz). Wi-Fi Network
Scan for
wireless
networks
Kismet
Security
enable
wirless
network
WEP
Xs
Tsh
Security
enable
wirless
network
WEP
18 Basic Operations
Other manuals for Gallery 15
3
This manual suits for next models
1
Table of contents
Other NextBase Digital Photo Frame manuals

NextBase
NextBase Gallery 13-S User manual

NextBase
NextBase GALLERY 15-S - User manual

NextBase
NextBase Gallery 15 User manual

NextBase
NextBase GALLERY 15-S - User manual

NextBase
NextBase Gallery 15 User manual

NextBase
NextBase GALLERY 15-S - User manual

NextBase
NextBase GALLERY 15-S - User manual

NextBase
NextBase Gallery 15 User manual

NextBase
NextBase PhotoM@il-X User manual

NextBase
NextBase Gallery 13-S User manual