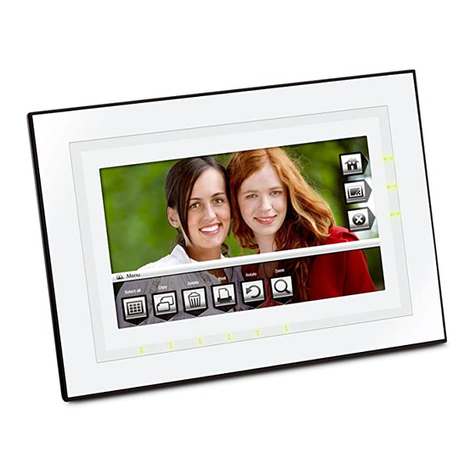
NextBase PhotoM@il-X User manual

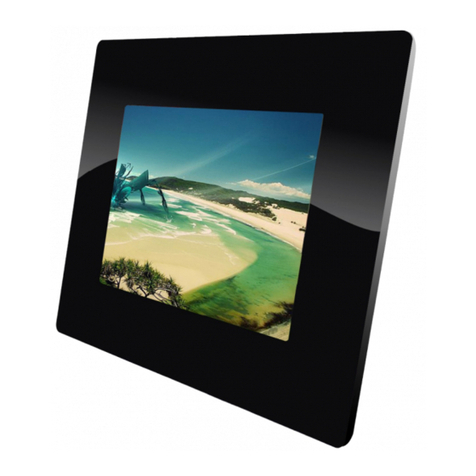
8'' Wi-Fi Digital Photo Frame
www.next-base.com
Entertainment Unlimited
Your Photo Mail Box
PhotoM@il -X
TM

,
Nextbase PhotoM@il-X - User s Guide
CONTENTS
General Introduction 1
CONTENTS......................................................
IMPORTANT SAFETY INSTRUCTIONS.........
GENERAL INTRODUCTION............................
PACKAGE CONTENTS...................................
PARTS AND CONTENTS
Button definitions.........................................
Front............................................................
Left...............................................................
Right............................................................
Top...............................................................
Bottom.........................................................
Back............................................................
Remote control...........................................
Notes on using the remote control ............
Replacing the battery..................................
Attaching to the 8'' x 6'' frame.....................
Attaching to the 10'' x 8'' frame by using
the frame mount.........................................
How to use the detachable stand..............
CONNECTIONS
Connecting the adapter to a DC socket.....
Inserting a memory card into
PhotoM@il-X..............................................
Inserting a USB disk into
PhotoM@il-X...............................................
BASIC OPERATIONS
Turning on the unit by using the adapter....
Turning on the unit by using the battery.....
Selecting Wi-Fi network.............................
CONNECTING TO A WIRELESS
NETWORK.....................................................
VIEWING PHOTOS
View photos ..............................................
Send photos...............................................
Begin slideshow..........................................
Slideshow settings......................................
Delay time...................................................
Sequence....................................................
Content........................................................
Effect............................................................
Music on/off.................................................
Copy to........................................................
1
2
3
4
5
5
6
6
6
7
7
8
9
9
10
10
11
12
12
13
14
14
14
16
18
19
20
20
20
21
21
21
22
22
Zoom in.......................................................
Rotate..........................................................
Delete..........................................................
Properties....................................................
VIEWING PHOTOM@IL
Email account.............................................
View photom@il.........................................
Add to address book..................................
Copy to.......................................................
WATCHING MOVIES
Watch movies.............................................
Play.............................................................
Copy to.......................................................
Delete.........................................................
Movie settings............................................
LISTENING TO MUSIC
Listen to music...........................................
Play.............................................................
Begin slideshow.........................................
Copy to.......................................................
Delete.........................................................
Music settings............................................
CHECKING WEATHER FORECAST
Locate my city............................................
CHANGING SETTINGS
Resize resolution.......................................
Wi-Fi network..............................................
Auto and manual receive............................
Language....................................................
Display settings..........................................
Date and time.............................................
Slideshow settings.....................................
Movie settings............................................
Music settings............................................
Product Information....................................
Software update.........................................
Blacklist book..............................................
Reset.........................................................
OTHER
Dimensions and parameters.......................
Trouble shooting........................................
Broken screen identification.......................
Adapter information...................................
24
24
24
25
26
26
29
29
31
32
32
33
34
35
35
36
36
37
38
40
42
43
44
45
46
46
48
48
49
49
50
51
52
53
54
55
56
IMPORTANT SAFETY INSTRUCTIONS
General Introduction
2
Read these instructions.
Keep these instructions.
Heed all warnings.
Follow all instructions.
Do not use this device near water.
Clean only with a dry cloth.
Do not block any ventilation openings. Install in accordance with the manufacturer's
instructions.
Do not install near any source, such as radiator, heat register, stove, and any other device
(including amplifiers) that produces heat.
Do not defeat the safety purpose of the polarized or grounding-type plug. A polarized plug
has two blades with one wider than the other. Agrounding-type plug has three prongs. The
wide blade or the third prong are provided for your safety. If the provided plug does not fit into
your outlet, consult an electrician for replacement of the obsolete outlet.
Prevent the power cord from being walked on or pinched particularly near plugs, especially at
the point where they exit from the device.
Only use attachments/accessories specified by the manufacturer.
Unplug this device during lightning storms or when unused for long periods of time.
Refer all servicing to qualified service personnel. Servicing is required when the device has
been damaged in any way, such as power-supply cord or plug is damaged, liquid has been
spilt or objects have fallen onto the device, the device has been exposed to rain or moisture,
does not operate normally, or has been dropped.
To reduce the risk of fire or electric shock, do not expose this device to rain or moisture.
The device shall not be exposed to dripping or splashing and any object filled with liquids, shall
be placed on the device.
WEEE statement: Please do not throw electronic devices into household waste. Separate
them for correct recycling.
1.
2.
3.
4.
5.
6.
7.
8.
9.
10.
11.
12.
13.
14.
15.
16.

General Introduction 3
GENERAL INTRODUCTION
Thank you for purchasing this Wi-Fi digital photo frame. Please read this manual carefully before
operating and keep it for future reference.
Nextbase PhotoM@il-X is an 8'' Wi-Fi digital TFT photo frame with which
enables . It can via a Wi-Fi internet
connection. The built-in Lithium battery (3.7V, 1500 mAh) . It supports
SD/MMC/MS/MS-PRO/xD
'' ''
a 2GB internal memory
you to store up to 10,000 photos send and receive emails
provides up to 2-hour use
memory cards and USB disks. PhotoM@il-X has been designed to fit
all standard 8 x 6 photo frames, which enables it to be personalized to suit your photos or your
room decor. PhotoM@il-X includes an extendable stand as well as wall fixing points which allow
you to use it on a table or hang it on a wall. On top of this, PhotoM@il-X has an inbuilt weather
forecast function.
Now, open the box and enjoy your digital photos!
,
Nextbase PhotoM@il-X - User s Guide

General Introduction
4
PACKAGE CONTENTS
AC-DC Adapter
PhotoM@il-X
Quick Start
Remote Control
OK
ESC
MENU
SETUP
SR3A
Frame Mount Magic Strip x 4
Detachable Stand
Frame Retaining Screw X 2
Operation Manual
8''Wi-Fi Digital PhotoFrame
www.next-base.com
EntertainmentUnlimited
YourPhotoMailBox
PhotoM@il-X
TM

1. ESC 2. DIR/OK ( )
3. HOT-KEY (One-click to check weather)
4. STANDBY
(Escape)
BUTTON DEFINITIONS
General Introduction 5
PARTS AND CONTENTS
1234
FRONT
1. Remote control sensor
The remote control signals are received here.
Remote control sensor
(Do not cover this)
,
Nextbase PhotoM@il-X - User s Guide

General Introduction
6
LEFT
RIGHT
TOP
1. LED indicator
1. USB port
pictures.Connect a USB memory stick here to view
USB
ESC STANDBY
HOT-KEYDIR/OK
1. Wi-Fi antenna
Please pull out the Wi-Fi antenna to connect to the internet.
Wi-Fi antenna
When PhotoM@il-X is powered and the DC adapter is connected, the LED indicator will be red
to show the battery is charging. When the battery is fully charged, the indicator will turn green.
When PhotoM@il-X is off and the DC adapter is connected, the LED indicator will be red to
show the battery is charging. When the battery is fully charged, the indicator will turn off.
When PhotoM@il-X is on and the DC adapter is not connected, the LED indicator will be green
to show the battery is being used. When the battery is discharged, the indicator will turn off.
l-X
When PhotoM@il-X is in its standby mode and is not charging, the LED indicator will turn green.
When PhotoM@i is in its standby mode and the DC adapter is connected, the LED indicator
will be red to show the battery is charging.
1
2
2. Remote control sensor

General Introduction 7
BOTTOM
BACK
1. DC IN 5V
Connect the included AC/DC adapter here.
2. Reset
Press it when PhotoM@il-X crashes.
3. Power ON/ OFF
4. Card slot
Support SD /MMC /MS /MS Pro /xD cards.
1. Stereo Speaker
2
Pull out metal frame connectors that can be screwed into wooden frames by using screws
provided. (See page 10 for details)
. Wall hanging mount (horizontal or vertical option)
4. Detachable stand. Flip out, and adjust to either vertical or horizontal use. (Refer to page 11
for details.)
. Metal connectors
3
1
2
2
4
2
4 3
3
3
1
,
Nextbase PhotoM@il-X - User s Guide

General Introduction
8
OK
ESC
STANDBY
HOT-KEY
1. ESC
Exit the current operation.
Go back to the previous menu.
When operating a slideshow or full screen
display, press ESC to exit the mode, and
move back to the thumbnail.
2. Up /Down /Left /Right
Direction keys Up /Down /Left /Right.
Navigate in sub-directory.
When photos are viewed in full screen,
Left /Right can be used to view the previous
photo or the next photo.
Up
3. OK
Press OK to confirm.
Press OK to enter the next menu or confirm
the selection.
4. HOT-KEY
Press HOT-KEY to get the weather forecast.
5. STANDBY
Press STANDBY , then the unit will enter standby
mode. Press it again, then the unit will wake up
and enter its normal operation mode.
Note:
Standby function would not work if the unit is not powered by the AC-DC adapter.
can be used to turn volume up and
Down to turn volume down whenever an audio
sound is playing.
REMOTE CONTROL
1
2
3
4
5

General Introduction 9
NOTES ON USING THE REMOTE CONTROL
NOTE:
REPLACING THE BATTERY
1. Do not drop or step on the remote control or subject it to shocks. Note that the remote control
may not work if there are obstacles between
2. Do not expose the remote sensor to strong light. Doing so may make operation impossible.
3. Use the remote control unit within the specified operating range.
4. Do not block the signal between PhotoM@il-X sensor and the remote control. If the signal is
blocked, the remote control will not work. Remote control sensor is shown on page 5.
the sensor on the frame and the remote control.
1. Use your finger nail to press A and
pull out the battery holder according
to the indicated direction.
Lithium Battery (CR2025)
To prevent leakage of fluid from the lithium battery, remove the battery when not using the
remote control unit for long periods of time (one month or more). If the battery leaks fluid,
carefully take the battery out and wipe the battery holder, then replace with a new lithium
battery.
Caution: The battery may present a risk of fire if not handled properly. Do not recharge,
o
disassemble, or heat it above 100 C.
Replace battery with the same type.
Dispose of used battery properly, keep away from children and do not dispose it in fire.
2. Remove the old battery, and put the
new battery on the battery holder with
the + side facing upwards.
3. Fit the battery holder back to its place.
CAUTION
RISK OF EXPLOSION IF BATTERY IS REPLACED BY AN INCORRECT TYPE.
DISPOSE OF USED BATTERIES ACCORDING TO THE INSTRUCTIONS.
,
Nextbase PhotoM@il-X - User s Guide

General Introduction10
ATTACHING TO THE 8'' X 6'' FRAME
ATTACHING TO THE 10'' X 8'' FRAME BY USING THE FRAME
MOUNT
Nextbase PhotoM@i can match with all standard 8'' X 6'' photo frames as shown below:
1.
PhotoM@i
then use the built-in metal frame
connectors on PhotoM@i .
l-X
Attach the standard 8" X 6" frame to PhotoM@il-X .
2. Move the frame locking latches to secure l-X in place.
3. If the chosen frame does not have its own locking latches,
l-X Pull out the metal frame connectors as shown below. Attach to
the frame by using the screws supplied.
Your Nextbase PhotoM@i can match with all standard 10'' X 8'' photo frames by
included in the accessories:
l-X using the
frame mount
Slide out both sides
Note: The remote control sensor is on both the front side and the left side. Make sure that one of
the sides is not blocked when attaching PhotoM@il-X to a photo frame.

General Introduction 11
Nextbase PhotoM@il-X can
1. Round slot for stand.
2 Select either horizontal or vertical modes as required, and install the stand.
PhotoM@i
be placed on a table by using the detachable stand. It can be placed
horizontally or vertically as required.
.
3. Lean l-X back.
1. Choose your favorite 10'' X 8'' frame.
2. Slot PhotoM@i into
3. Then mount the f (with PhotoM@i ) into the standard 10'' X 8'' wooden frames,
l-X the supplied Nextbase frame mount.
rame l-X and fix
securely.
Attach PhotoM@il-X to the frame mount, and make sure that the remote control sensor is aligned
with the remote control window. Press down and click in to place it securely.
Remote
control window
Remote control sensor
Frame mount PhotoM@il-X
HOW TO USE THE DETACHABLE STAND
1 2 3
,
Nextbase PhotoM@il-X - User s Guide

General Introduction12
1. CONNECTING THE ADAPTER TO A DC SOCKET
CONNECTIONS
Note:
1. Because of various sizes of memory cards provided by different suppliers, please the
angle slightly if the memory card cannot be read.
2. M PhotoM@i
xD cards can only be read, but cannot be written.
4.
adjust
ini SD adapter or dual voltage SD cards may not be recognized by l-X.
3.
Please do not use the MS-PRO adapter with a surface whose paint has fallen off. Doing so
may cause damages.
2. INSERTING A MEMORY CARD INTO PHOTOM@IL-X
Insert the card as shown

General Introduction 13
ESC STANDBY
HOT-KEYDIR/OK
3. INSERTING A USB DISK INTO PHOTOM@IL-X
Note:
1. Support USB 2.0.
2. Support JPEG, AVI (Motion JPEG, MPEG-4, Xvid, and DivX4,5) and MP3.
3. Connect a USB disk to PhotoM@il-X directly. Do not use an external cable, or this may cause
problems.
Insert the USB disk as shown below.
,
Nextbase PhotoM@il-X - User s Guide

14
TURNING ON THE UNIT BY USING THE ADAPTER
BASIC OPERATIONS
Basic Operations
1. Plug the AC-DC adapter to a wall outlet.
2. Connect the DC output plug of the adapter to the DC input jack of the main unit.
3. Press ON/OFF for 3 seconds to turn on the power, and the Nextbase opening screen will
appear.
1
23
TURNING ON THE UNIT BY USING THE BATTERY
1. PhotoM@i also works without adapter if the battery is charged.
2. The built-in battery (3.7V/1500mAh) allows up to 2-hour use.
3. Press ON/OFF for 3 seconds to turn on the power, and the Nextbase opening screen will
appear.
l-X
SELECTING WI-FI NETWORK
1. Pull out the Wi-Fi antenna.
Lighting

15
Basic Operations
3. The system will search for wireless network
automatically.
4. Select Wi-Fi Network (AP). Enter the password
on the key board if it is required.
5. Press OK on the unit or on the remote control to confirm your choice.
ESC STANDBY
HOT-KEYDIR/OK
OK
Note:
1. For first time setup, the network list will pop up to let the user select the Wi-Fi network. The
selected network will be remembered and automatically connected next time.
2. For later connections, if the previously selected network cannot establish connection,
will appear on the screen. Please enter Wi-Fi Network under Change Settings to search
for Wi-Fi networks again.
Nextbase
Security enable wirless network
Kismet
Security enable wirless network
Xs Tsh
Security enable wirless network
WEP
WEP
WEP
2. Select the language you prefer, and press OK to
confirm. The Language menu only appears after
you reset the unit or it is the first time operation. English
Francaise
Deutsch
Italiano
Espanola
Nederlands
Nordmann
Svenska
Language
Language English
Francais
Deutsch
Italiano
Espanol
Nederlands
Norsk
Svenska
Language
Change Settings
,
Nextbase PhotoM@il-X - User s Guide
2008-7-1 03:45
2008-7-1 03:45
Scan For Wireless Networks...
Wi-Fi Network
Scan For Wireless
Networks
Change Settings
Wi-Fi Network
Change Settings

16
View PhotoM@il
Watch Movie
Listen to Music
View Photo
My e-mail address:
Wi-Fi Network
Scan For Wireless Networks
Enter Manually
Resize Resolution
Wi-Fi Network
Auto and Manual Receive
Language
Change Settings
Display Settings
Setup
2. Navigate down to Change Settings, and press
to confirm.
3. Navigate down to Wi-Fi Network, and press to
confirm.
OK
OK
4. Navigate to Scan For Wireless Networks, and press
to confirm.OK The system will then search for wireless
networks and show the available ones. Press OK to
choose your preferred network.
CONNECTING TO A WIRELESS NETWORK
Scan For Wireless Networks...
Wi-Fi Network
Scan For Wireless
Networks
Change Settings
Nextbase
Security enable wirless network
My Sweet Home
Security enable wirless network
Mary Home
Security enable wirless network
WEP
WEP
WEP
Check Weather Forecast
Change Settings
Change Settings
Wi-Fi Network
Change Settings
2008-7-1 03:45
1. In the right top corner of the screen, there are two
icons: and . If appears in grey, it means
PhotoM@il-X is not connected to router; if
appears in blue, PhotoM@il-X has been connected
to router. If appears in grey, it indicates
PhotoM@il-X is not connected to the internet; if
appears in blue, PhotoM@il-X has been
connected to the internet. 2008-7-1 03:45
2008-7-1 03:45
2008-7-1 03:45

5. After selecting the Wi-Fi network you prefer, the
virtual keyboard will pop up for you to enter the
network password.
6.The message "Connecting to AP/router... "
Will pop up to show the network is being connected.
7. If the password is incorrect, the message on the
right will pop up. Select Try Again to try to re-connect
the network, or select Quit to go back to the Wi-Fi
network list.
8. When PhotoM@il-X is successfully connected to the
internet, the message "Successfully connected to
internet." will pop up. After 10 seconds, PhotoM@il-X
will automatically go back to the main menu.
Begin to synchronize with the website.Connecting to AP/router....
Begin to synchronize with the website.Can not connect to AP/router.
Successfully connected to internet.
Note:
The wireless channel of the Wi-Fi module that PhotoM@il-X is currently applying is between 1 and
11 (2.412~2.462GHz).
17
,
Nextbase PhotoM@il-X - User s Guide
Wi-Fi Network
Change Settings
Wi-Fi Network
Change Settings
Wi-Fi Network
Change Settings
2008-7-1 03:45
2008-7-1 03:45
2008-7-1 03:45
Try Again
Quit
Setup
1 2 3456 7 8 9 0
qw e rtyuiop
asdfghjk l ;
zx c v bn m ,./
Space Shift @
-
-
=
\
Enter
Please enter WEP key

VIEWING PHOTOS
In the main menu, there are 6 options in total:
View Photo,View PhotoM@il, Watch Movie ,
Listen to Music, Check Weather Forecast,
and Change Settings.
1. Navigate to View Photo, and press OK to enter
the sub-menu.
2. Navigate to Internal Memory, USB Disk or Memory
Card to select the storage base, and press OK
to confirm. The photos in internal memory will be
displayed in albums, and those in USB disk/
memory card will be displayed in their thumbnail
forms.
3. Use direction keys Up/ Down/ Left/ Right to
select the photo you want to view, and press OK
to display it in full screen.
VIEW PHOTOS
Check Weather Forecast
Change Settings
View PhotoM@il
Watch Movie
Listen to Music
View Photo
Internal Memory
Family
View Photo
Memory Card
USB Disk
Internal Memory
Family
Vitas-04.jpg
Garden
Pets
Kids.jpg
18 Setup
My e-mail address:
Internal Memory
2008-7-1 03:45
2008-7-1 03:45
2008-7-1 03:45
2008-7-1 03:45

Photo
Send
Begin Slideshow
Slideshow Settings
Music On
Zoom in
Rotate
Copy To
Delete
Properties
4. When photos are displayed in full screen, use
direction key Left to view the previous photo,
and Right to view the next one.
1. Press OK to select Send, you can either select
Add New Address or email
address.
2. Press OK to add a new address, use navigation
keys to enter the email address on the virtual
keyboard and press Enter to confirm the address.
3. After entering the address and pressing Enter,
the message on the right will pop up. Select Send
to this address to send the email. Select Change
this address to pop up to virtual keyboard to re-enter
the email address. Or select Delete this address to
delete the email address.
choose an existing
SEND PHOTOS
While viewing a photo in full screen, you can press
OK to bring up an option list.
Address Book
Add New Address
One mail has been sent!
1234567890
qwertyuiop
asdfghjkl;
zxcvbnm,./
Space Shift @
-
-
=
\
Enter
Please enter the email address.
1234567890
qwertyuiop
asdfghjkl;
zxcvbnm,./
Space Shift @
-
-
=
\
Enter
Please enter the email address.
Please select:
Send to this address
Change this address
Delete this address
19
,
Nextbase PhotoM@il-X - User s Guide
Note:
The maximum size that PhotoM@il-X displays is 7M,
and the maximum resolution is 4096 x 4096.
Maximumn storage of 100 email addreses
2008-7-1 03:45
2008-7-1 03:45
Setup
Table of contents
Other NextBase Digital Photo Frame manuals

NextBase
NextBase Gallery 15 User manual

NextBase
NextBase GALLERY 15-S - User manual

NextBase
NextBase GALLERY 15-S - User manual

NextBase
NextBase Gallery 13-S User manual

NextBase
NextBase Gallery 15 User manual

NextBase
NextBase Gallery 13-S User manual

NextBase
NextBase Gallery 15 User manual

NextBase
NextBase GALLERY 15-S - User manual

NextBase
NextBase Gallery 15 User manual

NextBase
NextBase GALLERY 15-S - User manual