Nextera POLYCOM VVX 400 User manual

POLYCOM VVX 400/410®TELEPHONE GUIDE
This Telephone Guide describes the various features available to you. Telephone Buttons and Icons
describe the physical buttons and keys on the phone, the Touchscreen Overview outlines basic functions,
and Telephone Features describe the phone functionalities of Nextera’s Polycom VVX 400/410®.The
Other Features and Access Code sections describes even more features that are available by either
entering a star [*] code or by accessing MyNextera – your on-line account manager.
For more detailed information on how to use your phone, view the online tutorial at
http://bcove.me/j78o7pid.
TELEPHONE BUTTONS
Speaker Provides ringer and hands-free (speakerphone) audio output.
Dialpad These are the telephone dialing keys – and more. Enables you to enter
numbers, letters, and special characters. You can also use the dialpad keys to
select menu items that have index numbers.
Security Slot The connector on the back of your phone enables you to attach a laptop
cable lock to your phone so you can secure it to a desktop.
Message waiting Indicator flashes red to indicate new messages.
Home Key Press the Home key from any screen to display Home View. From Home View
press the Home key to display other phone views.
Screen The 3.5-inch diagonal screen is backlit.
Navigation keys/
Select key Scroll through displayed information or options. Select a field of displayed
data.
Headset Key Enables you to place and receive calls through the headset. If you have a
headset attached and wish to use it instead of the handset, press the button
instead of picking up the handset. It will turn off your handset, turn on the
headset, and will glow green when active.
Speakerphone Key Enables placement and receipt of calls using the speakerphone. The key glows green when activated.
Mute Key Mutes audio during calls and conferences. The key glows red when activated.
Volume Keys These are the plus and minus keys at the bottom center of the telephone. They’re used to adjust the volume of the handset, headset, speaker, and phone’s ringer.
Pressing them while the phone is idle will adjust the ringer volume. Pressing them while on a call will adjust the call volume for the handset, headset or the
speakerphone.
SCREEN OVERVIEW
Phone Views Your phone has three main views: Home, Calls, and Lines View (the default).
To change views: For Home View press the Home key. From Home View press the Home key to display either Lines or Calls View.
Home Views Home View displays the phone line, messages, settings and information. To change the displayed page, press the down or up arrow key. To change the highlighted
entry, press the right or left arrow key. Select New Call to place a call. Select Messages to access voicemail. Select Directories to access Contact Directory,
Favorites and Recent Calls list. Select Forward to establish forwarding options for incoming calls. Select DND to toggle DND (Do Not Disturb) on or off. When DND is
enabled, your phone won’t ring and incoming calls will go to voicemail. Select Settings to access phone features and settings to customize the phone.
Lines Views Lines View is the default display. Lines view displays phone lines, favorites, and soft keys. If the phone has calls, the phone line indicates the number of calls and if
they are active or held. If there is an active call, the call color is medium grey. If the phone line has one or more held calls, the call color is light grey. To select a call,
use the up and down arrow keys.
Calls View If multiple calls are in progress or if there is one held call, Calls View can be accessed. Use the up and down arrow keys to view all calls.
Entering Data Use the dialpad keys to enter information. To delete characters, use left and right arrow keys until the cursor is positioned to the right of the character, then press the
double arrows. To enter characters, press key repeatedly to see the character options and then stop to select. To type special characters, select Encoding then use the
1, *, 0 or # key one or more times to enter special characters. To enter a space, select Encoding, select one of the alphabetic options and then press the 0 key.
About Calls Only one call can be active at one time (others can be on hold). You can use the headset, speakerphone, or handset for any call. During a call, you have the option to
change modes.

TELEPHONE FEATURES
PLACING, ANSWERING, RETURNING TO CALLS & ENDING CALLS
Placing a call: Simply pick up the handset, press the speakerphone key or press the headset key then enter the phone number or enter the phone number first then choose the method. To
place calls quickly, choose a favorite in Home or Lines view or choose from your Favorites list, Recent Calls list or Contact Directory.
Answering calls: To use the handset, pick up the handset. To use the speakerphone, press Answer,the speakerphone key, or the line key of the incoming call. To use the headset, press
headset key. If already in handset, speakerphone or headset mode, press Answer and the phone will automatically use that mode. To answer a new call while on an active call, tap Answer
and the current call will be held.
To Return to your calls: If you navigate away from your calls, return to Calls view by pressing More and then Lines or the Home key. Scroll up or down to see all lines and calls.
Ending Calls: Hang up to end a call or press End Call. In Calls view, select the held call, and press Resume > End Call.
FAVORITES
Favorites are contacts you call most often. Favorites display in your Favorites list and Lines view. They also display when you choose the phone line in Home view.
To assign a contact as a Favorite: From Home view, select Settings > Contact Directory. Select the contact and select More > Add. There are also 9 favorites that will display in Lines
view and from Home view. They can quickly be dialed by choosing the correct contact. They will display according to an assigned index number. The contact with the lowest index number
displays first. Establish the index number from the Edit Contract Screen by using the up and down arrow keys to select Favorite Index and entering an index number. Press Save.
To dial a Favorite: From Home view, select Settings > Contact Directory. From the Favorites list, use the up and down arrow key to select the favorite. The call is automatically placed.
To reorder your Favorites list: Update the contact’s Favorite Index number in the Contact Directory.
CALL HOLD AND RESUME
From Lines or Calls view, press Hold. If in Call View, the call must first be highlighted. To resume a held call, from Calls view, use the up and down arrow keys to highlight the call and press
Resume.
REDIAL
To dial the last number called, press the right arrow key for the Placed Calls list. The first number in the list is the last call placed. From the Placed Calls list, press Dial.
MICROPHONE MUTE
The mute feature allows you to hear the other party, but they cannot hear you. During a call, press the Mute button. The button turns red and a microphone on the screen indicates that the
other party (or parties) cannot hear you. Microphone Mute applies to all modes: Handset, Headset, and Speakerphone. You can still hear all other parties while mute is enabled. To turn off
microphone Mute, press Mute button again.
PLACING CONFERENCE CALLS
To establish a conference call: Call the first person. From Lines or Calls view, press More > Confrnc. The active call is held. Using the Dialer, call the second person. When the second
person answers, press More > Confrnc or press Join to join everyone in a conference.
To hold a conference call: From Lines or Calls View, press Hold. If in Calls view, be sure to highlight the conference first.
To resume a held conference call: From Lines or Calls view, press Resume.
To end a conference call: From Lines or Calls view, press End Call. ⋅
To split a conference call: From Lines or Calls view, press Split. The conference call ends. By default, the other two people are held.
USING THE SPEAKERPHONE
Press the speakerphone button and it will glow green and activate the speakerphone. If on a call and want to use the speakerphone instead of the handset or the headset, press the
speakerphone button then hang-up the handset. Press it again and the speakerphone will hang-up. Lifting the handset or pressing the headset button while on the speakerphone will turn
the speakerphone off and place the call on the handset or the headset.
INCOMING CALL RINGTONES
A simple way to personalize the phone is to change the phone’s ringtone. Unique ringtones can be chosen for the different lines on the phone.
To select an incoming call ringtone for the phone or a line: From Home view, select Settings > Basic > Ring Type. If multiple lines are configured on the phone, select the line to appl
y
a new ringtone to. From the Ring Type screen, use the up and down arrow keys to select the ringtone. To hear the ringtone before changing it, press Play. The default ringtone is Low Trill.
To set a ringtone for a contact: Navigate to the Contact Directory and select the contact. From the contact’s information screen, press Info > Edit > Ring Type. Use the up and down
arrow keys to select the ringtone and press Save.
WORKING WITH SHARED LINES
If the phone shares a line with other phones, an incoming call to the shared line will cause all phones to ring. The call can be answered on any of the phones. Calls on shared lines can be
transferred, held or set up with a conference call.
If there is an incoming call on a shared line, press Silence to stop the phone from ringing. The call’s visual notification will still display, and the option to answer the call is still available.
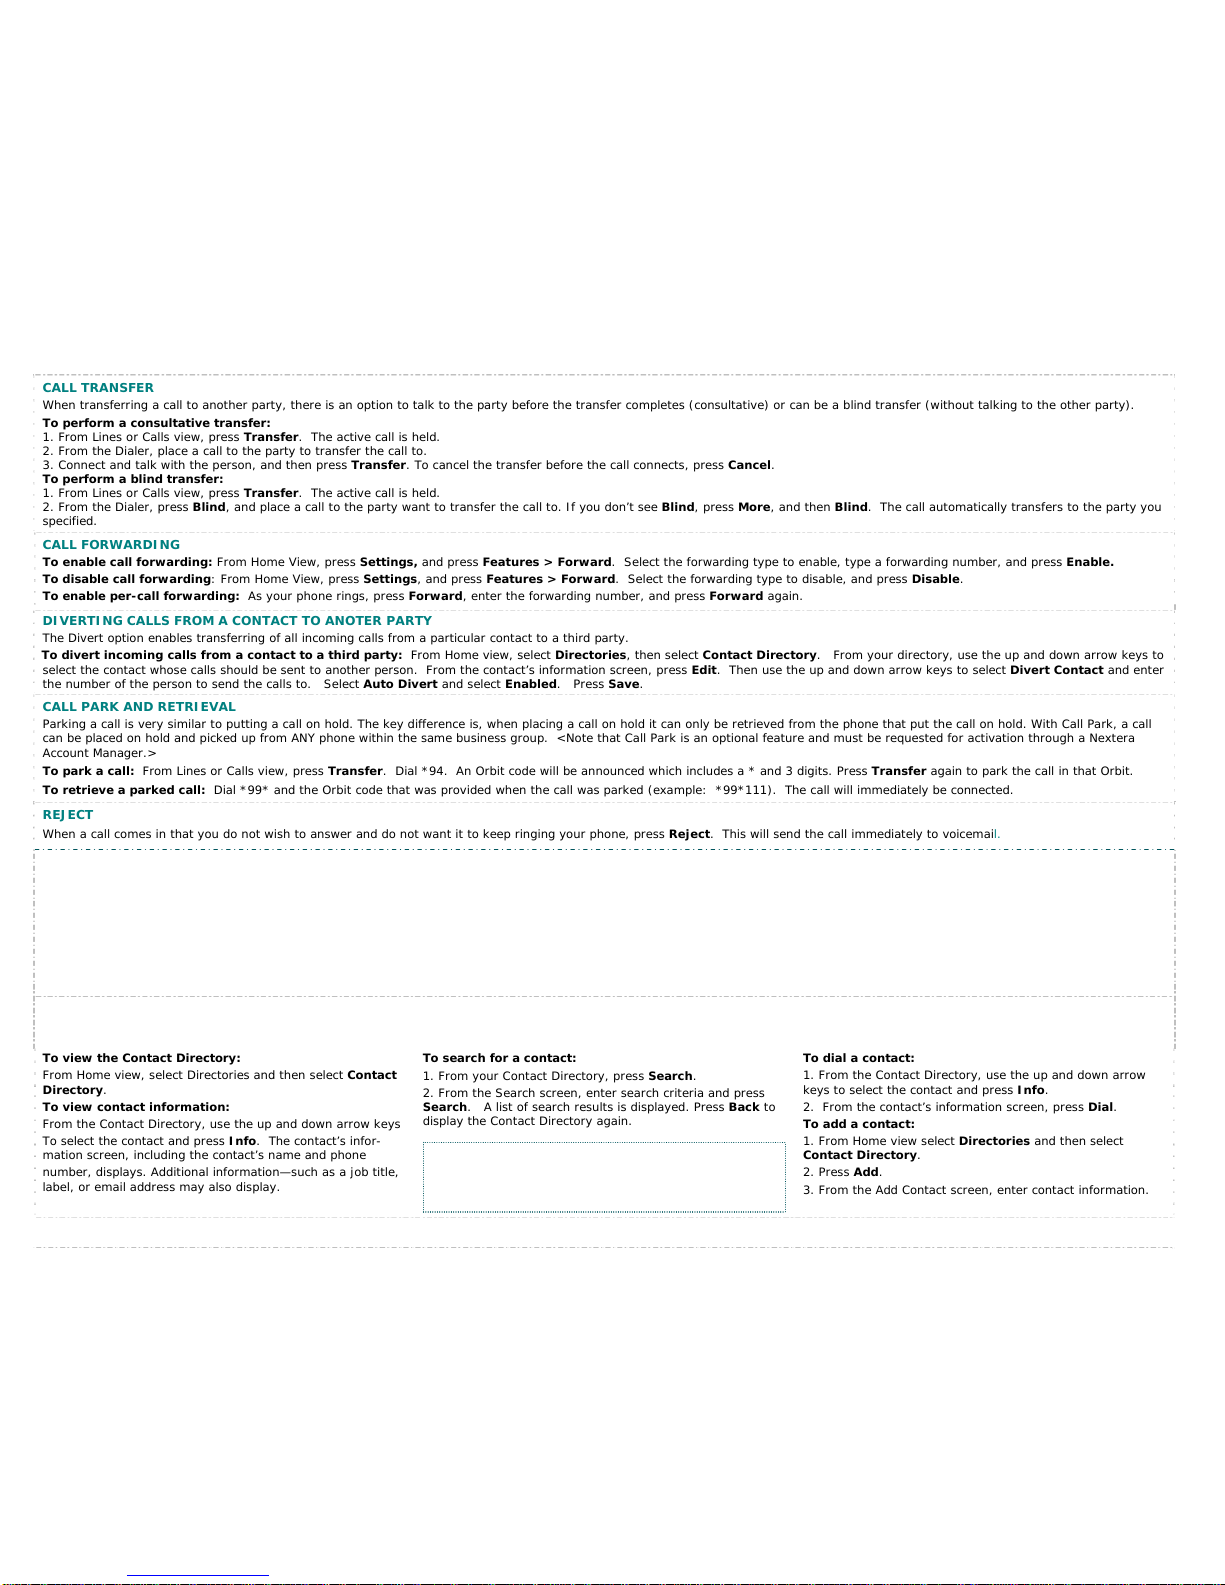
CALL TRANSFER
When transferring a call to another party, there is an option to talk to the party before the transfer completes (consultative) or can be a blind transfer (without talking to the other party).
To perform a consultative transfer:
1. From Lines or Calls view, press Transfer. The active call is held.
2. From the Dialer, place a call to the party to transfer the call to.
3. Connect and talk with the person, and then press Transfer. To cancel the transfer before the call connects, press Cancel.
To perform a blind transfer:
1. From Lines or Calls view, press Transfer. The active call is held.
2. From the Dialer, press Blind, and place a call to the party want to transfer the call to. If you don’t see Blind, press More, and then Blind. The call automatically transfers to the party you
specified.
CALL FORWARDING
To enable call forwarding: From Home View, press Settings, and press Features > Forward. Select the forwarding type to enable, type a forwarding number, and press Enable.
To disable call forwarding: From Home View, press Settings, and press Features > Forward. Select the forwarding type to disable, and press Disable.
To enable per-call forwarding: As your phone rings, press Forward, enter the forwarding number, and press Forward again.
DIVERTING CALLS FROM A CONTACT TO ANOTER PARTY
The Divert option enables transferring of all incoming calls from a particular contact to a third party.
To divert incoming calls from a contact to a third party: From Home view, select Directories, then select Contact Directory. From your directory, use the up and down arrow keys to
select the contact whose calls should be sent to another person. From the contact’s information screen, press Edit. Then use the up and down arrow keys to select Divert Contact and enter
the number of the person to send the calls to. Select Auto Divert and select Enabled. Press Save.
CALL PARK AND RETRIEVAL
Parking a call is very similar to putting a call on hold. The key difference is, when placing a call on hold it can only be retrieved from the phone that put the call on hold. With Call Park, a call
can be placed on hold and picked up from ANY phone within the same business group. <Note that Call Park is an optional feature and must be requested for activation through a Nextera
Account Manager.>
To park a call: From Lines or Calls view, press Transfer. Dial *94. An Orbit code will be announced which includes a * and 3 digits. Press Transfer again to park the call in that Orbit.
To retrieve a parked call: Dial *99* and the Orbit code that was provided when the call was parked (example: *99*111). The call will immediately be connected.
REJECT
When a call comes in that you do not wish to answer and do not want it to keep ringing your phone, press Reject. This will send the call immediately to voicemail.
DO NOT DISTURB
Enabling Do Not Disturb (DND) prevents the phone from ringing and sends all incoming calls directly to voicemail. All calls received while DND is enabled will be logged to the Recent Calls list.
To toggle Do Not Disturb on and off, from Home view, select DND. If the phone is idle, press DND.
By default, the Do Not Disturb feature applies to all lines on the phone. However, your phone may be set up so that you can enable the feature on a per-line basis. To enable or disable Do Not
Disturb for a particular line:
1. From Home view, select DND.
2. From the Line Select screen, use the up and down arrow keys to select the line to enable or disable Do Not Disturb on.
3. From the Do Not Disturb screen, select Enable or Disable.
CONTACT DIRECTORY
Store a large number of contacts in the phone’s local Contact Directory. From the local Contact Directory, view contact information, search for contacts and dial contacts. If able to update the
Contact Directory, can also add contacts, update contact information, and delete contacts.
To view the Contact Directory:
From Home view, select Directories and then select Contact
Directory.
To view contact information:
From the Contact Directory, use the up and down arrow keys
To select the contact and press Info. The contact’s infor-
mation screen, including the contact’s name and phone
number, displays. Additional information—such as a job title,
label, or email address may also display.
To search for a contact:
1. From your Contact Directory, press Search.
2. From the Search screen, enter search criteria and press
Search. A list of search results is displayed. Press Back to
display the Contact Directory again.
To dial a contact:
1. From the Contact Directory, use the up and down arrow
keys to select the contact and press Info.
2. From the contact’s information screen, press Dial.
To add a contact:
1. From Home view select Directories and then select
Contact Directory.
2. Press Add.
3. From the Add Contact screen, enter contact information.
If a Corporate Directory is available on the phone (entered
by Corporate Administrator), select Corporate Directory.
Then perform a search. The screen displays a list of
contacts, starting with the most successful matches.

CALL VIEW INDICATORS
Access Calls view if the phone has multiple calls in progress or at least one call is held. Use the up and down arrow keys to see all the calls. If the phone has multiple lines enabled, calls
display under the associated line. Call color indicates status:
Dark green =Active call Bright blue = Incoming call Dark blue = Held call
Use the up and down arrow keys to highlight a call. The soft keys apply to the highlighted call.
VOICE MAIL
When a caller has left a voice message, the telephone will flash the red light at top right of the phone, the status bar will identify the total number of new messages (the count is a total of all
messages on all lines on the phone) and there will be a stutter dial tone.
To listen to voicemail messages:
1. Press the messages button and select Message Center. Or, from Home view, select Messages >Message
Center.
2. If multiple lines are configured on the phone, the Line Select screen displays. Use the up and down arrow keys to
select the line that has the message.
3. From the Messages screen, press Connect and follow the prompts.
CALL LISTS
The phone maintains a Recent Calls list which lists missed, received, and placed calls. Each list can hold up to 100 entries.
To view the Recent Calls list, from Home view, select Directories and select Recent
Calls.
To manage a Call Record:
1. From the Recent Calls list, use the up and down arrow keys to highlight an entry and press
the right arrow key.
2. From the call details screen, options include:
. Press Dial or the right arrow key to call the person.
. Press Save to add the person to the Contact Directory. If the person is already in the
Contact Directory but isn’t a Favorite, Add to Favorites displays instead. Press Add to
Favorites to automatically make the person a Favorite.
3. Press Delete to delete the call from the list.
4. Press Edit to edit the phone number before dialing the person.
To customize the list:
1. From home view, Select Directories and select Recent Calls.
2. Press Type to filter calls for specific lines or types of calls. When filtering calls, can choose
to display only missed, received, or placed calls. Or choose to display all call types (the
default). Can Choose also to display only calls from a certain line.
3. Press Sort to sort the calls. When sorting calls by the time of the call, can order the calls i
n
ascending (oldest call first) or descending (most recent call first) order. When sorting calls by
call name, can orders calls in ascending (alphabetical) or descending (reverse-alphabetical)
order.
To remove all calls from the list:
1. From Home view, select Directories and select Recent Calls
2. Press Clear. All calls are then deleted from the call list.
Many options such as Personalized Name announcements,
hands free and timesavers, greetings, and group lists are
available with VoiceMail. Please refer to Nextera’s VoiceMail
User Guide.

These features can be activated and deactivated via the use of access codes by dialing a * and a 2 or 3-digit number.
*77 Anonymous Call Rejection Activation
*87 Anonymous Call Rejection Deactivation
*72 Call Forwarding Always Activation
*73 Call Forwarding Always Deactivation
*90 Call Forwarding Busy Activation
*91 Call Forwarding Busy Deactivation
*92 Call Forwarding No Answer Activation
*93 Call Forwarding No Answer Deactivation
*69 Call Return (Recall)
*67 Caller ID Block Per Call
*82 Caller ID Delivery Per Call
*78 Do Not Disturb Activation
*79 Do Not Disturb Deactivation
*66 Last Number Redial (Callback)
*60 Selective Call Rejection
*74 Speed Call 8
*75 Speed Call 30
*86 VoiceMail Access
Reminder Calls
*310 Individual Reminder Call Activation
*313 Individual Reminder Call Verify
*311 Individual Reminder Call, Cancel All
*312 Individual Reminder Call, Cancel One
*314 Regular Reminder Call Activation
*317 Regular Reminder Call Verify
*315 Regular Reminder Call, Cancel All
*316 Regular Reminder Call, Cancel One
OTHER FEATURES
These features are not immediately accessible via a button or soft key on the telephone set but are available by dialing access codes and/or by accessing the MyNextera
on-line Account Manager.
Call Forwarding Busy: Allows you to forward all your incoming calls to a different phone number if your phone is currently busy.
Call Forwarding No Answer: Allows you to forward all your calls to a different phone number when you do not answer your phone.
Call Return (Recall): Allows you to call most recent incoming calling number.
Last Number Redial (Callback): Allows you to redial last outgoing number.
Caller ID Block: Block your name and number from being shown on all calls by turning Caller ID Block on in the MyNextera online Account Manager.
Anonymous Rejection: Reject Calls from anonymous parties who have restricted their Caller ID. Calls from Anonymous Callers do not ring and you are not notified of the call.
Reminder Call: Allows you to schedule an announcement to ring on your phone. Reminders can be set for a one-time situation up to 24 hours in advance or can be regular reminders that
are repeated at the same time every day, every weekday or a specific day of the week.
Selective Call Rejection: Allows you to create a list of up to 10 numbers from which incoming calls are automatically rejected. When the parties on the list attempt to call, they will receive a
recorded announcement.
Speed Call: Speed Calling allows you to dial a pre-defined number by simply dialing either one or two digits. Speed Dial 8 allows you to set up to eight speed dial numbers that can be
dialed with a push of a button. Speed Dial 30 allows you to set up to 30 speed dial numbers that can be called with the push of two buttons.
Follow-Me: Allows you to customize where an in what sequence incoming calls will be forwarded to make sure you never miss a call. You can choose to set phone numbers to ring
simultaneously, in sequence, or the combination. For example, you may want to ring your business phone and cell phone simultaneously for a period of time and, if neither is answered, try
the home phone, and if that isn’t answered then forward to voicemail.
FEATURE ACCESS CODES
This manual suits for next models
1
Table of contents
Other Nextera Telephone manuals

Popular Telephone manuals by other brands


Nortel
Nortel BCM50 3.0 quick start guide

Rescue Phone
Rescue Phone CRT instruction manual

Louroe Electronics
Louroe Electronics AOP-SP-CF Installation and operating instructions

Northern Telecom
Northern Telecom Logic 10 installation manual

ASCOM
ASCOM OFFICE 45 - operating instructions

CaptionCall
CaptionCall 78T quick start guide