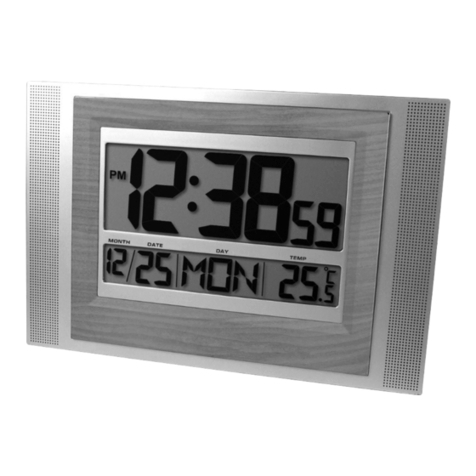
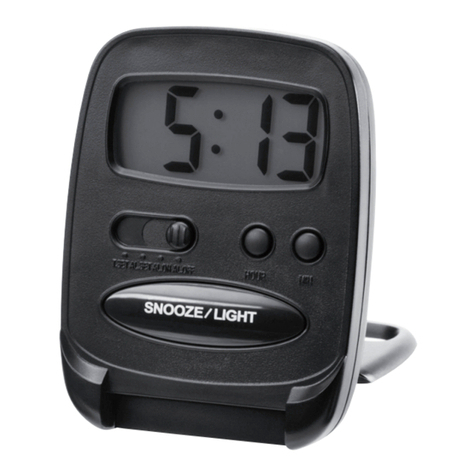
NexxTech 8001330 User manual

8001330
User Manual
III) ALARM SETTING
Hold the “MODE” button to display the current alarm time.
1) Push the slide switch to “AL.SET” to enter the alarm
setting mode:
a) Press the “MODE” button to enter alarm and
snooze time setting mode. The selected setting will
flash.
b) Press the “UP” and “DOWN” buttons to set the
time. The snooze time range is between 1-60
minutes.
2) The alarm has the following functions:
“AL.ON” means “alarm on, snooze off”, the alarm will
ring 1 time (1 minute).
“SNZ” means “alarm on, snooze on”, the alarm will
ring 3 times (1 minute each time). The snooze time
interval can be set.
“AL.OFF” means “alarm off, snooze off”, the alarm
will not ring.
3) When the alarm is on and snooze is off, the alarm will
ring for 1 minute. Press any button to stop the alarm.
4) When both the alarm and snooze are turned on, and
the desired time is reached, the alarm will ring for 1
minute.
To temporarily stop the alarm and activate the
snooze, press the “SNZ” button on the back.
The snooze function can be used 3 times and the
alarm will ring for 1 minute each time.
To turn off the alarm, press any button (C/F, UP,
DOWN or MODE) while the alarm is sounding.
4) STOPWATCH:
a) In “Stopwatch” mode, press the “SNZ” button
to start/stop timer.
b) In “Stopwatch” mode, press the “MODE” button to
clear the record.
c) The “Stopwatch” mode will display “/I\”.
V) THERMOMETER DISPLAY
Under the normal mode, press the ˚C/˚F button to
toggle between the Celsius and Fahrenheit display.
VI) 12HR/24HR DISPLAY
Under the normal mode, press the “DOWN” button to
toggle between 12HR and 24HR hour display.
I) PRODUCT FEATURES
1) Normal time: Hour, Minute, Month, Date, Day display.
Year, Month, Day, Hour, Minute setting. Year setting
ranges from 1900 to 2099.
2) Timer function: Stopwatch and countdown timer.
3) Alarm function: Alarm and snooze function. Hour,
minute and snooze time setting.
4) Thermometer: Displays Celsius or Fahrenheit.
5) 12/24 hour format display.
6) Powered by 1 x CR2025 battery (included).
II) TIME SETTING
1) Push the slide switch to “T.SET” to enter time setting
mode:
a) Press the “MODE” button to set the hour, minute,
year, month and date. The selected setting will
flash.
b) Use the “UP” and “DOWN” buttons to set the time.
2) The calendar year range is between 1900 and 2099.
3) The day will be auto adjusted and the seconds will be
set to zero.
4) Push the switch to “NORMAL” to exit the time setting
and to return to the normal time display.
IV) TIMER SETTING
1) Push the slide switch to “TIMER” to enter the timer
mode.
2) Press the “MODE” button under the timer mode to
show the following settings:
3) COUNTDOWN TIMER:
a) The “Countdown” timer mode will display “\I/”.
b) The maximum countdown is 30 hours, 59 minutes,
59 seconds.
c) Press the “MODE” button under time mode to
select the countdown timer setting.
d) Press the “UP” and “DOWN” buttons to adjust the
countdown time range between 0-30 hours, 59
minutes, 59 seconds.
e) Press the “SNZ” button to start/stop the
countdown timer.
f) When the countdown timer stops, press the
“MODE” button to reset timer.
g) Slide the switch to “NORMAL” to exit the timer
mode.
LIMITED WARRANTY
THE SOURCE WARRANTY
The Source warrants that this product will be free from
defects in materials and workmanship for a period of ninety
(90) days from the date of purchase. Within this period,
simply take the product and your proof of purchase to any
The Source store or dealer and the product will be repaired
without charge for parts and labour. The Source reserves
the right to charge for transportation. Any product which has
been subject to misuse or accidental damage is excluded
from this warranty.
This warranty is only applicable to a product purchased
through The Source company owned stores and dealers and
to a product that is presented for repair in a country where
The Source offers the product for sale. While this warranty
does not confer any legal rights other than those set out
above, you may have additional statutory rights which will
vary under the laws of the various countries, states, province
and other governmental entities in which The Source
operates. This warranty is subject to all statutory rights you
may have in the country of purchase.
Limited Warranty
© 2012 The Source.
All Rights Reserved.
Imported by:
The Source,
Barrie, Ontario, Canada, L4M 4W5
Manufactured in China
For product support please visit
www.thesource.ca
Please Recycle
Recyclez
—> STOPWATCH —> COUNTDOWN —> COUNTDOWN
` HOUR SETTING
COUNTDOWN <——— COUNTDOWN
SECOND SETTING MINUTE SETTING
—> HOUR —> MINUTE —> YEAR —> MONTH —> DATE
—> HOUR —> MINUTE —> SNOOZE TIME
—> HOUR —> MINUTE —> SECOND

8001330
Manuel de l’utilisateur
III) RÉGLAGE DE L’ALARME
Maintenez enfoncé le bouton « MODE » pour afficher
l’heure d’alarme courante.
1) Glissez l’interrupteur à la position « AL.SET » pour
entrer en mode de réglage de l’alarme :
a) Appuyez sur le bouton « MODE » pour régler
l’heure, la minute, et l’intervalle de rappel d’alarme.
L’item à régler clignote.
b) Utilisez les boutons « UP » et « DOWN » pour
régler l’heure. L’intervalle de rappel d’alarme peut
être réglé entre 1 et 60 minutes.
2) L’alarme est dotée des fonctions suivantes :
« AL.ON » indique que l’alarme est activée et le
rappel d’alarme est désactivé, l’alarme sonnera 1 fois
(pendant 1 minute).
« SNZ » indique que l’alarme est activée et le rappel
d’alarme est activé, l’alarme sonnera 3 fois
(intervalles d’une minute). L’intervalle de rappel
d’alarme peut être régler.
« AL.OFF » indique que l’alarme est désactivée et le
rappel d’alarme est désactivé. L’alarme ne sonnera pas.
3) Quand l’alarme est activée et le rappel d’alarme est
désactivé, l’alarme sonne pendant 1 minute. Appuyez
sur n’importe quel bouton pour arrêter l’alarme.
4) Quand l’alarme et le rappel d’alarme sont activés,
lorsque l’heure désirée est atteinte, l’alarme sonne
sonne pendant 1 minute. Pour arrêter l’alarme
temporairement et activer le rappel d’alarme,
appuyez sur le bouton « SNZ », situé sur le dos de
l’appareil. Le rappel d’alarme peut être utiliser
3 fois et
l’pendant 1 minute à chaque rappel. Pour désactiver
l’alarme, appuyez sur n’importe quel bouton (C/F, UP,
DOWN ou MODE) pendant que l’alarme sonne.
4) CHRONOMÈTRE
a) Dans le mode « Chronomètre », appuyez sur le
bouton « SNZ » pour commencer/arrêter la
minuterie.
b) Dans le mode « Chronomètre », appuyez sur le
bouton « MODE » pour effacer l’entrée.
c) Le mode « Chronomètre », affichera « /I\ ».
V) AFFICHAGE DE LA TEMPÉRATURE
Dans le mode normal, appuyez sur le bouton ˚C/˚F pour
basculer entre l’affichage Celsius et Fahrenheit.
VI) FORMAT D’AFFICHAGE 12H/24H
Dans le mode normal, appuyez sur le bouton
« DOWN » pour basculer entre l’affichage en format
12H ou 24H.
I) CARACTÉRISTIQUES DU PRODUIT
1) Affichage du temps courant : Heure, Minute, Mois,
Date, Jour. Possibilité de réglage de l’année, le mois, la
date, l’heure et la minute. L’année peut être réglée
entre 1900 et 2099.
2) Fonction de minuterie : Chronomètre ou compteur à
rebours.
3) Fonction d’alarme : Alarme quotidienne et fonction de
rappel d’alarme, réglage de l’heure, la minute et la
fonction de rappel d’alarme.
4) Thermomètre : Affichage de la température en Celsius
ou Fahrenheit.
5) Affichage de l’heure en format 12 ou 24 heures.
6) Alimentée par une pile-bouton CR2025 (fournie).
II) RÉGLAGE DE L’HEURE
1) Glissez l’interrupteur à la position « T.SET » pour entrer
au mode de réglage de l’heure :
a) Appuyez sur le bouton « MODE » pour régler
l’heure, la minute, l’année, le mois et la date. L’item
à régler clignote.
b) Utilisez les boutons « UP » et « DOWN » pour
régler l’heure.
2) L’année peut être réglée entre 1900 et 2099.
3) Le jour sera ajusté automatiquement et les secondes
seront mises à zéro.
4) Glissez l’interrupteur à la position « NORMAL » pour
quitter le réglage de l’heure et retourner à l’affichage de
l’heure normal.
IV) COMMENT UTILISER LA MINUTERIE
1) Glissez l’interrupteur à la position « TIMER » pour entre
en mode minuterie.
2) Appuyez sur le bouton « MODE » pour accéder aux
réglages suivants :
3) COMPTEUR À REBOURS
a) Le compteurs à rebours affichera « \I/ ».
b) Le temps maximum du compteur à rebours est 30
heures, 59 minutes, 59 secondes.
c) Appuyez sur le bouton « MODE » dans ce mode
pour sélectionner le réglage du compteur.
d) Appuyez sur les boutons « UP » et « DOWN »
pour régler le temps de comptage à rebours (entre
0 et 30 heures, 59 minutes, 59 secondes).
e) Appuyez sur le bouton « SNZ » pour
commencer/arrêter le compteur à rebours.
f) Lorsque le compteur à rebours arrête, appuyez sur
le bouton « MODE » pour retourner à l’affichage
de l’heure normal.
g) Glissez l’interrupteur à la position « NORMAL »
pour quitter le mode compteur à rebours.
GARANTIE LIMITÉE
GARANTIE LA SOURCE
La Source garantit ce produit contre tout vice de matière ou
de fabrication pour une période de quatre-vingt-dix (90) jours
à compter de la date d'achat. Au cours de cette période, vous
n'avez qu'à retourner le produit, accompagné d'une preuve
d'achat, à tout magasin ou détaillant La Source où il sera
réparé sans frais pour les pièces et la main-d'oeuvre. La
Source se réserve le droit d'imposer des frais de transport. La
garantie ne s'applique pas aux produits endommagés suite à
un mauvais usage ou à un accident.
La garantie s'applique uniquement à un produit acheté dans
un magasin de la compagnie La Source ou chez un détaillant
La Source et à un produit vendu dans le pays où l'on fait la
demande de réparation au titre de la garantie. Bien que cette
garantie n'accorde aucun droit particulier autre que ceux
susmentionnés, vous pouvez avoir des droits statutaires
additionnels qui varient selon le pays, l'état, la province ou
l'entité gouvernementale où La Source exerce ses affaires.
Cette garantie se conforme à tous les droits légaux que vous
pourriez avoir dans le pays d'achat.
Garantie Limitée
© 2012 La Source.
Tous droits réservés.
Importé par :
La Source,
Barrie, Ontario, Canada, L4M 4W5
Fabriqué en Chine
Pour le service à la clientèle, veuillez visiter
www.thesource.ca
RecyclezRecyclez
—>CHRONOMÈTRE—>COMPTEUR À —> RÉGLAGE DE L’HEURE
REBOURS DU COMPTEUR
À REBOURS
RÉGLAGE DES SECONDES RÉGLAGE DES MINUTES
DU COMPTEUR À REBOURS DU COMPTEUR À REBOURS
—> HOUR —> MINUTE —> SECOND
—> HOUR —> MINUTE —> SNOOZE TIME
—> HOUR —> MINUTE —> YEAR —> MONTH —> DATE
Table of contents
Languages:
Other NexxTech Clock manuals
Popular Clock manuals by other brands
Sapling
Sapling SAL Series installation manual
La Crosse Technology
La Crosse Technology Radio Controlled Analog Clock Quick setup instructions
Quasar
Quasar 3073 manual
Davtron
Davtron 850B installation manual
NATURE & DECOUVERTES
NATURE & DECOUVERTES 50173640 manual
Siemens
Siemens SICLOCK TC 400 operating instructions
