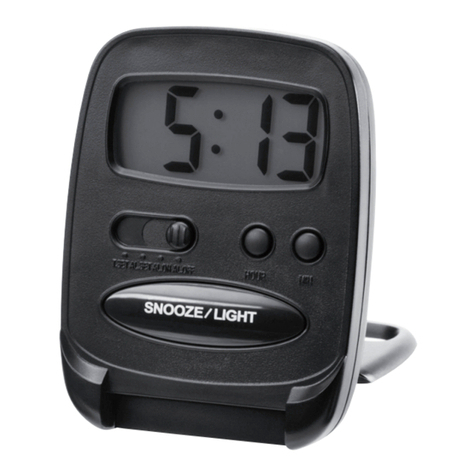
NexxTech C8171 WWVB User manual

PANTONE: 445C SIZE: A5
CMOS: TM8706-367, LCD-385, BATTERY 2 x AAA
Model: C8171 WWVB
DISPLAY SYMBOLS
LCD display
INSTALLING OR REPLACING THE BATTERIES
•Begin by opening the battery compartment cover at
the bottom of the clock.
• Insert two AAA batteries (not included) into the battery
compartment and make sure the polarity is correct
by following the (+ or -) symbols engraved inside.
• Replace the battery whenever the display becomes
dim or difficult to read.
RADIO CONTROLLED TIME FEATURE
Once the battery is installed the clock will begin to
seek out the radio signal to update the time. This
typically takes between 5-8 minutes in good conditions.
If after eight minutes the signal has not been received,
we recommend that you set the time manually. (See
Setting the Time Manually.) After the first signal is
received, the clock will automatically seek out the
atomic clock signal at 2:00AM, 8:00AM, 2:00PM and
8:00PM, and will continue to do so each day.
WWVB COVERAGE MAP
Note: Radio Controlled Clock may not work in some
locations or areas.
SIGNAL STRENGTH INDICATOR
The signal indicator displays signal strength in 3 levels.
Wave segment flashing means time signals are being
received. The signal quality could be classified into three types:
If the RC clock receives signal successfully, a Sync-time
symbol appears on LCD.
The unit has already received the time signal. Otherwise the
signal strength symbol will disappear from the LCD display.
Note:
SETTING THE TIME ZONE
• Slide the switch on the right hand side of the clock to
the [TIME SET] position. The time zone and time will
begin to flash.
• Press the [12/24/YR] button to set the clock to the
correct Time Zone, then the time will adjust itself to
the right time automatically.
1
2
3
4
5
6
7
10
8
9
3
4
1
5
2
6
7
8
6301461
User’s Instructions
RC TRAVEL CLOCK
Thank you for your purchase of this quality clock. The
utmost care has gone into the design and manufacture
of your clock. Please read these instructions carefully
and store them in a safe place for future reference.
FEATURES
• Radio Controlled Accuracy - Sets Time Automatically
• Calendar shows Month, Day & Date
• Alarm with Repeat Snooze
• E.L. Backlight for night time viewing
• Daylight savings time function (DST)
PRODUCT DESCRIPTIONS
1. SNOOZE/LIGHT bar
2. HR/MONTH button
3. ˚C/˚F button
4. 12/24/YR button
5. MIN/DATE button
6. ALARM ON/OFF select switch
7. LOCK•TIME SET•ALARM SET•DATE SET select switch
8. RESET button
1. Be cautious of using the receiveing mode for an extended
period of time. The receiving mode will shut off
automatically after 6-12 minutes. Receiving mode
consumes more battery power resulting in reduced
battery life.
2. In an environment with radio frequency interference, the
unit may not maintain communication. The RC function
will return to normal when interference stops.
1. Temperature window
2. Clock window
3. Date
4. Month
5. Day of the week
6. Snooze On indicator
7. Alarm On indicator
8. Signal strength indicator
9. Daylight savings time indicator
10. Time Zone map

USING THE ALARM AND SNOOZE FUNCTION
• To activate the alarm, slide the ALARM switch on the
left hand side of the clock to the [ON] position, the
bell indicator will appear on the display..
• To deactivate alarm, slide the ALARM switch to the
[OFF] position, the bell indicator will disappear.
Note:
The snooze will be on automatically after activating the
alarm.
• To activate the snooze function just press the
[SNOOZE/LIGHT] button. The alarm will stop sounding
and then sound again in 5 minutes.
• When the Alarm function is activated, if you do not
activate the snooze button the 4-step crescendo
alarm will automatically snooze once every 5
minutes for a total of 4 times. The alarm duration is 60
seconds.
• When the Alarm sounds, the E.L. backlight will be
on for 4 seconds.
CARE OF YOUR CLOCK
• Replace the batteries promptly when necessary and
store the clock without batteries when not in use. It is
time to replace the batteries when the LCD display
becomes dim.
• Clean your clock with a soft cloth or paper towel.
Do not use corrosive cleaners or chemical solutions
on the clock.
• Avoid putting the clock in a highly humid environment
such as poolside or in a bathroom.
• Do not expose the clock to direct sunlight, extreme
hot or cold temperatures.
Note:
Attention! Please dispose of used unit and batteries in
an ecologically safe manner.
IMPORTANT
For best reception, please read the following instructions:
1. This sophisticated instrument will automatically
receive the time signal transmitted from Fort
Collins, Colorado Atomic Clock transmitter.
2. It is strongly recommended to start this clock at
night time and let the clock receive the signal
automatically at midnight.
3. Always place the unit away from interfering sources
such as TV set, computer, etc..
4. Avoid placing the unit on or next to metal plate.
5. Closed area such as airports, basements and tower
blocks may not receive the RC signal.
6. Do not start reception in a moving vehicle such as
an automobile or train.
NOTE:
It is recommended that for the first use of the clock,
you set the clock manually and then allow the Radio
Control signal to update the time setting each day.
4
• The default Time Zone is Pacific zone. There are
four time zones for you to select: P=Pacific
M=Mountain C=Central E=Eastern.
• Slide the switch to the [LOCK] position to exit the
setting mode. The clock will now begin keeping time.
SETTING THE TIME MANUALLY
If the clock does not receive the time signal successfully,
you can set the time manually. As soon as the transmitter
is received again,the clock will automatically synchronize
with the received time.
• Slide the switch on the right hand side of the clock to
the [TIME SET] position. The time zone and time will
begin to flash.
• Press the [HR/MONTH] button to set the clock to
the desired hour, press the [MIN/DATE] button to
set it to the desired minute.
• Slide the switch to the [LOCK] position to exit the
setting mode. The clock will now begin keeping time.
Note:
In normal time mode, pressing the [12/24/YR] button will
toggle between the 12 and 24 hour time formats.
SETTING THE CALENDAR MANUALLY
• Slide the switch on the right hand side of the clock to
the [DATE SET] position. The year, month and date
will begin to flash.
• Press the [HR/MON] button to set the desired
month.
• Press the [MIN/DATE] button to set the desired date.
• Press the [12/24/YR] button to set the desired
year.
• Slide the switch to the [LOCK] position to return to
normal time keeping mode.
Note:
The day of the week will adjust itself automatically
depending on what year, month and date you enter.
ABOUT THE DAYLIGHT SAVINGS TIME (DST)
This clock has been pre-programmed to automatically
switch when daylight savings time is in effect. Your clock
will show DST on the display during this time.
Please note:
With the pre-programmed DST feature, if you live in an
area where Daylight Savings Time is not observed, the
time display on your clock will read +/- one hour during the
DST time period.
SETTING THE ALARM AND DAY LANGUAGE
• Slide the switch on the right hand side of the clock to
the [ALARM SET] position. The Alarm time and day
language will begin flashing.
• Press the [HR/MONTH] button to set the desired alarm
hour. Press the [MIN/DATE] button to set the desired
alarm minute.
• Press [12/24/YR] button to select the day language:
GB=English FR=French DE=German ES=Spanish
IT=Italian
• Slide the switch to the [LOCK] position to return to
normal time keeping mode.
Note:
In normal time mode press the [HR/MONTH] button to
view the alarm time.

CMOS: GPL081A3-487A
Suitable Model: C8236 PANTONE: 445C SIZE: A5
ORBYX ELECTRONICS WARRANTY
ORBYX Electronics warrants that this product will be free
from defects in materials and workmanship for a period of
ninety (90) days from the date of purchase. Within this
period, simply take the product and your proof of
purchase to any ORBYX Electronics store or dealer and
the product will be repaired without charge for parts and
labour. ORBYX Electronics reserves the right to charge
for transportation. Any product which has been subject to
misuse or accidental damage is excluded from this
warranty.
This warranty is only applicable to a product purchased
through ORBYX Electronics' company owned stores and
dealers and to a product that is presented for repair in a
country where ORBYX Electronics offers the product for
sale. While this warranty does not confer any legal rights
other than those set out above, you may have additional
statutory rights which will vary under the laws of the
various countries, states, province and other
governmental entities in which ORBYX Electronics
operates. This warranty is subject to all statutory rights
you may have in the country of purchase.
LIMITED WARRANTY
Limited Warranty/Garantie Limitée
© 2008 ORBYX Electronics. All Rights Reserved.
Imported in Canada for/
Importé au Canada pour
Orbyx Electronics,
Concord, Canada, L4K 4M3
Manufactured in China
For product support please contact
www.orbyxelectronics.com or 1-866-363-3059
5
Other NexxTech Clock manuals
Popular Clock manuals by other brands
Furnika
Furnika NEW MIRROR WATCH manual

TFA
TFA 60.3500 operating instructions

Ambient Weather
Ambient Weather TIDECLOCK-25 user manual

DC-Digital
DC-Digital DC-Webserver-Clocks-1 Operation manual
AirTime
AirTime AT12RPS Installation and user guide

La Crosse Technology
La Crosse Technology BBB87740x1 instruction manual
