NEXZU Roadlark User manual

E-Bicycles

You are now the proud owner of a made in India electric
vehicle designed and manufactured by Nexzu Mobility.
on one of your smartest
purchases ever!
Congratulations
This document will help you understand your product better.
It contains instructions for the maintenance of your product
and guidelines for a better riding experience.

CONTENTS
Introduction
Important points
Quick start guide
Know your e-bicycle
Know your e-bicycle parts
Bicycle identification - chassis number
Technical specifications
Using the bicycle
01
02
03
10
12
13
14
16

Different riding modes
Battery information
Maintenance schedule
FAQ’s
Warranty terms & conditions
Troubleshooting
Customer & vehicle details
Notes
19
22
23
25
30
36
38
39
CONTENTS

01
INTRODUCTION
NEXZU
OWNERS MANUAL
“At Nexzu we build products that define the future of urban mobility.
We have created your new electric cycle with a focus on design and
a passion for quality.
We hope you enjoy riding it as much as we enjoyed crafting it for you.”
Yours Truly,
TEAM NEXZU

WARNING
IMPORTANT POINTS
“Warning” means that specific precautions are required to avoid
causing damage to the e-bicycle.
CAUTION
NOTE
Failure to follow the instructions after this symbol may lead to
serious injury or even death for the rider, people in the vicinity,
or people inspecting or repairing this bike.
A “Note” provides key information that will make the procedure
either easier or clearer
02
NEXZU
OWNERS MANUAL
The safety of our customers, fellow riders and pedestrians is of utmost
importance to us.
Understanding the below signs will help you identify potential hazards.
Please exercise good judgement.

5.2 AH - 2.5 - 3 hrs for full charge
8.7 AH - 4.5 - 5 hrs for full charge
CHARGING
TIME
New electric bicycles battery should be charged completely. Initial
charge ensures current is flowing through all the cells and helps
to condition the battery right out of the box.
CHARGE THE
BATTERY
LED CONTROL PANEL
03
NEXZU
OWNERS MANUAL
Insert charger cable to the power supply 230V / 50 cycle and then connect to
the battery socket.
CAUTION
Low – Motor Assist 50% | – Motor Assist 70% | – Motor Assist 90%Medium High
ON / OFF switch
Walk assist mode
Pedelec mode
% of charge
810
POWER
ON/OFF
6km
MODE
LOW MID HIGH
50 70 90
QUICK START GUIDE
04
NEXZU
OWNERS MANUAL
Rompus+Roadlark
Motor
Range
Pedelec mode
Throttle mode
Max. Speed
Battery (Li-ion)
Battery location
Brake
BLDC 250W 36V BLDC 250W 36V
75 Km 22 Km
25 Km/Hr 25 Km/Hr
5.2 Ah + 8.7 Ah 5.2 Ah
In Frame &
Rear Detachable
Dual E Disc Brake
In Frame
100 Km 32 Km
Dual E Disc Brake

05
NEXZU
OWNERS MANUAL
PRE RIDE CHECK
We want you to be safe and have fun while you ride your gadget. To do that,
please check following parts:
Check front and
rear brakes are
functioning
Check that your
seat post is
inserted correctly
Check handle
bars
Check that the crank
arms and pedals are
firmly secured
Check the bike
for any
loose joints
Check tyre
pressure

SAFETY INSTRUCTIONS CAUTION
NEXZU
OWNERS MANUAL 06
1
23
4
Always wear
a helmet.
Ride cautiously in
wet weather as
roads get slippery
and tyres may slide
more easily.
In wet conditions do not
ride if the water level
rises above the motor,
as the motor and brakes
will malfunction.
Take extra precaution
while executing turns.

DO's
Do not switch on the vehicle while the
battery is being charged.
Do not leave the e-bike outdoors in
wet or rainy conditions.
Scrap battery should be returned to
the authorized dealer.
Do not fit accessories which are not
recommended by Nexzu.
Maintain proper tyre pressure.
BRAKING PRECAUTION
While applying brakes, return the throttle to the neutral position.
Gradually apply both front and rear brakes to reduce the speed of the bicycle to a full
stop.
While moving forward, ensure both brake levers are free; power to motor supply will
be cut off when brakes are applied.
WARNING
Never put oil on brake pad, brake disc.
During wet conditions brakes should be applied cautiously keeping a safe braking
distance.
It is advisable to unplug the charger
after batteries are charged.
NEXZU
OWNERS MANUAL 07
DON'Ts

08
NEXZU
OWNERS MANUAL
BATTERY MAINTENANCE TIPS
A completely discharged battery may be
permanently damaged; call your authorized
service centre if this happens
If the cycle is unused for a long time, charge
the battery half way every two months
Store your battery in a humidity free area at
temperatures between 15 - 40 deg celsius to
avoid damage to the electronic components
Do not charge the battery immediately after a
long drive; let the vehicle cool for 30 minutes
Avoid parking and charging the battery in direct
sunlight
Unplug the bike once the battery is fully charged
09
NEXZU
OWNERS MANUAL
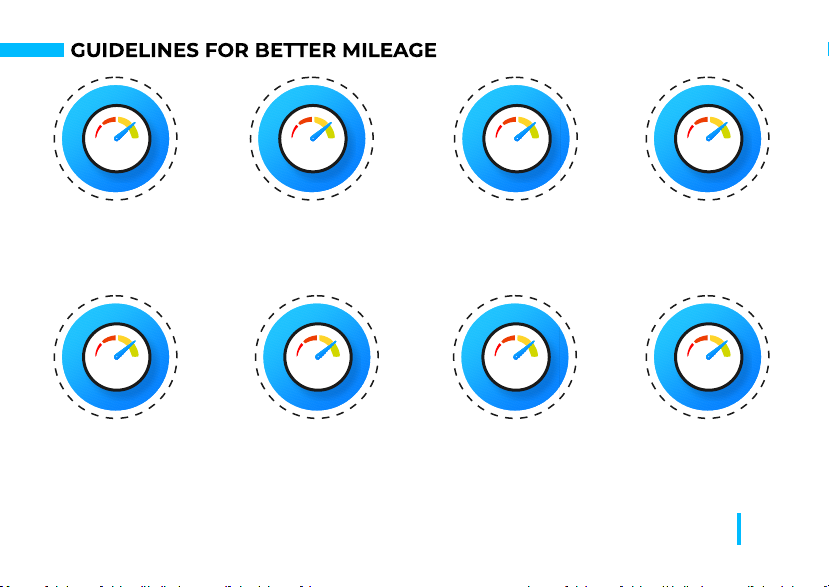
Avoid riding
on muddy
roads
Avoid riding
against the
wind
Avoid riding
on slopes
Avoid frequent
braking and
accelerating
Keep tyres
properly
inflated
Ensure free
rotation of
wheels
Avoid carrying
extra load
on cycle
Ride on
low / eco
mode

KNOW YOUR E-BICYCLE
ROADLARK
10
NEXZU
OWNERS MANUAL

ROMPUS+
KNOW YOUR E-BICYCLE
11
NEXZU
OWNERS MANUAL

KNOW YOUR E-BICYCLE PARTS
Identifying the
Main Components
Handlebar
Brake lever
Headset
Front fork
Front brake
Tyre
Pedal
Crank
Chain
Frame
Rear battery
Handle
stem
Seat
Seat post
Hub motor
Free wheel
Rear hub
Rear brake
LED display
12
NEXZU
OWNERS MANUAL
Battery
(Roadlark)

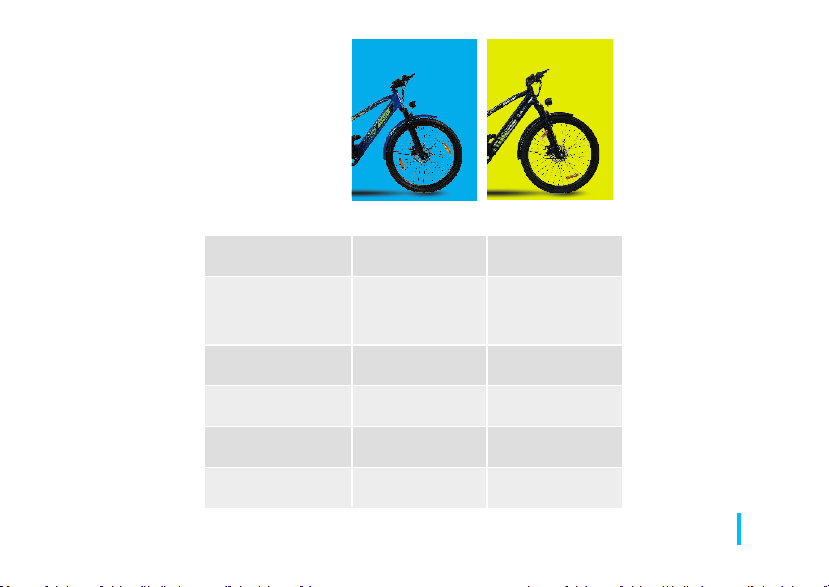
BICYCLE IDENTIFICATION - CHASSIS NUMBER
13
NEXZU
OWNERS MANUAL
You can find your e-bicycle chassis number engraved near the chain sprocket
on right hand side of chassis (as indicated in the yellow box in the photo below).
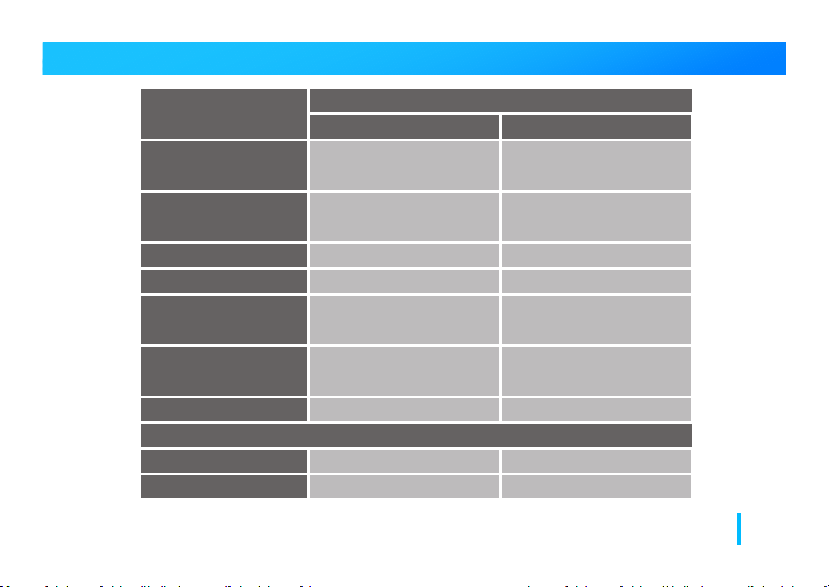
TECHNICAL SPECIFICATIONS
14
NEXZU
OWNERS MANUAL
Model
Parameters ROADLARK ROMPUS+
Motor
Battery
Battery location
Charger
Speed in kms/hr
Battery life
(average cycles)
Range*
Pedelec mode(kms)
Throttle mode(kms)
Charging time
36 Volt/250 Watt
BLDC motor
36 Volt/250 Watt
BLDC motor
36 V, Front 5.2 AH &
Rear 8.7 AH Li-ion
36 V, Front 5.2 AH
In frame + Rear detachable In frame
42V, 2A 42V, 2A
Front 2.5 - 3 Hrs
Rear 4.5 - 5 Hrs
2.5 - 3 Hrs
750 750
25 25
100
75
32
22

TECHNICAL SPECIFICATIONS
* Under standard test condition.
15
NEXZU
OWNERS MANUAL
Parameters ROADLARK ROMPUS+
Throttle grip
Controller
Tyre
Front suspension
Front & rear brake
Drivetrain
Motor, Controller
No of reflectors
Light & horn
DrivetrainHeadlight
Front & rear
mudguard
Frame material
Saddle
Full Full
36V, 15A
26" Cotton tube tyre
Yes
IP65
Electronic disc brake
36V, 15A
26" Cotton tube tyre
Yes
Electronic disc brake
IP65
Rear 18T Front 44T Rear 18T Front 44T
1010
Yes Yes
LED LED
Yes Yes
Cold rolled steel
High grade foam
cushion
Model
Cold rolled steel
High grade foam
cushion

USING THE BICYCLE
BATTERY
Rompus+ : 1 x factory fitted in-frame battery (you don't need to install the
battery). Charge the in-frame battery using the socket (marked in yellow circle).
Roadlark : 1 x factory fitted in-frame battery (you don't need to install the
battery)
1 x detachable battery.
16
NEXZU
OWNERS MANUAL
Charging socket for in-frame battery
(Roadlark & Rompus+)
Charging the in-frame battery:
1. Connect the charger to a standard power
supply 230V wall socket.
2. Connect the charger output pin to the
battery charging socket. Turn on the power
supply.
This manual suits for next models
1
Table of contents
Other NEXZU Bicycle manuals


