Trident SPIKE User manual
SPIKE/TITIAN ASSEMBLY MANUAL
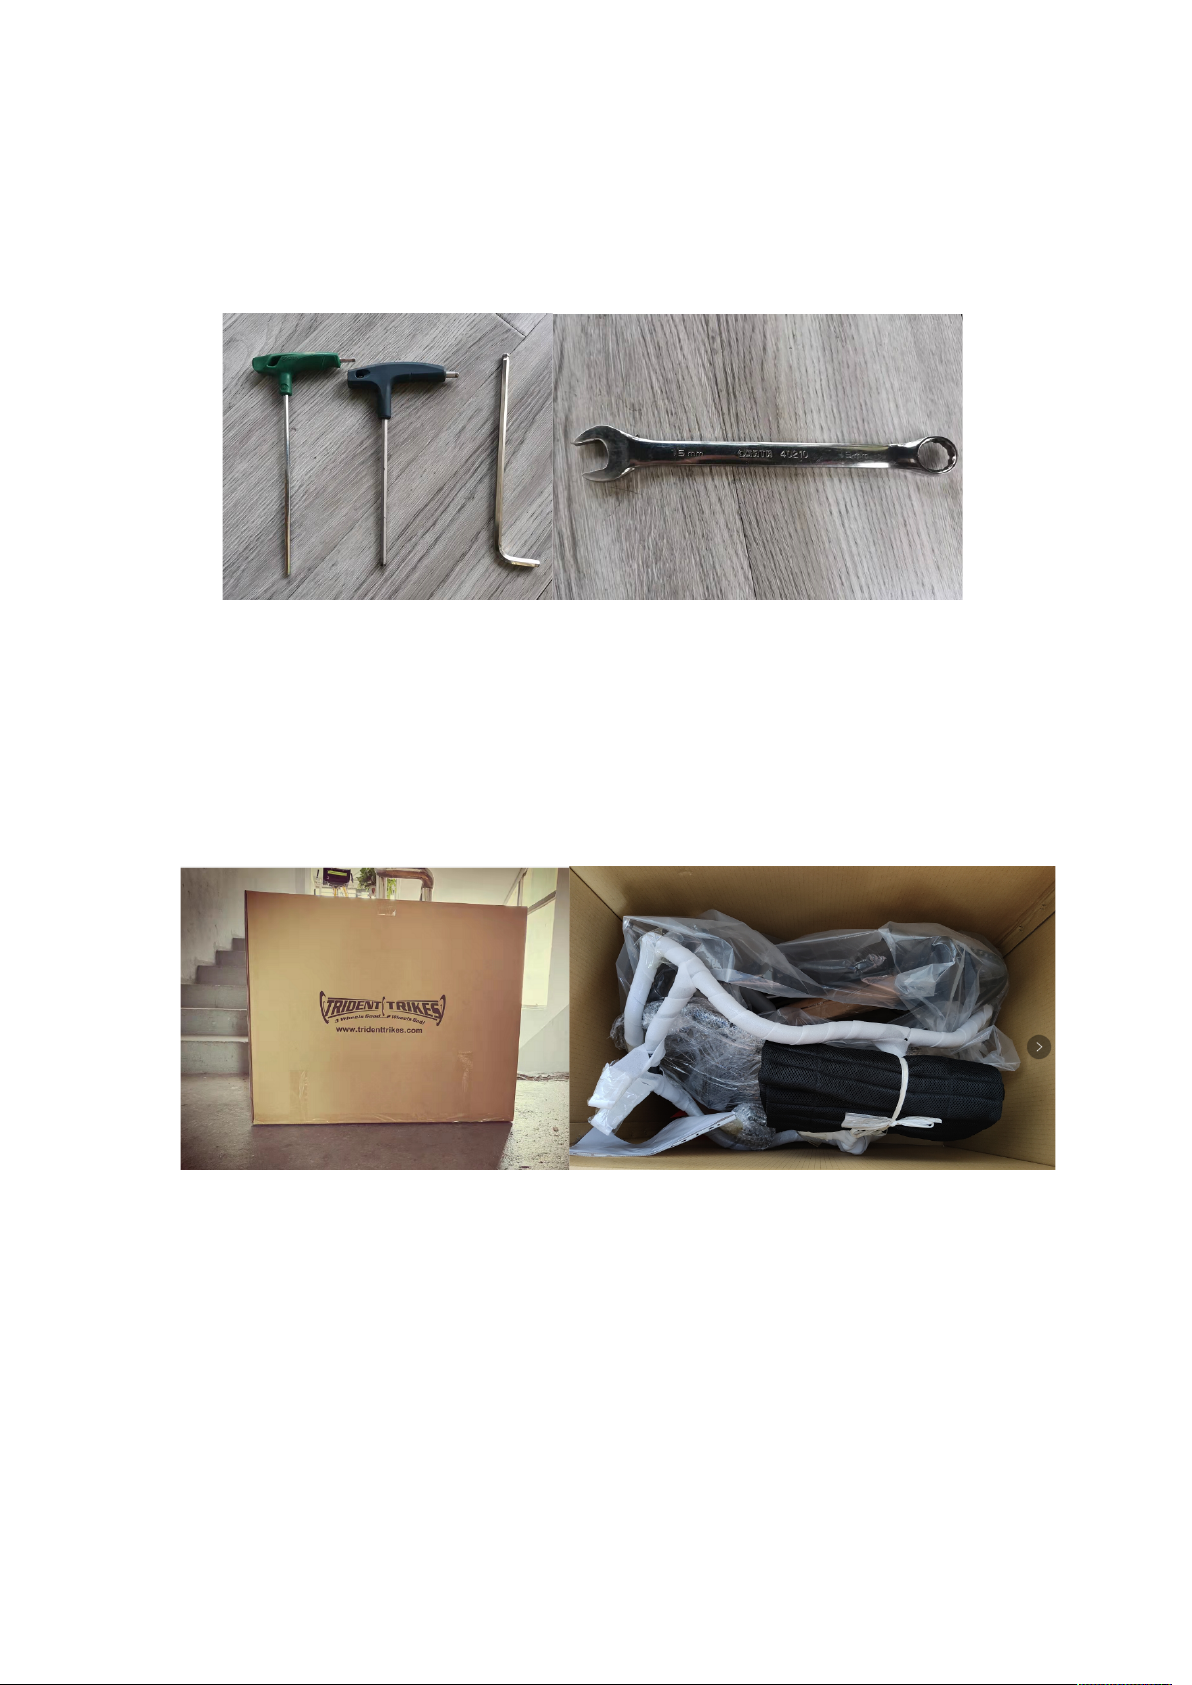
TOOLS /SUPPLIES: Allen Wrenches: 4mm/5mm/6mm
Open Wrenches: 1/2” or 13mm, 15 mm or a Pedal Wrench
Chain Tool , Chain Lube, Lithium Grease
These Trikes come partially assembled. We have previously built the entire Trike up and
adjusted the brakes and derailleurs and then disassembled to fit in the box. The things
that need to be done is installing the wheels, brakes , installing the steering bar , putting
the seat cloth on the seat and attaching it to the frame , adjusting the length of the boom
and chain, pedals, and inflating the tires.
NOTES:
As we continually try to make improvements on our models, some specifications will
change over time.
Periodically check all the bolts especially in the first 100 miles
Check Spokes after riding 50 miles and again after 100 miles. It is common for Stainless
spokes to be loosen up a little when first riding.
Most Trikes will need some readjusting after the cables stretch a little.
Important –When adjusting the boom, the chain length needs to be adjusted accordingly.
Riding with improper chain length can cause damage to both the rear derailleur and frame.
Always make sure there is enough chain for the big chainring/big cassette cog gear
combination. Also when retightening boom bolts- do it evenly- Don’t tighten one fully and
then tighten the other. This could lead to cross threading the nut. Tighten one halfway, then
tighten the other halfway go back and tighten the first one some more and then the second
one etc. If the boom does not have at least 1” behind the rear boom bolt- you need a long
boom. Generally speaking, this applies to people over 6’3 or so.
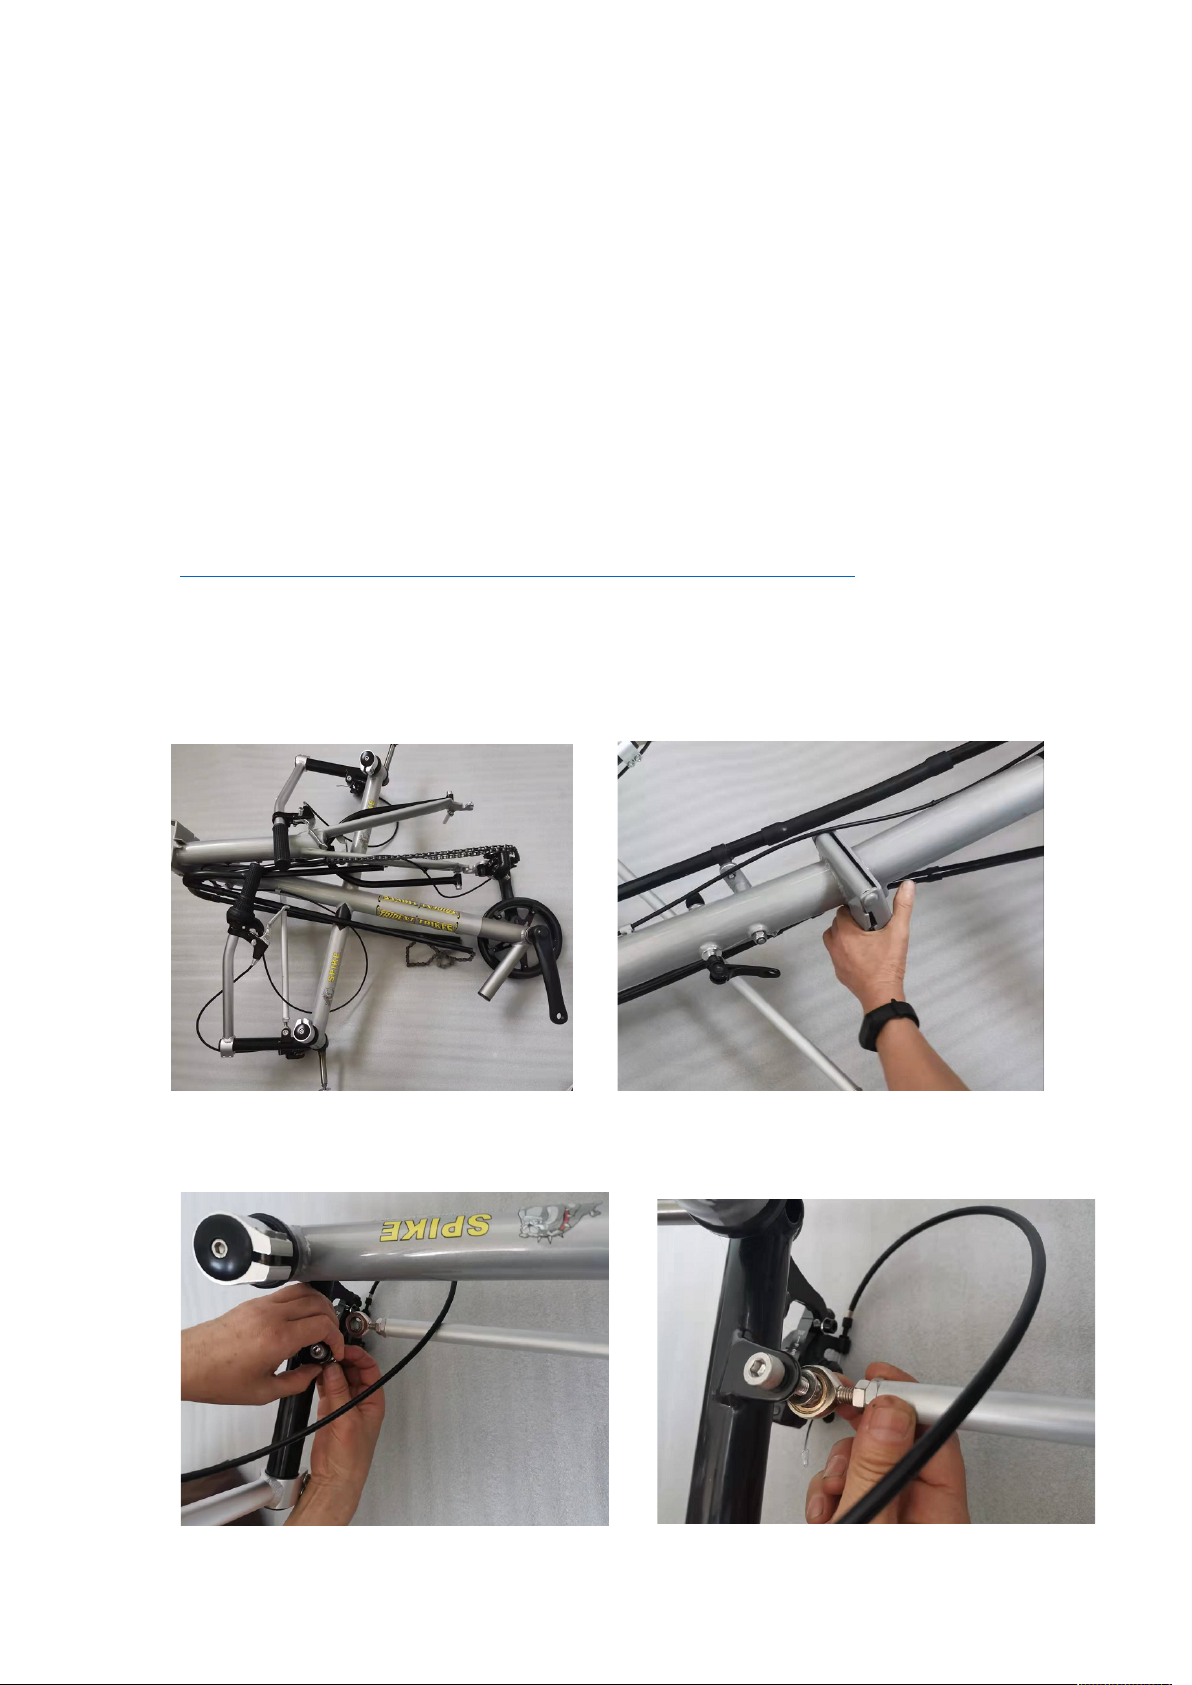
STEP 1: Tak e a ll p ac ki ng m at er i al s o ff the Trike. The Spike/Titan Trikes come folded in the
shipping carton. Unfold the Trike and close and tighten the quick release of the folding
hinge. Here are instructions on how to fold and unfold a Titan
http://tridenttrikes.com/wp-content/uploads/2016/02/HowtoFoldaTitan.pdf
PLEASE NOTE THAT THE SERIAL NUMBER OF YOUR TRIKE IS INSIDE THE HINGE
STEP 2: Reconnect the left side steering bar to the kingpin. Tighten with a 6mm Allen
Wrench and a ½” or 13mm wrench
STEP 3: Rotate the handlebars to to the vertical position and use 5mm allen wrench to
tighten. On some Spikes and all Titans there are also Horizontal Bars on top of the vertical
handlebars. Rotate those around to a comfortable hand position and tigthen using a 5 mm
Allen Wrench.
STEP 4 : Loosen the 2 bolts holding the boom with a 6mm Allen Wrench .Pull the boom
out about 8 inches. Make sure the derailleur post is perpendicular to the ground and the
retighten. You will do a final chain length and boom adjustment at the end of assembly.

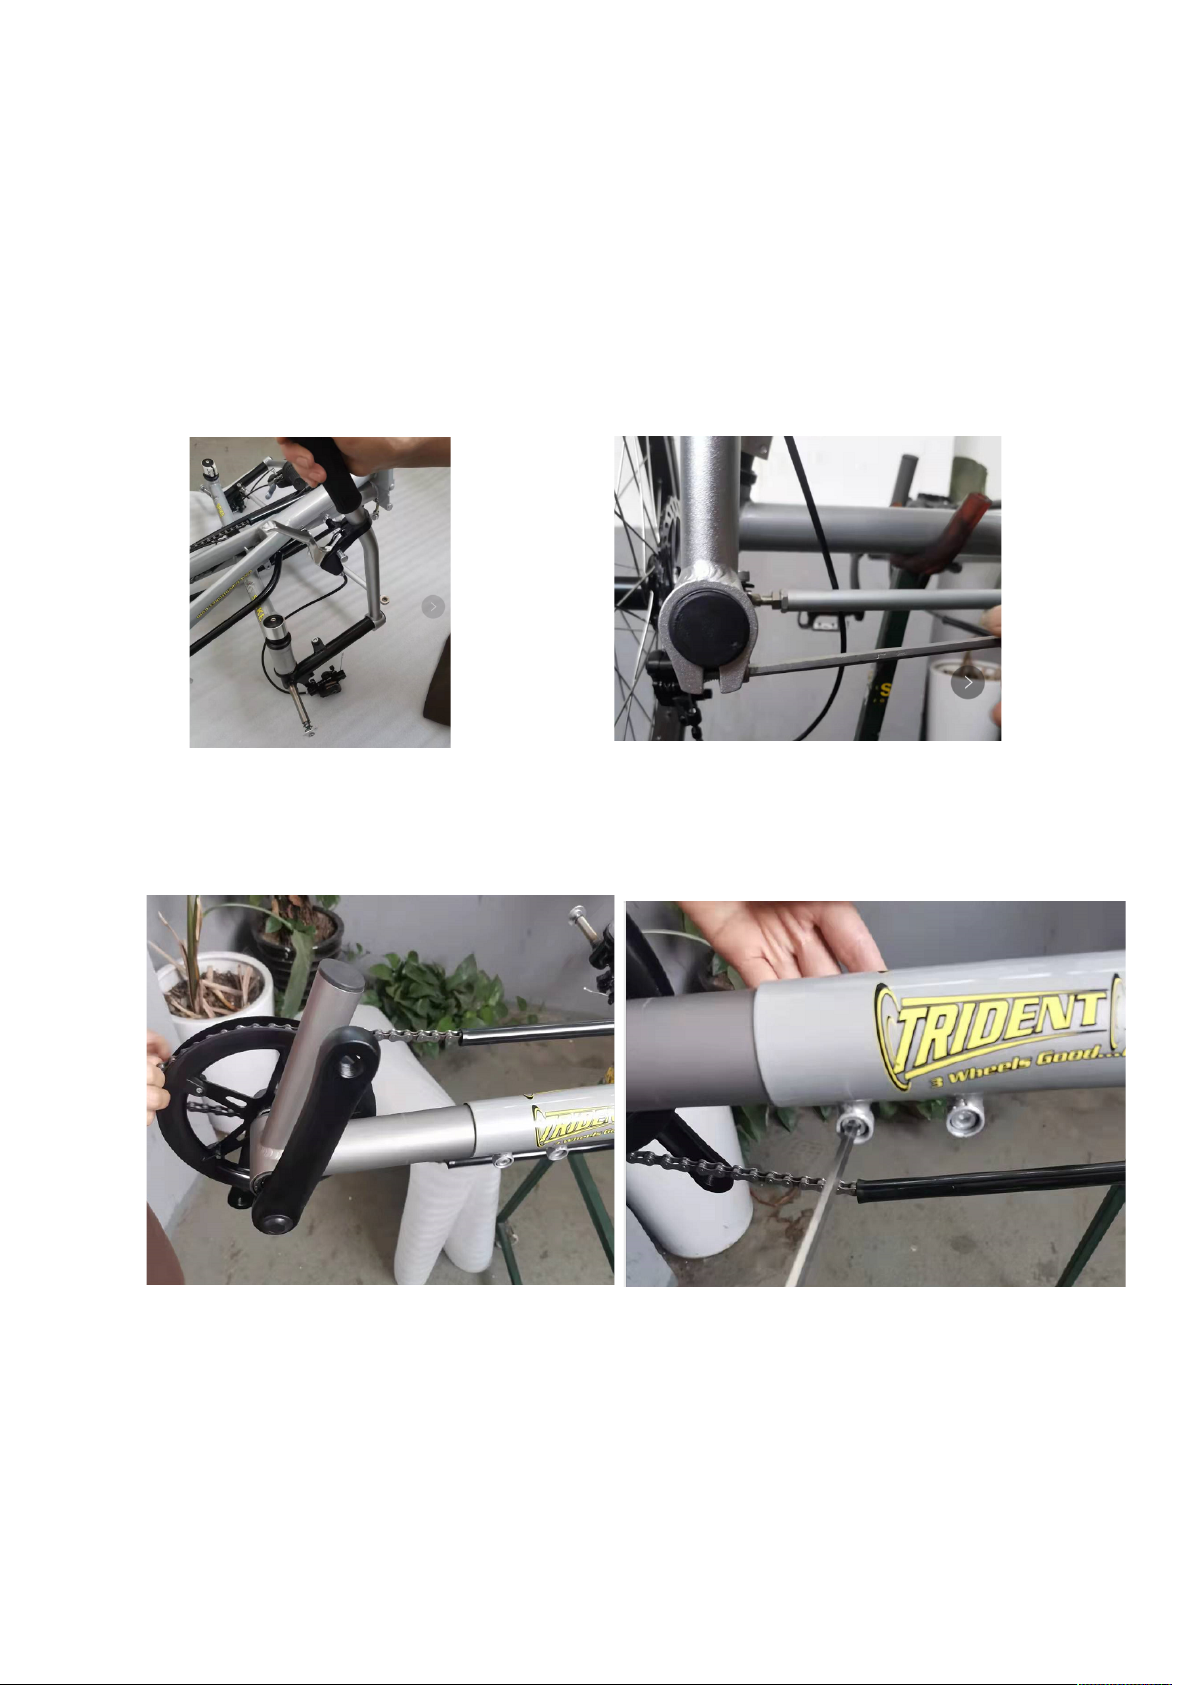
STEP 5: Installing the front wheels. Remove the wheel cap and bolt using a 4 mm Allen
Wrench. Sometimes there are very thin washers that we use to micro adjust the
wheel/brake rotor position that also need to be temporarily removed. We normally put a
little lithium grease on the spindle that will make removing wheels easier later, but this is
optional. Look at the tire or the brake rotor on the wheel to determine which is the left or
right wheel. Rotate the brake caliper out of the way and put the wheel on the spindle. The
spindle has a small end that goes through the outer bearing. Put the wheel cap, thin washer
(if any) into the end of the spindle and retighten fully using a 4mm allen wrench. Make
certain that the brake caliper is completely rotated out of the way of the brake rotor.
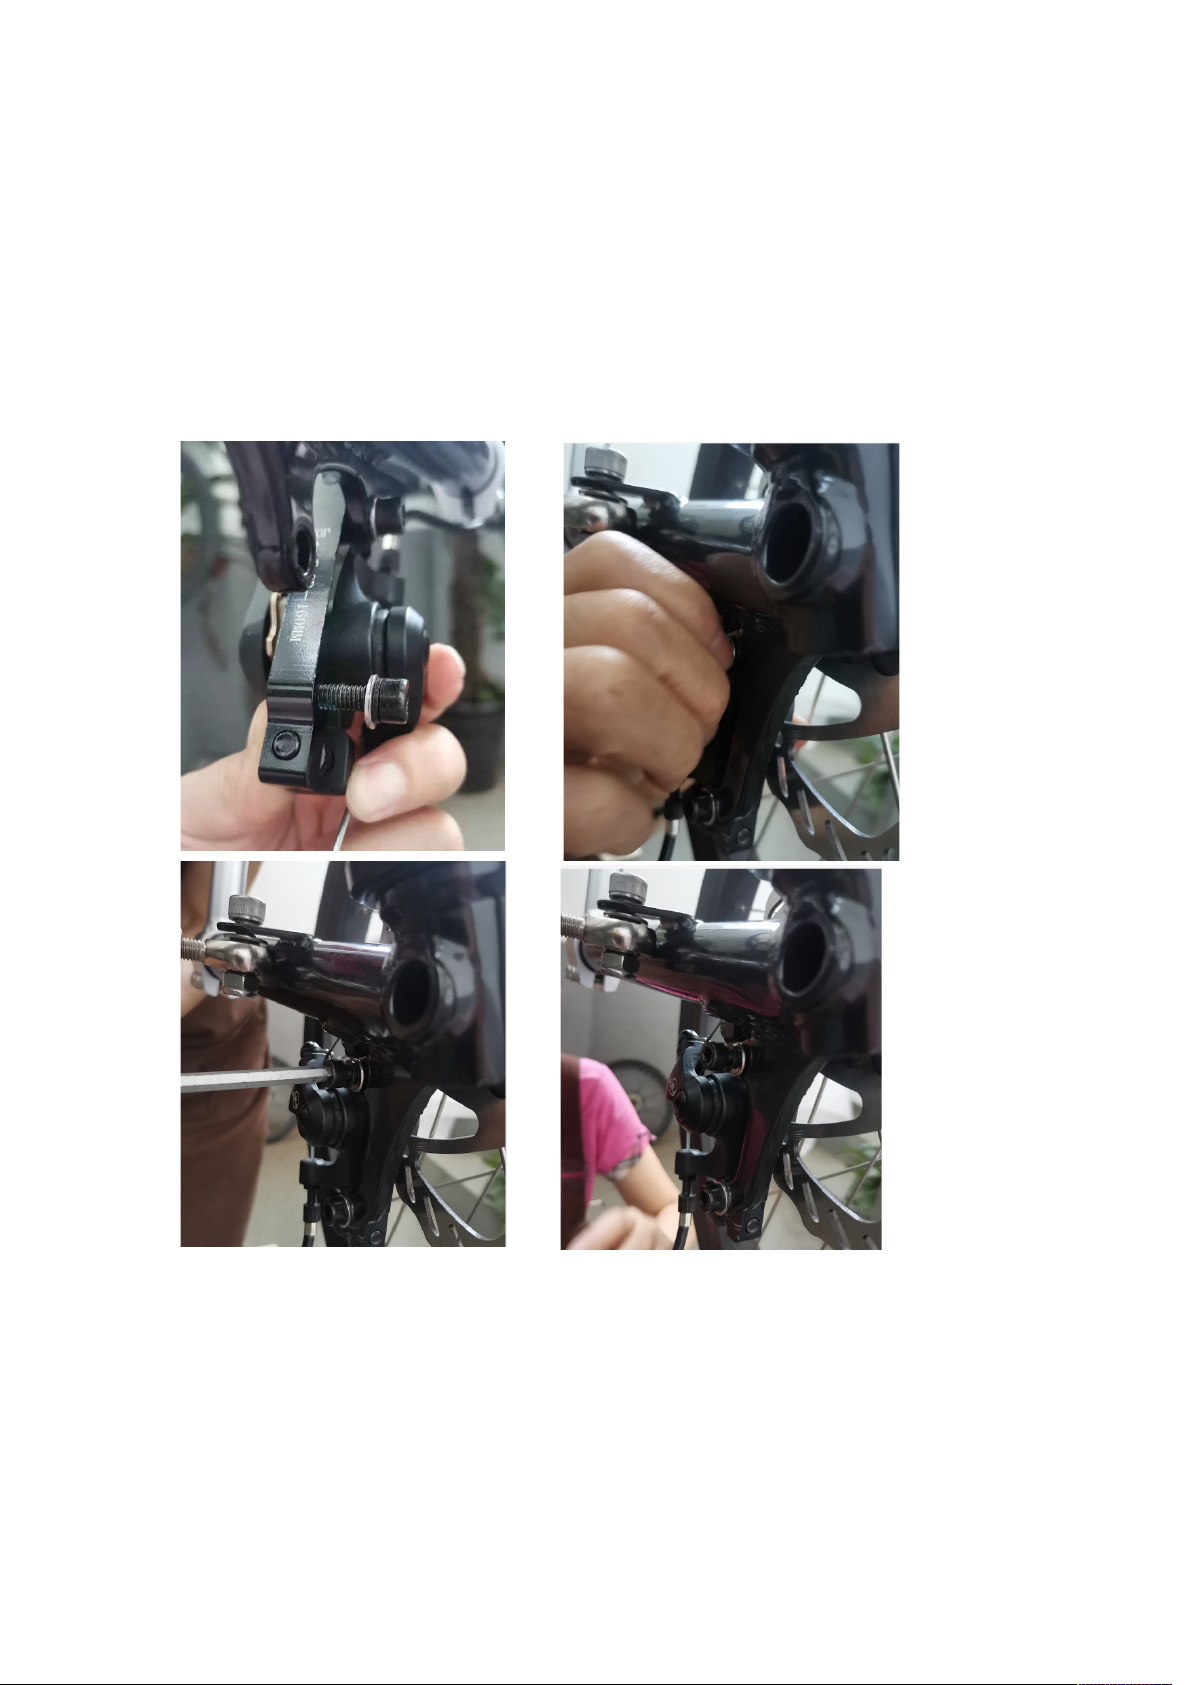
STEP 6: Reinstall the Brakes Remove the bolt from the side of the caliper using a 5mm
wrench, rotate the caliper around the brake rotor, put the bolt back in and the fully tighten
the brake caliper on the kingpin. Squeeze the brake lever once or twice to make sure all is
aligned.

STEP 7: Install the rear wheel , fasten it with quick release
STEP 8: Tak e th e se at cl ot h an d a tt a ch it to the se at fra me . I t is su ppo se d to fi t ti gh t. As
you sit on the seat- it will stretch. First attach the top of the seat cover to the seat. Next
attach 1 lower corner. For the remaining lower corner, turn the seat cover inside out at that
corner and stretch it over the last corner and flip it back right side out. Next tighten the
Velcro straps. You can start from Number 4 strip from bottom, then No.3 from bottom, then
adjust each one to give you as much or as little support as you like. Sometimes these
straps are very tight and you have to pull hard to attach them. The hardest part is at the
lower bend- make sure you work the sides of the cover over the seat frame as you pull the
straps.
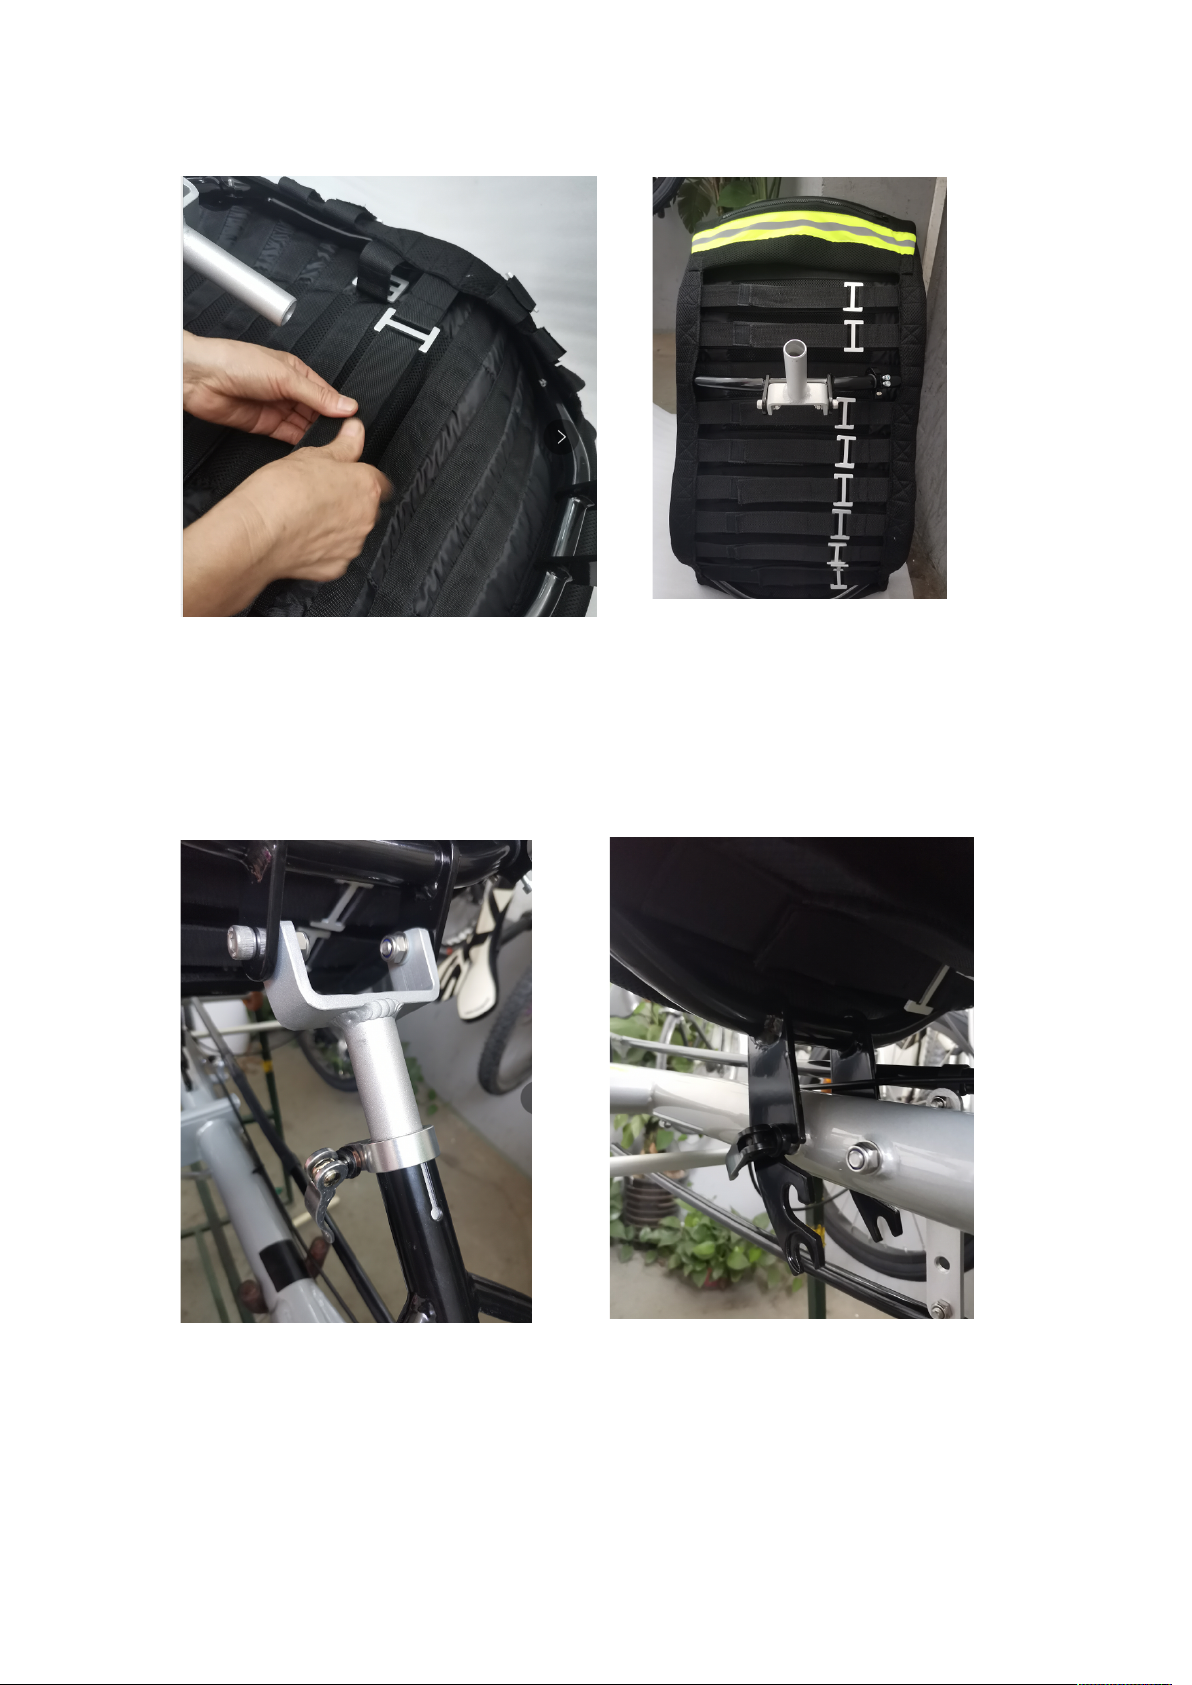
+STEP 9: Install the seat on the frame , fasten the quick releases after you adjust your
required angle and height. There are 3 height positions- we recommend you start in the
middle position.
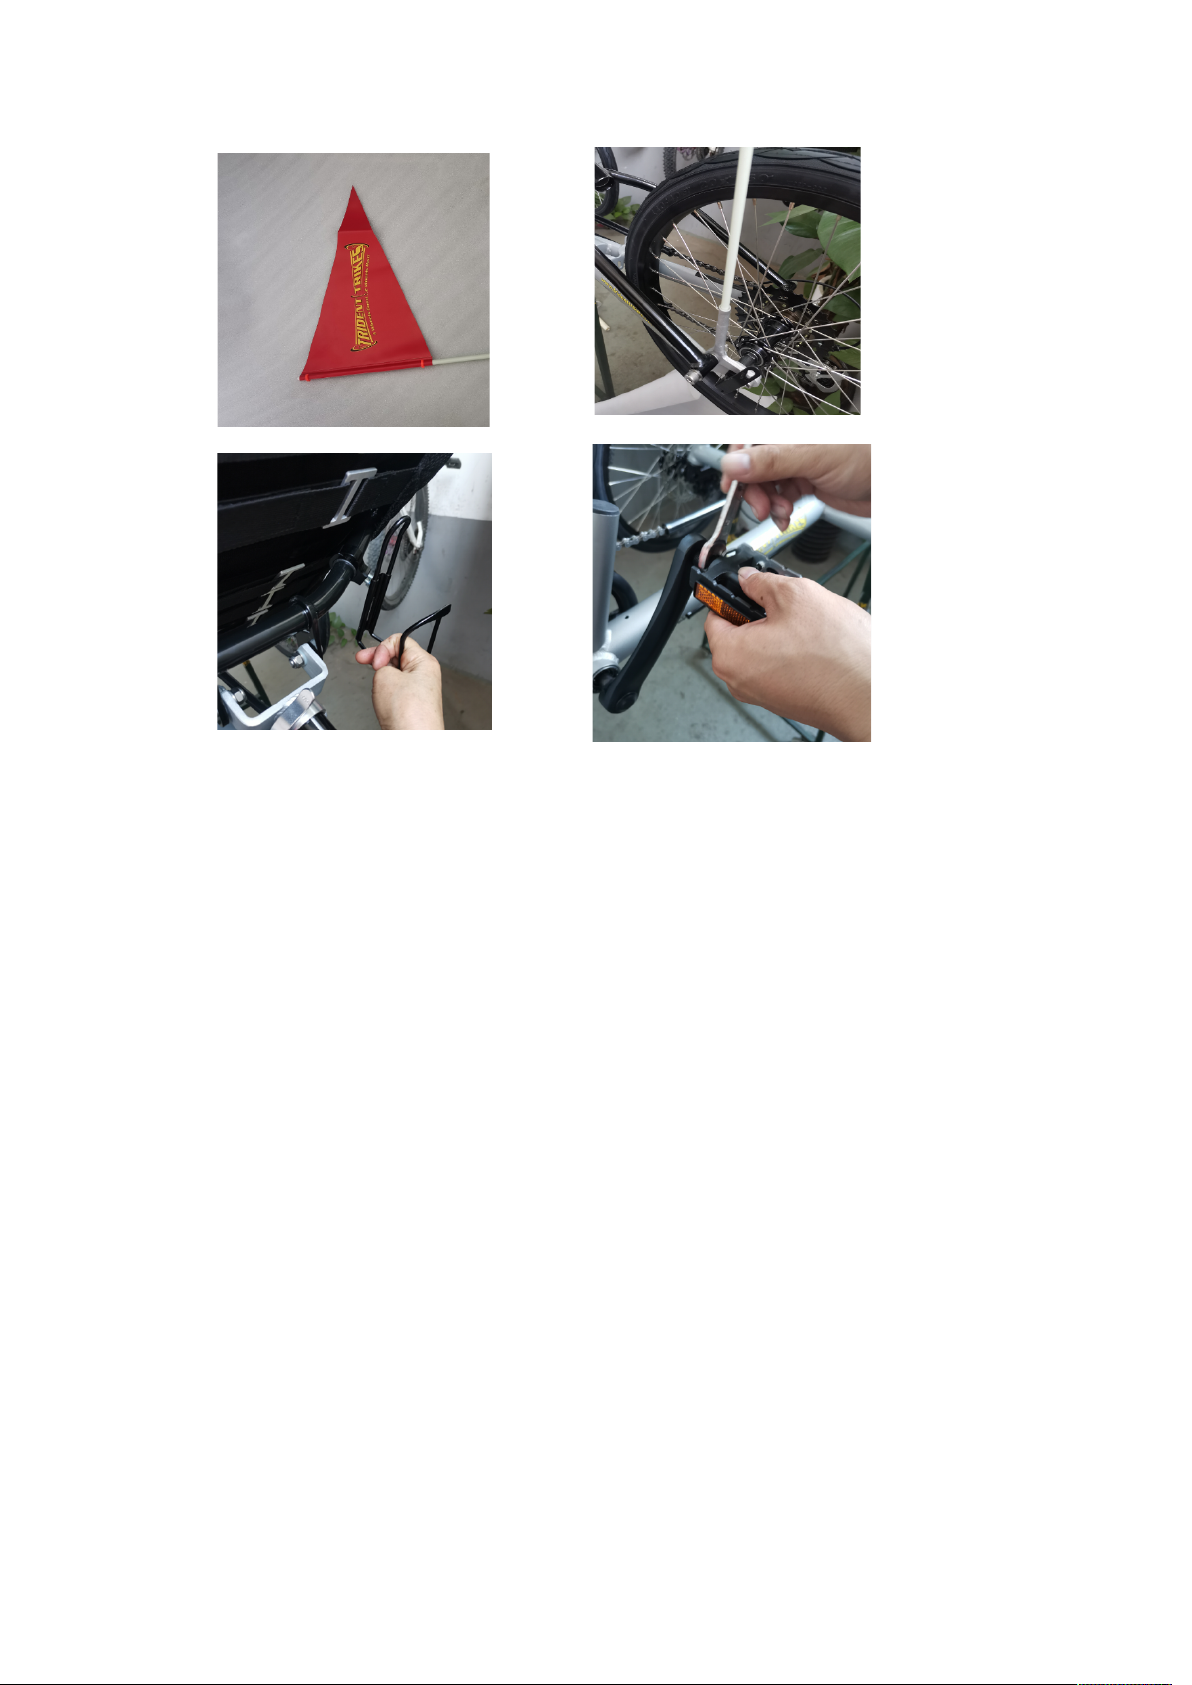
STEP 10: Install the accessory parts – for the pedals use a 15mm wrench or a Pedal
Wrench. Please note the Left Pedal has reverse threads- if you try to install it incorrectly
you can ruin the crankset.
FINAL CHAIN ADJUSTMENT: Adjust the seat to your desired position. Then adjust the
boom length to a comfortable length. Sometimes you will need to adjust the chain length
at this point using a Chain Tool. We have supplied some extra chain as well as a Master
Link in your parts package. As a general rule of thumb for adjusting- put the front on the
Middle Chain Ring , or on the Single Chainring if your Trike only has one. Then put the rear
on gear 4 counting down from the largest cog. Adjust your chain length so that the Rear
Derailleur Cage hangs down at about 6:30-7:00 (just left of vertical). Last step is to lube
the chain- you can use any brand you like, but make sure it is chain lube- not something
like WD-40. Make sure you lube the entire chain top and bottom.
You are all finished!!! Please call or email us if you have any questions about assembly.
This manual suits for next models
2
Table of contents


